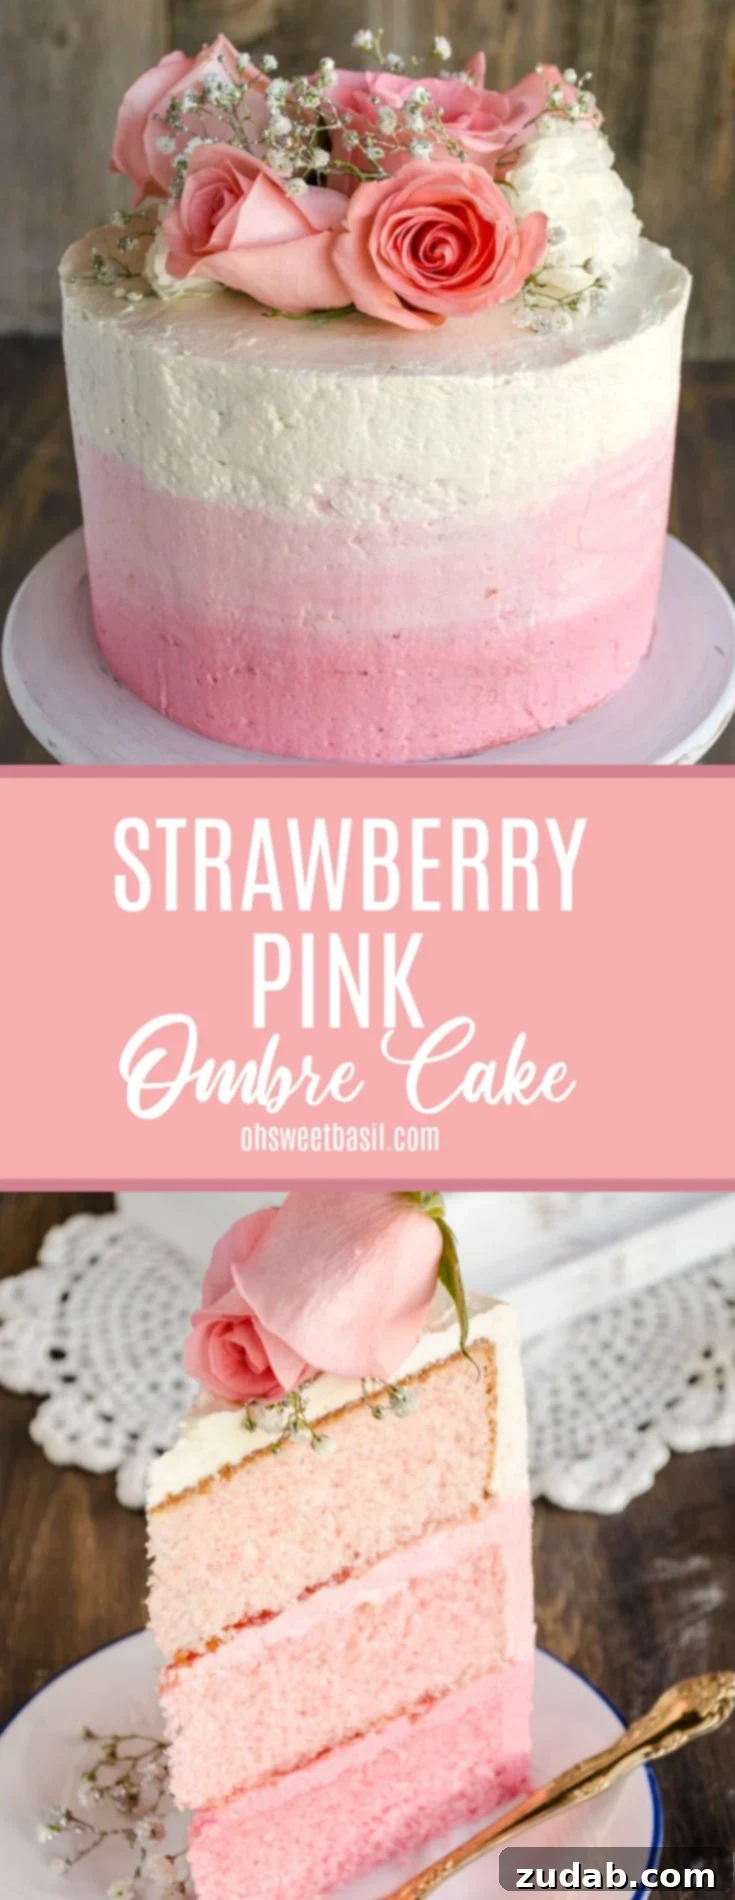
Create a Show-Stopping Ombre Strawberry Cake: Your Essential Guide for Mother’s Day & Special Celebrations
This breathtaking, irresistible ombre strawberry cake recipe is the ultimate sweet centerpiece for any special occasion. Whether you’re celebrating Mother’s Day, a joyous baby shower, or honoring cancer survivors, this delightful treat is surprisingly simple to create, even for novice bakers!
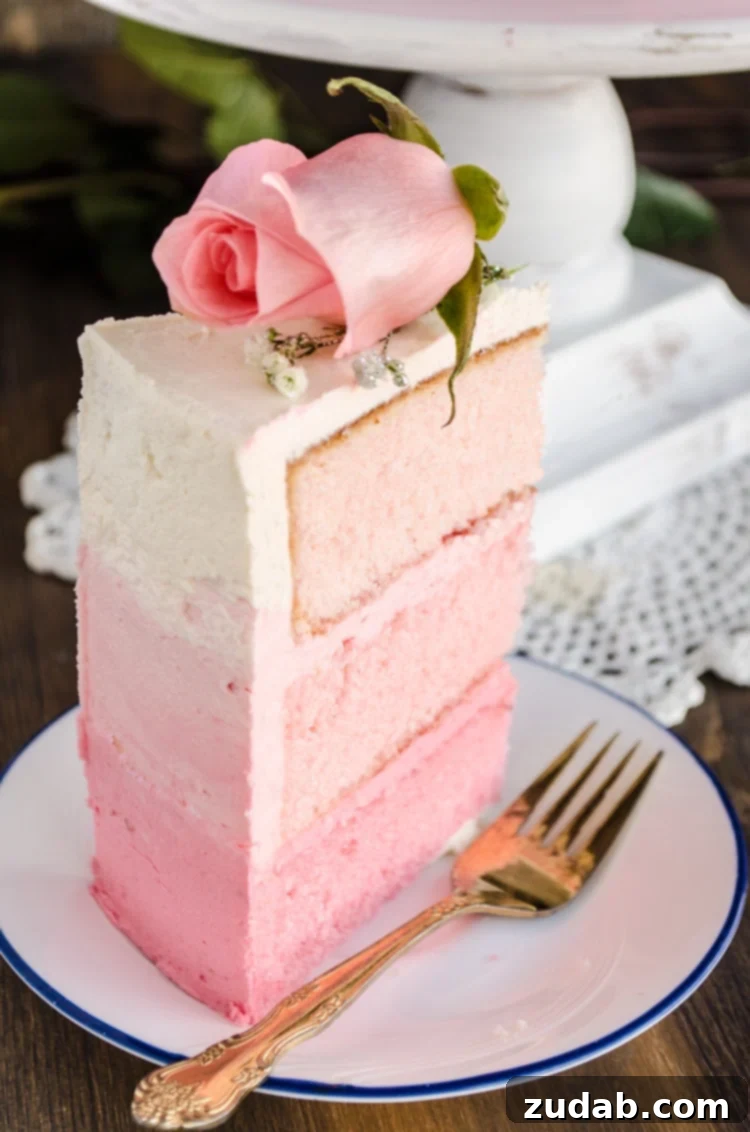
As Mother’s Day approaches, it’s the perfect opportunity to honor the remarkable women in your life. What could be a more heartfelt and beautiful gesture than presenting them with a homemade Ombre Strawberry Cake? This isn’t just a dessert; it’s a vibrant expression of love and appreciation, designed to make any celebration unforgettable.
This show-stopping cake is guaranteed to be the gorgeous centerpiece of any event. The best part? It’s much easier to make than you might imagine! You don’t need advanced decorating skills to achieve its stunning visual appeal. Beyond Mother’s Day, this lovely dessert is perfect for a baby shower, breast cancer awareness events, Valentine’s Day, or simply to add a touch of joy to an ordinary day. Get ready to impress everyone with your baking prowess!
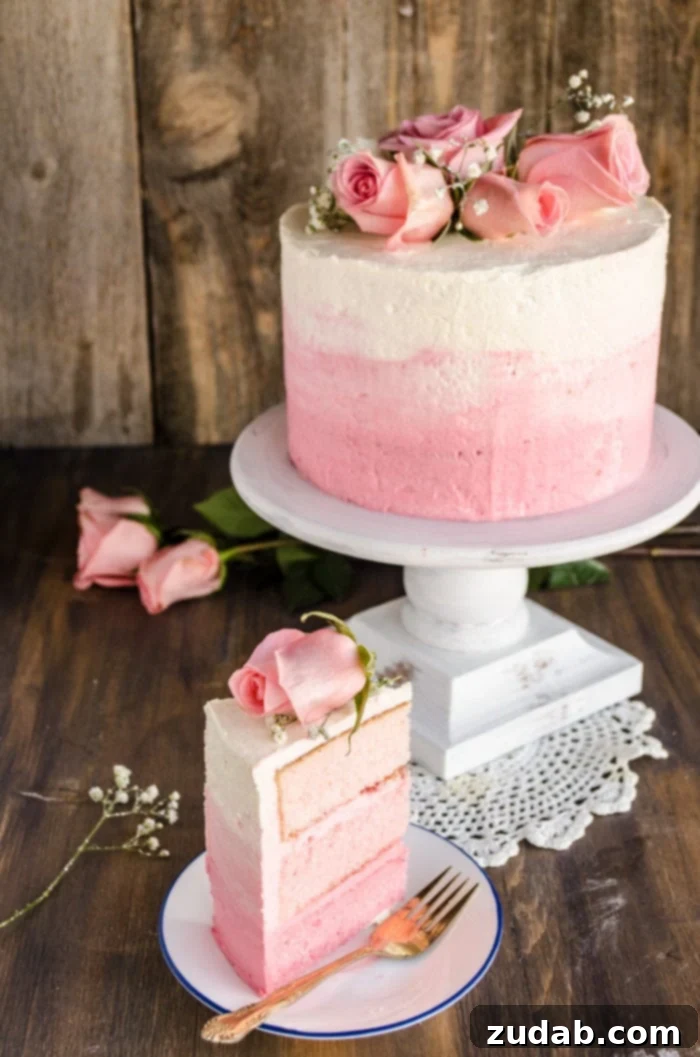
Why You’ll Absolutely Love This Ombre Strawberry Cake
This Ombre Strawberry Cake is more than just a pretty face; it’s a delightful culinary experience that combines fresh strawberry flavor with a stunning visual presentation. Here’s why this recipe will become your new favorite:
- Visually Stunning: The beautiful gradient of pink hues makes this cake an instant showstopper, perfect for capturing attention and admiration at any gathering.
- Deliciously Flavorful: Infused with real strawberry extract and enhanced with strawberry jam, every bite bursts with authentic fruit flavor.
- Surprisingly Simple: Despite its elaborate appearance, the ombre effect is achieved with straightforward techniques that even beginners can master. No complex piping skills required!
- Versatile for Any Occasion: While ideal for Mother’s Day or baby showers, its charming pink palette makes it suitable for birthdays, bridal showers, Valentine’s Day, or breast cancer awareness events.
- Customizable: Easily adapt the colors, frosting type, and even make it dye-free using natural ingredients.
Essential Ingredients for Your Ombre Strawberry Cake
To craft this beautiful Ombre Mother’s Day Strawberry Cake, you’ll need a selection of common baking ingredients, ensuring a moist, tender crumb and a rich, creamy frosting. Here’s a detailed list to guide your shopping:
For the Cake Layers:
- All-Purpose Flour: Provides structure to the cake.
- Melted Butter: Key for our “Magic Cake Release” method, ensuring your cakes never stick.
- Milk, Room Temperature: Contributes to the cake’s moisture and tenderness. Room temperature is crucial for proper emulsion with other ingredients.
- Egg Whites: Give the cake a light, airy texture and a bright, white base for vibrant coloring.
- Strawberry Extract: Infuses the cake with a delightful, authentic strawberry flavor.
- Vanilla Extract: Enhances the overall sweetness and aroma, complementing the strawberry notes.
- Cake Flour: A low-protein flour that results in a softer, more delicate crumb, perfect for a tender cake.
- Granulated Sugar: Sweetens the cake and helps tenderize the batter.
- Baking Powder: The primary leavening agent, ensuring a good rise.
- Salt: Balances the sweetness and enhances all the flavors.
For the Frosting and Filling:
- Unsalted Butter, Softened but Still Cool: The foundation of a rich, creamy buttercream. Keeping it cool yet softened is essential for the right consistency.
- Red Liquid Food Coloring or Wilton Paste: Used to create the beautiful ombre gradient in both the cake and frosting. Gels (like Wilton) are more concentrated, so use sparingly.
- Strawberry Jam or Preserves: Adds a luscious, fruity layer between your cake tiers, intensifying the strawberry experience.
Magic Cake Release: Your Secret to Effortless Baking
Tired of your beautiful cakes sticking to the pan? Say goodbye to baking frustrations forever! With this incredibly simple Magic Cake Release method, your cakes will slide out effortlessly every single time, leaving you with perfectly intact layers. This technique is a game-changer, especially for delicate cakes like this ombre masterpiece.
Here’s how to achieve flawless cake release:
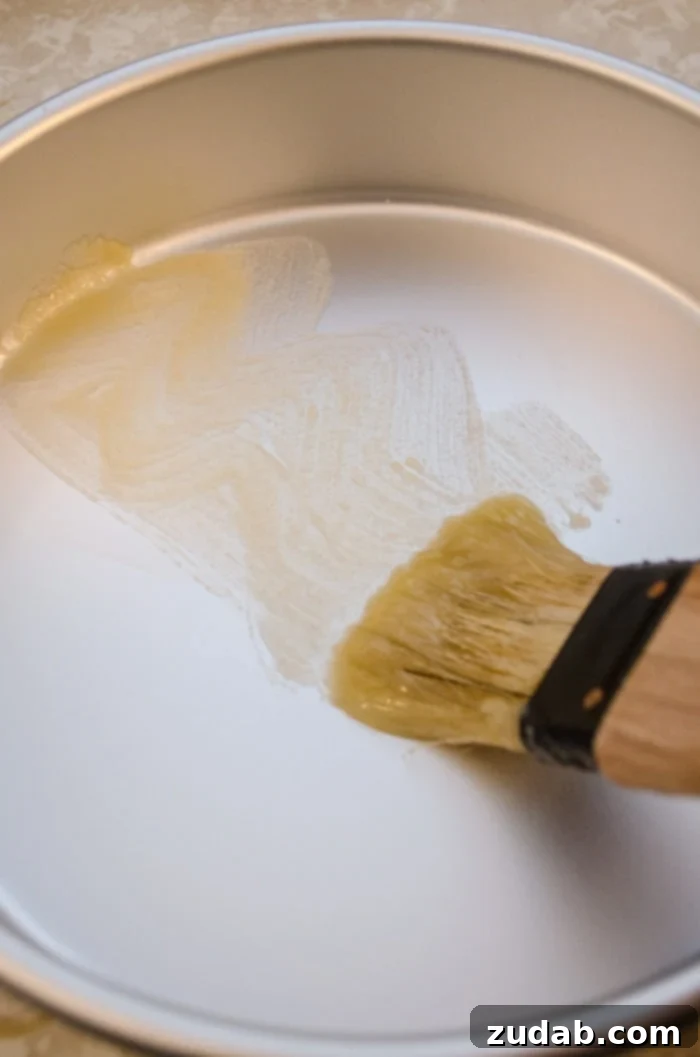
- Prepare the Paste: In a small bowl, mix equal parts melted butter and all-purpose flour. For chocolate cakes, you can substitute cocoa powder for flour to avoid white residue. Usually, 2-3 tablespoons of each ingredient per pan is sufficient for standard round cake pans.
- Apply Thoroughly: Using a pastry brush, generously brush this paste onto every corner and crevice of your baking pan. Make sure to cover the bottom, sides, and any intricate designs if using a bundt pan. No spot should be missed!
- Bake and Enjoy: Once your pans are perfectly prepped, pour in your batter, bake as directed, and marvel at the flawless release. This method works wonders for all types of cakes, including delicate sponge cakes and intricate bundt cakes!
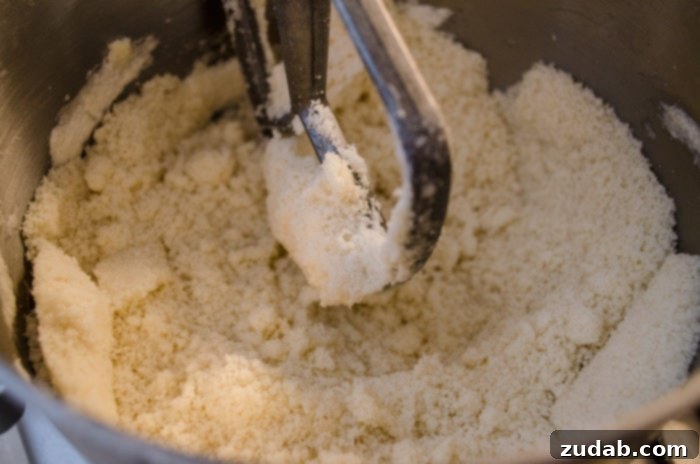
Now that your round cake pans are expertly prepped and your oven is preheating to the ideal temperature, it’s time to whip up a silky-smooth white cake batter. Begin by combining the liquid ingredients (milk, egg whites, strawberry, and vanilla extracts) in one bowl and the dry ingredients (cake flour, granulated sugar, baking powder, and salt) in another. An unorthodox but brilliant step involves beating the softened butter into the dry mix until it resembles coarse sand. This unique method is a scientific marvel, imparting a remarkably light and velvety texture to your finished cake.
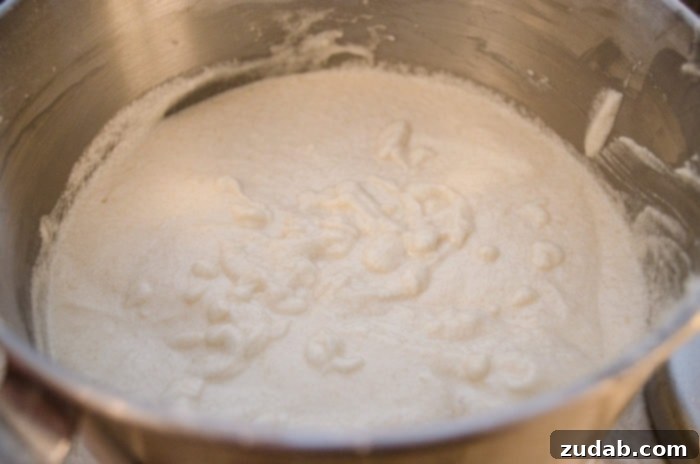
Finally, incorporate the prepared liquid ingredients, including the essential strawberry flavor, into your sandy dry mix to complete the batter. This careful layering of ingredients ensures a perfectly balanced and tender crumb that’s ready to take on its beautiful ombre hues!
Crafting the Perfect Ombre Effect for Your Cake Layers
The ombre effect is what gives this strawberry cake its stunning, eye-catching design, and it’s surprisingly easy to create. The key is to approach coloring with a light hand and understand the nuances of food dyes. Remember, a little color goes a long way, especially when using concentrated gel or paste food colorings compared to liquid dyes.
Be sure to proceed with caution—adding too much coloring initially can result in hues darker than intended, which are difficult to lighten! Keep in mind that liquid food coloring and concentrated gels or pastes (like Wilton) are not created equal. Gels are far more potent, so use them sparingly, adding a tiny amount at a time until you achieve your desired distinct shades.
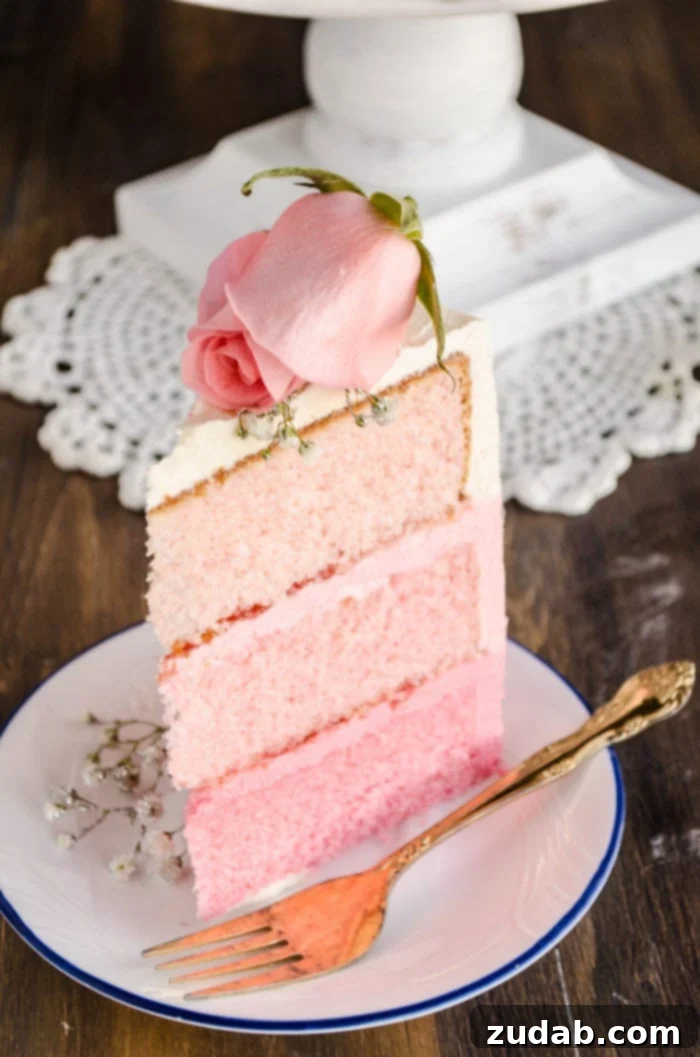
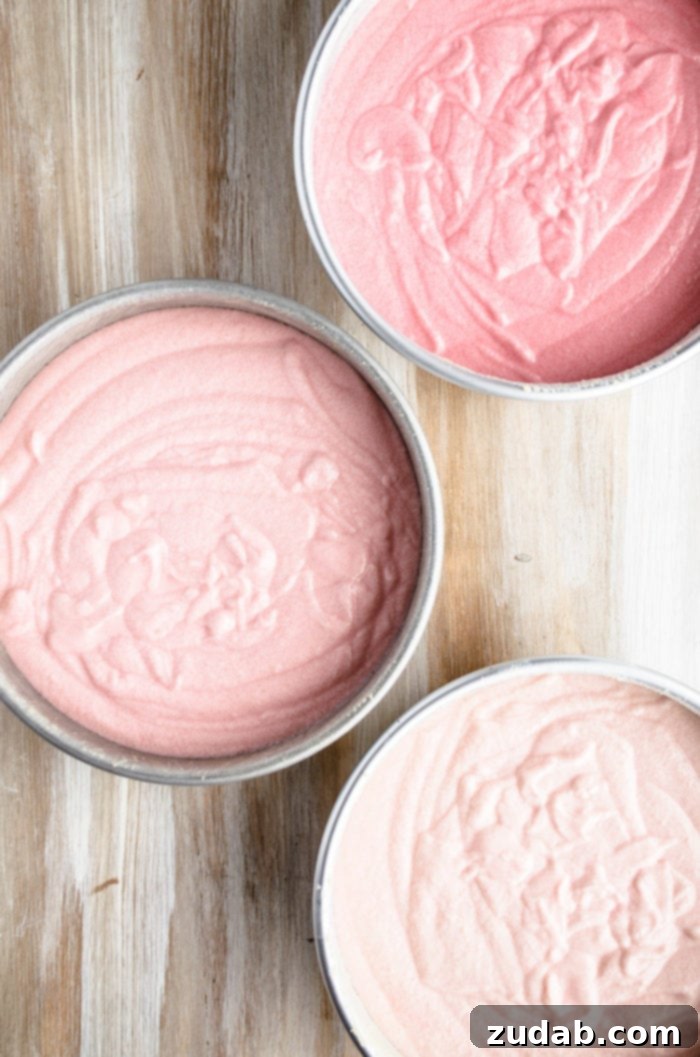
- Divide the Batter Evenly: Once your white cake batter is fully prepared, divide it as evenly as possible into three separate mixing bowls. This ensures consistent layer thickness and color distribution.
- Color Each Layer Distinctly:
- Darkest Shade (Bowl 1): Add 2 teaspoons of liquid red food coloring (or a small drop of gel paste, adjusting as needed) and whisk thoroughly until the color is fully blended with absolutely no streaks.
- Medium Shade (Bowl 2): Incorporate 1 teaspoon of liquid food coloring (or a tiny amount of gel paste) and mix well, ensuring an even, medium pink hue.
- Lightest Shade (Bowl 3): For the softest pink, add just 1/4 to 1/2 teaspoon of liquid food coloring (or a speck of gel paste). Adjust the intensity gradually by adding a drop or two at a time until each shade is distinct and forms a beautiful progression.
- Bake the Colored Layers: Carefully pour each bowl of colored batter into your prepared cake pans. Gently tap the pans on the counter a few times to release any trapped air bubbles and help the batter settle into an even surface. Bake the cakes at 350°F (175°C) for 20–25 minutes, or until a wooden toothpick inserted into the center of each cake comes out clean.
- Cool the Cake Layers Properly: Once baked, allow your cakes to cool in their pans on wire racks for approximately 5 minutes. This brief resting period helps the cake structure set. Then, carefully invert them onto the wire racks to cool completely. This cooling process is crucial and should take at least an hour, or ideally an hour and a half, to prevent crumbling during frosting. If you’re in a hurry, you can speed up the cooling by placing the hot cakes (still on racks) in the fridge or freezer for a shorter period.
Optimizing Your Oven Rack Placement for Even Baking
The placement of your cake pans in the oven can significantly impact how evenly your layers bake. For the best and most consistent results with this strawberry cake recipe, it is always recommended to bake the cake layers individually on the center rack of your oven. This ensures even heat distribution and prevents over-browning or under-baking.
If your oven isn’t large enough to accommodate all three pans on a single center rack, a good alternative is to place two layers on the upper rack and one on the lower rack. When using this method, keep a close eye on all the layers throughout the baking process. Ovens can have hot spots, and different rack positions might cause cakes to bake at varying rates. Test each layer with a toothpick independently. If one layer finishes baking first, remove it promptly and allow the remaining layers to continue baking until they are also perfectly done. This diligent monitoring will ensure all your ombre layers are baked to perfection.
Achieving the Perfect Ombre Frosting Effect
While your beautiful cake layers are cooling, it’s the perfect time to prepare your frosting. For this ombre strawberry cake, any type of white frosting will work – simply choose your favorite! I personally adore using Italian Meringue Buttercream (and I recommend doubling the recipe for this cake to ensure you have plenty), but a good quality store-bought white frosting is also an excellent option, especially if you plan to color it yourself. The key is to have enough frosting to create generous layers and a smooth finish; when in doubt, always double the recipe!
Once your chosen frosting is prepared, the process for creating the ombre effect is very similar to how you colored the cake batter:
- Divide the Frosting: Just as you did with the cake batter, divide the prepared white frosting as evenly as possible into three separate mixing bowls.
- Color the Frosting Shades:
- Darkest Shade (Bowl 1): Tint this bowl with 2 teaspoons of liquid red food coloring (or a very small amount of concentrated gel paste) for the deepest pink shade. Mix until thoroughly combined and streak-free.
- Medium Shade (Bowl 2): Add 1 teaspoon of liquid red food coloring (or a tiny speck of gel paste) for a lovely medium pink hue. Blend well.
- Lightest Shade (Bowl 3): For the softest color, use just 1/4 to 1/2 teaspoon of liquid food coloring (or the barest hint of gel paste). Adjust as needed by adding micro-drops until you achieve a delicate, distinct light pink, ensuring a smooth and gradual gradient effect when applied to the cake.
Frosting and Assembling Your Stunning Strawberry Cake
Assembling an ombre cake might seem daunting, but with these simple steps, you’ll create a professional-looking dessert with ease. Patience and a cool cake are your best friends here!
- The Essential Crumb Coat:
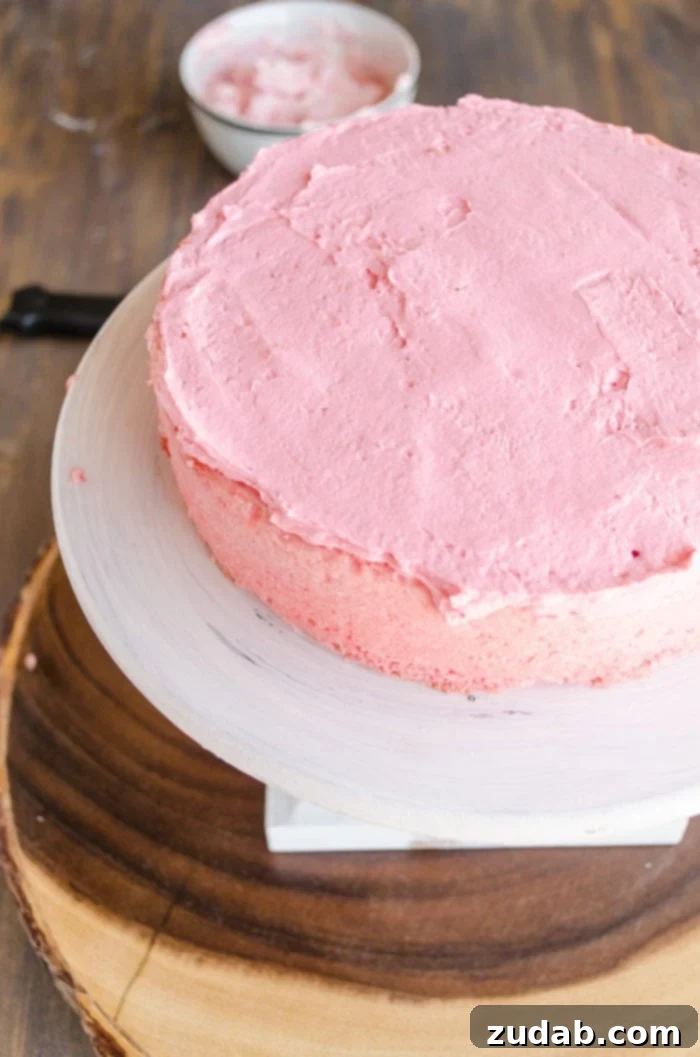
- Once your cake layers are completely cool, place a small spoonful of frosting (any color will do, or the darkest pink) on your serving platter or cake stand. This acts as a “glue” to stabilize the cake.
- Carefully place the darkest of your three cake layers on top of this frosting stabilizer.
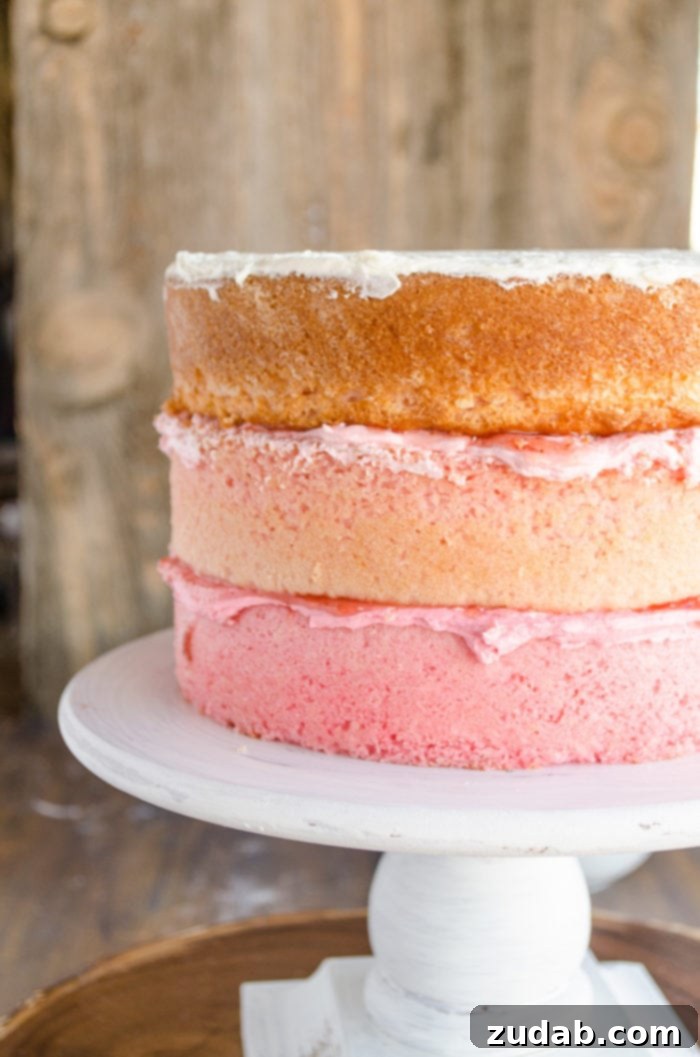
- Spread a generous layer of your darkest pink frosting on top of this first cake layer, aiming for about 1/4 to 1/2 inch thick.
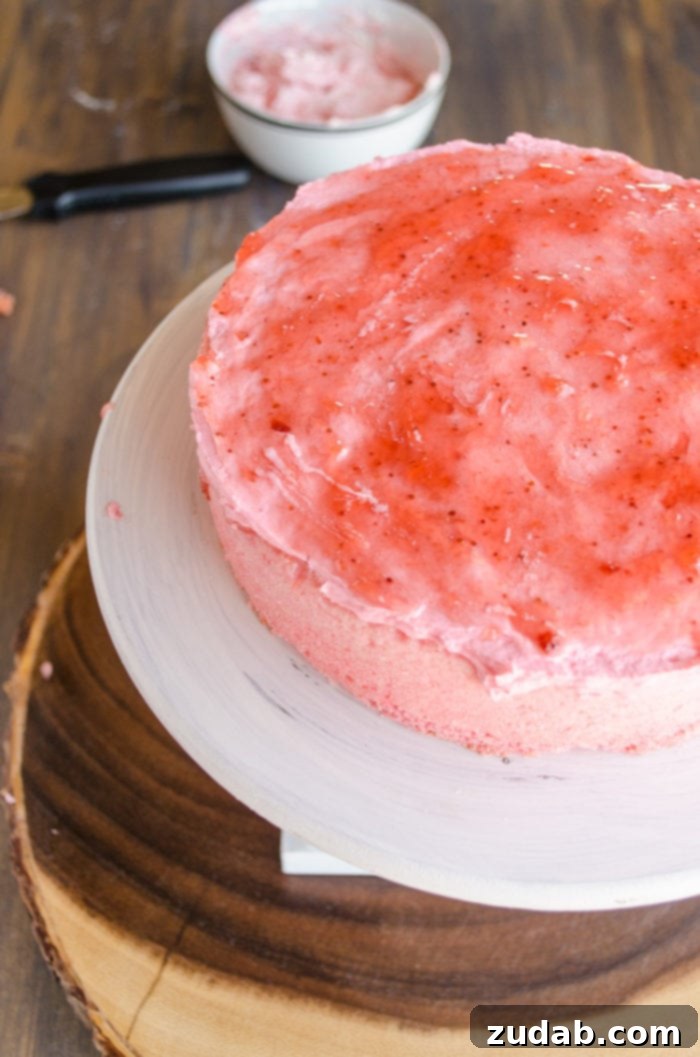
- Next, add a luscious layer of strawberry jam over the darkest frosting. This provides a burst of fruity flavor and adds another dimension to the cake.
- Gently place the next darkest cake layer on top. Repeat the frosting and jam layers, then add the lightest cake layer on top.
- Finally, spread a very thin layer of the lightest frosting over the entire cake – top and sides. This is your “crumb coat,” designed to seal in any loose crumbs and create a smooth base for your final frosting layers. Freeze the cake for 15–20 minutes to allow the crumb coat to set firmly. This step is crucial for a clean finish!
- Frosting the Ombre Layers:
- Once the crumb-coated cake is firm from the freezer, it’s time for the vibrant ombre effect.
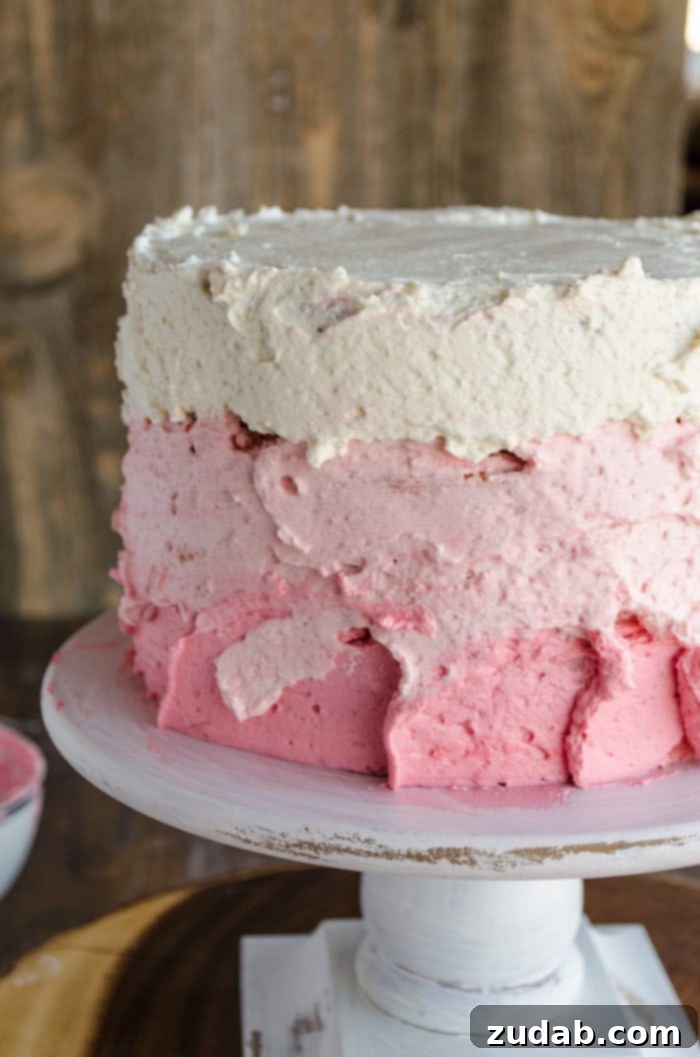
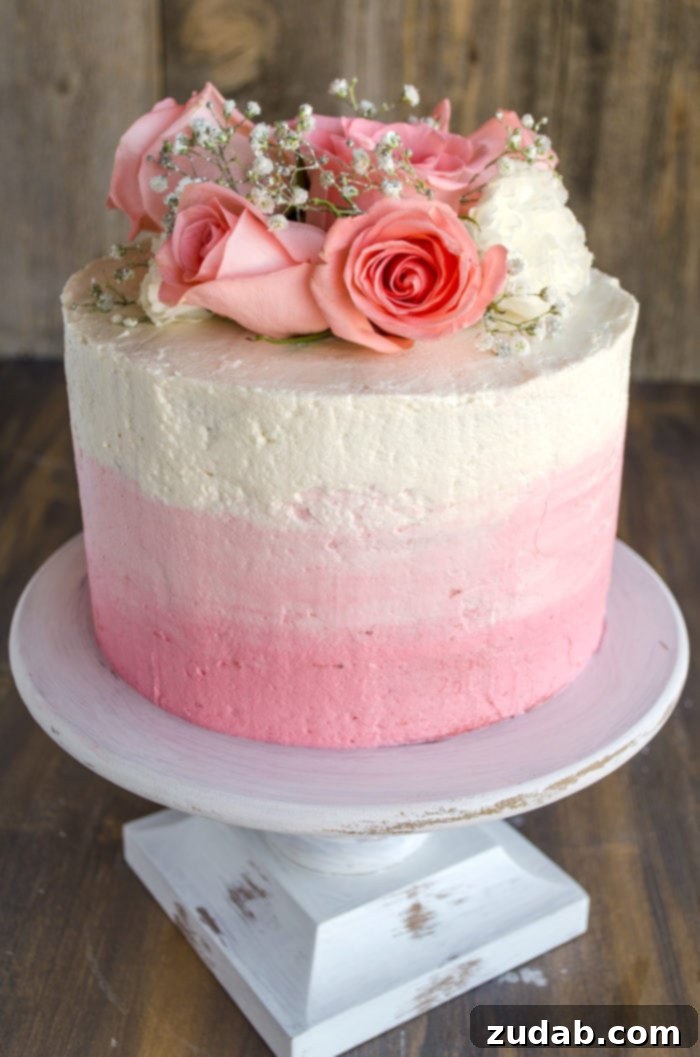
- Begin by spreading the darkest pink frosting around the bottom third of the cake’s sides. Apply it generously.
- Next, apply the medium pink frosting to the middle third of the cake, gently blending its top edge into the darker layer below.
- Finally, use the lightest pink frosting for the top third of the cake’s sides and generously cover the entire top of the cake. Carefully blend the bottom edge of this layer into the medium pink layer for a seamless gradient. (A note from experience: don’t be shy with the frosting here! I was a bit conservative, and this delicious frosting truly deserves to be spread liberally!)
- Smoothing the Sides for a Professional Finish:
- Once all that delicious, beautifully colored frosting is slathered onto your cake, it’s time to create that smooth, polished finish.
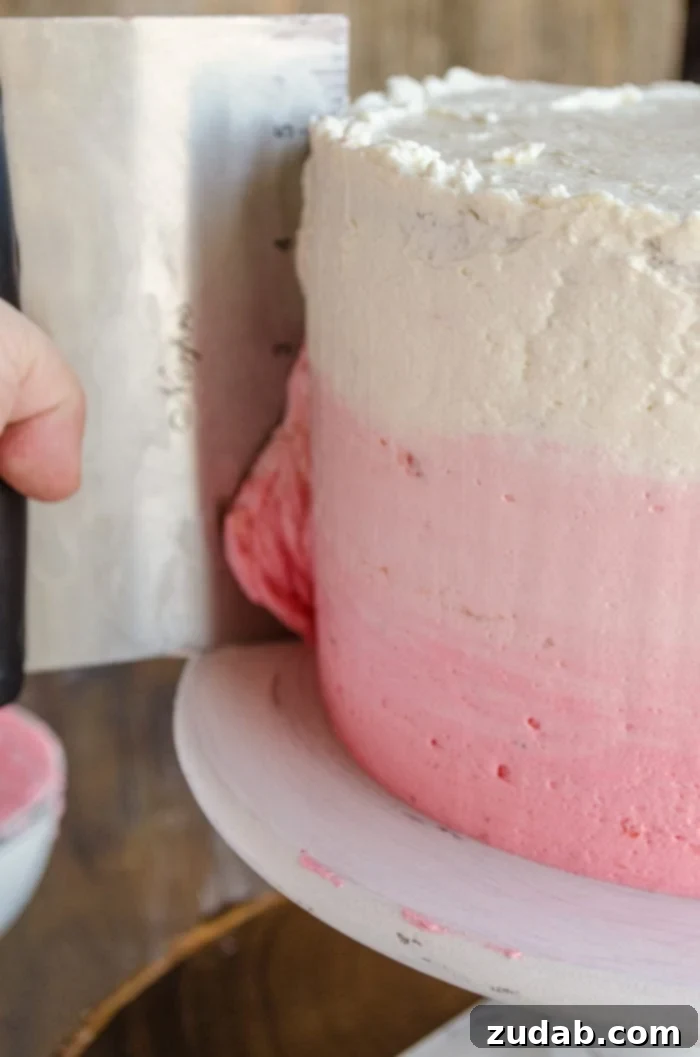
- Grab a tool with a long, flat edge. A bench scraper, a large offset spatula, or even a clean ruler works perfectly.
- If you have a lazy Susan or a rotating cake stand, this step becomes incredibly easy. Simply place your cake on it and slowly spin the stand while holding your scraper vertically and gently against the frosting. The motion will smooth out the frosting and help the ombre colors blend gracefully into one another. If you don’t have a rotating stand, simply rotate the cake manually as you smooth. You’ll be amazed as your masterpiece comes to life!
Does the Type of Cake Pan Truly Matter for Baking Success?
You might be surprised to learn just how much the type and condition of your cake pans can influence the final outcome of your baked goods. In my own experience, I’ve noticed a significant difference in how each layer of this ombre cake baked due to varying pan types. You may observe that my topmost layer has a slightly more pronounced browning compared to the others. This was a direct result of using different baking pans.
The bottom two cake layers were baked in brand-new, high-quality Wilton pans, which typically conduct heat evenly and consistently. However, the top layer was made in a very old, well-loved pan I borrowed. Despite all layers finishing baking at the exact same time and spending identical durations in the oven, the older pan clearly led to a different level of browning. This illustrates that pan material, thickness, and even age can affect heat distribution, impacting crust development and overall texture. For best results and consistent ombre layers, using matching, good-quality cake pans is highly recommended.
The Grand Finale: Finishing Touches and Elegant Presentation
With your stunning Ombre Strawberry Cake frosted to perfection, it’s almost ready for its grand debut! The final touches are what truly elevate this dessert from delicious to absolutely magnificent. The right presentation can transform your cake into an unforgettable centerpiece.
First, place your cake in the refrigerator until you’re ready to serve it. Refrigerating not only helps the frosting set firmly, but it also keeps the cake fresh and moist, preventing it from drying out. A well-chilled cake is also easier to slice cleanly.
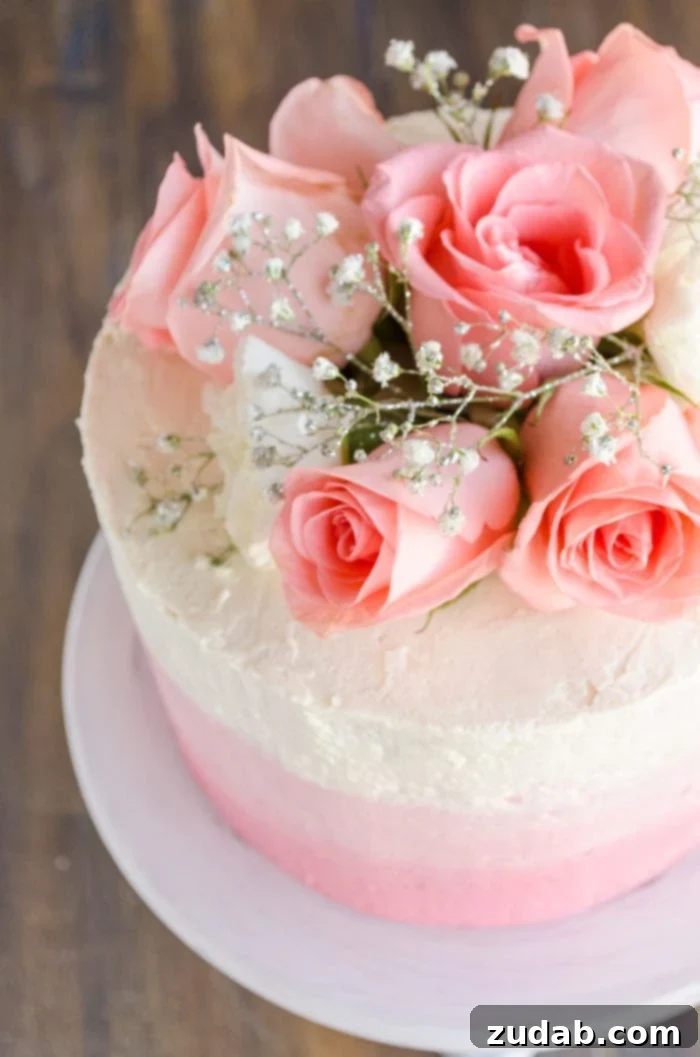
Just before you’re ready to display your masterpiece, add some freshly cut flowers for a touch of elegance. Pink roses and delicate sprigs of baby’s breath are classic choices that perfectly complement the cake’s aesthetic. I was incredibly fortunate to find these gorgeous blooms, including some sparkling baby’s breath, at my local grocery store – they looked absolutely stunning on the cake!
When it’s time to serve your breathtaking Ombre Mother’s Day Strawberry Cake, gently remove the flowers as needed before slicing. You can even place a small sprig or a single rose petal on each plate as a lovely, edible (for petal types, or simply for show) garnish to enhance the presentation. Or, for a truly special moment, hand out the individual flowers to any little girls present; it’s a small gesture that will make them feel incredibly cherished and add an extra sprinkle of joy to the celebration!
Can This Strawberry Cake Recipe Be Made Dye-Free?
Absolutely! If you prefer to avoid artificial food dyes or simply wish to experiment with natural colorings, you can easily achieve beautiful shades of pink for this delightful Mother’s Day Strawberry Cake. Nature offers wonderful alternatives that not only provide vibrant hues but can also enhance the nutritional value of your dessert.
Here are some fantastic dye-free options:
- Beet Juice: A few drops of beet juice can create lovely soft to vibrant pinks. Add it gradually to your frosting or cake batter, mixing until you reach your desired shade. Don’t worry, the flavor of beet is virtually undetectable in small amounts.
- Beet Powder: Similar to beet juice, a pinch of beet powder works wonderfully for coloring. It’s concentrated, so start with a tiny amount and build up the color.
- Freeze-Dried Strawberries: For an extra burst of strawberry flavor along with natural color, blend freeze-dried strawberries into a fine powder. Mix this powder into your cake batter and frosting. This method provides a beautiful, natural pink tint and intensifies the berry taste.
- Raspberry Puree: Fresh or frozen raspberries can be pureed, strained to remove seeds, and then reduced slightly to create a concentrated coloring. This will add a beautiful pink-red hue and a delicious tart-sweet raspberry note.
These natural alternatives allow you to create a gorgeous and wholesome ombre cake that’s just as impressive, without compromising on color or taste!
Storage and Make-Ahead Tips
Preparing this stunning cake doesn’t have to be a last-minute rush. With a few make-ahead and storage tips, you can enjoy a stress-free baking experience and ensure your cake is perfectly fresh for your celebration:
- Cake Layers: Baked and completely cooled cake layers can be wrapped individually in plastic wrap, then again in aluminum foil, and stored at room temperature for up to 2 days, or in the freezer for up to 2-3 weeks. Thaw frozen layers overnight in the refrigerator before assembling.
- Frosting: Most buttercreams can be made 2-3 days in advance and stored in an airtight container in the refrigerator. Before using, bring to room temperature and re-whip until smooth and fluffy.
- Assembled Cake: An assembled and frosted cake can be stored in an airtight cake carrier in the refrigerator for 3-4 days. Allow it to come to room temperature for about 30-60 minutes before serving for the best flavor and texture.
- Freezing Whole Cake: For longer storage, freeze the entire frosted cake (without fresh flower decorations) uncovered until the frosting is firm. Then, wrap it tightly in several layers of plastic wrap, followed by aluminum foil. It can be frozen for up to 1 month. Thaw overnight in the refrigerator, then bring to room temperature before serving and decorating with fresh flowers.
Other Irresistible Cake Recipes You’ll Adore:
Are you looking for more delightful cake recipes to share with your loved ones and make every occasion special? Explore these other fantastic creations from our kitchen:
- Pink Mother’s Day Cake
- The Most Perfect Moist Chocolate Cake
- Vanilla Cake with Fresh Strawberry Frosting
- No-Bake Mini Cheesecakes with Raspberry Sauce
- Chocolate Cherry Cake
- No Bake Mini Chocolate Cheesecakes
- Cookies and Cream Red Velvet Molten Lava Cakes
Ombre Strawberry Cake Recipe
Carrian Cheney
2 hours
40 minutes
2 hours
40 minutes
14
servings
Ingredients
- 3 Tablespoons All-Purpose Flour
- 3 Tablespoons Butter, melted
- 1 ½ Cup Milk, room temperature
- 9 Egg Whites, room temperature
- 5 teaspoons Strawberry Extract
- 2 teaspoons Vanilla Extract
- 3 ⅓ Cups Cake Flour
- 2 ¼ Cups Granulated Sugar
- 6 teaspoons Baking Powder
- 1 ½ teaspoons Salt
- 18 Tablespoons Unsalted Butter, softened but still cool
- 1-1 ½ Tablespoons Red Liquid Food Coloring, much less if using Wilton paste
- 1/2 Cup Strawberry Jam or Preserves
Instructions
Making the Cake
-
Prepare (3) 8-inch cake pans by stirring 3 tablespoons flour and 3 tablespoons melted butter together to make a paste. Brush paste all over inside of cake pans with a pastry brush, all the way up to the rim. Move an oven rack to the middle position and place all three pans inside to make sure they will fit on one rack. If not, move racks to upper and lower middle positions. Set the oven to heat to 350 degrees F (175°C).
-
Whisk together the milk, egg whites, strawberry, and vanilla extracts in a mixing bowl and set aside.
-
Mix together the cake flour, granulated sugar, baking powder, and salt in a mixing bowl (or a stand mixer). Beat in the unsalted butter at low speed until no white streaks remain and the mixture looks crumbly, like wet sand.
-
Beat in about 2 cups of the milk/egg mixture for a minute and a half. Add the remaining liquid mixture and beat until fully incorporated, about a minute longer, scraping the sides and bottom as necessary.
-
Divide the batter as evenly as possible into three mixing bowls. Stir 2 teaspoons liquid red food coloring into one bowl, one teaspoon into another, and 1/4 -1/2 teaspoon into the third. Adjust the coloring to your liking by adding a few more drops of food coloring if necessary. Whisk well to ensure no streaks of color remain.
-
Pour each bowl of batter into a prepared cake pan and tap on the counter to release bubbles and even out the surface. Place in the oven, either on a single rack or two on the upper and one on the lower. Bake for about 20-25 minutes, or until a toothpick inserted in the middle comes out clean.
-
Cool cakes on a wire rack for about 5 minutes, then carefully invert onto cooling rack and let cool completely for about an hour and a half. (You can place them in the fridge if you have room for faster cooling.)
-
While cakes cool, make your desired frosting recipe and divide it into three bowls, tinting it as you did the cake layers, adjusting as necessary for the ombre effect.
Cake Assembly
-
Place a spoonful of frosting on your serving platter or cake plate to act as a stabilizer. Set the darkest of the three cake layers on top of the frosting. Spread a layer of your darkest frosting on top, about 1/4 to 1/2 inch thick. Next, add a layer of strawberry jam over the frosting and place the next darkest cake layer on top. Repeat with the remaining layers.
-
With the darkest color frosting bowl in hand, begin to scoop and ‘wipe’ generous amounts of frosting on the outside bottom layer of cake. Try to use up all the darkest frosting for the bottom third. Repeat with the second lighter color of frosting on the middle layer’s third, then the lightest frosting on the sides of the top layer and the top of the cake. Using a clean ruler, bench scraper, or large offset spatula, smooth out the sides of the cake, keeping your scraper vertical, and letting the frosting colors blend together. This is made much easier if you have a lazy Susan or rotating cake stand, but it’s not strictly necessary. Refrigerate until ready to serve. Place freshly cut roses/flowers on top just before presenting to your friends and family.
Recipe Notes
The cake will keep for 3-4 days when stored properly in the fridge.
Nutrition
Serving:
1
slice
,
Calories:
451
kcal
,
Carbohydrates:
66
g
,
Protein:
7
g
,
Fat:
18
g
,
Saturated Fat:
11
g
,
Polyunsaturated Fat:
1
g
,
Monounsaturated Fat:
5
g
,
Trans Fat:
1
g
,
Cholesterol:
48
mg
,
Sodium:
322
mg
,
Potassium:
286
mg
,
Fiber:
1
g
,
Sugar:
40
g
,
Vitamin A:
568
IU
,
Vitamin C:
1
mg
,
Calcium:
118
mg
,
Iron:
1
mg
Nutrition information is automatically calculated, so should only be used as an approximation.
Like this? Leave a comment below!