
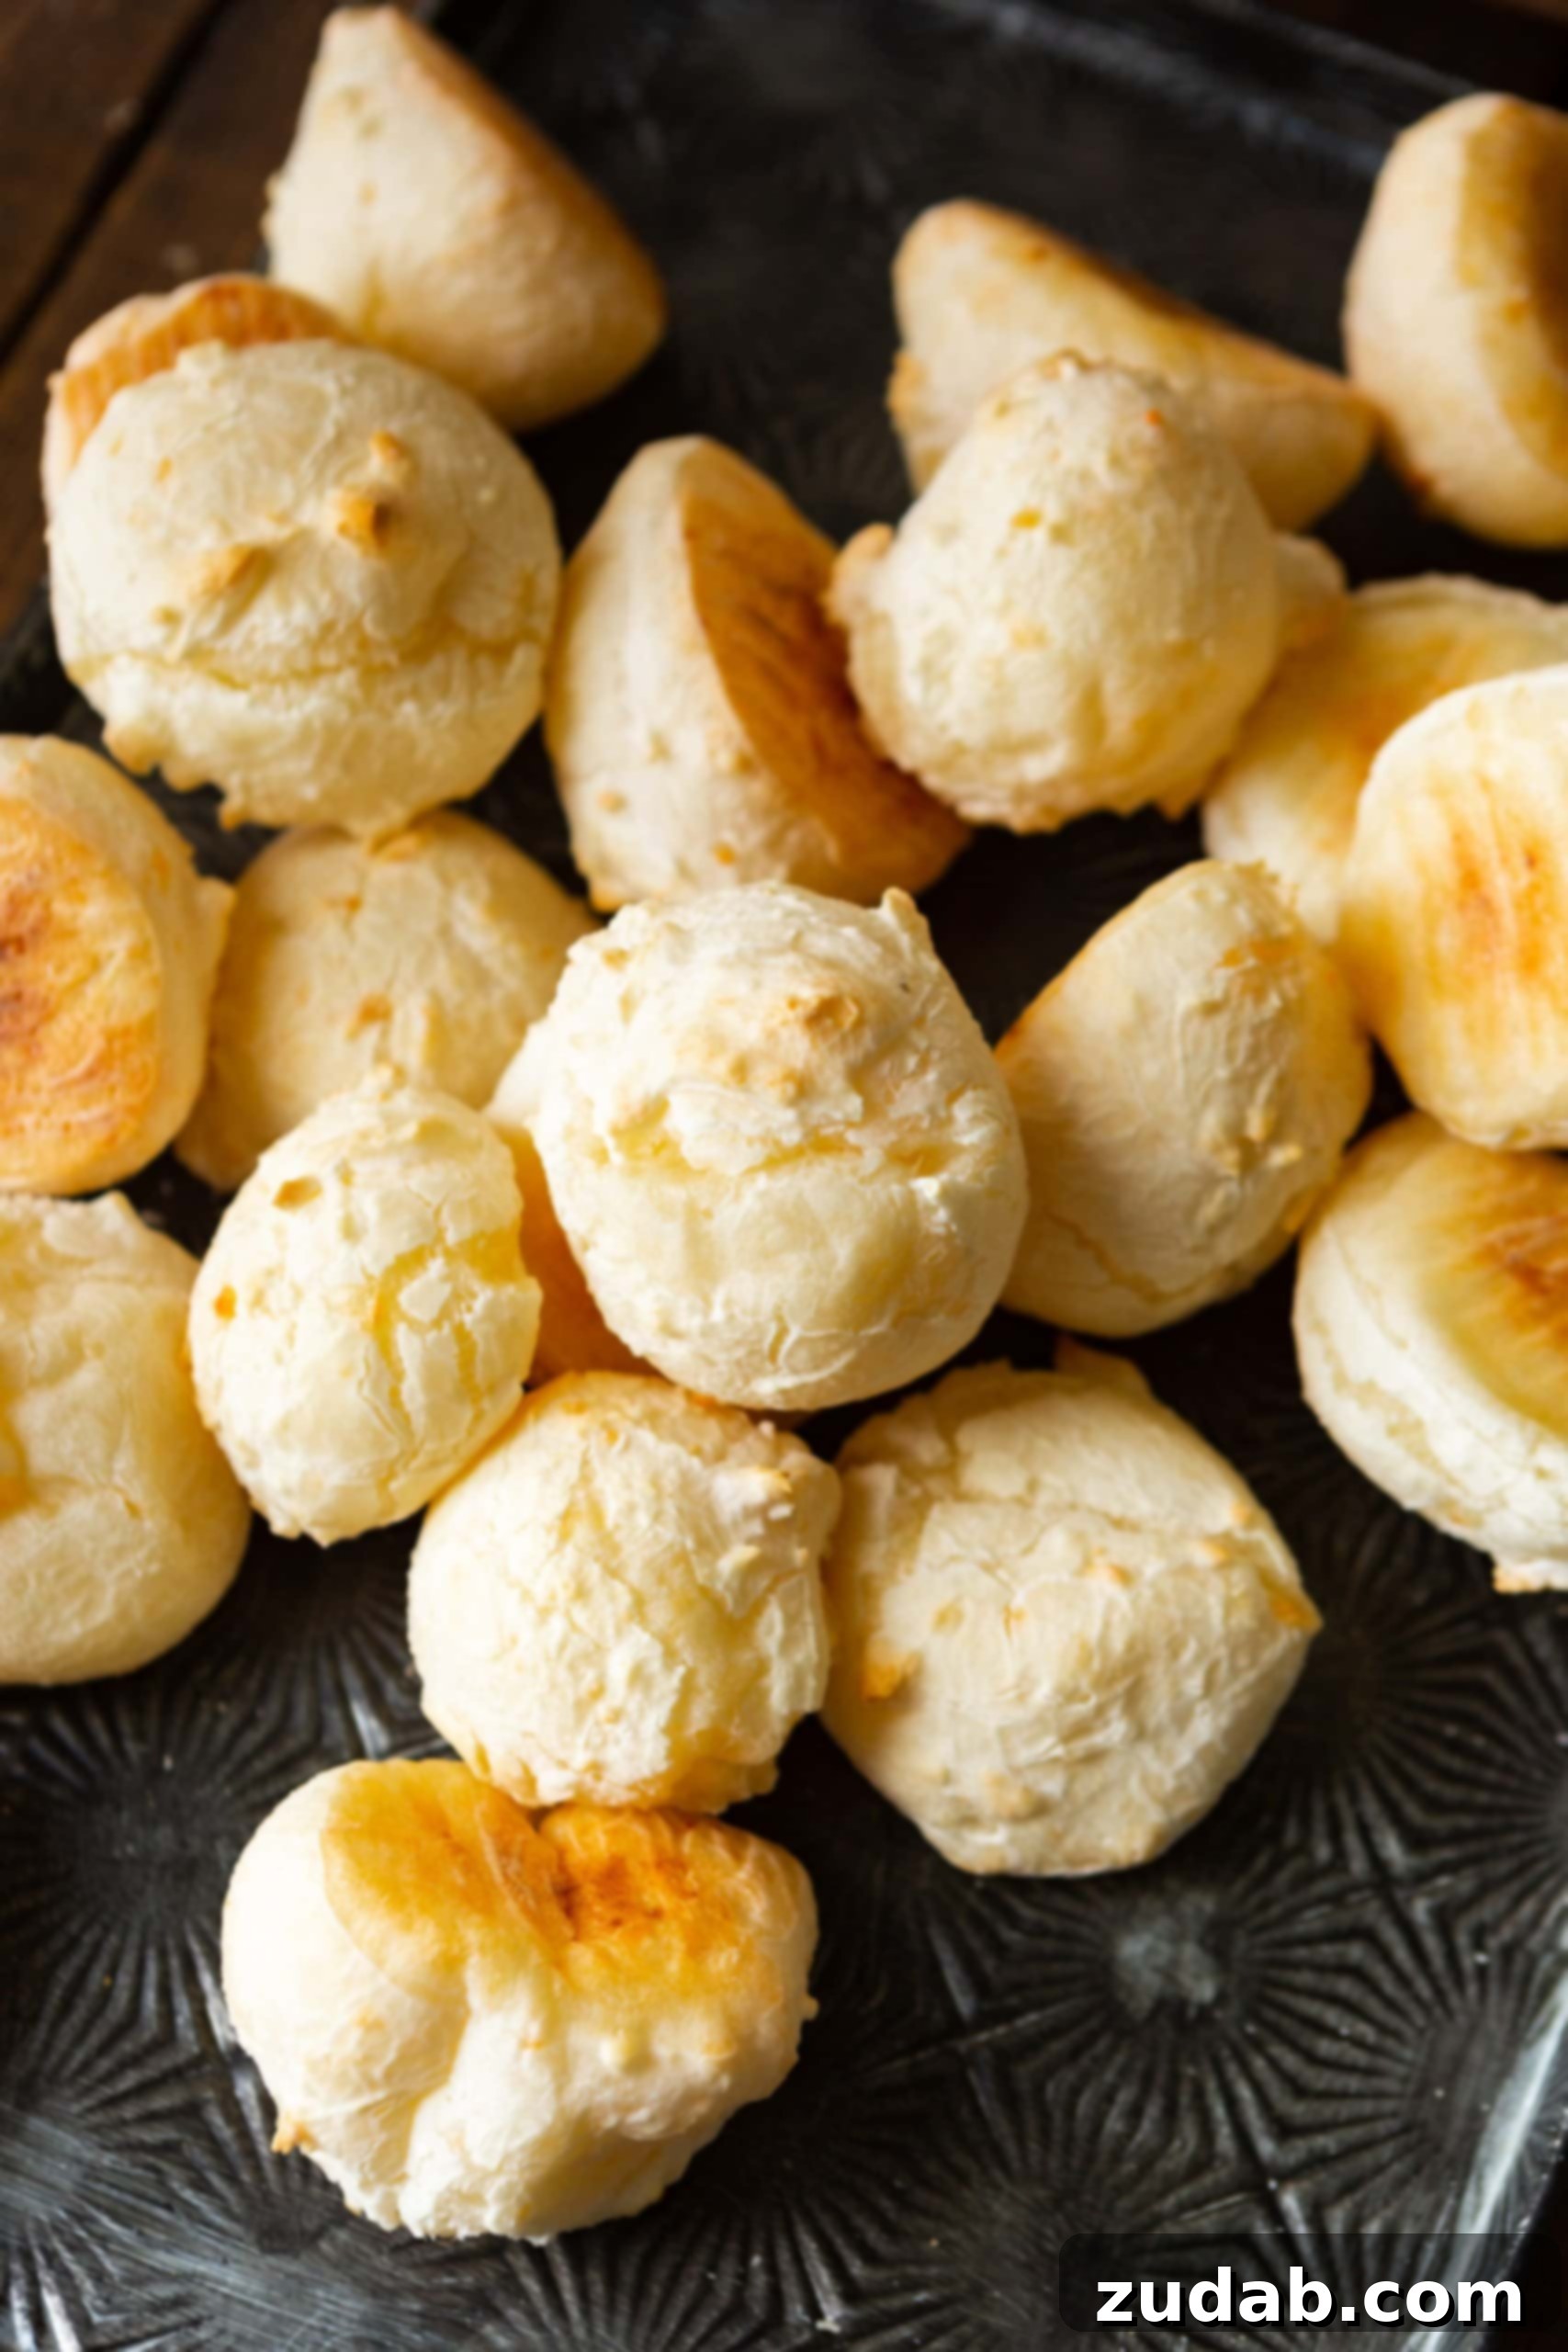
Pao De Queijo Brazilian Cheese Bread offers a delightful culinary journey into the heart of Brazil. This simple yet incredibly flavorful gluten-free bread is a national treasure, crafted from tapioca flour and a delectable blend of Parmesan and Mozzarella cheeses. Its allure lies in its unique texture: a subtly crispy exterior that yields to a soft, chewy, and intensely cheesy interior – truly the epitome of cheesy bread perfection.
One of the most appealing aspects of this cherished recipe is its remarkable simplicity and speed. Forget about the lengthy processes associated with traditional bread making; there’s no yeast, no tedious rising time, and absolutely no waiting around. You simply mix, bake, and savor. This makes Pao de Queijo an ideal choice for a quick snack, a last-minute appetizer, or a comforting accompaniment to any meal. Furthermore, these versatile cheese breads freeze exceptionally well, allowing you to prepare a batch in advance and enjoy them fresh from the oven on a busy day, whenever the craving strikes.
For many, Pao de Queijo evokes memories of vibrant Brazilian culinary experiences, even if they’re a taste of Brazil recreated closer to home. Perhaps you’ve had the pleasure of dining at a Brazilian Churrascaria, like Tucanos – a fantastic restaurant where the succulent meats are paraded around on skewers, and your little wooden disc dictates whether the feast continues (green) or pauses (red). It’s an unforgettable, lively, and truly delicious experience! In our family, celebrating Cade’s birthday at Tucanos has become a cherished annual tradition. It’s more than just a meal; it’s an immersive cultural experience that brings us together.
We adore introducing our children to the vibrant atmosphere of Brazilian dining, even if it’s not the authentic, bustling streets of Brazil itself. The excitement builds when the drums emerge, and everyone joins in singing to celebrate. These moments of shared joy and unique traditions are what make life so special. And, of course, no Brazilian dining experience would be complete without their signature cheese bread, Pao de Queijo. It’s an irresistible staple, and after years of tweaking and testing, I’ve finally perfected a recipe that captures the magic of those restaurant-style bites. These little bundles of cheesy delight are so addictive, it’s hard to stop at just one!
What is Pao De Queijo? Unveiling Brazil’s Beloved Cheese Bread
Pronounced “pow-du-KEH-zho,” pão de queijo translates literally to “cheese bread” in Portuguese, a fitting name for this intensely savory and comforting treat. It is a wildly popular snack and breakfast food throughout Brazil, found in bakeries, cafes, and street stalls across the country. While it shares some textural similarities with a French pate a choux (like that used for cream puffs or éclairs), its fundamental difference lies in its star ingredient: tapioca flour rather than traditional all-purpose wheat flour.
This substitution is crucial, not only making pão de queijo naturally gluten-free but also imparting its signature chewy, elastic texture. Unlike regular flour, tapioca flour (derived from cassava root) becomes gelatinous when heated with liquids, forming a unique dough that bakes into a small, puffed, and wonderfully airy cheese roll. The result is a roll that is remarkably light, yet satisfyingly rich with a distinctive cheesy flavor and an irresistible bounce.
Essential Ingredients for Authentic Pao de Queijo
Creating these delightful Brazilian cheese breads requires only a handful of readily available ingredients. The magic happens when these simple components combine to form the distinctive chewy and cheesy texture that makes Pao de Queijo so beloved. Here’s a comprehensive look at your shopping list and why each ingredient is key to success:
- Tapioca Flour (Polvilho Doce): This is the cornerstone of Pao de Queijo, providing its unique elastic and chewy texture, and making it naturally gluten-free. Ensure you’re using sweet tapioca flour (polvilho doce) for the best results, as sour tapioca flour (polvilho azedo) offers a different, tangier profile.
- Milk (2% recommended): Milk contributes to the richness and moisture of the dough. The fat content in 2% milk balances flavor without making the rolls too heavy.
- Water: Combined with milk and oil, water helps to hydrate the tapioca flour and create the initial gelatinous dough, mimicking the pâte à choux method.
- Salt: Essential for enhancing all the flavors, especially the cheese. Don’t skip it!
- Vegetable Oil: The oil is heated with the liquids to “cook” the tapioca flour, contributing to the bread’s tender interior and slightly crispy crust. A neutral-flavored oil like vegetable or canola oil is ideal.
- Parmesan Cheese: Adds a sharp, salty, and umami depth that is quintessential to Pao de Queijo. Freshly grated Parmesan will always yield superior flavor compared to pre-shredded varieties.
- Mozzarella Cheese: Chosen for its incredible meltiness and mild, creamy flavor, mozzarella contributes to that satisfying, gooey, stretchy cheese pull you expect from perfect cheese bread.
- Eggs: Eggs act as a binder, helping to emulsify the dough and provide structure and richness, contributing to the bread’s airy internal texture.
The complete recipe with all precise measurements and step-by-step instructions can be found in the detailed recipe card at the conclusion of this post. Gather these ingredients, and get ready to create a taste of Brazil right in your own kitchen!
Where to Find Tapioca Flour and Potential Substitutions
Tapioca flour, also known as tapioca starch or polvilho doce, is a crucial ingredient for authentic Pao de Queijo. Thankfully, it’s becoming increasingly accessible in most grocery stores due to the rising popularity of gluten-free baking. You should typically be able to find it in the baking aisle alongside other specialty flours, or sometimes in the dedicated gluten-free section. Brands like Bob’s Red Mill offer a high-quality tapioca flour that works wonderfully for this recipe. If your local store has an international foods aisle, check there as well, as tapioca products are common in many global cuisines.
While tapioca flour is highly recommended for its unique elastic and chewy characteristics, you might wonder if there are any suitable alternatives. It’s important to note that no substitution will perfectly replicate the distinct texture that tapioca flour provides. However, if you’re in a pinch, you can use one tablespoon of arrowroot starch, cornstarch, or even regular all-purpose flour for every 1.5 teaspoons of tapioca starch called for in a recipe. Be aware that using cornstarch or arrowroot will result in a slightly different, perhaps less chewy, texture, while all-purpose flour will make the bread no longer gluten-free and will significantly change the chewiness and crispness. For the authentic Pao de Queijo experience, sticking to tapioca flour is truly the best choice.
Storing, Freezing, and Reheating Pao de Queijo for Lasting Enjoyment
One of the many benefits of making Pao de Queijo at home is its excellent versatility in terms of storage, allowing you to enjoy fresh, warm cheese bread whenever you desire.
- Storing Baked Pao de Queijo: To keep your baked pao de queijo fresh, first ensure they have cooled completely to room temperature. Then, transfer them into an airtight container or a resealable plastic bag. Store them in the refrigerator, where they will maintain their quality for approximately 4-5 days. While they are best enjoyed warm and freshly baked, a quick reheat can bring them back to life.
- Freezing Unbaked Pao de Queijo Dough: This is a fantastic option for meal prepping and enjoying fresh Pao de Queijo with minimal effort later. After preparing the dough and forming it into individual balls (as if you were about to bake them), arrange these unbaked dough balls on a baking sheet. Place the entire baking sheet into the freezer for about an hour, or until the dough balls are completely solid. Once frozen solid, transfer them to a freezer-safe ziplock bag or airtight container. They will keep beautifully in the freezer for up to 2 months. When you’re ready to bake, simply preheat your oven to 400 degrees Fahrenheit (200 degrees Celsius) and bake the frozen dough balls for 20-25 minutes, or until golden brown and puffed. There’s no need to thaw them first!
- Reheating Baked or Frozen Pao de Queijo: Whether you’re reheating previously baked rolls from the refrigerator or warming up baked-from-frozen rolls, the oven is your best friend for restoring their crispy exterior and soft interior. Place them in a preheated oven at 350 degrees Fahrenheit (175 degrees Celsius) for about 8 minutes, or until they are warmed through and slightly crispy again. Avoid the microwave if possible, as it can make them soft and rubbery rather than restoring their desired texture.
With these storage and reheating tips, you can always have delicious Pao de Queijo ready to go, making it a convenient and delightful addition to your culinary repertoire.
If you’re craving those addicting little cheese breads, there’s absolutely no need to head to your closest Brazilian restaurant. You can easily make authentic pao de queijo from scratch right in your own kitchen, and it’s surprisingly simple! This recipe guarantees a batch of irresistible, crispy-on-the-outside, gooey-on-the-inside cheese puffs that will transport your taste buds straight to Brazil.
Explore More Brazilian Flavors: Delicious Recipes to Try
Once you’ve mastered the art of Pao de Queijo, you might find yourself eager to delve deeper into the rich and diverse world of Brazilian cuisine. Here are a few more fantastic Brazilian-inspired recipes to expand your culinary horizons:
- Brazilian Smoked Tri Tip
- Brazilian Coconut Rice
- Torta de Limão (Brazilian Lime Tart)
- Brazilian Burger (X-Tudo)
Pao De Queijo (Brazilian Cheese Bread)
Print Recipe
Ingredients
- 4 Cups Tapioca Flour
- 1 ¼ Cups Milk, 2%
- 1/2 Cup Water
- 2 teaspoons Salt
- 6 Tablespoons Vegetable Oil
- 2 Large Eggs
- 1 ¼ Cups Parmesan Cheese, shredded
- 1 ¼ Cups Mozzarella Cheese, shredded
Instructions
- Preheat your oven to 400 degrees Fahrenheit (200°C).
- In a stand mixer bowl, add the tapioca flour.
- In a medium saucepan, combine the milk, water, salt, and vegetable oil. Bring this mixture to a boil over medium-high heat.
- Once boiling, immediately remove the pot from the heat. With the mixer on low speed, slowly pour the hot liquid mixture into the tapioca flour until well combined and a shaggy dough forms.
- Add one egg to the dough and mix until fully incorporated and smooth. Then, add the second egg and mix again until the dough is uniformly smooth and elastic.
- Turn the mixer to low speed and gradually add both the shredded Parmesan and Mozzarella cheeses. Mix until the cheeses are thoroughly combined into the dough.
- Using a small cookie scoop (a tablespoon-sized scoop works well) dipped in water (to prevent sticking), scoop uniform balls of dough onto ungreased baking sheets, leaving some space between each.
- Bake for 20-25 minutes, or until the Pao de Queijo are puffed up and golden brown on the outside. For an even crispier exterior, bake for an additional 5 minutes if desired. (See notes below for freezing instructions if you prefer to bake from frozen).
- Serve your Pao de Queijo warm, ideally straight from the oven, to best enjoy their soft, chewy, cheesy centers.
Recipe Notes
Freezing Unbaked Dough: To freeze for later, scoop the dough balls onto a baking sheet and freeze until solid (about 1-2 hours). Transfer to a freezer-safe bag and store for up to 2 months. Bake directly from frozen at 400°F (200°C) for 20-25 minutes.
Storing Baked Pao de Queijo: Store leftover baked Pao de Queijo in an airtight container or ziplock bag in the refrigerator for 4-5 days.
Reheating: To reheat baked Pao de Queijo (either refrigerated or previously frozen and baked), place them in a 350°F (175°C) oven for about 8 minutes, or until warmed through and crispy.
Nutrition
Calories: 117kcal,
Carbohydrates: 18g,
Protein: 4g,
Fat: 3g,
Saturated Fat: 2g,
Polyunsaturated Fat: 1g,
Monounsaturated Fat: 1g,
Trans Fat: 1g,
Cholesterol: 23mg,
Sodium: 324mg,
Potassium: 37mg,
Sugar: 1g,
Vitamin A: 120IU,
Calcium: 109mg,
Iron: 1mg
Nutrition information is automatically calculated and should only be used as an approximation.