
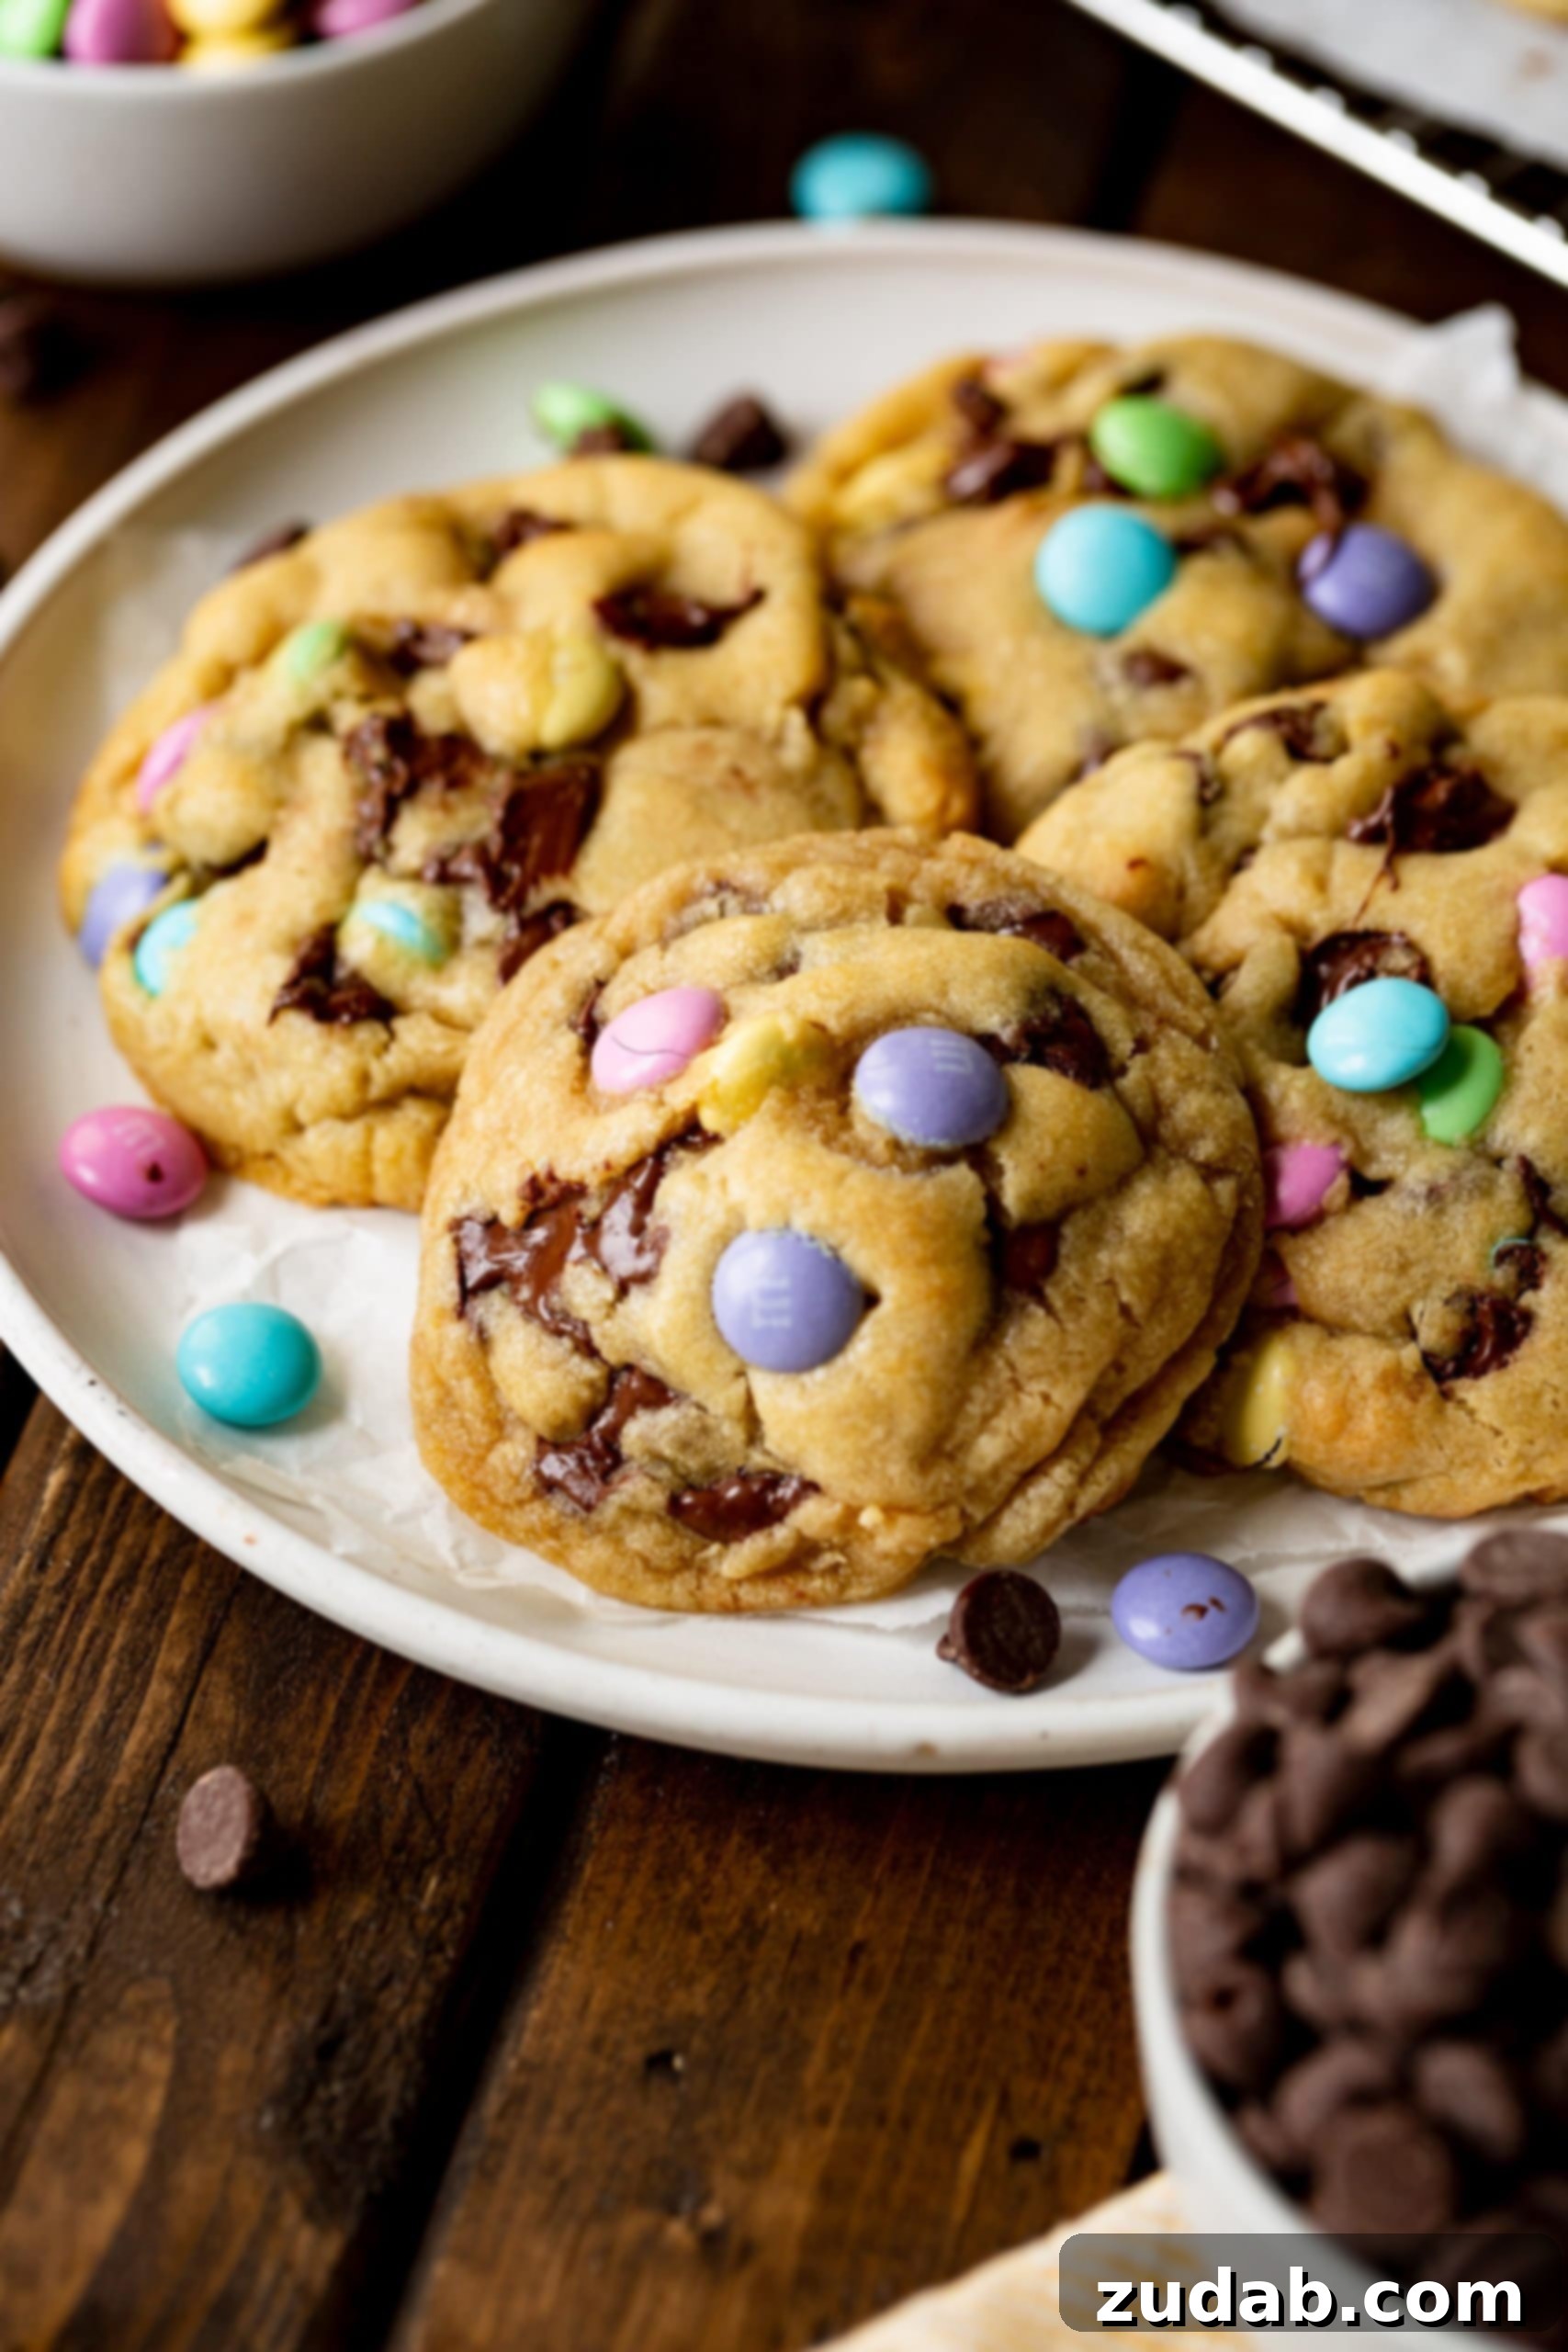
Indulge in the ultimate homemade treat with these deliciously thick, incredibly soft, and wonderfully chewy M&M Cookies! While originally crafted with vibrant Easter M&Ms, this versatile recipe is a true year-round delight, promising the perfect bite every time. Imagine a cookie with delightfully crunchy edges giving way to a warm, gooey center, bursting with rich chocolate and colorful candy. Trust us, the experience of savoring one fresh from the oven is absolutely unparalleled!
The demand for this particular M&M cookie recipe was truly astounding, especially after we shared a sneak peek on our Instagram. The response was overwhelming, filled with requests and eager anticipation. We usually plan recipes a year in advance, meticulously developing and photographing them, but the sheer excitement for these cookies meant we simply couldn’t wait. Despite Easter already passing, we knew these incredible treats had to be shared with you immediately. They were too glorious to keep under wraps!
Our inboxes and direct messages were flooded with enthusiastic comments and emails, all clamoring for this specific recipe. Your incredible feedback truly fueled our desire to get this out to you sooner rather than later. So, here they are! No need to wait an entire year for these irresistible M&M-studded wonders. We believe everyone deserves to enjoy these fantastic cookies whenever the craving strikes.
Unleash Your Creativity: Endless Possibilities for M&M Cookie Add-Ins
While this recipe shines with seasonal Easter M&M’s, its true beauty lies in its adaptability. This foundational cookie dough is incredibly versatile, allowing you to customize it with virtually any mix-ins you desire, making it perfect for any occasion, holiday, or just because! Imagine swapping out the pastel Easter M&M’s for classic primary colors, or for festive holiday-themed candies. With the Fourth of July just around the corner, wouldn’t these cookies be absolutely stunning with patriotic red, white, and blue M&M’s? The vibrant colors combined with the signature soft chewiness are sure to be a hit at any summer gathering. Beyond M&M’s, consider crunchy Reese’s Pieces for a peanut butter twist, or explore other options like various chocolate chips or nuts. The possibilities are truly limitless, and we’ll dive deeper into exciting add-in ideas later in this post.
One of the best features of this M&M cookie recipe is that it doesn’t strictly require chilling the dough, which means you can enjoy fresh-baked cookies in no time! However, for an even richer flavor profile and a slightly thicker, chewier texture, we highly recommend allowing the dough to rest in the refrigerator for at least 30 minutes. This resting period allows the flour to fully hydrate and the flavors to meld beautifully. If you choose to refrigerate the dough overnight or freeze it, remember to let it sit on the counter for about 15-30 minutes before baking. This crucial step helps the dough soften slightly, ensuring your cookies spread just enough to achieve that perfect golden-brown edge and soft center.
Essential Ingredients for Your Perfect M&M Cookies
Crafting these exceptional M&M cookies requires a straightforward list of ingredients, mostly standard for any classic chocolate chip cookie recipe, with the delightful addition of those colorful candy-coated chocolates. Here’s a detailed look at what you’ll need and why each component is vital for achieving the perfect balance of flavor and texture:
- Unsalted Butter – The foundation of any great cookie, using unsalted butter gives you complete control over the saltiness of your recipe. Ensure it’s properly softened – it should yield slightly when gently pressed with a finger, but your finger shouldn’t sink right through. This consistency is crucial for proper creaming.
- Brown Sugar – This is key for the incredibly moist and chewy texture of these cookies. Always use fresh, soft brown sugar, as dried-out sugar can affect the final consistency. The molasses in brown sugar also contributes a rich, caramel-like depth of flavor.
- White Sugar – Regular granulated white sugar works alongside brown sugar to achieve the ideal balance of sweetness and contributes to the crispness around the edges.
- Large Egg – Eggs provide essential structure to the cookies, binding all the ingredients together and adding to their rich flavor. A large egg ensures the right moisture balance.
- Vanilla Extract – A critical flavor enhancer! For the best results, always opt for pure vanilla extract, not imitation. The quality of your vanilla truly elevates the overall taste of your cookies.
- All-Purpose Flour – The backbone of our cookie. Proper measurement is essential for chewy, soft cookies. Spoon and level the flour into your measuring cup rather than scooping directly from the bag, which can compact the flour and lead to dry, dense cookies.
- Baking Soda – This leavening agent reacts with the acidic brown sugar to give the cookies their characteristic rise and light, fluffy interior.
- Cornstarch – Our secret ingredient for extra thickness and an unbelievably soft, tender crumb. It prevents the cookies from spreading too much, ensuring they stay delightfully thick.
- Salt – Absolutely essential for balancing the sweetness of the sugars and chocolates. A touch of salt significantly enhances all the other flavors, bringing out their best qualities.
- Semi-Sweet Chocolate Chips – Use regular or mini-sized chips; the choice is yours! Feel free to experiment with milk chocolate, dark chocolate, or a blend of your favorite varieties to customize the chocolate intensity.
- Easter M&M’s (or any Holiday M&M’s) – These vibrant candies add pops of color, a delightful crunch, and an extra layer of chocolatey sweetness. Don’t limit yourself to Easter; any holiday or classic M&M’s will work beautifully!
You’ll find the precise measurements for each ingredient, along with detailed step-by-step instructions, in the printable recipe card conveniently located at the end of this article. Feel free to save or print it for your baking adventures!
Step-by-Step Guide: How to Make Irresistible M&M Cookies
Baking these incredible M&M cookies is a straightforward process, perfect for bakers of all skill levels. The comprehensive instructions are in the recipe card below, but here’s a quick overview of the basic steps to give you a clear idea of what to expect:
- Prepare Your Dry Ingredients – In a medium bowl, thoroughly whisk together the flour, cornstarch, baking soda, and salt. Whisking ensures these dry ingredients are evenly distributed, preventing pockets of leavening or salt in your finished cookies. Set this mixture aside.
- Cream Your Wet Ingredients – In the bowl of a stand mixer fitted with a paddle attachment (or using a hand mixer), beat the softened unsalted butter with both the brown and white sugars. Cream them together on medium speed for about 1-2 minutes until the mixture is light, fluffy, and well combined. Then, beat in the large egg and pure vanilla extract until just incorporated. Scrape down the sides of the bowl as needed to ensure everything is mixed evenly.
- Combine Dry and Wet Mixtures – Gradually add the whisked dry ingredients to the wet ingredients in the mixer, mixing on low speed until just combined. It’s crucial not to overmix the dough at this stage, as overmixing can develop the gluten in the flour, resulting in tough cookies. Stop mixing as soon as no streaks of flour remain.
- Gently Fold in M&M’s and Chocolate Chips – This step is key for preserving the integrity of your M&M’s! Switch from the mixer to a sturdy wooden spoon or a spatula. Gently fold in the semi-sweet chocolate chips and the festive M&M’s by hand. Using a mixer for this can crush the M&M’s, losing their vibrant color and satisfying candy shell crunch.
- Form the Cookie Dough Balls – Using a regular-sized cookie scoop, portion out generous, heaping scoops of dough. Roll them into smooth, uniform balls. For an extra bakery-style look, press a few additional chocolate chips and M&M’s onto the tops of each dough ball before placing them on your baking sheet. This ensures beautiful candy and chocolate visibility after baking.
- Bake to Golden Perfection – Arrange your cookie dough balls on a parchment-lined baking sheet, leaving ample space between them to allow for spreading. Bake in your preheated oven for approximately 8-10 minutes. It’s important not to overbake! The cookies should look slightly underdone and soft in the center when you remove them from the oven. They will continue to set and firm up as they cool on the baking sheet, achieving that perfectly chewy texture we all love.
Pro Tips for Achieving Bakery-Style M&M Cookies
Want your homemade M&M cookies to look like they came straight from a gourmet bakery display? Follow these simple yet effective tips to elevate their appearance:
- Strategic Candy Placement: Just before or immediately after baking (while the cookies are still warm and pliable), gently press a few extra chocolate chips and M&M’s onto the tops of each cookie. This ensures a beautiful, loaded look with plenty of visible goodies.
- The “Round” Trick: For perfectly circular cookies, immediately after removing them from the oven and letting them cool for just about 2 minutes on the baking sheet, use a large glass or a round biscuit cutter that is slightly larger than your cookies. Place it over a cookie and gently swirl it around the edges. This trick pushes the warm edges back into a flawless round shape, giving them that professional, polished finish.
Why These M&M Cookies Will Become Your New Favorite
These M&M cookies aren’t just good; they’re truly exceptional. Here’s why you’ll fall head over heels for this recipe:
- Unforgettable Texture: Prepare for a symphony of textures! Each cookie boasts wonderfully crispy edges, transitioning into an irresistibly thick, soft, and profoundly chewy center. The delightful crunch from the candy-coated M&M shells adds yet another layer of pleasure to every bite, creating a truly dynamic mouthfeel that keeps you coming back for more.
- Visually Stunning Appearance: With their rich golden-brown hue and the vibrant pops of color from the M&M’s, these cookies are as beautiful to look at as they are delicious to eat. They instantly brighten any dessert platter or cookie jar, making them perfect for celebrations or simply adding a cheerful touch to your day.
- Heavenly Flavor Profile: These cookies deliver a rich, buttery, and deeply sugary taste, enhanced by the nuanced sweetness of brown sugar. The perfect combination of semi-sweet chocolate chips and the unique flavor of M&M’s creates a harmonious, utterly heavenly flavor that’s both comforting and exciting.
- Remarkable Ease of Preparation: Don’t let their gourmet appearance fool you – these cookies are incredibly simple to make! Even our youngest family members love to get involved in the process, especially when it comes to adding the M&M’s. Their simplicity makes them a fantastic baking project for families and beginner bakers alike.
- Speedy Satisfaction: Craving cookies in a hurry? These are your answer! While we do recommend a short 30-minute rest for optimal flavor development, it’s not strictly necessary. This means you can mix, bake, and be enjoying warm, delicious cookies in less than an hour – instant gratification at its finest!
Creative Variations: Elevate Your M&M Cookies with Diverse Add-ins
The beauty of having such a perfect base cookie dough is that you can truly let your imagination run wild with add-ins. The possibilities for customization are genuinely endless, allowing you to create a unique cookie for every mood or occasion. Here are just a few exciting ideas to get you started:
- Peanut Butter Chips: For a nutty, creamy addition that pairs wonderfully with chocolate.
- Caramel Bits: Adds pockets of gooey, buttery caramel flavor.
- White, Dark, or Milk Chocolate Chips: Mix and match your favorite chocolate intensities for varied richness.
- Different M&M’s Varieties: Explore peanut M&M’s, peanut butter M&M’s, almond M&M’s, pretzel M&M’s, crispy M&M’s, or dark chocolate M&M’s for unique textures and flavors.
- Broken Pretzel Pieces: Introduces a delightful salty crunch that perfectly complements the sweet cookie.
- Toffee Bits: For a buttery, caramel-like crunch that melts in your mouth.
- Butterscotch Chips: Adds a distinct, sweet, and slightly savory flavor.
- Reese’s Pieces: For an unmistakable peanut butter and chocolate flavor explosion.
- Reese’s Mini Peanut Butter Cups (chopped): Brings soft, chewy peanut butter goodness to your cookies.
We absolutely love hearing about your culinary experiments! Please share with us what amazing combinations of add-ins you use to create your own “best of the best” cookies. Your creativity inspires us all!
Can You Freeze These M&M Cookies? Absolutely!
Yes, these M&M cookies are wonderfully freezer-friendly, offering a convenient way to prepare ahead or enjoy fresh-baked treats on demand. You have two excellent options: freezing the raw cookie dough balls or freezing the fully baked cookies.
Freezing Cookie Dough Balls – This method is fantastic for having fresh, warm cookies anytime. First, form your cookie dough into individual balls as directed in the recipe. Place these dough balls on a baking sheet lined with parchment paper, ensuring they don’t touch. Pop the entire baking sheet into the freezer for about an hour, or until the dough balls are firm. Once frozen solid, transfer them to a freezer-safe ziploc bag or an airtight container. They will keep beautifully in the freezer for up to 2-3 months.
When you’re ready to bake, simply place the frozen dough balls on a parchment-lined baking sheet. Allow them to thaw on the counter for about 30 minutes. Then, bake them according to the instructions in the recipe card, adding an extra minute or two to the baking time if they still seem a bit frozen.
Freezing Fully Baked Cookies – If you’ve baked a large batch and want to save some for later, freezing baked cookies is a great option. Allow the cookies to cool completely on a wire rack before freezing. Once fully cooled, place them in a single layer in a freezer-safe ziploc bag or an airtight container, separating layers with parchment paper if stacking. They will maintain their quality in the freezer for 2-3 months. To enjoy, simply remove the desired number of cookies and let them thaw at room temperature on the counter for approximately 30 minutes. For a “fresh from the oven” experience, you can also warm them briefly in the microwave or a low oven.
You asked, you begged, and we delivered! We put our hearts into getting this recipe out to you all, and we are absolutely thrilled with the result. These spring-inspired Easter M&M chocolate chip cookies are truly one of our finest creations yet, earning all the heart eyes from everyone who tries them. Now it’s your turn! We can’t wait to see your beautiful pictures and hear about all the wonderful celebrations and everyday moments you share these delightful cookies with!
Explore More Irresistible M&M Cookie Recipes:
- Decadent Chocolate M&M Cookies
- Buttery Shortbread M&M Cookies
- Ultimate Peanut Butter Chocolate Chip and M&M Cookies
- Vibrant Red Velvet M&M Cookies
- Loaded Kitchen Sink Cookies (with M&M’s!)
- Classic Boyfriend Cookies (often featuring M&M’s)
Spring Easter M&M Cookies

Pin
Ingredients
- 2 ½ Cups All-Purpose Flour
- 2 teaspoons Cornstarch
- 1 teaspoon Baking Soda
- 1/2 teaspoon Salt
- 14 Tablespoons Unsalted Butter, softened * see note
- 1 Cup Light Brown Sugar
- 1/2 Cup White Granulated Sugar
- 1 Large Egg
- 3 teaspoons Pure Vanilla Extract
- 1 ¼ Cup Semi-Sweet Chocolate Chips, plus more for topping
- 1 Cup M&Ms (Easter or any preferred holiday/classic variety), plus more for topping
Instructions
-
Preheat your oven to 350 degrees Fahrenheit (175°C).
-
Line two large cookie sheets with parchment paper to prevent sticking and ensure even baking. Set them aside.
-
In a medium bowl, whisk together the all-purpose flour, cornstarch, baking soda, and salt until they are thoroughly combined. This ensures even distribution of the leavening and seasoning. Set this dry mixture aside.2 ½ Cups All-Purpose Flour, 2 teaspoons Cornstarch, 1 teaspoon Baking Soda, 1/2 teaspoon Salt
-
In the bowl of a standing mixer equipped with a paddle attachment, beat the softened unsalted butter with both the light brown sugar and white granulated sugar. Cream them together for about 1 minute on medium speed, until the mixture is light, fluffy, and cohesive.14 Tablespoons Unsalted Butter, 1 Cup Light Brown Sugar, 1/2 Cup White Granulated Sugar
-
Add the large egg and pure vanilla extract to the creamed butter and sugar mixture. Beat again until just combined, scraping down the sides of the bowl to ensure all ingredients are well incorporated.1 Large Egg, 3 teaspoons Pure Vanilla Extract
-
Gradually add the reserved dry ingredients to the wet mixture, mixing on low speed until just combined. Be careful not to overmix; stop as soon as no dry streaks of flour are visible.
-
Switch to a sturdy wooden spoon or rubber spatula for this next step. Gently fold in the semi-sweet chocolate chips and M&Ms by hand. Using the mixer at this stage can break and crush the candies. Once evenly distributed, use a cookie scoop to form the dough into uniform balls. For a bakery-style presentation, gently press 2-3 extra M&Ms and chocolate chips onto the top of each dough ball before baking.1 ¼ Cup Semi-Sweet Chocolate Chips, 1 Cup M&Ms (Easter or any preferred holiday/classic variety)
-
Optional Dough Chill: For enhanced flavor and a thicker cookie, you may cover the dough with plastic wrap and refrigerate for at least 30 minutes, or even overnight in a ziploc bag. If chilling overnight, remember to allow the dough balls to sit at room temperature for 15-20 minutes before baking to soften slightly. If not chilling, proceed directly to baking.
-
Place the prepared cookie dough balls on the parchment-lined baking sheets, ensuring adequate spacing (we recommend no more than 8 cookies per sheet for optimal spreading). Bake for 8-10 minutes. The cookies will appear slightly under-baked and soft in the center when you remove them from the oven. This is normal and desired for a chewy texture. Let them cool on the baking sheet for 5-10 minutes to set before transferring to a wire rack to cool completely.
Recipe Notes
Nutrition
Nutrition information is automatically calculated, so should only be used as an approximation.