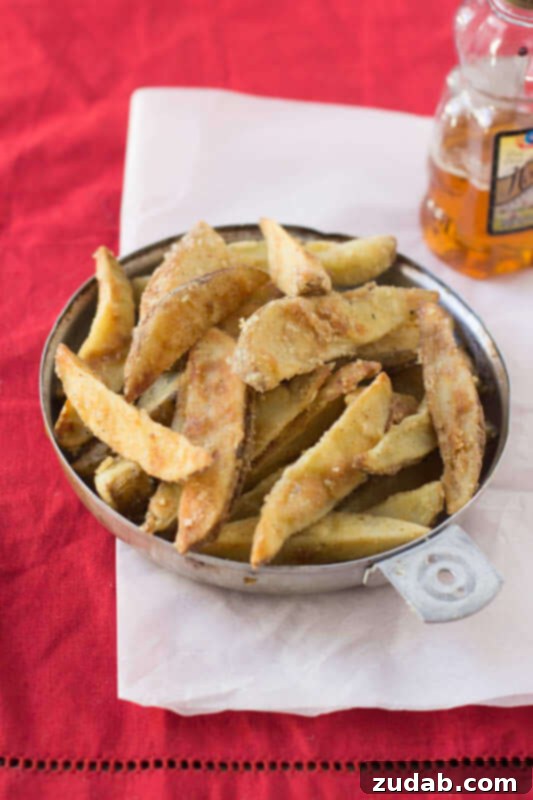
The Ultimate Homemade Jo Jo’s Recipe: Crispy Potato Wedges Just Like Your Favorite Store
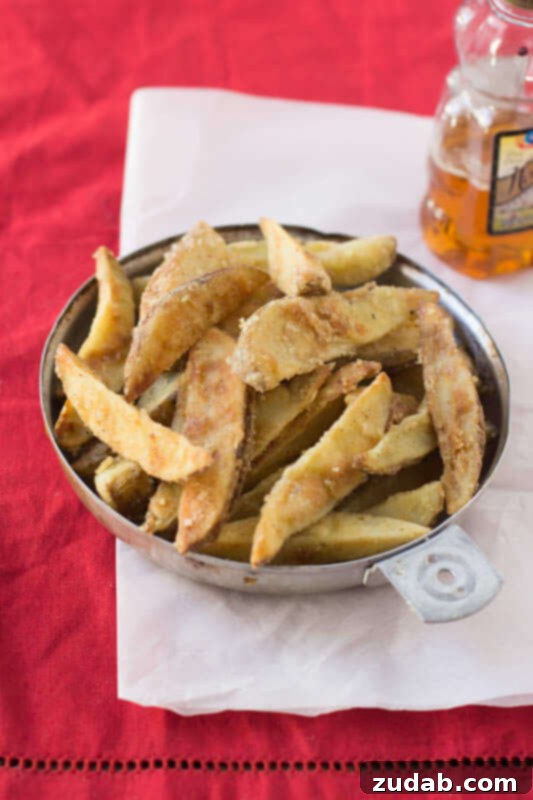
Growing up, my grocery store experiences were shaped by Fred Meyer and Safeway. While Fred Meyer offered a delightful mix of clothes and household items, it was Safeway’s delicatessen that truly captured my culinary heart. I’ve often reminisced about childhood favorites like Bagel Bites and Mozzarella Sticks, but as I journeyed back through my taste-bud memories, I realized two more significant treats had slipped my mind: Safeway’s famous Jo Jo’s, and their irresistible fried rice and sesame chicken. The joy of picking up a plastic bag, sealed with a sticker, brimming with those perfectly seasoned potato wedges was a cherished part of my youth. While the fried rice and sesame chicken became adult pleasures, the Jo Jo’s held a special, timeless appeal. Today, we’re diving deep into that nostalgic flavor to create the best homemade Jo Jo’s, crispy on the outside, tender on the inside, just like you remember from the deli.
For those craving other takeout-inspired dishes, you might also enjoy our Sweet and Sour Chicken, Pretend Orange Chicken, or our delightful Bacon Fried Rice. But for now, let’s focus on perfecting those beloved potato wedges.
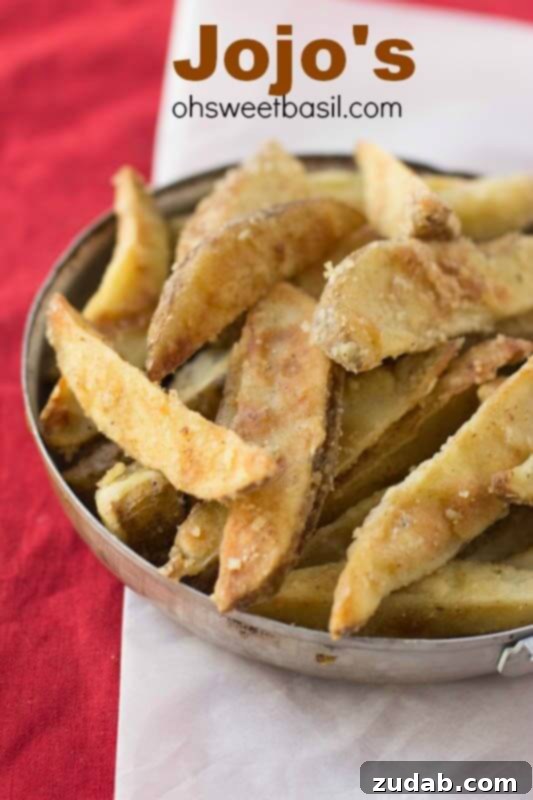
I understand not everyone refers to these glorious potato wedges as “Jo Jo’s,” and that’s perfectly fine! Regional names vary, but the irresistible taste is universal. These thick, flavorful potato wedges were always a special reward after a successful grocery trip with Mom. Sometimes, if we were extra good, we’d even get a corn dog or chicken strips to go along with them! I can vividly recall the savory aroma and the melt-in-your-mouth tenderness of those Jo Jo’s. Did you ever have a favorite snack you’d grab at the store?
This deep affection for potatoes isn’t just a nostalgic whim. In a few weeks, I’m heading to Idaho with the Idaho Potato Commission, and my mind is absolutely buzzing with potato possibilities. I’m incredibly excited about this trip for several reasons. Firstly, my parents recently relocated to Rexburg, Idaho, a town where I also spent some of my college years. Secondly, I genuinely adore Idaho. It’s a state of breathtaking beauty, profound tranquility, and its residents are remarkably easygoing and genuine. And, believe it or not, the air there truly smells cleaner – mingled, of course, with the earthy scent of farms, which I actually find quite charming. I dream of moving there someday. So, if anyone knows of a job opening, send it my way!
A little insider tip for serving your Jo Jo’s: while ketchup is a classic, try drizzling a touch of honey over them instead. The sweet and savory combination is unexpectedly delicious and highly addictive!
What Exactly Are Jo Jo’s?
Jo Jo’s are essentially thick-cut potato wedges, distinguished by their unique preparation which typically involves deep-frying or baking until they achieve a wonderfully crispy exterior and a fluffy, tender interior. Unlike standard French fries, Jo Jo’s are characterized by their hearty size, robust potato flavor, and often a savory seasoned coating that adds an extra layer of deliciousness. They are a staple in many deli counters and fast-food establishments, particularly in the Pacific Northwest, where they are almost exclusively served alongside fried chicken, creamy coleslaw, and hearty baked beans, creating a comforting and satisfying meal.
The beauty of a perfect Jo Jo lies in this textural contrast: a golden-brown, crunchy crust that gives way to a soft, steaming potato center. This makes them incredibly satisfying and a step above your average potato side dish.
The Jo Jo’s Difference: Deep-Fried vs. Baked Perfection
While classic Jo Jo’s are often deep-fried for maximum crispiness, this homemade recipe focuses on a baked version that delivers comparable results with less oil and effort. Both methods aim for that coveted crispy outside and fluffy inside, but they each have their merits.
- **Deep-Fried Jo Jo’s:** This method yields the most authentic deli-style Jo Jo’s, with an incredibly crisp, golden crust. The key is to fry them twice – once at a lower temperature to cook the potato through, and then a second time at a higher temperature to achieve that signature crunch and color. This ensures they are cooked thoroughly without being greasy.
- **Baked Jo Jo’s:** Our recipe utilizes baking, which is a healthier and often more convenient option for home cooks. By preheating the pan with butter and cooking at a high temperature, we mimic the effects of frying, encouraging browning and crisping. Flipping them halfway through is crucial for even cooking and a uniformly crispy texture. The seasoned flour coating ensures a flavorful and slightly crunchy crust without the need for excessive oil.
Regardless of your preferred cooking method, the goal remains the same: a potato wedge that is a true testament to its name—crisp, tender, and utterly delicious.
Choosing the Right Potato for Outstanding Jo Jo’s
The foundation of any great potato dish starts with selecting the right variety. For Jo Jo’s, as with the best French fries, the ideal potato is one that is golden brown in color, crispy on the outside, fluffy on the inside, and not overly oily.
Russet potatoes, often referred to as Idaho potatoes, are by far the superior choice for Jo Jo’s. Here’s why:
- **High Starch Content:** Russets are known for their high starch and low moisture content. When cooked, this starch converts into sugars and creates a light, fluffy interior texture that absorbs flavors beautifully.
- **Textural Excellence:** The high starch allows them to crisp up incredibly well, forming that desirable crunchy exterior while maintaining a soft, almost mashed-potato-like consistency inside. This stark contrast in textures is what makes Jo Jo’s so appealing.
- **Shape and Size:** Their elongated shape is perfect for cutting into uniform wedges, which ensures even cooking.
While other potatoes like Yukon Golds or Red Potatoes can be used for roasting, they have a waxier, lower-starch content that results in a denser, creamier texture rather than the light and airy fluffiness desired for Jo Jo’s. Stick with Russets or classic Idaho baking potatoes for the best results.
Are Potatoes a Healthy Choice? Debunking the Myths
Potatoes often get a bad rap, usually due to how they’re prepared (hello, deep-fried chips and loaded fries!). However, in their natural state, potatoes are incredibly nutritious and can be a valuable part of a balanced diet. Our baked Jo Jo’s offer a healthier alternative to their deep-fried counterparts, allowing you to enjoy their benefits without guilt.
Potatoes are packed with essential vitamins and minerals:
- **Vitamin C:** A powerful antioxidant that supports immune health and collagen production.
- **Vitamin B6:** Important for brain development, nerve function, and red blood cell formation.
- **Potassium:** Crucial for maintaining fluid balance, nerve signals, and muscle contractions, often found in higher amounts than a banana!
- **Fiber:** Especially when eaten with the skin on, potatoes are an excellent source of dietary fiber, which aids digestion, promotes fullness, and helps regulate blood sugar levels.
Furthermore, potatoes alone are naturally low in calories and contain no fat or cholesterol. The nutritional content changes with cooking methods and added ingredients, but when prepared thoughtfully, potatoes offer significant health benefits. Enjoying these homemade Jo Jo’s means you’re getting a wholesome serving of vegetables with delicious flavor.
Jo Jo’s Recipe

Ingredients
- 1/3 Cup All-Purpose Flour
- 2 teaspoons Seasoned Salt
- 1/2 teaspoon Pepper
- 1/4 Cup Butter, melted
- 6 Russet Baking Potatoes, washed and sliced into wedges
Instructions
-
Preheat your oven to 450 degrees Fahrenheit (230°C).
-
Line two large baking sheets with foil for easy cleanup.
-
In a large resealable plastic bag, combine the 1/3 cup flour, 2 teaspoons seasoned salt, and 1/2 teaspoon pepper. Shake well to mix the spices.
-
Place the baking pan with the 1/4 cup melted butter into the preheating oven for a few minutes until the butter is fully melted and shimmering. This helps create a crispy crust.
-
Add the potato wedges to the plastic bag, a handful at a time. Seal the bag and shake vigorously to ensure each potato wedge is evenly coated with the flour and seasoning mixture.
-
Remove the potatoes from the bag, shaking off any excess flour mixture. Arrange the coated potato wedges in a single layer, skin side down, on the prepared baking sheets. Scoop any extra melted butter from the pan and drizzle it over the potatoes.
-
Bake for 10-15 minutes, then carefully flip the potatoes over and bake for another 10-15 minutes, or until they are golden brown and crispy to your liking. The total cooking time may vary depending on the thickness of your wedges.
-
Serve your delicious Jo Jo’s hot and enjoy!
Recipe Notes
To reheat: Preheat your oven to 400 degrees Fahrenheit (200°C). Place the leftover Jo Jo’s on a baking sheet and reheat for about 10 minutes, or until warmed through and crispy again.
Nutrition
Nutrition information is automatically calculated, so should only be used as an approximation.
Tips for Achieving Crispy Jo Jo’s Every Time
Making truly crispy Jo Jo’s at home is entirely achievable with a few simple techniques:
- **Don’t Overcrowd the Pan:** Arrange the potato wedges in a single layer on the baking sheet, leaving some space between each piece. Overcrowding traps steam, leading to soggy potatoes instead of crispy ones. If necessary, use two baking sheets.
- **Preheat the Pan:** As specified in the recipe, preheating the pan with the butter ensures that the potatoes hit a hot surface immediately, promoting browning and crispiness.
- **Even Coating:** Ensure every potato wedge is thoroughly coated with the flour and seasoning mixture. This coating is what will crisp up in the oven, giving you that delightful texture.
- **Flip Halfway:** Flipping the potatoes midway through cooking allows both sides to get golden brown and crispy.
- **High Heat is Key:** Baking at 450°F (230°C) is crucial for crisping. Lower temperatures will dry out the potatoes before they can achieve that desirable crunch.
- **Soaking (Optional for Deep Frying):** If you decide to deep-fry, consider soaking the cut potato wedges in cold water for 30 minutes to an hour. This removes excess starch, which can lead to even crispier results. Pat them thoroughly dry before frying.
Serving Suggestions for Your Homemade Jo Jo’s
These versatile potato wedges pair wonderfully with a variety of dishes. While the classic pairing with fried chicken, coleslaw, and baked beans is always a winner, here are a few other ideas:
- **Classic Diner Style:** Serve them alongside your favorite burgers, hot dogs, or deli sandwiches for a comforting, American-inspired meal.
- **Breakfast Side:** Jo Jo’s make a fantastic alternative to hash browns or home fries with eggs, bacon, and toast.
- **Dipping Extravaganza:** Offer a selection of dipping sauces! Beyond ketchup and honey, try a spicy sriracha mayo, tangy ranch, creamy aioli, or even a savory cheese sauce.
- **Appetizer Platter:** Arrange them on a platter with other finger foods for parties or game nights.
- **Main Course Accompaniment:** They are a perfect side for roasted meats, grilled fish, or even a hearty vegetable main course.
However you choose to enjoy them, these homemade Jo Jo’s are sure to be a crowd-pleaser and a delightful trip down memory lane.
Making Jo Jo’s at home is more than just cooking; it’s about recreating a piece of cherished nostalgia, one crispy, tender potato wedge at a time. This recipe offers a straightforward path to achieving that perfect texture and flavor, bringing the deli counter experience right into your kitchen. Whether you’re making them for a weeknight dinner, a special gathering, or just to satisfy a craving, these Jo Jo’s promise a satisfying and delicious experience. So grab your Russets, get seasoning, and prepare to indulge in the crispy, flavorful goodness of homemade Jo Jo’s!
Honey Roasted Red Potatoes
The BEST Potato Rolls