
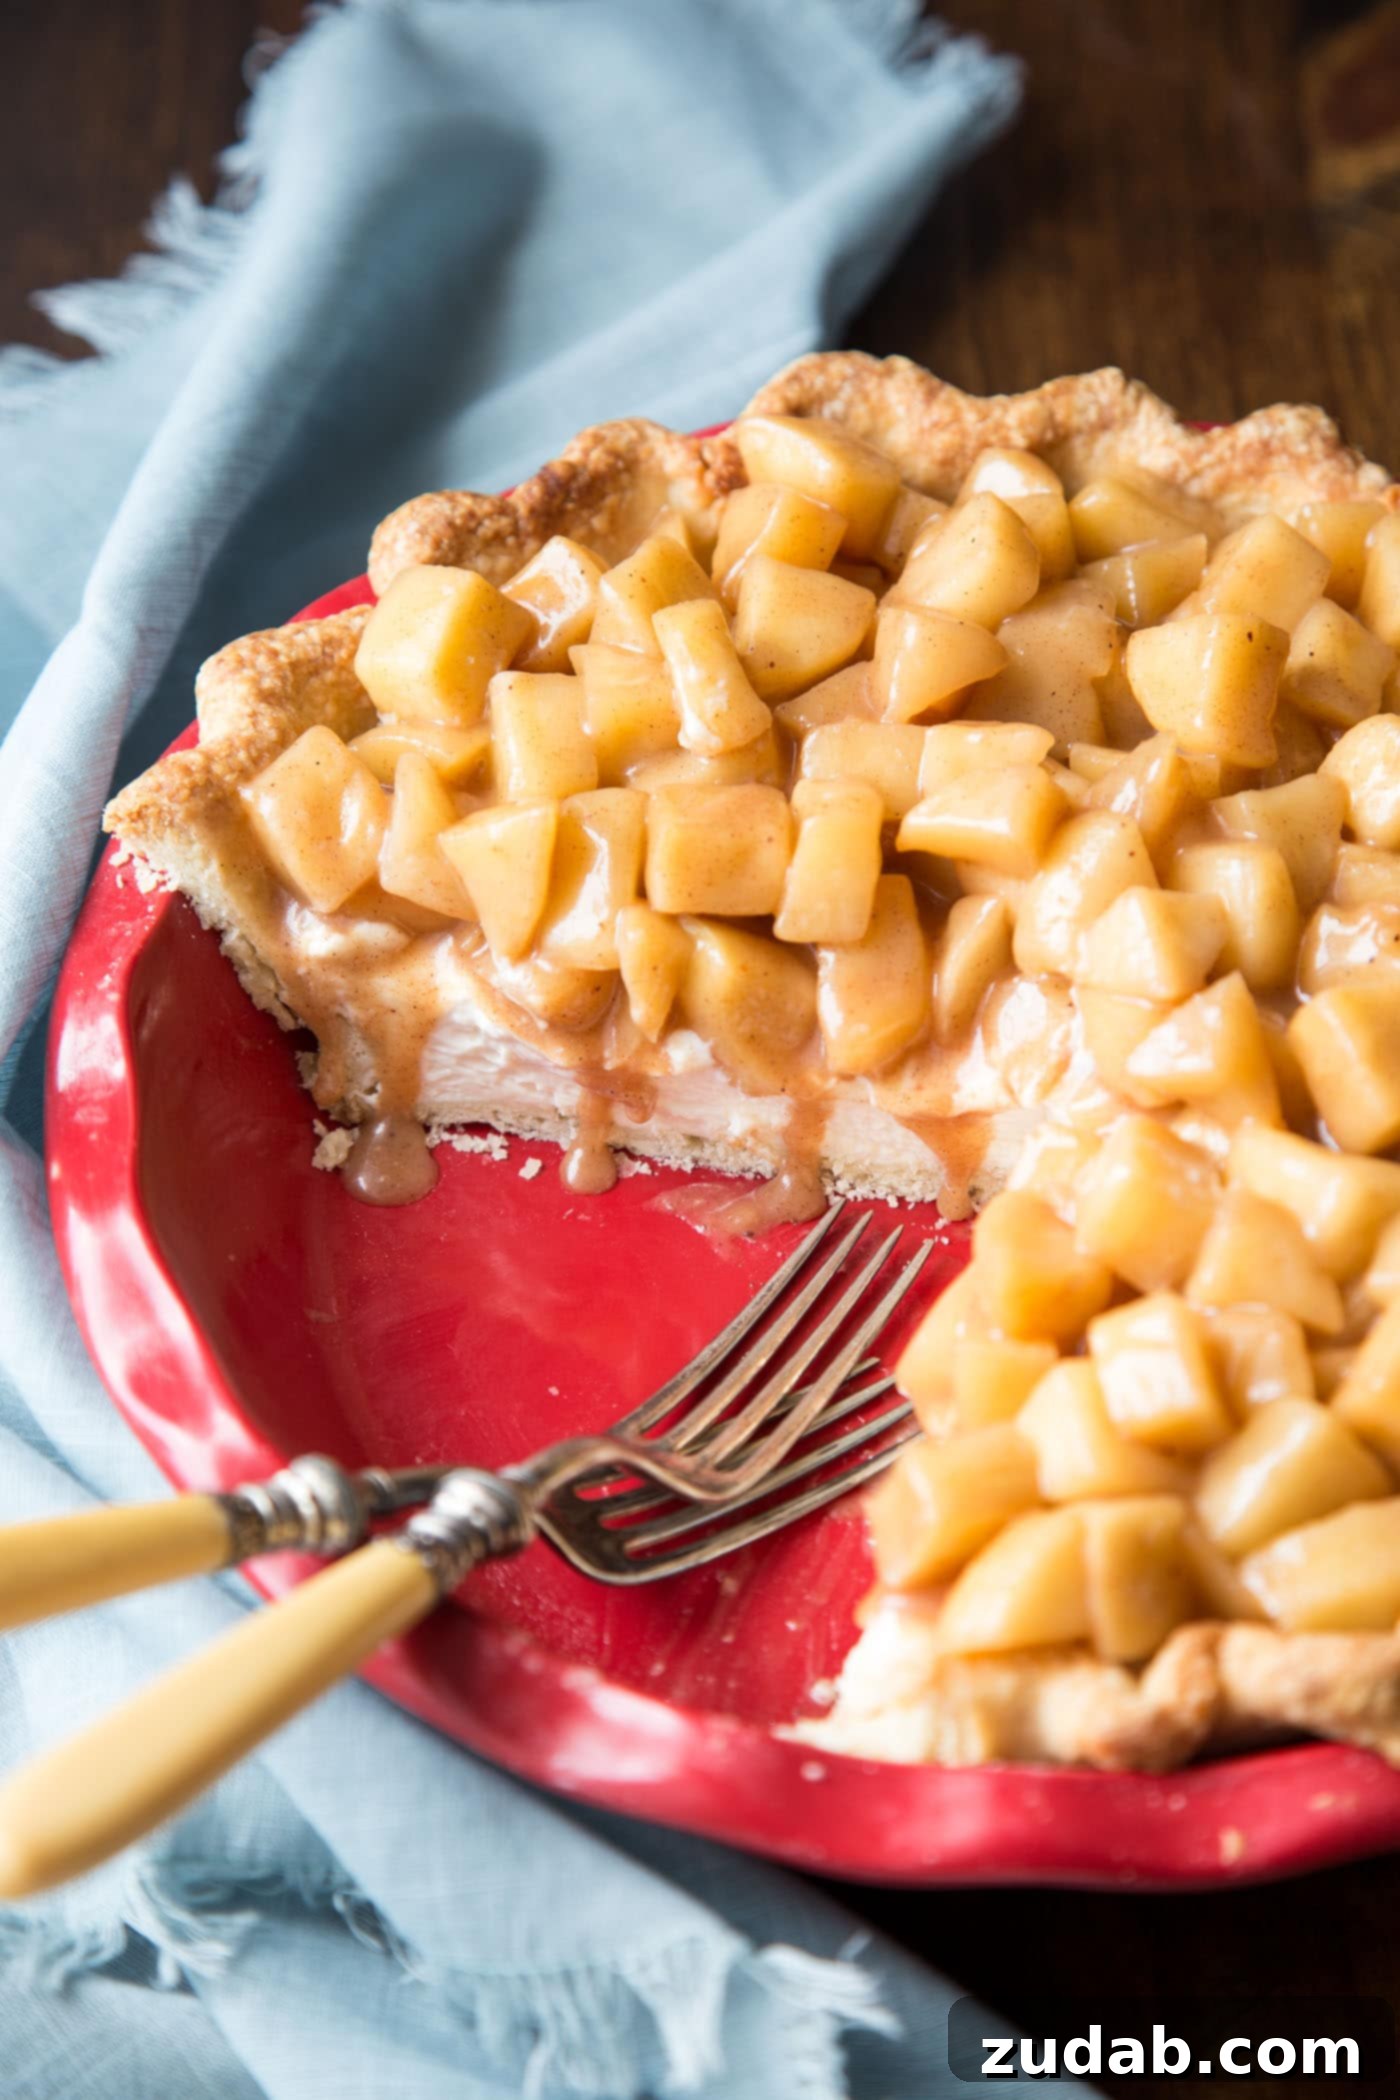
Step aside, traditional apple pie! It’s time to elevate your dessert game with this truly unforgettable Apple Cream Cheese Pie. Imagine a perfectly flaky, homemade pie crust, generously filled with a smooth, luscious cream cheese mixture, and then crowned with a vibrant topping of fresh apples, gently cooked until tender with an aromatic blend of warm spices. This pie isn’t just a dessert; it’s an experience, offering a delightful harmony of textures and flavors that will captivate your palate.
While classic apple pies hold a special place in our hearts, this cream cheese rendition brings a sophisticated twist that makes it truly stand out. The cool, tangy cream cheese layer perfectly complements the sweet, spiced apples, creating a contrast that is both refreshing and deeply comforting. It’s the ideal treat for any occasion, from a casual family dinner to a festive holiday gathering, promising to be a showstopper every time.
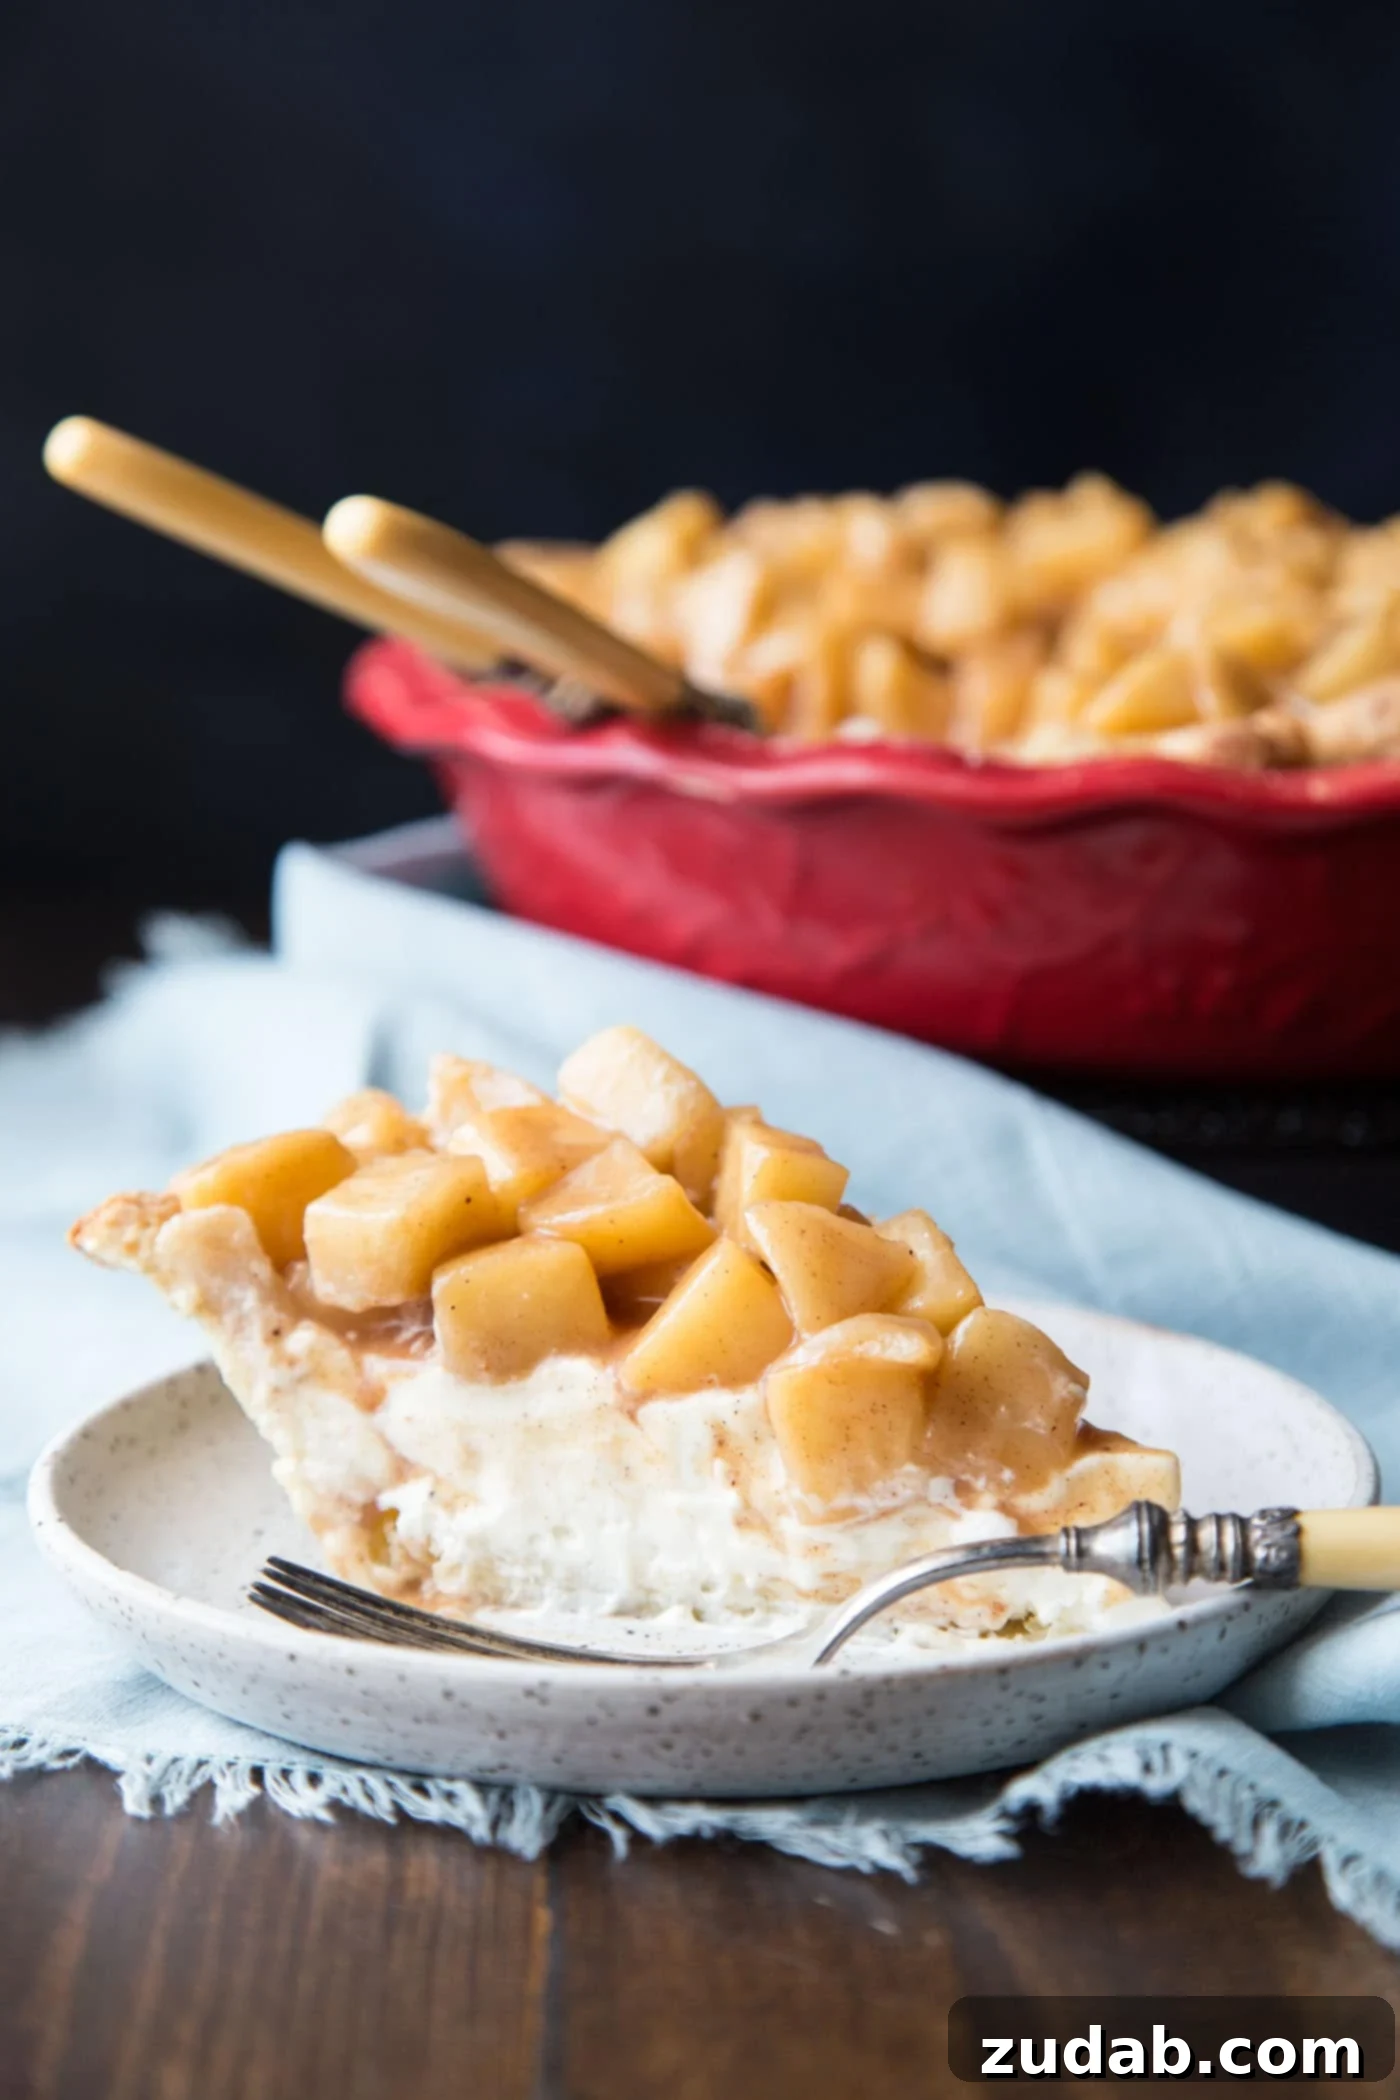
Cream pies, such as a delightful Strawberry Cream Pie or a luscious Peaches and Cream Pie, are often synonymous with bright, sunny summer days. However, you’ll be thrilled to discover that this Apple Cream Cheese Pie masterfully bridges the seasonal gap. It beautifully marries the quintessential flavors of autumn with the refreshing coolness and creamy texture typically found in summer desserts. This unique combination makes it an exceptionally versatile dessert, perfect for celebrating the vibrant bounty of fall, or even becoming a new staple for your Thanksgiving feast, as my husband specifically requested it for ours!
The magic of this pie lies in its ability to deliver both warmth and coolness in a single bite. The tender, spiced apples evoke cozy autumn evenings, while the smooth, chilled cream cheese layer adds a refreshing counterpoint. This makes it suitable for serving at varying temperatures, though it’s best enjoyed slightly chilled to fully appreciate the creamy texture. Its unique profile ensures it will become a much-anticipated dessert for any fall event, offering a welcome departure from the expected.
Crafting Your Apple Cream Cheese Pie: A Comprehensive Guide
Creating this irresistible Apple Cream Cheese Pie involves a harmonious assembly of three key components: a perfectly baked pie crust, a rich and tangy cream cheese filling, and a tender, warmly spiced apple topping. Each element plays a crucial role in achieving the pie’s exceptional flavor and delightful texture. Let’s break down the process step-by-step, ensuring a flawless result every time.
The Foundation: A Flaky Homemade Pie Crust
A truly exceptional pie begins with its crust, and for this Apple Cream Cheese Pie, a homemade pie crust is highly recommended. The difference in flavor and texture between a homemade crust and a store-bought one is truly remarkable. Achieving that signature flaky texture is simpler than you might think, primarily relying on using cold ingredients and careful handling. The goal is a crust that is golden brown, crisp, and holds up beautifully against the creamy and fruity fillings.
To start, you’ll prepare your pie dough according to your favorite recipe, or use our recommended “Kristin’s Magic Pie Crust” linked above. The secret to flakiness lies in keeping your butter and water as cold as possible. This prevents the butter from fully integrating with the flour, instead creating pockets that steam during baking, resulting in those desirable airy layers. Once your dough is prepared, it needs ample time to chill in the refrigerator—at least an hour—to allow the gluten to relax and the butter to firm up, making it easier to roll and reducing shrinkage during baking. When rolling out your dough, ensure it’s about 2 inches larger than your pie dish to allow for crimping and a beautiful edge. Lightly flour your work surface and rolling pin to prevent sticking.
Next comes blind baking, a crucial step for cream pies to prevent a soggy bottom. This involves baking the empty pie shell before adding any wet fillings. After fitting the rolled dough into your pie dish, trim any excess, leaving enough to fold under and flute the edges. Freeze the prepared crust while your oven preheats to 425°F (220°C). This rapid temperature change helps set the crust quickly and maintain its shape. Line the frozen crust with parchment paper, ensuring it covers the edges, then fill it with pie weights or dried beans. Bake for about 20 minutes, then remove the weights and paper. For an extra golden finish, you can brush the crust with an egg wash before returning it to the oven for another 10-13 minutes, until it achieves a beautiful golden brown hue. Once baked, allow the crust to cool completely on a wire rack for at least two hours before moving on to the fillings. This patience is key to a sturdy and perfectly textured base.
The Heart of the Pie: Velvety Cream Cheese Filling
The rich and cool cream cheese filling is what truly sets this pie apart. It’s a delightful contrast to the warm, spiced apples, adding a tangy sweetness and an incredibly smooth texture that melts in your mouth. This filling is a simple yet elegant combination of heavy whipping cream and softened cream cheese, sweetened with granulated sugar and infused with pure vanilla extract for a touch of warmth.
To prepare this luxurious layer, begin by whipping cold heavy cream with half of the granulated sugar and half of the vanilla extract until stiff peaks form. The cold temperature of the cream is essential for proper whipping, ensuring a light and airy consistency. Once whipped, gently transfer this mixture to a separate bowl and refrigerate it while you prepare the cream cheese base. In the same stand mixer bowl (no need to clean it!), beat the room temperature cream cheese with the remaining sugar and vanilla extract until it’s wonderfully creamy and smooth. The cream cheese should be at room temperature to prevent lumps and ensure a silky texture. Finally, gently fold the whipped cream back into the cream cheese mixture using a spatula or on the lowest “stir” setting of your mixer, just until everything is combined. Overmixing at this stage can deflate the whipped cream. Cover the finished cream cheese filling and refrigerate it until you’re ready to assemble the pie. Keeping it chilled helps it firm up and maintains its delightful texture.
The Crown Jewel: Perfectly Spiced Apple Topping
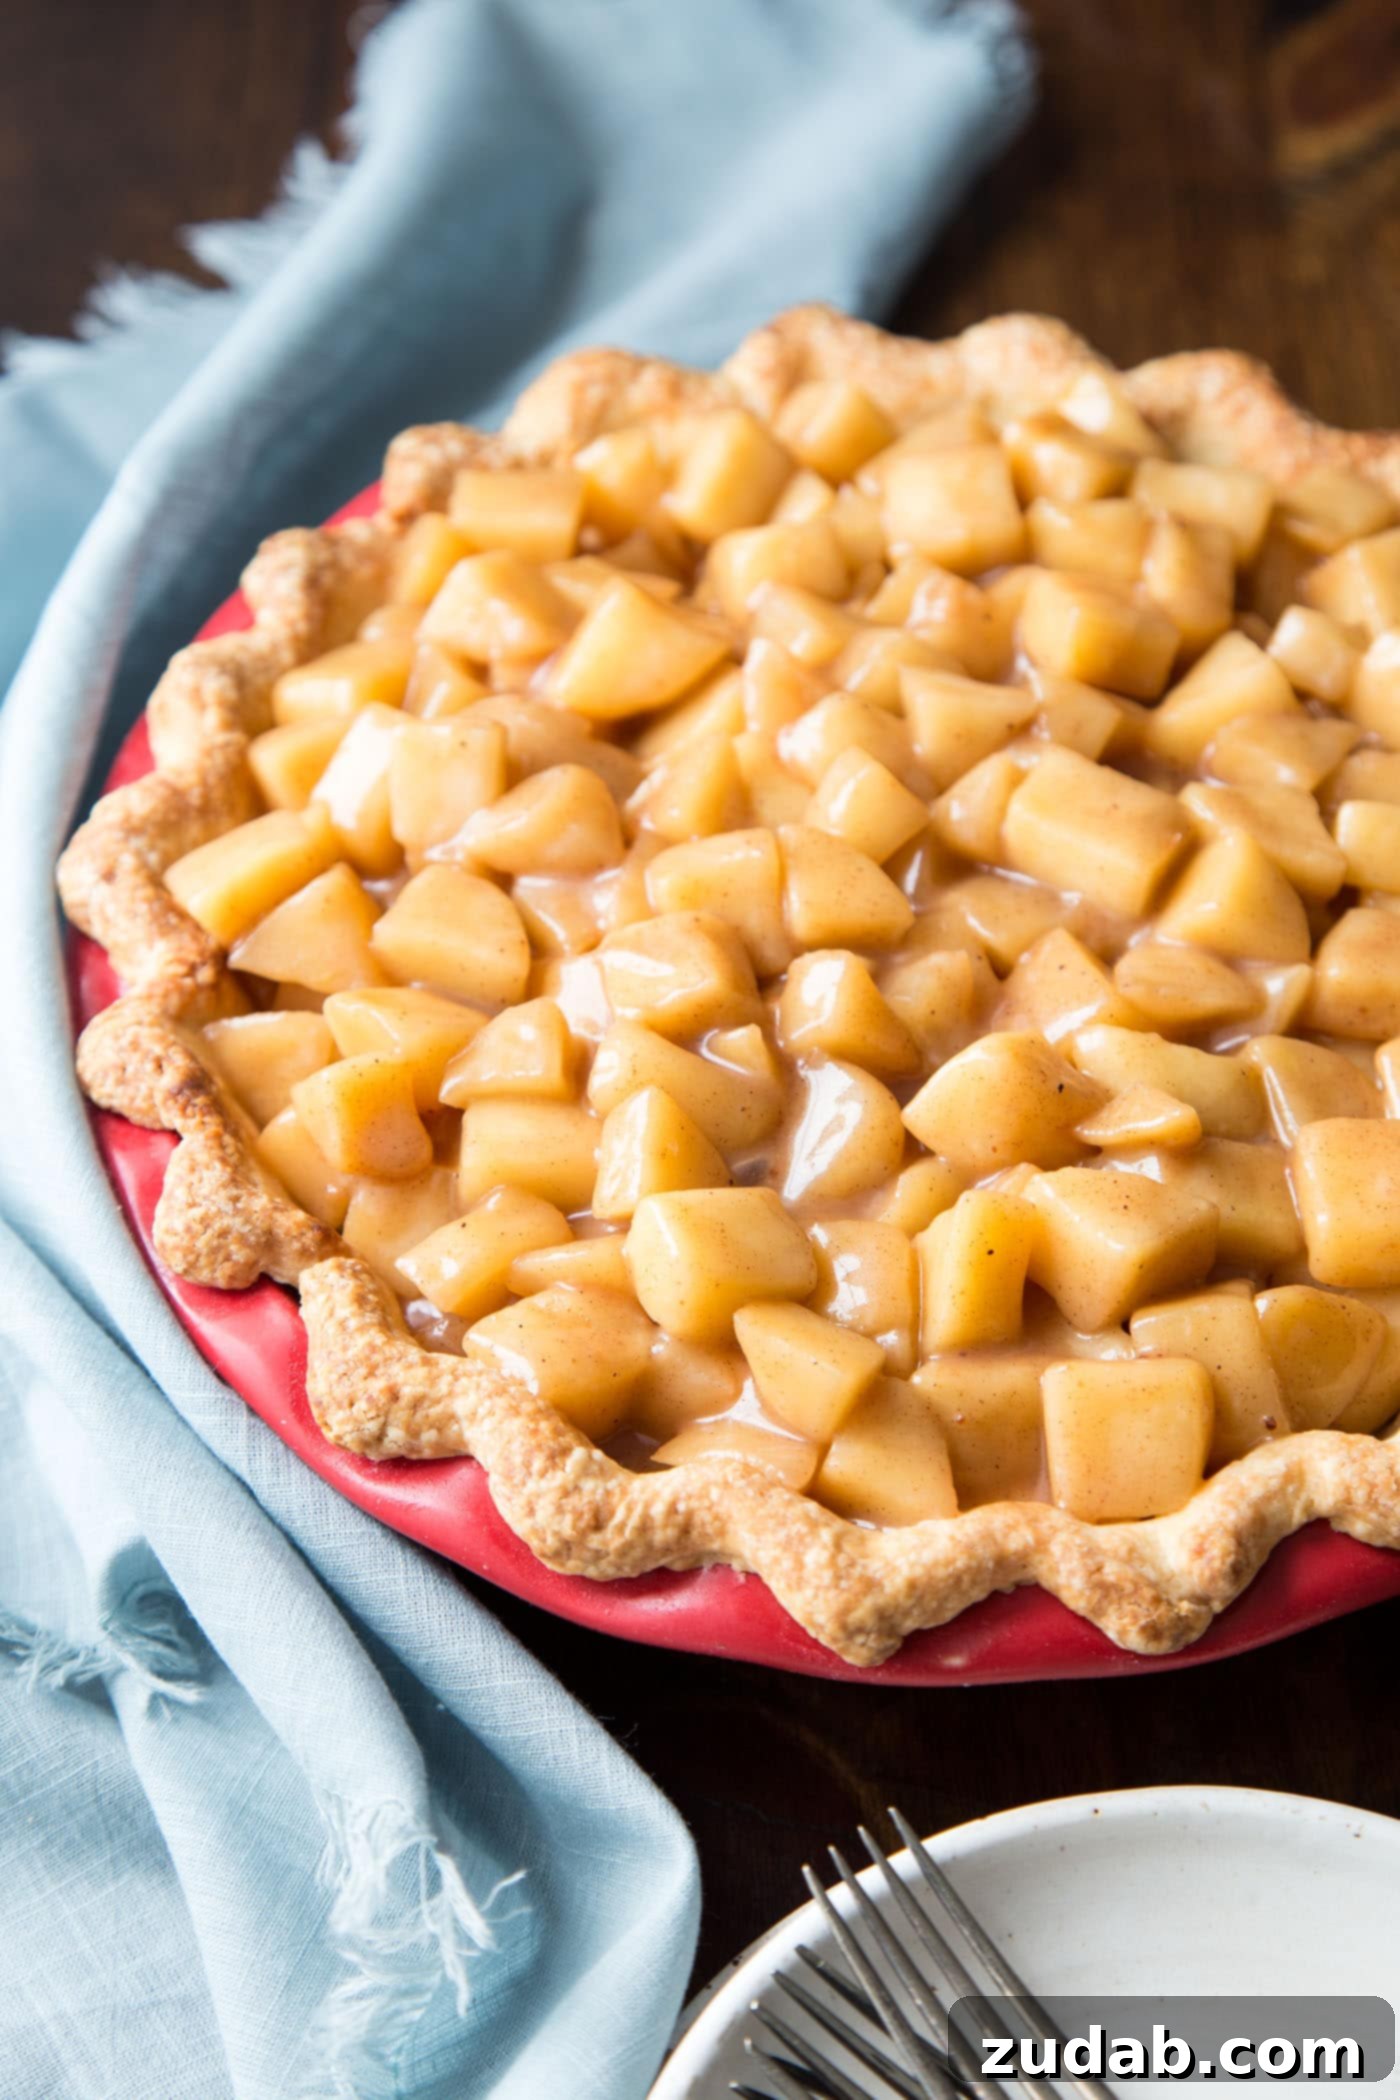
No apple pie is complete without its signature fruit topping, and for this cream cheese version, we cook our apples to tender perfection with an irresistible blend of warm spices. The filling is made with fresh, crisp apples, light brown sugar for depth of sweetness, bright lemon juice to balance the flavors, and of course, a generous amount of apple pie spice to infuse that quintessential autumn aroma.
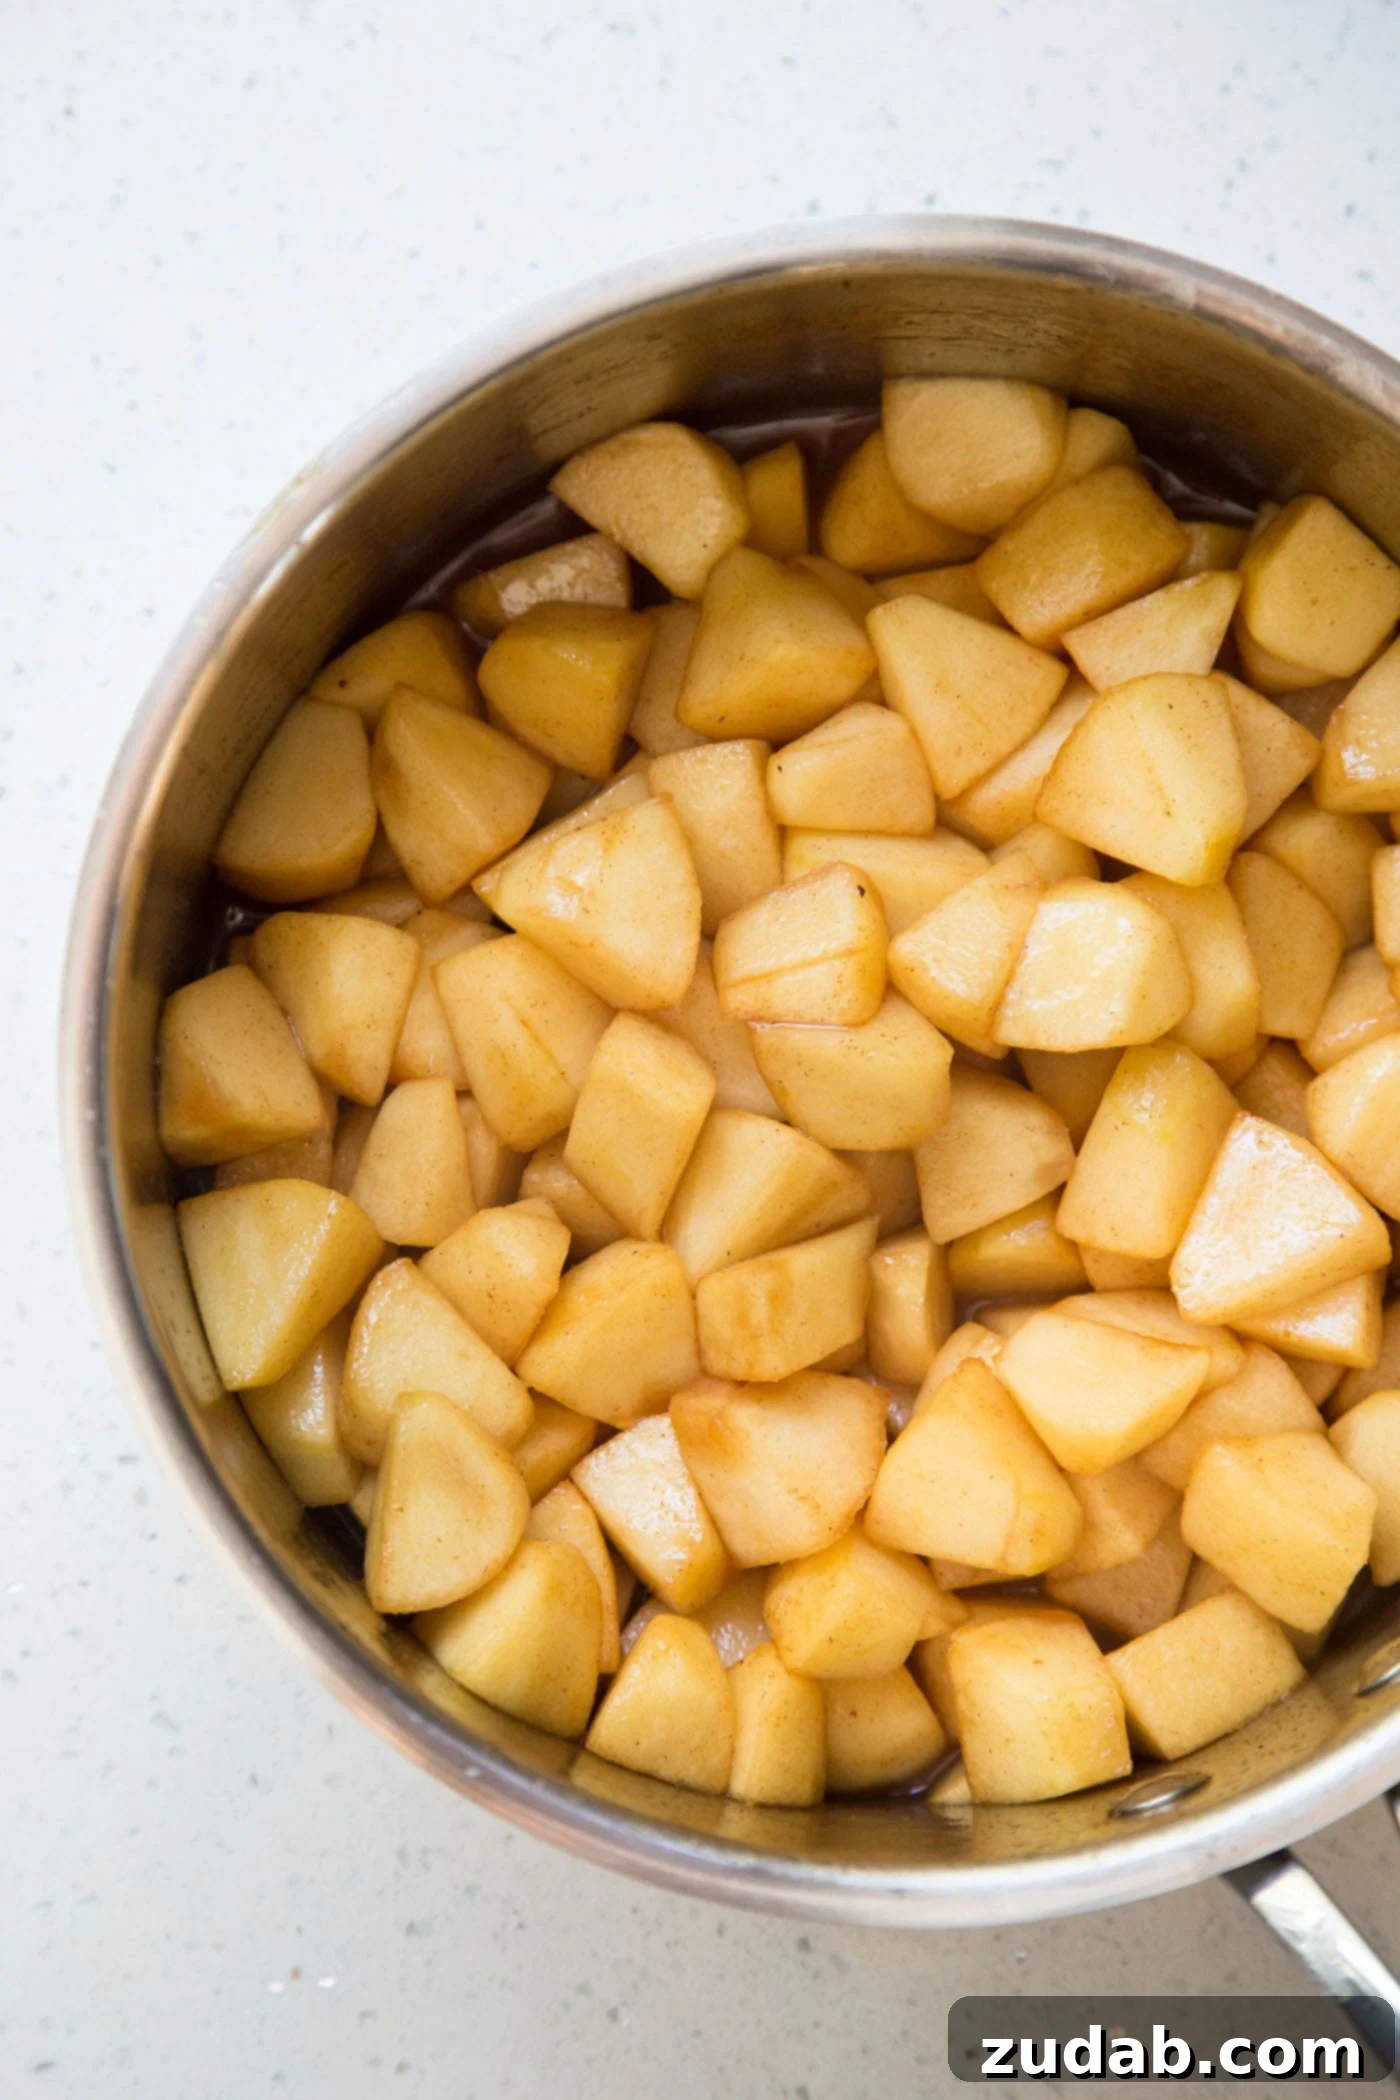
Start by peeling, coring, and dicing your chosen apples. Toss them in a large bowl with the brown sugar, apple pie spice, and fresh lemon juice. The lemon juice not only adds a bright counterpoint but also helps prevent the apples from browning. In a saucepan over medium heat, melt a touch of unsalted butter, then add your apple mixture. Cook for approximately 10-12 minutes, stirring frequently, until the apples are soft but still retain a slight bite—you want them tender, not mushy. This “al dente” texture is crucial for the overall mouthfeel of the pie.
Towards the end of cooking, you’ll thicken the apple mixture with a cornstarch slurry. In a separate small bowl, whisk together 2 teaspoons of cornstarch with 2 tablespoons of cold water until smooth. Pour this mixture over the simmering apples and continue stirring until the sauce visibly thickens to a glossy, juicy consistency. This step ensures your apple topping isn’t watery, but rather a rich, clinging sauce. Once thickened, remove the saucepan from the heat and allow the apple topping to cool completely. Just like the pie crust and cream filling, a completely cooled apple topping is essential for proper pie assembly and to maintain the integrity of the cream layer. This thoughtful preparation of each component guarantees a pie that is perfectly structured and incredibly flavorful.
Selecting the Perfect Apples for Your Cream Pie
The type of apple you choose significantly impacts the final taste and texture of your Apple Cream Cheese Pie. For this recipe, the ideal apples are those that are naturally sweeter, crisp, and firm, ensuring they hold their shape well during cooking without turning into a mealy sauce. Their crispness will mellow to a tender bite, while their sweetness will blend harmoniously with the brown sugar and spices.
I have extensively tested this apple pie recipe with several varieties, specifically Fuji and Rave apples, and both yielded absolutely delicious results. Fuji apples are known for their sweet, juicy, and crisp texture, which makes them a fantastic choice. Rave apples also performed beautifully, offering a lovely balance of sweetness and tartness that brightens the overall flavor profile. Honestly, it’s hard to go wrong with any crisp, firm, and flavorful apple, so feel free to experiment with your favorites or use a delightful mixture for added complexity.
However, one type of apple I would generally recommend avoiding for this particular recipe is Granny Smith. While Granny Smiths are a classic choice for many apple pies due to their firm texture, their intensely tart flavor can sometimes overpower the delicate sweetness and tang of the cream cheese filling. If you prefer a more tart apple, consider blending it with a sweeter variety to achieve a balanced flavor. Ultimately, the best apple is one you enjoy eating raw, as its inherent qualities will shine through in the cooked topping.
Mastering Thickness: The Role of Cornstarch in Apple Filling
Achieving the perfect consistency for your apple topping – a thick, juicy sauce that beautifully coats the tender apple pieces without being too watery or overly gummy – is crucial. For this Apple Cream Cheese Pie recipe, I found that using just 2 teaspoons of cornstarch, mixed with 2 tablespoons of water to create a smooth slurry, was generally sufficient to thicken the apple filling to the desired texture.
However, there’s a significant caveat to consider: the amount of natural liquid your apples release during cooking. Different apple varieties, and even apples from different harvests, can vary greatly in their moisture content. If your apples release a substantial amount of juice, you might find yourself needing a little more cornstarch to achieve that ideal thick, glossy sauce. Conversely, if your chosen apples are on the drier side and release less liquid, you might need to reduce the amount of cornstarch or even omit it entirely, as I discovered during my testing.
For example, when I used Fuji apples, which tend to be very juicy but don’t release a tremendous amount of liquid when cooked, the initial 2 teaspoons of cornstarch actually made the apple filling much too thick, sacrificing the wonderful juicy factor. In that particular instance, I realized the Fuji apples would have been perfectly fine even without any added cornstarch, relying solely on their natural pectin to create a slight thickness. On the other hand, when I worked with Rave apples, they released considerably more juice during cooking compared to the Fuji variety. Consequently, the cornstarch was absolutely necessary to adequately thicken the sauce, ensuring it wasn’t overly watery.
This variability means that while the recipe provides a great starting point, a little personal judgment is required. When cooking your apples, observe how much liquid they release. If the mixture appears too thin and watery after the apples have softened, you can add a little more cornstarch slurry (start with ½ teaspoon of cornstarch mixed with 1 tablespoon of water) until you reach your preferred thickness. The goal is a luscious, spoonable sauce that beautifully envelops the apple pieces, enhancing the pie without becoming a solid mass. Don’t be afraid to trust your instincts and adjust as needed for the best possible outcome.
Expert Tips for a Flawless Apple Cream Cheese Pie
Achieving pie perfection is within reach with a few strategic tips that can make all the difference in the flavor, texture, and presentation of your Apple Cream Cheese Pie. Here’s how to ensure your dessert is nothing short of magnificent:
- Crust Choice Flexibility: While a homemade pie crust undoubtedly elevates this recipe, don’t hesitate to use a store-bought pie crust for convenience. If opting for a pre-made crust, ensure you select a deep-dish variety. This provides ample space for all three delicious layers – the robust crust, the creamy filling, and the generous apple topping – ensuring a balanced and satisfying slice.
- Alternative Crust Options: For those looking for a different texture or flavor profile, a cookie crust made from crushed graham crackers or ginger snaps would also work beautifully. A ginger snap crust, in particular, would add a lovely spiced complement to the apple filling, while graham crackers offer a classic, buttery base. Simply combine crushed cookies with melted butter and press into your pie dish, then chill or bake briefly as needed.
- Preparation in Advance: This pie is an excellent candidate for make-ahead preparation, ideal for busy hosts or when planning for holidays. Each individual component – the pie crust, the cooked apple topping, and the cream cheese filling – can be made a few days in advance and stored separately in the refrigerator. On the day of serving, simply assemble the cooled components into the blind-baked crust. This staged approach significantly reduces stress and ensures a fresh, perfectly set pie.
- Essential Refrigeration: Due to its luxurious cream cheese filling, this apple pie must always be kept refrigerated. This is crucial for food safety and for maintaining the pie’s structure and cool, creamy texture. Once assembled, the pie will remain fresh and delicious for 3 to 5 days when stored properly in the refrigerator, ideally covered to prevent it from absorbing other food odors.
- Serving Suggestions: For the best experience, serve your Apple Cream Cheese Pie chilled. While it’s fantastic on its own, consider garnishing each slice with a dollop of extra whipped cream, a sprinkle of cinnamon, or even a drizzle of homemade caramel sauce for an extra touch of indulgence. A scoop of vanilla bean ice cream also makes a delightful accompaniment, offering a hot-and-cold contrast.
- Cooling is Key: Patience is paramount! Ensure both the blind-baked pie crust and the cooked apple topping are completely cool before assembling the pie. Adding warm or even slightly warm components to the cream cheese filling will cause it to melt and lose its structure, resulting in a runny, disappointing pie. Allow ample time for cooling, or even make these components the day before.
More Autumn Pies You’ll Adore
This Apple Cream Cheese Pie has the potential to become an instant classic in your repertoire of fall desserts. Once you’ve savored its unique blend of creamy texture and spiced apple goodness, you’ll undoubtedly be on the lookout for more comforting and delicious pie recipes to celebrate the autumn season. Here are a few more fantastic options that capture the essence of fall:
- Sweet Potato Pie with Cheesecake Filling: A soulful classic elevated with a rich, tangy cheesecake layer.
- Pear Cranberry Pie: A vibrant and elegant pie featuring the sweet-tart symphony of pears and cranberries.
- Classic Pumpkin Pie: The quintessential Thanksgiving dessert, perfectly spiced and smooth.
- S’more Bomb Pie: Indulge in nostalgic campfire flavors with this gooey, chocolatey, and marshmallow-topped pie.
- Apple Hand Pies: Portable pockets of apple perfection, ideal for on-the-go snacking or individual servings.
We are absolutely thrilled for you to try this amazing Apple Cream Cheese Pie recipe. It’s truly a standout dessert that blends classic autumn flavors with an irresistible creamy twist. If you decide to bake this delightful pie, we would absolutely love to see your creations! Please share a photo and tag us on Instagram @wildwildwhisk and @ohsweetbasil. Happy baking!
Apple Cream Pie
30 mins
45 mins
1 hr 15 mins
10
Take a break from a traditional Apple Pie and give this Apple Cream Cheese Pie a try. Homemade pie crust is filled to the brim with a delicious creamy filling and topped with plenty of fresh apples cooked with warm spices until tender.
Ingredients
Pie Dough
- 1 1/2 Cup All-Purpose Flour
- 2 Tablespoons Granulated Sugar, rounded
- 1/4 teaspoon Kosher Salt, rounded
- 5 oz Butter, unsalted, cubed & cold
- 3 Tablespoon Water, cold
- Extra Flour for Rolling
Apple Topping
- 7 Apples, medium, approximately 2 lb 10 oz, yields 2 lb peeled & diced
- 1/3 Cup Light Brown Sugar, packed
- 1 teaspoon Apple Pie Spice
- 1 Tablespoon Lemon Juice, fresh squeezed
- 1 oz Butter, unsalted
- 2 teaspoon Cornstarch
- 2 Tablespoon Water
Cream Cheese Filling
- 1 Cup Heavy Whipping Cream, cold
- 8 oz Cream Cheese, room temperature
- 1/2 Cup Granulated Sugar
- 1 teaspoon Pure Vanilla Extract
Instructions
Make the pie crust
- Add flour, sugar, and salt to a small bowl and whisk thoroughly. Transfer this mixture to a food processor fitted with a dough blade. Add cubed cold butter and pulse several times until the butter is roughly pea to bean-sized; variations in size are acceptable.
- With the food processor running, drizzle cold water through the water hole. Stop the food processor as soon as the dough begins to come together. You may need to pause and use a spatula to mix any dry flour from the bottom.
- Turn the dough out onto a clean counter or cutting board and shape it into a flat disk. Wrap it tightly in plastic wrap and refrigerate for at least one hour to allow it to rest.
- Remove the pie dough from the fridge and roll it into a circle approximately 2 inches larger than your pie dish. Use extra flour as needed to prevent sticking to the counter and rolling pin.
- Carefully transfer the rolled dough into your pie dish, gently pressing it into the bottom and sides. Allow the excess dough to hang over the edges. Trim if necessary to create an even edge, but leave enough to fold under and flute for decoration. Cover the prepared dough with plastic wrap and freeze while the oven preheats.
- Preheat your oven to 425°F (220°C).
- Take the frozen pie crust from the freezer. Use a fork to poke holes across the bottom and sides. Line the crust with parchment paper, ensuring it’s large enough to cover the entire crust, including the edges. Fill the parchment-lined crust with pie weights or dry beans, ensuring they reach the top. Place the pie dish on a baking sheet and bake for 20 minutes.
- Carefully remove the pie crust from the oven and discard the pie weights or beans and parchment paper. If desired, brush the crust with an egg wash for a richer color. Return the pie crust to the oven and bake for another 10-13 minutes, or until it turns a beautiful golden brown.
- Once baked, remove the pie crust from the oven and place it on a wire rack to cool completely, which typically takes about 2 hours.
Make the apple topping
- In a large bowl, toss the peeled and diced apples with light brown sugar, apple pie spice, and fresh lemon juice until well coated. Set aside.
- Melt unsalted butter in a saucepan over medium heat. Add the apple mixture and cook for approximately 10-12 minutes, stirring frequently, until the apples are soft but still retain a slight crunch.
- In a separate small bowl, mix the cornstarch with water until smooth. Pour this cornstarch slurry over the apple mixture in the saucepan. Continue stirring until the mixture thickens to a glossy, juicy sauce. Turn off the heat and allow the apple topping to cool completely.
Prepare the cream cheese filling
- In the bowl of a stand mixer, beat the cold heavy whipping cream with half of the granulated sugar and half of the pure vanilla extract until stiff peaks form. Transfer the whipped cream to another bowl and refrigerate it.
- In the same stand mixer bowl (no need to wash it), beat the room temperature cream cheese with the remaining granulated sugar and vanilla extract until creamy and smooth. Gently fold the reserved whipped cream back into the cream cheese mixture using a spatula or the mixer on its lowest setting, just until thoroughly combined. Cover and refrigerate until ready to assemble the pie.
Assemble the pie
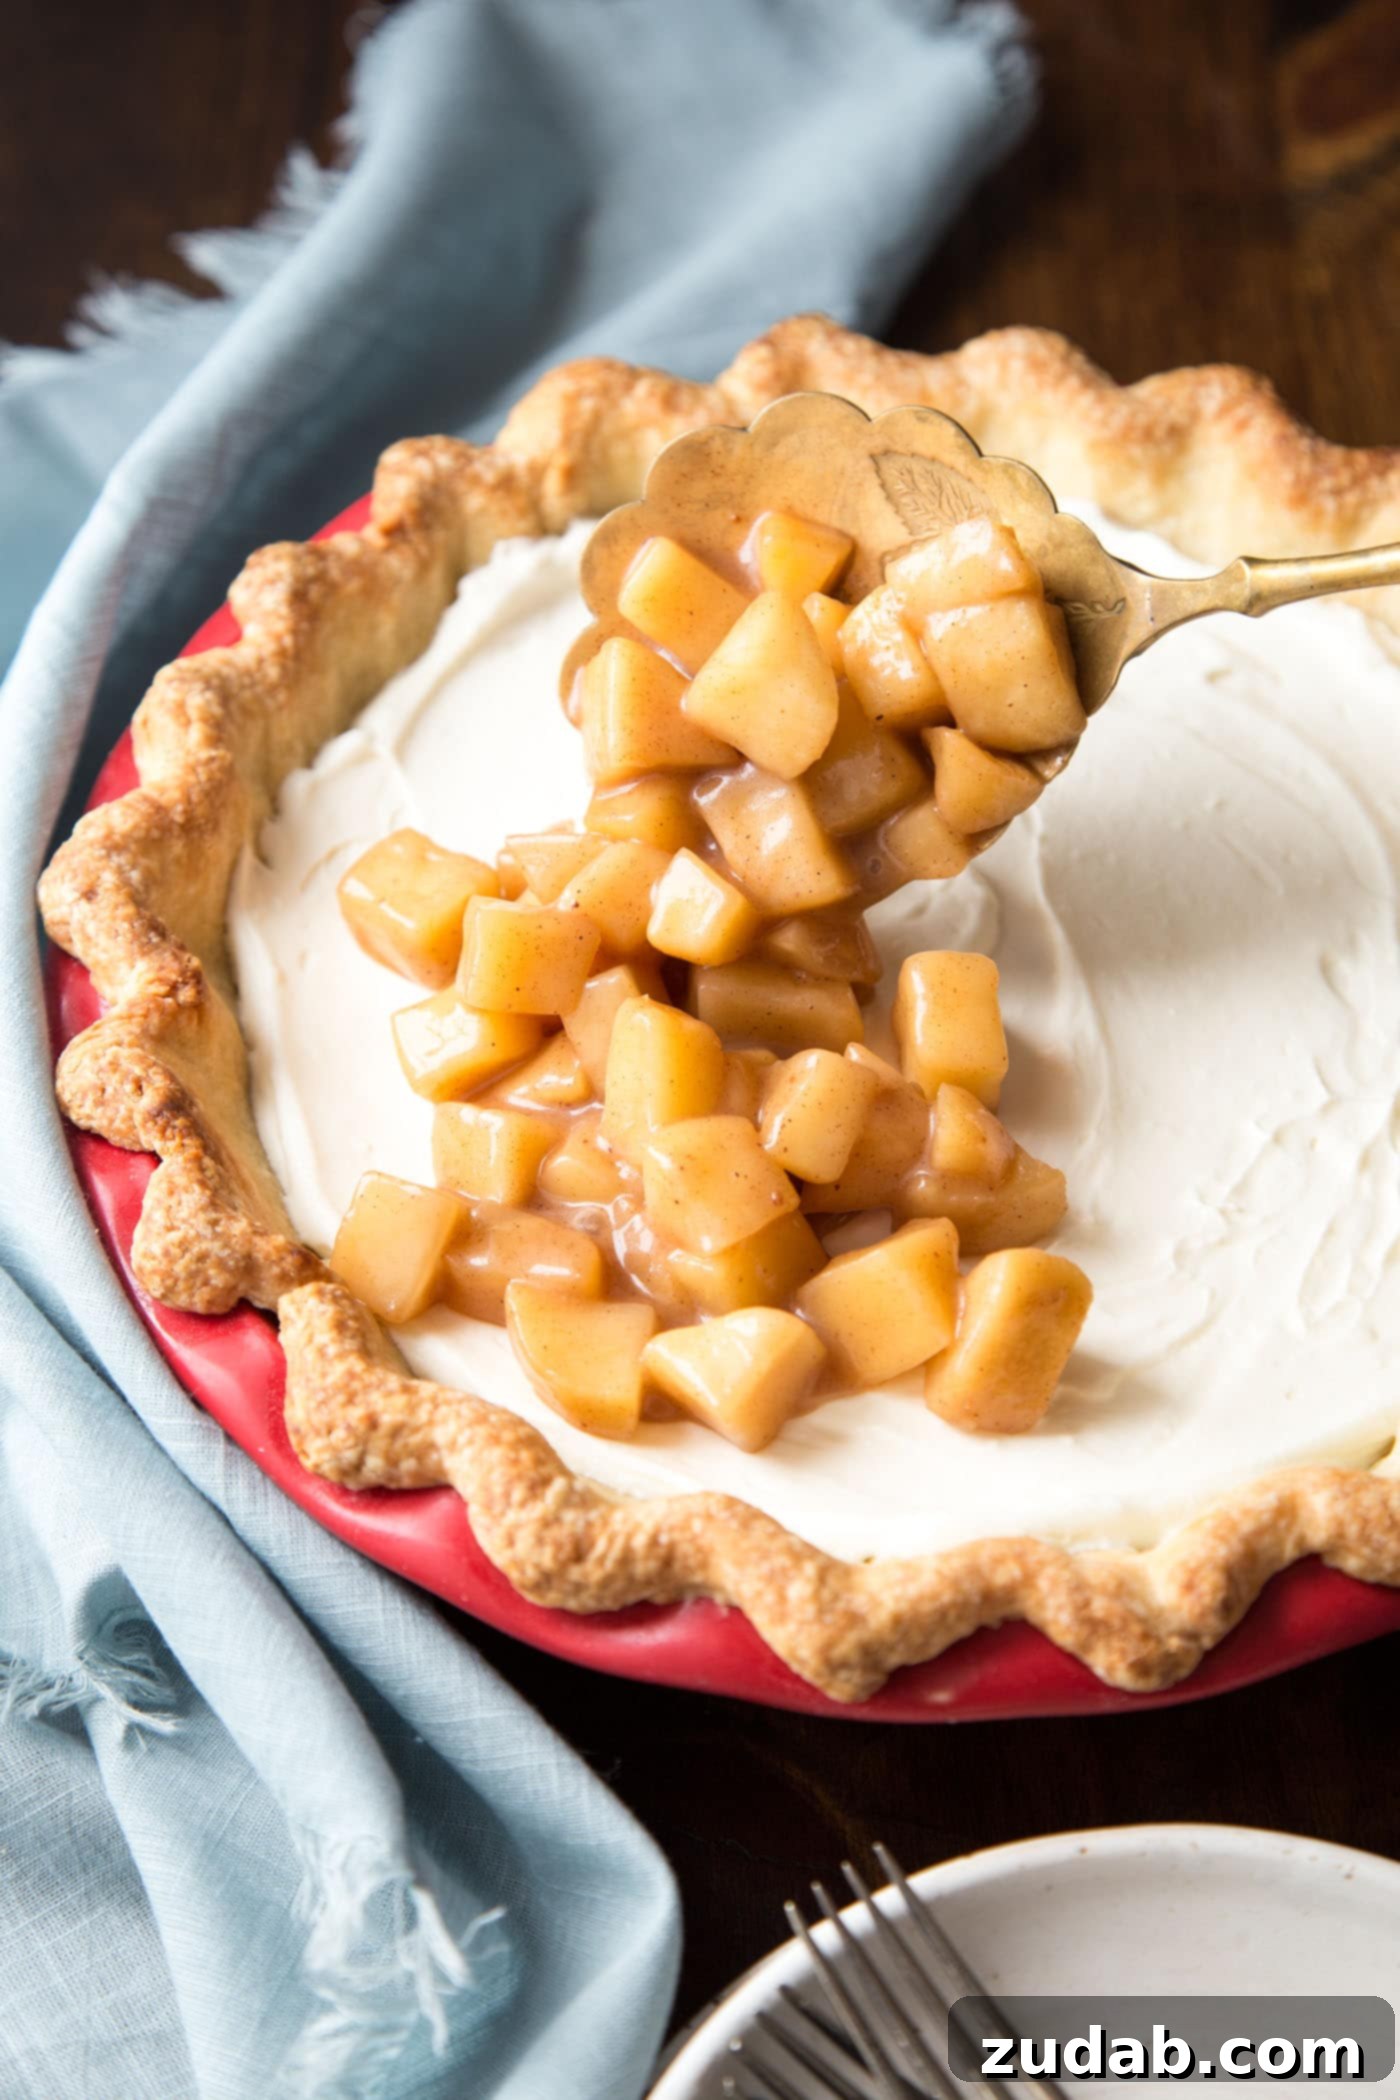
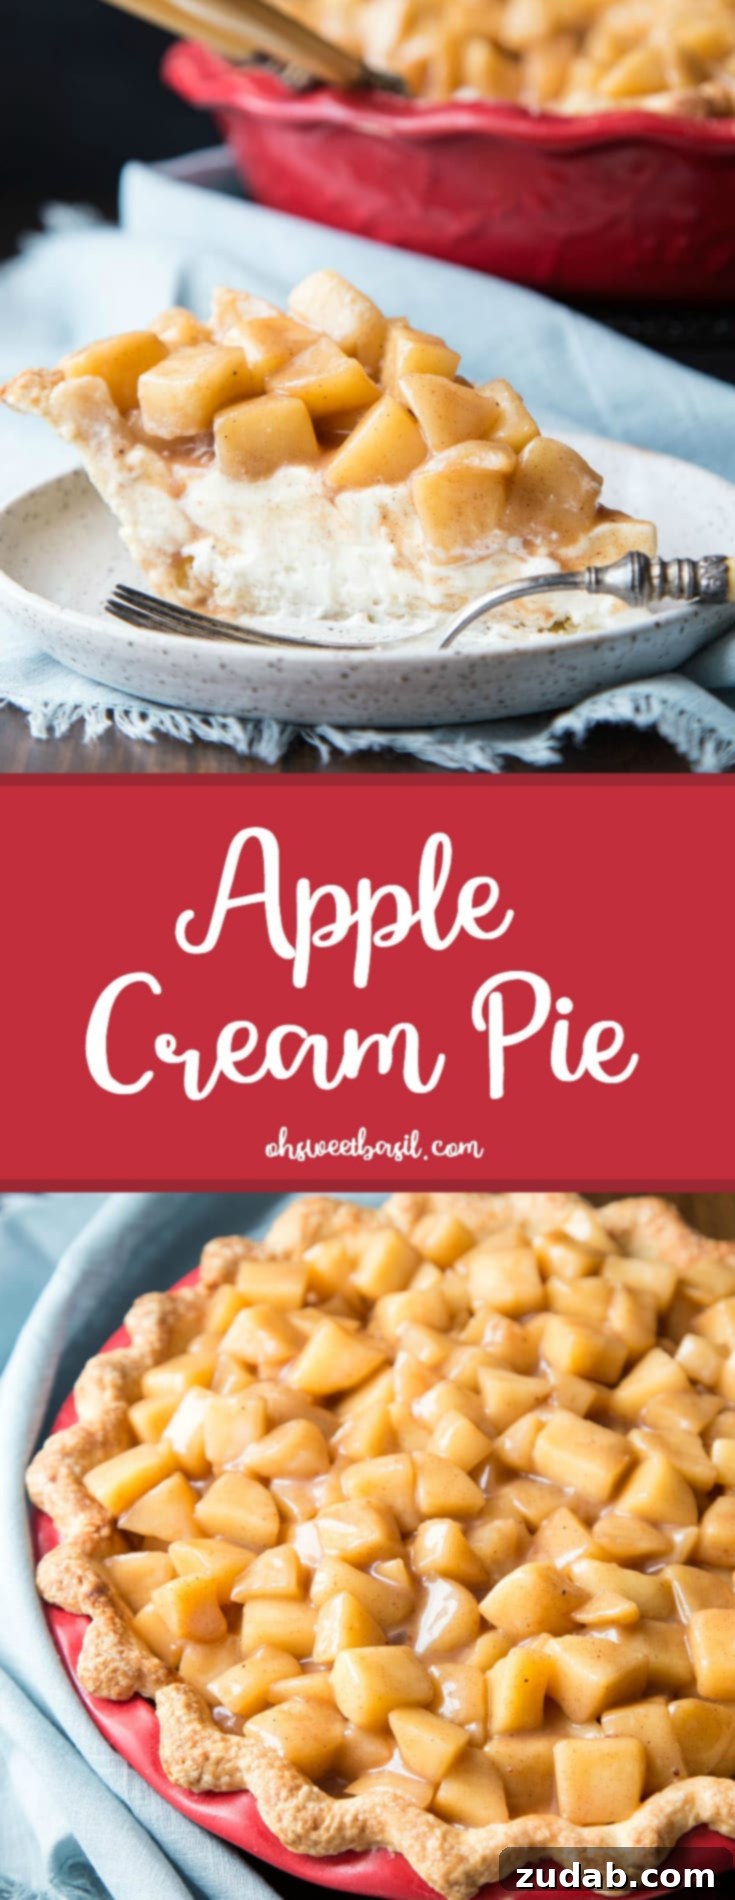
- Once both the blind-baked pie crust and the spiced apple topping are completely cool, evenly spread the chilled cream cheese filling into the pie crust, leveling the top with a spatula. Then, spoon the cooled apple pie filling over the cream cheese layer. Keep the assembled pie refrigerated until you are ready to serve.
Recipe Notes
Apple cream pie can be stored in the refrigerator for 2-3 days, covered loosely with plastic wrap.
Nutrition
Serving: 1 slice
Calories: 496kcal
Carbohydrates: 54g
Protein: 4g
Fat: 31g
Saturated Fat: 19g
Cholesterol: 94mg
Sodium: 266mg
Potassium: 215mg
Fiber: 4g
Sugar: 34g
Vitamin A: 1148IU
Vitamin C: 7mg
Calcium: 59mg
Iron: 1mg
Nutrition information is automatically calculated, so should only be used as an approximation.
Like this? Leave a comment below!