
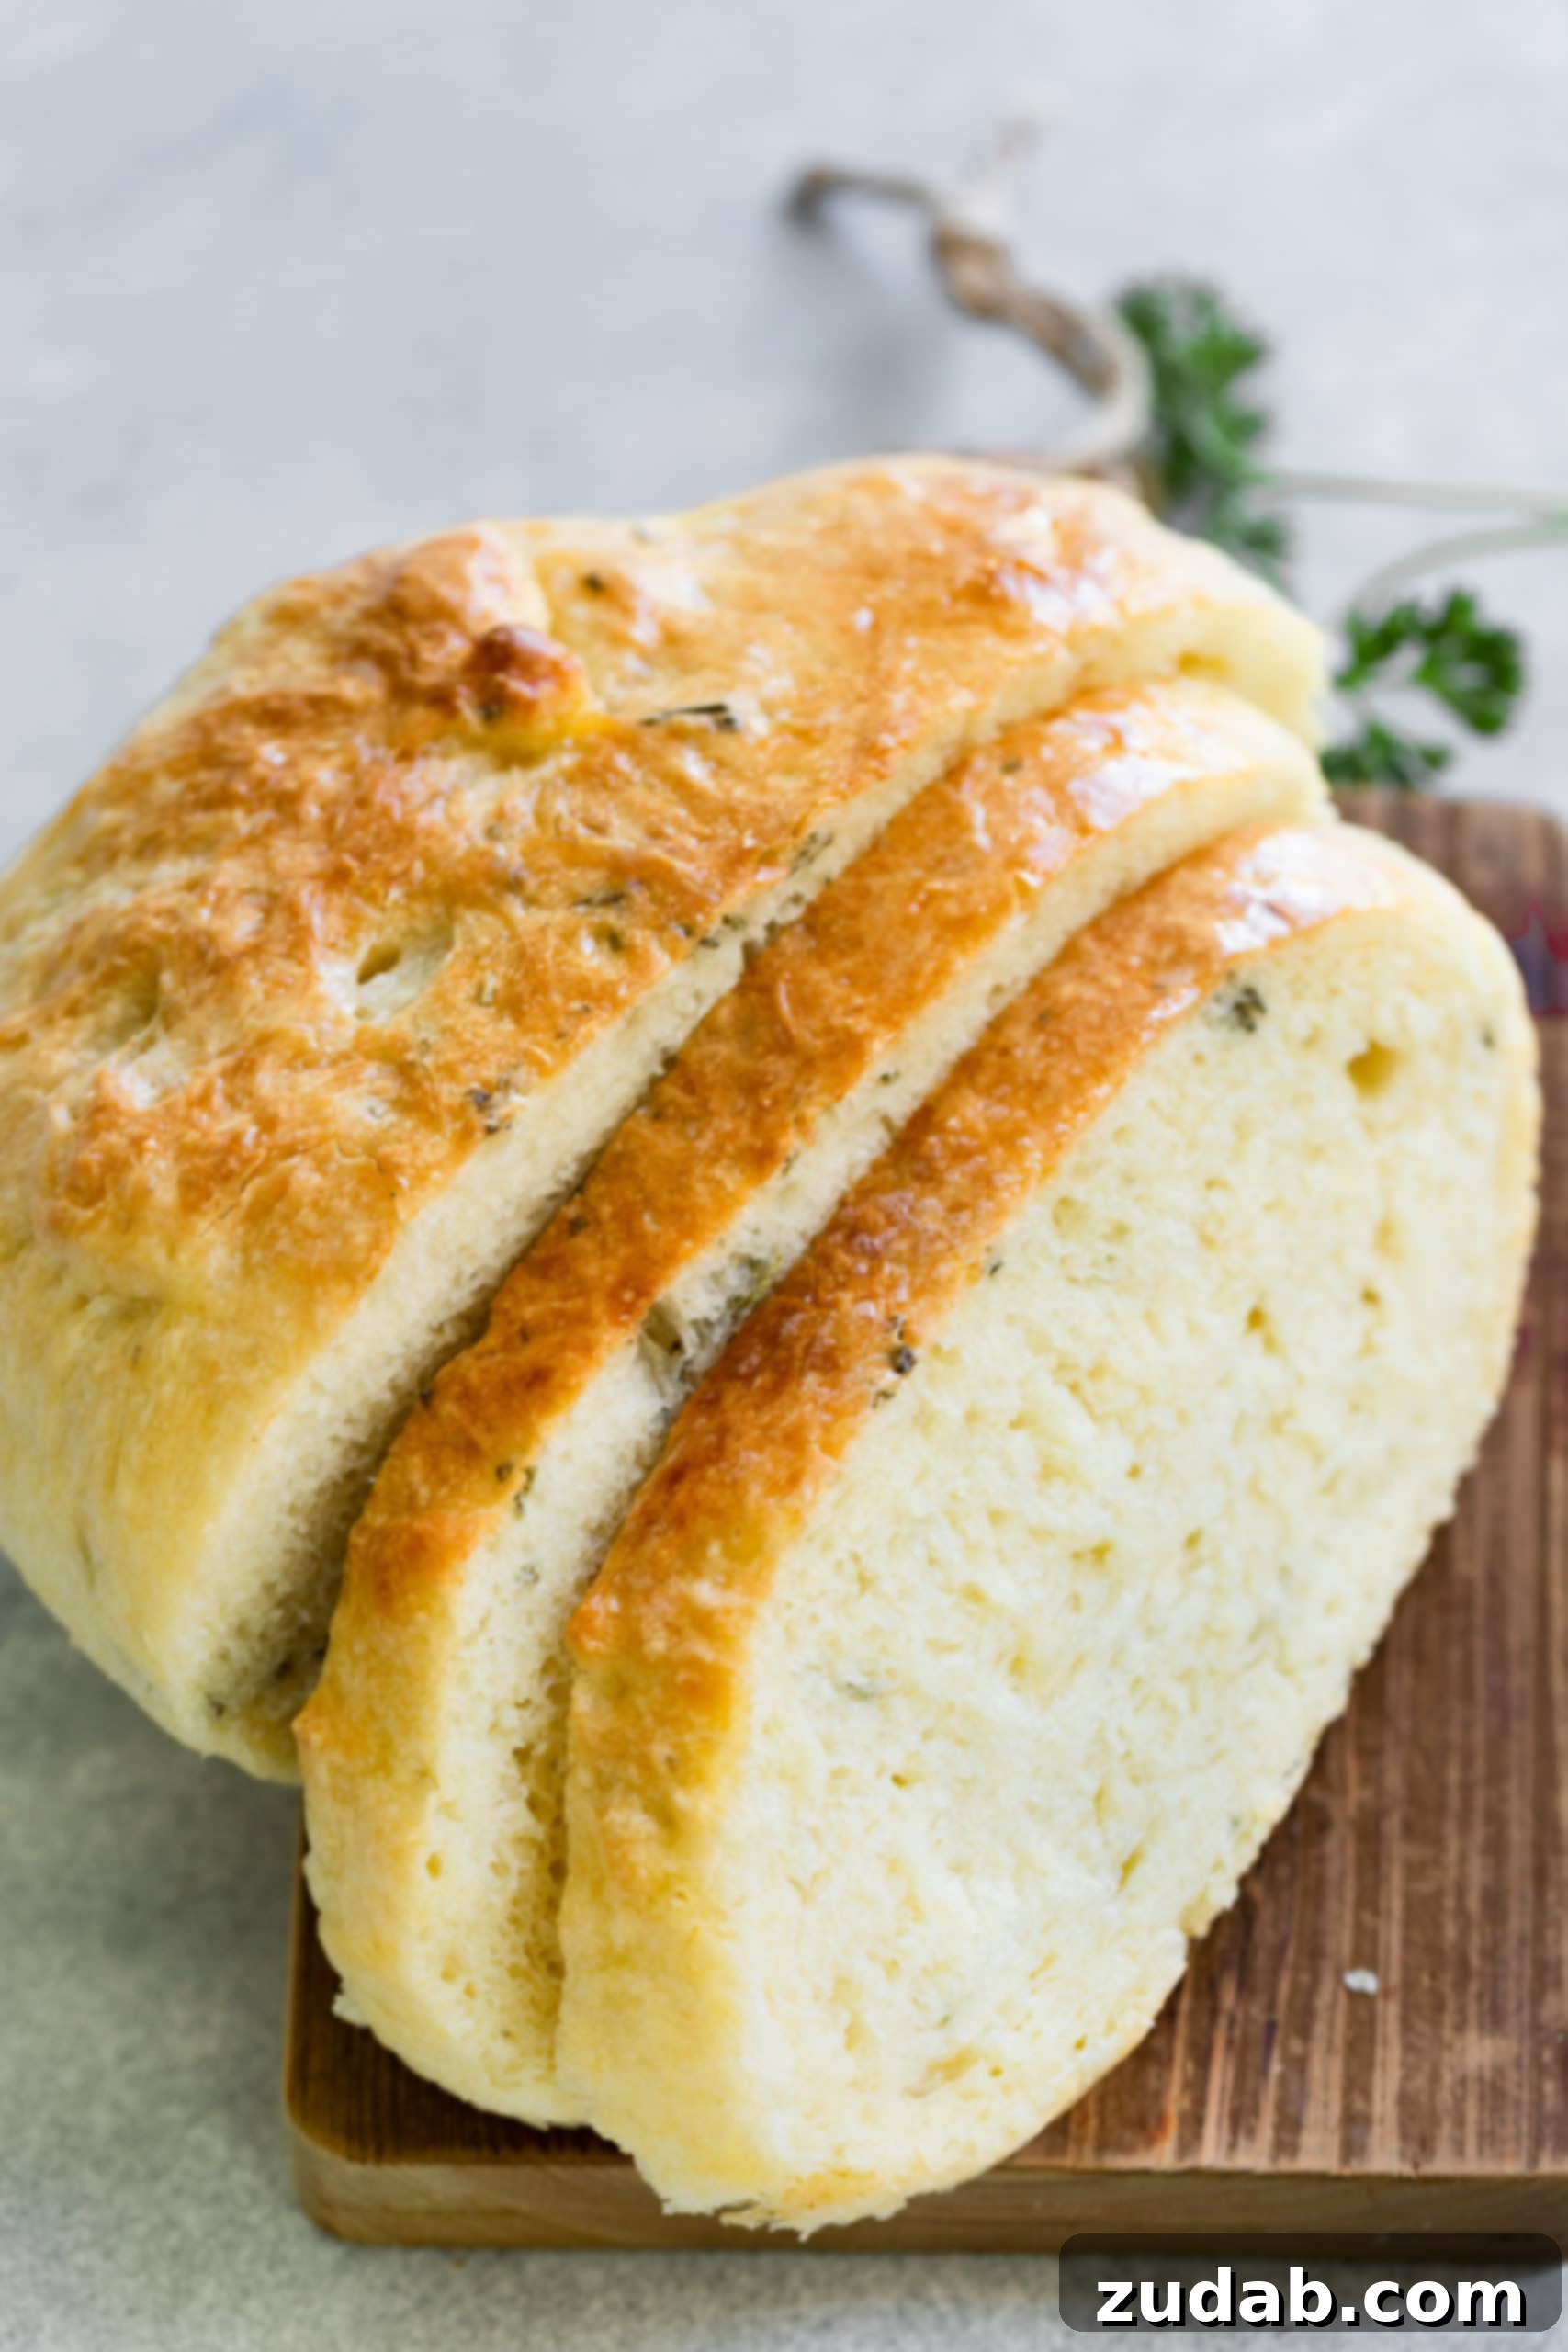
Unlock the joy of fresh, homemade bread with this incredibly simple and flavorful **herbed peasant bread recipe**. Imagine a loaf that’s perfectly golden and irresistibly crispy on the outside, yet wonderfully soft and tender on the inside. This isn’t just any bread; it’s a versatile masterpiece that comes together in just a few hours, requiring minimal effort thanks to its **no-knead** nature. It’s the kind of **easy bread recipe** that will quickly become a cherished staple in your kitchen, transforming ordinary meals into extraordinary culinary experiences.
There’s something truly special about the aroma of freshly baked bread filling your home. This particular **homemade bread** has earned its place as a weekend ritual for many, including several of my friends who swear by baking it every Sunday. When you hear multiple independent endorsements for the same recipe, you know it’s a must-try! I can already envision dipping generous slices into the rich, savory gravy of a slow-cooked pot roast or sopping up the robust, meaty sauce from our authentic bolognese. Its rustic charm and incredible texture make it the ideal companion for almost any comforting dish.
My first attempt at this **peasant bread recipe** left me completely smitten. The process is astonishingly straightforward – you literally make the entire dough in **one bowl**, eliminating the need for extensive cleanup. The result is consistently fluffy bread with a delightful crumb, making it an absolute dream to bake. What I love most is its convenience; I can prepare the dough after a relaxed Sunday morning and have a warm, freshly baked loaf ready for dinner. The biggest bonus? It’s a **no-knead bread** dough! This means less time and effort in the kitchen, allowing you to enjoy the rewarding experience of baking without the traditional labor. You are truly going to fall in love with this recipe!
Understanding Peasant Bread: Its History and Appeal
The name “peasant bread” evokes a sense of history and simplicity, and rightly so. This style of bread traces its origins back to rural Europe, where it was a daily staple for the working class. Unlike the finer, more elaborate breads enjoyed by nobility, **rustic peasant bread** was crafted from the most basic, readily available, and inexpensive ingredients. Flour, water, salt, and yeast – these humble components were transformed into hearty, nourishing loaves that sustained families for generations. Baking was often a communal affair, with villagers bringing their dough to shared ovens, fostering a strong sense of community and resourcefulness.
The beauty of peasant bread lies in its unpretentious nature and its straightforward preparation. It wasn’t about intricate techniques or fancy additions, but about creating a wholesome, satisfying bread that could be made consistently with minimal fuss. This historical context gives the bread its enduring appeal today. In a world of complex culinary trends, there’s a comforting honesty in baking a bread that connects us to these ancient traditions. It’s a testament to how simple ingredients, combined with patience and a touch of warmth, can yield something truly extraordinary. Our herbed version adds a modern twist, infusing those classic rustic flavors with aromatic fresh herbs, elevating the experience without sacrificing its inherent simplicity.
Essential Ingredients for Your Herbed Peasant Bread
One of the many charms of this **peasant bread recipe** is its reliance on **simple ingredients** that you likely already have in your pantry. We enhance the classic flavors by incorporating **fresh herbs**, which add an incredible aromatic depth and vibrant taste. However, feel free to personalize this aspect; you can experiment with your favorite herb combinations or even omit them entirely for a pure, unadulterated rustic loaf. For precise measurements, please refer to the comprehensive recipe card located at the conclusion of this post. Here’s a breakdown of what you’ll need and why each component is crucial:
- All-Purpose Flour or Bread Flour: This forms the structural backbone of your bread. While standard all-purpose flour works wonderfully, bread flour, with its higher protein content, can yield a slightly chewier and more structured crumb. Either option will produce a delicious result for your **homemade bread**.
- Kosher Salt: Far more than just a seasoning, salt is vital for enhancing the flavor of the bread, balancing the sweetness, and controlling the yeast’s activity. Don’t skip it, as it truly brings out the best in the flour.
- Warm Water: The optimal temperature for activating instant yeast is between 105-115 degrees F (40-46 degrees C). Water that’s too cold won’t activate the yeast, and water that’s too hot can kill it, so proper temperature is key for a successful rise.
- Sugar: A small amount of sugar acts as food for the yeast, helping it to activate quickly and produce the gases necessary for the dough to rise beautifully. It also contributes to the golden-brown crust.
- Instant Yeast: For this **easy bread recipe**, instant yeast is highly recommended. Unlike active dry yeast, which often requires proofing in warm water first, instant yeast can be mixed directly with the dry ingredients, simplifying the process even further.
- Rosemary: Freshly minced rosemary contributes a wonderfully earthy and fragrant pine-like aroma. It pairs exceptionally well with the rustic character of the bread.
- Thyme: Fresh thyme adds a delicate, slightly minty, and citrusy note. If fresh isn’t available, a couple of pinches of dried thyme can be used, though fresh is always preferred for maximum flavor.
- Parsley: Finely chopped fresh parsley introduces a bright, fresh, and slightly peppery undertone that complements the stronger herbs beautifully and adds a touch of color.
- Butter: Used for generously greasing the baking bowls, ensuring your loaves don’t stick and develop a lovely crust. Additionally, brushing the hot bread with melted butter (or olive oil) right out of the oven enhances its richness and creates a soft, golden sheen.
- Flaked Sea Salt: A sprinkle of flaky sea salt on top of the warm, buttered crust provides an extra burst of flavor and a delightful textural crunch, making each bite even more satisfying.
Step-by-Step Guide: Crafting Your Own Peasant Bread
Baking this **herbed peasant bread** is a wonderfully rewarding experience, and I’m here to guide you through each step to ensure you achieve perfectly golden, tender loaves every time. The process is remarkably simple, particularly given its **no-knead** advantage. For the complete, detailed instructions and precise measurements, always refer to the recipe card at the end of this post. Here are the fundamental steps to creating your magnificent **homemade bread**:
- Combine Dry Ingredients: Begin by gathering your dry ingredients—flour, kosher salt, sugar, and instant yeast—in a single large mixing bowl. This is where the “one-bowl” magic truly starts! Use a sturdy spoon or whisk to thoroughly combine everything, ensuring the yeast is evenly distributed throughout the flour mixture. This step prepares the foundation for your dough.
- Incorporate Wet Ingredients & Herbs (No Kneading!): To the dry mixture, add the warm water and your chosen fresh herbs. Mix everything until just combined. The dough will be quite wet and shaggy, almost like a thick cake batter – this is exactly what you want. The key here is to avoid overmixing, and absolutely **no kneading** is required! This simplicity is what makes this **easy bread recipe** so appealing and approachable for bakers of all skill levels.
- The First Rise (Proofing): Once mixed, cover the bowl tightly with plastic wrap to prevent the dough from drying out. Place the covered bowl in a warm spot in your kitchen. This warm environment is crucial for activating the yeast and allowing the dough to rise properly. Let it rest and rise for at least an hour, or until it has visibly increased in size and appears bubbly. (For more detailed tips on creating the ideal proofing environment, see the dedicated section below).
- Prepare for Baking: While your dough is finishing its rise, preheat your oven to the specified temperature (425 degrees F, for optimal crust development). Take two 1.5-quart oven-safe mixing bowls (or bread pans, see tips below) and generously grease them with butter. This not only prevents sticking but also contributes to the rich flavor and golden crust of your **rustic bread**.
- Divide and Bake: The dough will be very wet and sticky – this is normal! Using two forks, gently scrape the dough from the sides of the bowl and divide it into two equal portions. Carefully transfer half of the dough into each of your prepared, greased bowls. Do not worry about shaping perfect loaves at this stage, the wet dough will naturally form a rustic shape in the bowls. Place the bowls in the preheated oven and bake according to the recipe card’s instructions, usually starting at a higher temperature and then reducing it to ensure even cooking and a beautiful crust.
- The Finishing Touch: Once your loaves emerge from the oven, golden brown and fragrant, immediately brush the tops with a touch of melted butter or olive oil. This adds a lovely sheen and softens the crust slightly. Finish with a sprinkle of flaky sea salt, if desired, for an extra burst of flavor and texture. Carefully transfer the hot loaves to a wire rack to cool completely before slicing and serving. Cooling is essential for the bread’s internal structure to set.
Mastering the Art of Proofing Bread Dough
Proofing is a critical stage in bread making, especially for a **no-knead bread** like this **herbed peasant bread recipe**. It’s the period during which the yeast ferments, producing carbon dioxide that creates air pockets, giving your bread its light and airy texture. For yeast to perform its job effectively, it requires a warm and consistent environment. Without proper proofing, your bread can end up dense and heavy instead of fluffy and tender.
Many homes, especially during cooler months, can have chilly spots in the kitchen, which isn’t ideal for yeast activity. One of my favorite tricks for creating a perfectly warm proofing environment is placing the covered dough bowl in my laundry room and running the dryer for a cycle. The warmth generated by the dryer creates a cozy microclimate that’s perfect for yeast to thrive.
Another excellent option is to utilize your oven, even without actually baking yet. Preheat your oven to its lowest setting, usually around 170 degrees Fahrenheit (77 degrees Celsius), for about 10 minutes. Then, turn the oven off completely. Place your covered dough bowl inside the warm, turned-off oven, leaving the oven door slightly cracked open. This technique provides a consistent, gentle warmth without the risk of overheating the delicate yeast. Allow the dough to rise for at least an hour, or until it has visibly doubled in size and feels light and airy. Observing these tips will ensure your **homemade bread** achieves its ideal volume and texture, contributing to that desired soft and tender interior.
Versatile Baking Options: Beyond the Round Loaf
While this **peasant bread recipe** is traditionally baked in round, oven-safe mixing bowls to achieve its characteristic rustic shape, its versatile dough lends itself beautifully to other forms. Don’t feel limited to round loaves; you can easily adapt this **easy bread recipe** to suit your preferred baking vessels and serving styles.
Baking in Standard Bread Pans: Absolutely! If you prefer a more conventional loaf shape, baking this dough in standard bread pans works wonderfully. Simply divide the dough equally between two loaf pans (typically 9×5 inches or similar) that have been thoroughly greased. The baking time will generally remain the same as specified in the recipe card for the round bowls. The resulting rectangular loaves are perfect for slicing evenly for sandwiches or toast.
Creating Dinner Rolls in Muffin Tins: For charming individual servings, transform this dough into delightful dinner rolls using muffin tins. Generously grease a 12-cup muffin tin. Using two forks, gently divide the dough into 12 equal portions and place one portion into each muffin cup. The baking time will be significantly reduced for these smaller rolls, typically requiring only about 18-20 minutes in the oven, or until golden brown and cooked through. These make a fantastic accompaniment to any meal, providing that fresh **homemade bread** experience in a bite-sized format.
Beyond these, consider other creative applications. You could gently flatten portions of the dough into a rustic focaccia shape, topping it with extra herbs, olive oil, and coarse sea salt. Or, use smaller portions as a base for quick mini pizzas or savory flatbreads. The inherent adaptability of this **no-knead bread** dough means your imagination is the only limit!
Storage Solutions for Your Peasant Bread
Proper storage is key to extending the freshness and deliciousness of your **herbed peasant bread**. While it’s always best enjoyed warm from the oven, you can certainly preserve its quality for later. This **homemade bread** keeps remarkably well, allowing you to savor its flavors for days.
Room Temperature: For immediate enjoyment, store your peasant bread at room temperature. Once completely cooled, place the loaf in an airtight container or a large resealable plastic bag (like a Ziploc). This will keep it fresh and tender for 3 to 4 days. Avoid refrigerating fresh bread unless specified, as it can actually cause it to dry out and become stale more quickly.
Refrigerator Storage: If you need to extend its shelf life beyond a few days, refrigerating the bread can help, though it may alter the texture slightly. Wrap the loaf thoroughly in plastic wrap or aluminum foil, then place it in a resealable bag. It will last for up to a week in the refrigerator. To revive its texture, a quick toast or warming in the oven is recommended.
Freezing for Long-Term Freshness: For optimal long-term storage, freezing is your best bet. Ensure the bread has completely cooled. You can freeze it whole, in halves, or pre-sliced for convenience. Wrap the bread tightly in plastic wrap, then an additional layer of aluminum foil, or place it in a freezer-safe bag. Properly wrapped, this **easy bread recipe** can be stored in the freezer for up to 3 months without significant loss of quality. To enjoy, simply thaw at room temperature, then warm it in the oven for a few minutes to restore its fresh-baked feel and flavor. Leftover herbed peasant bread makes phenomenal toast the next day. Just slice it, toast it until golden, spread a little butter, and enjoy a slice of perfection!
Perfect Pairings: What to Serve with Peasant Bread
In my humble opinion, a slice of delicious **homemade bread** pairs perfectly with almost any meal – because who can resist the heavenly goodness of carbs? This **herbed peasant bread recipe**, with its rustic charm and flavorful crust, is incredibly versatile and makes an exceptional accompaniment to a wide array of dishes. Its sturdy crumb and tender interior are ideal for soaking up sauces and complementing hearty flavors. Here are just a few ideas to get you started on how to best enjoy this wonderful bread:
- Soups: The robust texture of peasant bread is absolutely divine with warm, comforting soups. It’s perfect for dipping and scooping up every last drop. Try it with a creamy roasted tomato basil soup, a hearty and filling beef stew, or a rich and cheesy cheddar broccoli soup.
- Chilis: A big bowl of spicy chili finds its perfect counterpoint in a piece of crusty peasant bread. The bread provides a wonderful textural contrast and soaks up the savory broth. It’s a fantastic match for an Instant Pot award-winning chili or a smoky smoked brisket chili.
- Pasta Dishes: Elevate your favorite pasta meals by serving them with slices of this herbed bread. It’s ideal for wiping plates clean of rich sauces. Imagine it alongside an authentic Italian bolognese or a classic plate of spaghetti and meatballs.
- BBQ & Grilled Meats: The rustic flavor of peasant bread complements smoky and savory BBQ dishes exceptionally well. It can serve as a side or even as a base for open-faced sandwiches. Pair it with tender smoked brisket, juicy pulled pork, or fall-off-the-bone smoked ribs.
- Cheese Boards & Spreads: This bread’s sturdy yet tender crumb makes it an excellent vehicle for various cheeses, dips, and spreads. Serve it sliced with a selection of artisanal cheeses, a creamy hummus, or a flavorful bruschetta.
- Sandwiches & Paninis: Its robust texture holds up beautifully, making it an excellent choice for hearty sandwiches or pressed paninis. The herbed flavor adds an extra layer of deliciousness to your favorite fillings.
This **no-knead peasant bread recipe** truly is a game-changer for anyone looking to enjoy the rewards of **homemade bread** without the fuss. It’s incredibly easy to make, undeniably delicious, and wonderfully versatile, pairing beautifully with virtually any meal. Beyond main courses, it makes fantastic sandwiches and paninis, elevating your everyday lunch. I genuinely can’t wait for you to try this simple yet spectacular recipe and experience the sheer delight of baking your own rustic, herbed loaf!
More Easy Bread Recipes You’ll Love:
- Easy French Bread
- Perfectly Moist Skillet Cornbread
- Homemade Naan
- Garlic Cheddar Herb Irish Soda Bread
- Best Potato Rolls
- Easy No-Knead Artisan Bread
- One Hour Rolls
- Crazy Easy 7-Up Biscuits
- The Easiest Herbed Focaccia Bread
- All Our Bread Recipes Here!
4.34 from 12 votes
Easy Herbed Peasant Bread Recipe
Ingredients
- 4 Cups All Purpose Flour, or bread flour
- 2 1/4 teaspoons Kosher Salt
- 2 teaspoons Sugar
- 2 teaspoons Instant Yeast
- 2 Cups Warm Water
- 2 teaspoons Rosemary, freshly chopped
- 1 teaspoon Thyme, freshly chopped
- 1 teaspoon Parsley, freshly chopped
- 2-3 Tablespoons Butter, room temperature
- Flaked Sea Salt, if desired
Instructions
-
In a large mixing bowl, stir together the flour, salt, sugar, and instant yeast.
-
Add the water and herbs and then mix until just combined.
-
Cover your bowl with plastic wrap and set aside in a warm spot to rise for at least an hour. (Preheat an oven to 170 degrees F for 10 minutes if your house is chilly. Turn the oven off, then with the door cracked, place the bowl in.)
-
Preheat the oven to 425 degrees F. Grease two 1.5-quart oven-safe mixing bowls (or bread pans) with about a tablespoon of softened butter each.
-
Use two forks to begin scraping the dough from the sides of the bowl and folding it into and on top of itself to create a ball shape.
-
Then, using the forks, divide the dough into two equal portions. Place half of the dough in the first buttered bowl, then repeat with the second half of dough in the other bowl.
-
Allow the dough to rest, uncovered, for 30 minutes more. Transfer to the oven for 15 minutes, then turn down the oven to 375 degrees F and bake for 15 minutes more.
-
Remove from the oven and brush with olive oil or melted butter, and sprinkle with flaked sea salt if desired. Move the loaves to a wire rack to cool.
Nutrition
Calories: 107kcal,
Carbohydrates: 20g,
Protein: 3g,
Fat: 1g,
Saturated Fat: 1g,
Polyunsaturated Fat: 0.1g,
Monounsaturated Fat: 0.4g,
Trans Fat: 0.05g,
Cholesterol: 3mg,
Sodium: 273mg,
Potassium: 39mg,
Fiber: 1g,
Sugar: 0.5g,
Vitamin A: 40IU,
Vitamin C: 0.2mg,
Calcium: 6mg,
Iron: 1mg
Nutrition information is automatically calculated, so should only be used as an approximation.
Like this? Leave a comment below!
REMEMBER TO SUBSCRIBE TO our FREE Oh Sweet Basil NEWSLETTER AND RECEIVE EASY RECIPES DELIVERED INTO YOUR INBOX EVERY DAY!
When you try a recipe, please use the hashtag #ohsweetbasil on INSTAGRAM for a chance to be featured in our stories! FOLLOW OH, SWEET BASIL ON FACEBOOK | INSTAGRAM | PINTEREST | TWITTER FOR ALL OF OUR LATEST CONTENT, RECIPES AND STORIES.