
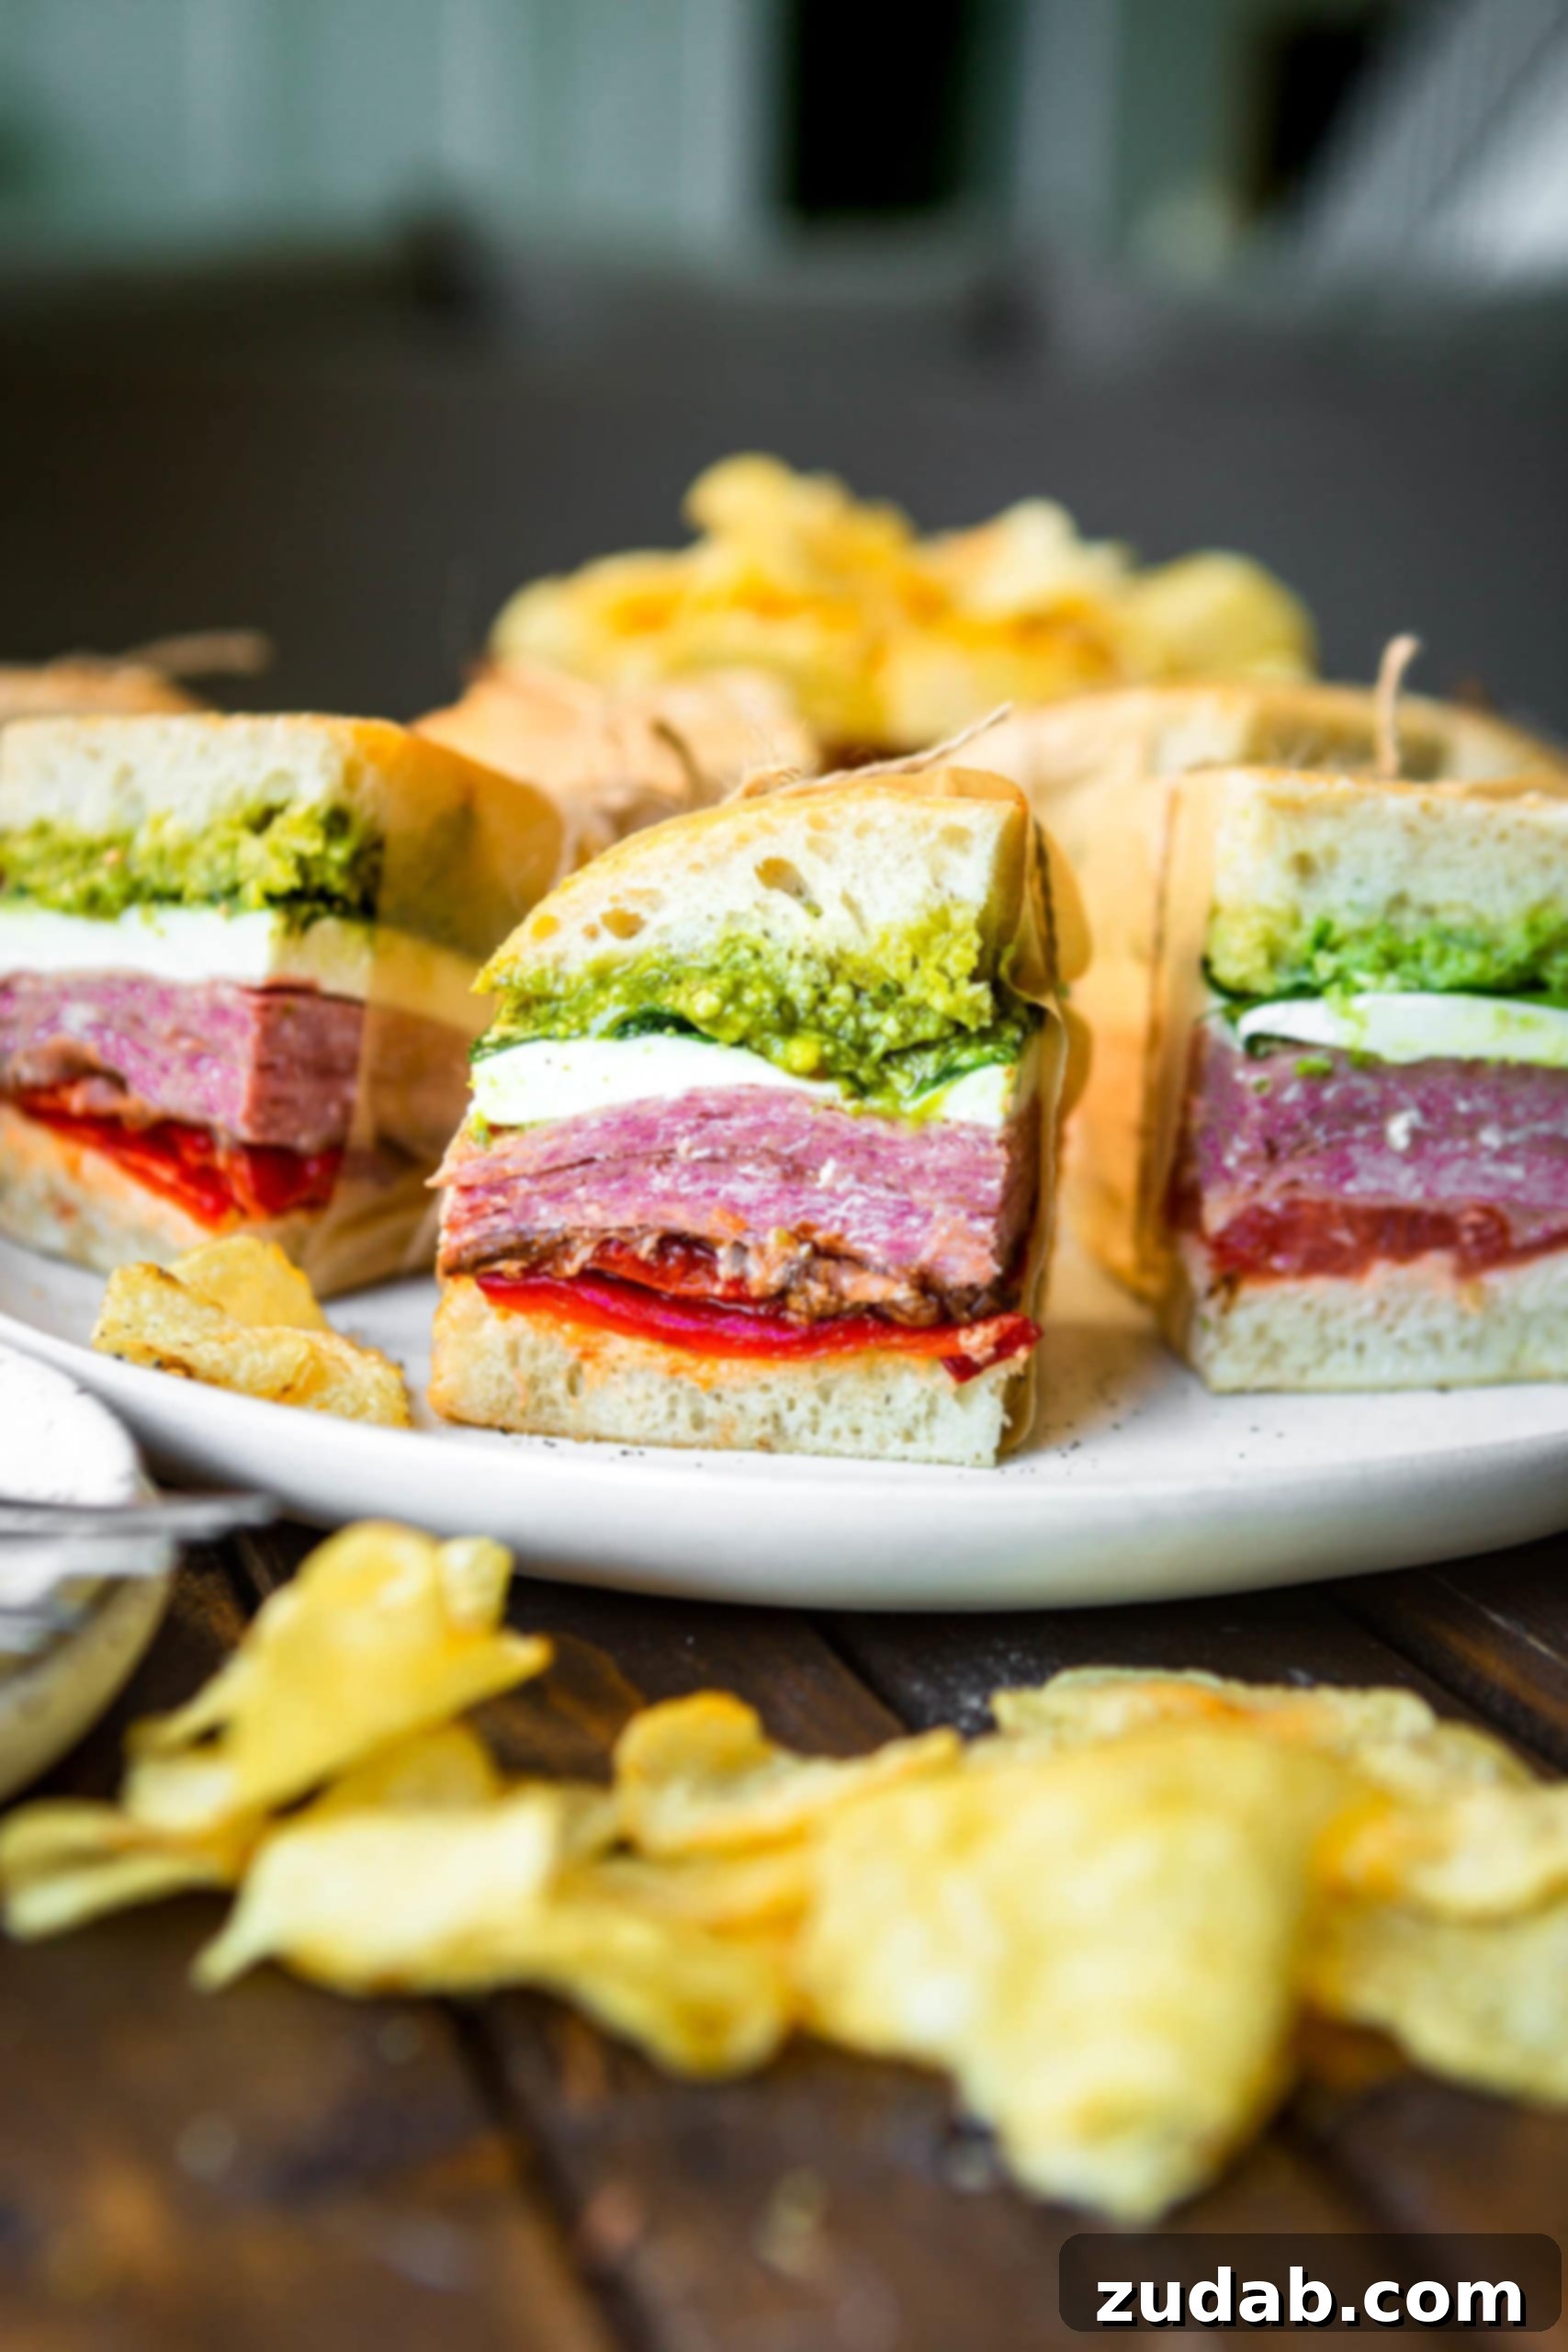
Imagine layers of savory Italian cured meats, sweet roasted red peppers, ripe tomatoes, crisp spinach, and creamy fresh mozzarella, all nestled between slices of artisanal Italian bread. Now, picture that culinary masterpiece gently pressed, allowing all the incredible flavors to meld into a harmonious symphony with every bite. These **Italian pressed sandwiches** are not just a meal; they’re an experience, a delightful journey for your taste buds, perfect for any occasion!
For years, I’ve dreamed of sharing this fantastic recipe for **pressed Italian sandwiches** with you, and the time has finally come! They are wonderfully versatile, making them an ideal choice for a scenic picnic, a sophisticated lunch, or a satisfying make-ahead meal that only gets better with time.
Crafting the Ultimate Italian Pressed Sandwich: A Visual Guide
Why Choose Pressed Sandwiches for Your Next Picnic?
There’s a special charm about picnics, a simple joy that connects us to nature and good company. Throughout my life, picnics have always been a cherished affair. I remember growing up, our family would prepare a big bowl of creamy potato salad, sometimes grab some fried chicken (don’t judge, it was a classic combo!), and head out to a local park or the mountains. These gatherings were pure magic, especially during summer church picnics filled with games, water slides, and family fun.
However, my absolute favorite kind of picnicking involved homemade sandwiches and an array of delicious sides. There’s an incredible sense of freedom and wonder in unplugging from the everyday hustle and finding solace amidst the hills. If you’ve ever forgotten that simple pleasure – especially the one we were all reminded of during those quiet quarantine days – let me reintroduce you to it. A generously stacked, flavorful sandwich, complemented by fresh fruit, a bag of salty chips, and perhaps a sweet treat like our lemon drop cookies, promises to bring immense happiness to you and your loved ones.
Pressed sandwiches are inherently perfect for picnics because the pressing process makes them sturdy and less prone to falling apart. The flavors have ample time to meld beautifully, ensuring every bite is rich and harmonious. Plus, they’re incredibly portable and can be made well in advance, taking the stress out of last-minute meal prep. While Italian flavors are a personal favorite, the concept of a pressed sandwich is wonderfully adaptable. You can explore countless variations, from a turkey BLT style with mayonnaise and avocado, to a vegetarian delight featuring heirloom tomatoes, fresh mozzarella, roasted bell peppers, and grilled eggplant. The possibilities are truly endless, limited only by your imagination!
What Exactly is a Pressed Sandwich?
A pressed sandwich is precisely what its name implies: a sandwich that has undergone a period of gentle compression. It typically starts with a robust, flavorful bread, such as ciabatta or a crusty baguette, generously loaded with an assortment of delicious ingredients. Once assembled, the sandwich is tightly wrapped, often in plastic wrap, and then placed under a heavy object for several hours, or even overnight. This pressing technique serves a crucial purpose: it compacts the layers, making the sandwich easier to eat, and, more importantly, it allows all the individual flavors to infuse and meld together. The result is an incredibly cohesive and intensely flavorful sandwich, where every component contributes to a rich, unified taste experience that often surpasses an unpressed sandwich.
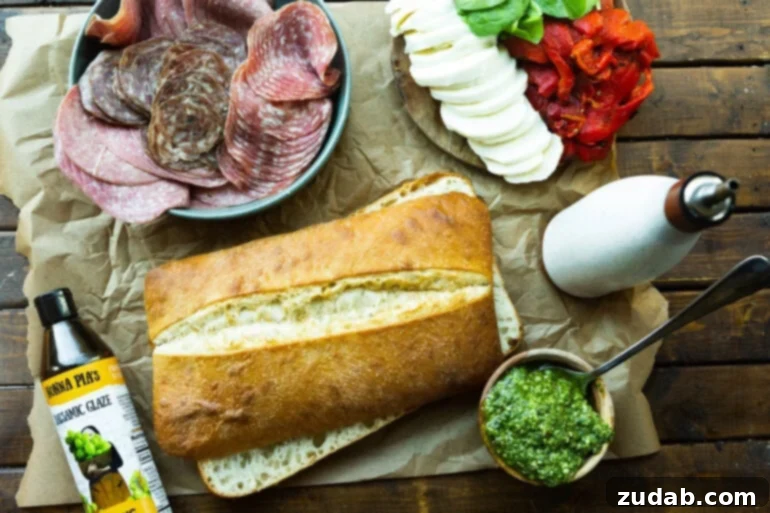
Key Ingredients for Authentic Italian Pressed Sandwiches
To create these undeniably delicious Italian pressed sandwiches, a careful selection of fresh, high-quality ingredients is essential. Each component plays a vital role in building flavor and texture. Here’s your comprehensive shopping list to ensure your next picnic is a culinary triumph:
- Italian Bread: Opt for a sturdy bread like ciabatta or focaccia. These varieties have a good crust and a chewy interior that can withstand the pressing, absorbing flavors without becoming overly soggy. If you prefer, a good garlic bread can also work!
- Prosciutto: This delicate, thinly sliced Italian dry-cured ham adds a wonderful salty, savory depth and a melt-in-your-mouth texture.
- Assorted Italian Meats: A medley of Italian cold cuts is key for a complex flavor profile. Consider Genoa salami for its rich, garlicky notes, varzi salami for a more peppery kick, and calabrese salami for a touch of spice. Combining different cured meats adds layers of taste.
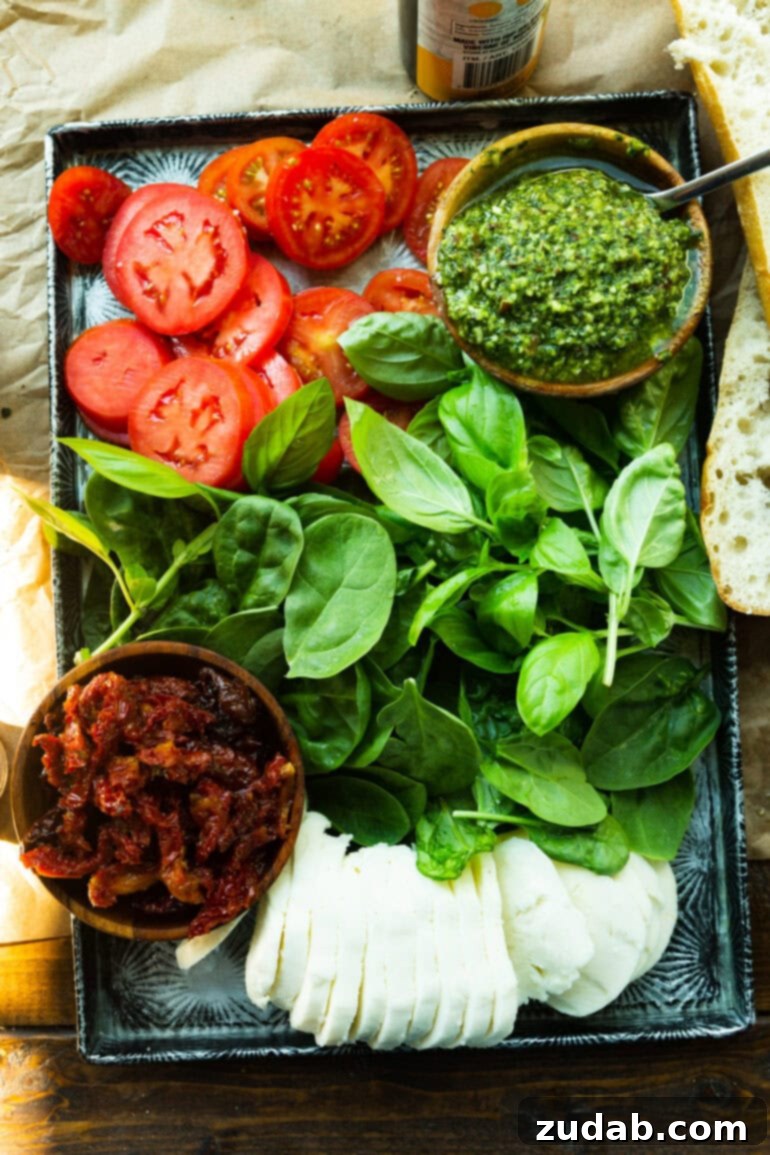
- Fresh Tomatoes: Slices of ripe, juicy tomatoes provide a burst of fresh acidity and sweetness. Roma tomatoes work well due to their lower water content.
- Roasted Red Bell Peppers or Sun-dried Tomatoes: Roasted red peppers add a smoky, sweet, and slightly tangy element, while sun-dried tomatoes offer a concentrated, intense umami flavor. Both are fantastic additions.
- Balsamic Glaze: A drizzle of rich, sweet, and tangy balsamic glaze elevates all the flavors, bringing a touch of gourmet sophistication.
- Fresh Mozzarella: Creamy, mild fresh mozzarella provides a delightful contrast to the savory meats and bright vegetables. Its softness complements the pressed texture.
- Baby Spinach or Fresh Basil: Vibrant baby spinach adds a fresh, slightly peppery crunch. Alternatively, fresh basil leaves contribute an aromatic, sweet, and peppery Italian essence that is truly irresistible.
- Pesto: A generous spread of basil pesto is a non-negotiable. It infuses the sandwich with herbaceous, garlicky, and nutty notes, and also acts as a fantastic moisture barrier for the bread.
To complete your picnic spread, I highly recommend a bag of crisp, sweet grapes and some crunchy kettle-cooked potato chips. Remember, these sandwiches are entirely customizable! Feel free to swap out meats, experiment with different cheeses, or add your favorite vegetables and spreads. The exact measurements for each ingredient can be found in the detailed recipe card at the end of this post, allowing you to tailor the perfect sandwich to your taste.
Step-by-Step Guide to Crafting Your Pressed Italian Sandwich
Making a truly exceptional sandwich is all about layering and technique. While it seems straightforward, a few key steps ensure your Italian pressed sandwich is nothing short of perfection. Here’s how to assemble your masterpiece:
- Prepare the Bread: Carefully slice your chosen Italian bread (ciabatta or focaccia works best) horizontally through the middle, creating two halves. This allows for even layering and easy pressing.
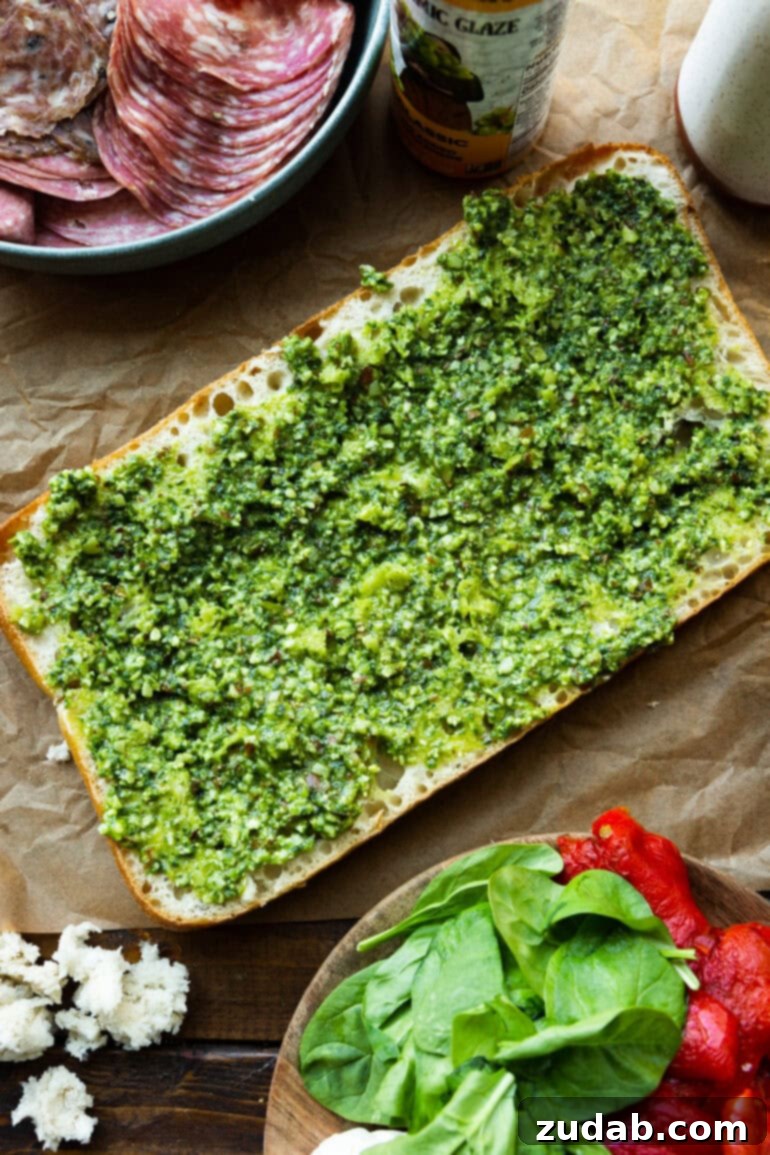
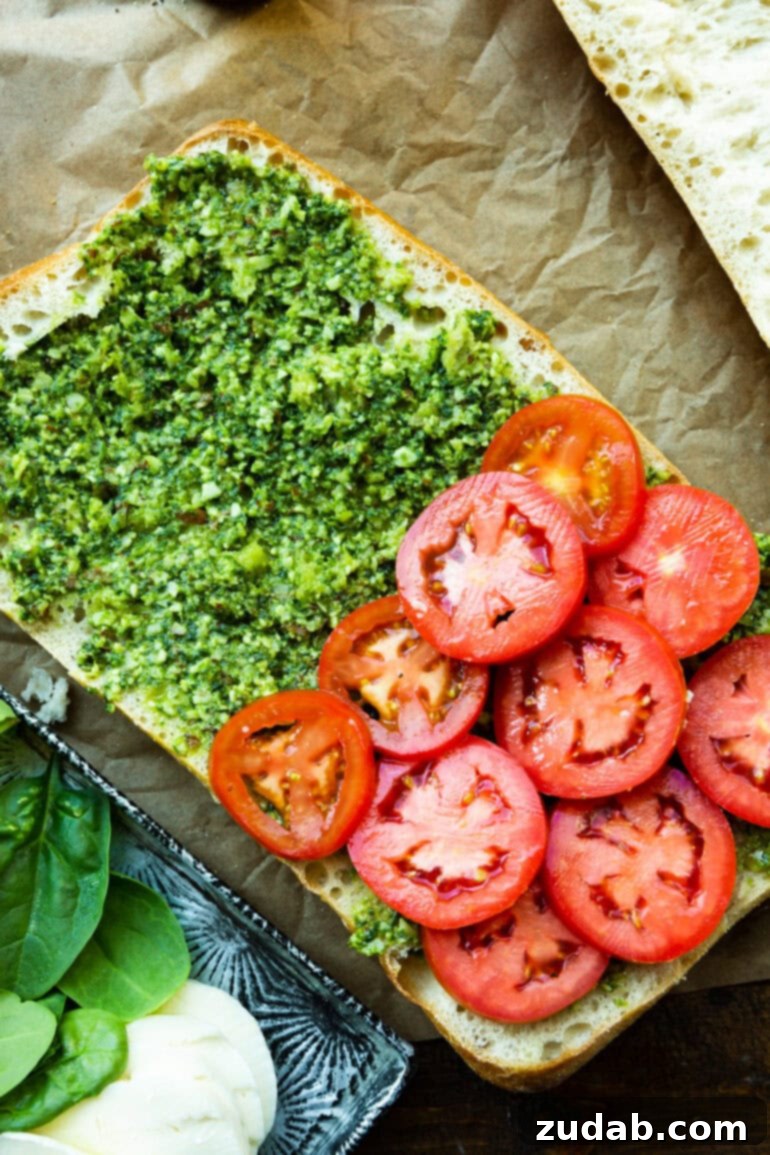
- Apply the Spreads: On one half of the bread, spread a generous and even layer of pesto. This not only imparts incredible flavor but also acts as a barrier to prevent the bread from getting soggy. On the other half, drizzle a very small amount of high-quality olive oil.
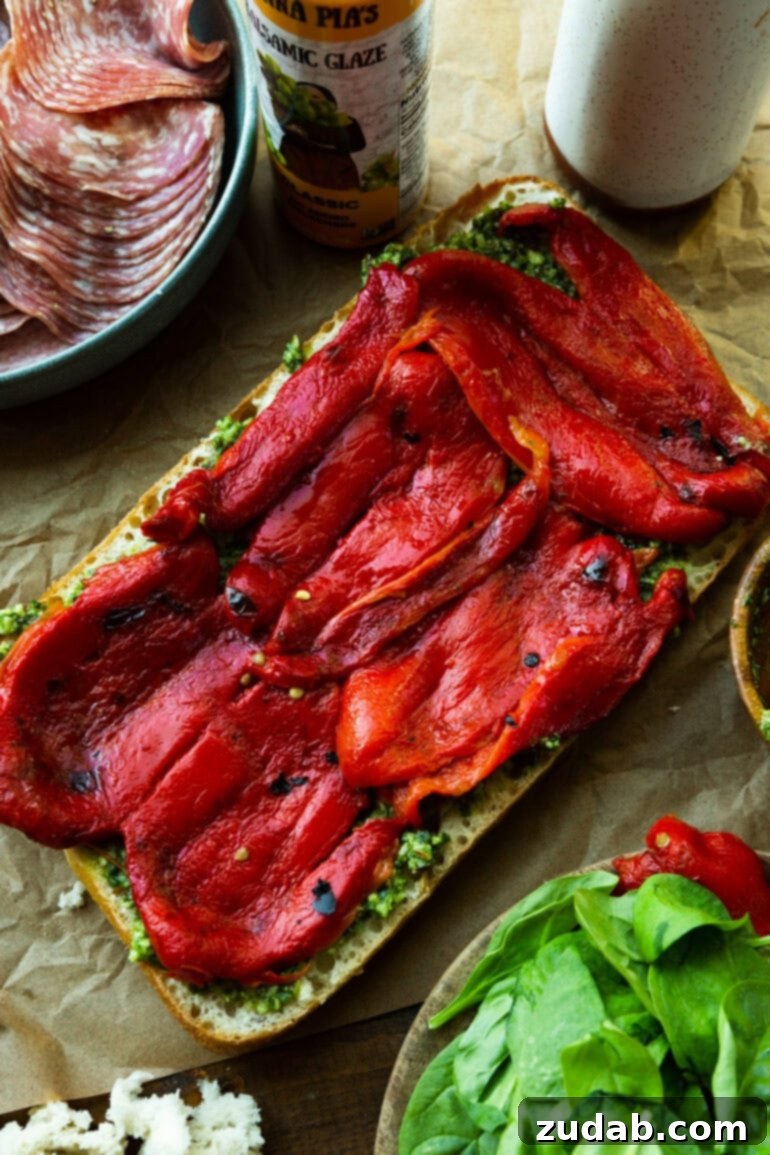
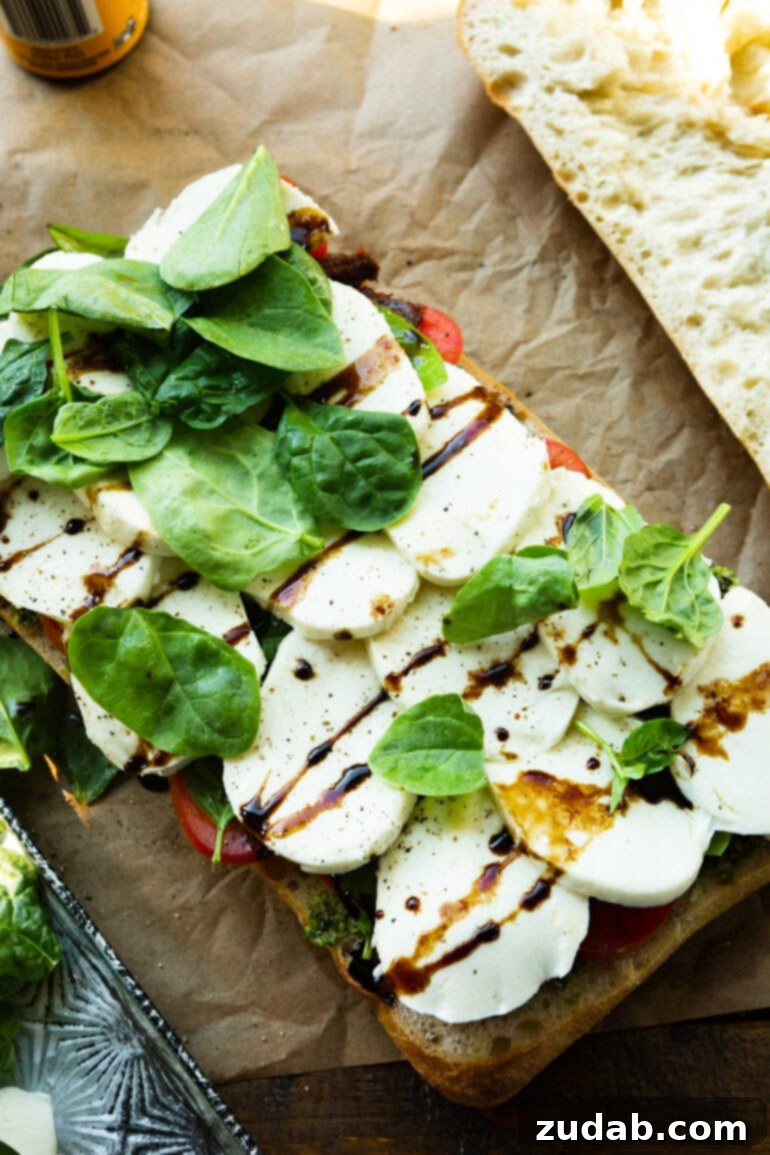
- Build the Vegetable Base: On the olive oil-drizzled side, artfully arrange your tomato slices and roasted red peppers (or sun-dried tomatoes). Ensure they lie relatively flat. Drizzle these vibrant vegetables with a touch of balsamic glaze, enhancing their natural sweetness and adding a tangy counterpoint.
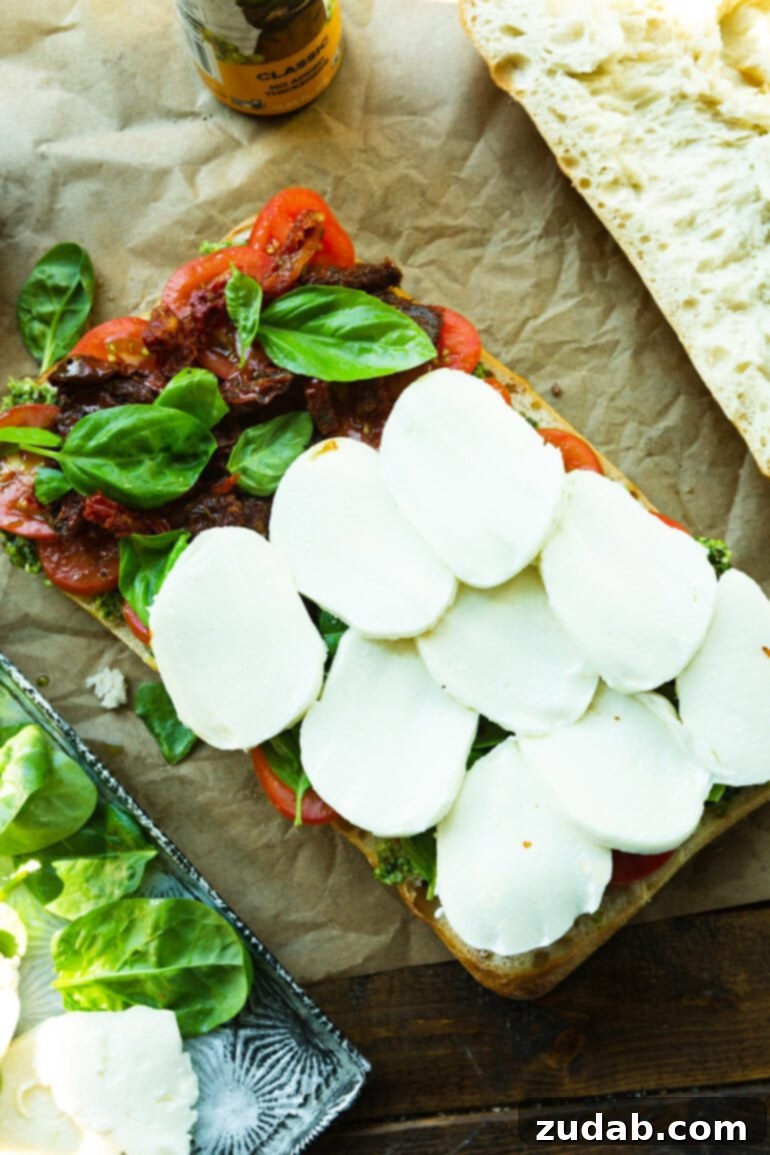
- Layer the Meats and Cheese: Now, it’s time for the star ingredients! Begin layering your prosciutto, followed by the assorted Italian meats (Genoa salami, varzi, calabrese). Then, add the slices of fresh mozzarella. Finish with a layer of fresh baby spinach or aromatic basil leaves, ensuring an even distribution for flavor and texture.
- Press and Chill: Gently place the pesto-covered bread half on top of the layered ingredients to close your sandwich. Tightly wrap the entire sandwich in plastic wrap. For the pressing, lay the wrapped sandwich on a sturdy cookie sheet or cutting board. Place a heavy object, such as a cast-iron skillet, a few cookbooks, or even dumbbells, on top to apply even pressure. Refrigerate for a minimum of 6 hours, or ideally, overnight. This crucial step allows the flavors to truly meld and the sandwich to become wonderfully cohesive.
- Slice and Serve: Once pressed, unwrap the sandwich, slice it into individual portions (small or large, as desired), and serve with your favorite picnic sides. The waiting is the hardest part, but the result is always worth it!
These instructions are designed to ensure maximum flavor and ideal texture. For more detailed measurements and specific ingredient quantities, please refer to the recipe card below.
Expert Tips for Perfect Pressed Sandwiches
How to Press Your Sandwich Effectively
Achieving the perfect pressed sandwich involves applying even, consistent pressure for an adequate amount of time. While there are fancy sandwich presses available, the easiest and most effective method often involves items you already have at home. Simply place your tightly wrapped sandwich on a sturdy, flat surface like a cutting board or a cookie sheet. Then, stack heavy, flat objects directly on top. My go-to is often my heaviest cast iron skillet, but a few thick cookbooks, another cookie sheet weighted down with dumbbells, or even a brick (cleaned, of course!) can work perfectly. The goal is to ensure the sandwich is compressed evenly between two flat surfaces. Allow it to press for at least 6 hours, or for maximum flavor melding and firmness, leave it overnight in the refrigerator. This extended pressing time allows the bread to slightly compact, the juices to distribute, and the flavors to fully integrate.
How to Roast Red Peppers at Home
Roasting red peppers adds a deep, sweet, and smoky flavor that perfectly complements the other ingredients in your Italian pressed sandwich. It’s a simple process that yields fantastic results:
- Preheat your oven’s broiler.
- Place whole red bell peppers directly on a baking sheet.
- Position the baking sheet on the top rack, directly under the broiler coils.
- Roast for 8-10 minutes, turning the peppers occasionally with tongs until their skins are completely blackened and blistered on all sides. This charring is key to their flavor.
- Once roasted, carefully remove the baking sheet from the oven. Immediately transfer the hot peppers to a heat-safe bowl and cover it tightly with plastic wrap, or place them in a paper bag and seal it. This steaming process helps loosen the skins.
- Let the peppers cool for about 15-20 minutes, or until they are cool enough to handle.
- Once cooled, the skins should peel off easily. Slice the peppers open, remove the core and seeds, and then slice them into strips or leave them in larger pieces for your sandwich.
How to Keep Your Pressed Sandwich from Getting Soggy
One of the biggest concerns with layered sandwiches, especially pressed ones, is the dreaded soggy bread. Fortunately, this is easily preventable with a few clever techniques to create effective moisture barriers. There’s truly nothing worse than a beautiful sandwich compromised by wet bread! Here’s how to ensure your Italian pressed sandwich stays firm and delicious:
- Pesto as a Barrier: A generous layer of pesto isn’t just for flavor; it’s an excellent fat-based barrier. Spread it liberally on one side of your bread. The oil in the pesto helps repel moisture from the wetter ingredients. If you prefer not to use pesto on both sides, a thin spread of butter or even a light brushing of olive oil can serve a similar purpose.
- Pat Dry Wet Ingredients: Before adding them to your sandwich, take an extra minute to pat dry any inherently wet ingredients. This includes sliced tomatoes, roasted red peppers (even if jarred, drain them well), or sun-dried tomatoes (if packed in oil, blot away excess oil). A simple paper towel can make a huge difference in removing surface moisture that could otherwise soak into your bread.
- Strategic Layering with Meats and Cheese: Utilize your drier ingredients, like Italian cured meats and cheese, as additional protective layers. Place them strategically between the bread and any potentially wet ingredients. For instance, putting a layer of prosciutto or mozzarella directly against the bread on both sides can help create an effective shield, keeping the bread dry while still allowing the flavors to mingle beautifully.
What to Serve with Your Italian Pressed Sandwich at a Picnic?
These flavorful Italian pressed sandwiches are hearty enough to be a meal on their own, but they truly shine when paired with complementary sides, especially for a picnic. Here are some of my favorite accompaniments that round out the perfect outdoor feast:
- Crispy Kettle Chips: A classic for a reason! The salty crunch provides a delightful textural contrast.
- Simple Green Salad: A light, fresh salad with a vinaigrette dressing cuts through the richness of the sandwich.
- Fresh Fruit Medley: Crisp grapes, sliced melon, berries, or citrus segments offer a refreshing, sweet counterpoint.
- Creamy Potato Salad: A timeless picnic staple that pairs wonderfully with savory sandwiches.
- Classic Macaroni Salad: Another beloved picnic side that offers a comforting, creamy texture.
- Tropical Fruit Salad: For a burst of exotic sweetness and vibrant colors.
- Marinated Tomatoes Salad: A simple yet incredibly flavorful side that highlights fresh, ripe tomatoes.
Remember to pack plenty of cold beverages, a comfortable blanket, and perhaps some light entertainment. Don’t forget to take a picture of your beautiful picnic spread and tag us on social media! We’d absolutely love to see your creations!
These **Italian pressed sandwiches** are robust, bursting with authentic flavors, and incredibly portable, making them perfect for a picnic, potluck, baby shower, bridal shower, or a delightful brunch. The best part? You can prepare them a **day ahead of time**, and they actually taste even better the next day as the flavors continue to marry. You are going to absolutely adore these!
More Delicious Sandwich Recipes to Explore:
- Our Favorite Chicken Salad Sandwich
- Classic French Dip Sandwich
- Fresh Caprese Sandwich
- Sun Dried Tomato Bacon Pesto Grilled Cheese
- Honey Avocado Turkey Bacon Sandwich
- Sun Dried Tomato Pesto Panini
- Best Triple Decker Club Sandwich
Italian Pressed Sandwiches
By: Sweet Basil
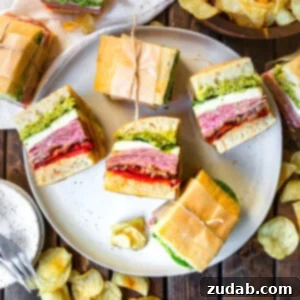
Layers of Italian meats, roasted red peppers, tomatoes, spinach and fresh mozzarella all pressed between tender slices of Italian bread. Oh baby, these Italian pressed sandwiches are so yum!
Prep Time: 15 mins
Total Time: 6 hrs 15 mins (includes pressing time)
Servings: 6 Small Sandwiches
Ingredients
- 1 Loaf Italian Bread (12oz, ciabatta or focaccia recommended)
- 1/4 Cup Pesto (homemade pesto recipe here)
- 4-6 Slices Tomato (ripe, firm slices)
- 2 Red Bell Peppers (roasted, seeded, and sliced open – see note below)
- Balsamic Glaze (learn how to make balsamic glaze)
- 3 Ounces Prosciutto
- 6 Ounces Italian Meats Mix (such as Genoa salami, Varzi, Calabrese)
- Fresh Mozzarella (sliced or pulled)
- 1 Cup Baby Spinach (or fresh basil leaves)
Instructions
- Slice open the Italian bread horizontally. Spread one side liberally with pesto. On the other half, drizzle a very small amount of olive oil.
- On the olive oil-drizzled side, lay the tomato slices and roasted red pepper pieces flat. Drizzle them with a little balsamic glaze.
- Layer the meats: start with prosciutto, then add the Italian meat mix. Follow with the fresh mozzarella slices. Finish with a layer of baby spinach or basil leaves.
- Close the sandwich by placing the pesto-covered bread half on top. Wrap the entire sandwich tightly in plastic wrap.
- Place the wrapped sandwich in the refrigerator with a heavy object on top (like a cast-iron skillet or a stack of heavy cookbooks) for 6 hours or up to overnight. This pressing allows the flavors to meld and the sandwich to become firm.
- Once pressed, unwrap, slice into desired portions, and serve with your favorite picnic sides like chips and salad!
Recipe Notes
*To roast red peppers at home: Heat your oven’s broiler. Place whole peppers on a cookie sheet directly under the coils. Roast, turning occasionally, for 8-10 minutes until skins are blackened and blistered. Transfer to a bowl, cover, and let cool. Peel off the skin, slice open, and remove seeds before using.
Nutrition Information (Approximate)
- Serving: 1 Sandwich
- Calories: 652 kcal
- Carbohydrates: 44g
- Protein: 15g
- Fat: 46g
- Saturated Fat: 20g
- Polyunsaturated Fat: 7g
- Monounsaturated Fat: 13g
- Trans Fat: 1g
- Cholesterol: 33mg
- Sodium: 1118mg
- Potassium: 453mg
- Fiber: 4g
- Sugar: 26g
- Vitamin A: 2074 IU
- Vitamin C: 55mg
- Calcium: 31mg
- Iron: 2mg
Nutrition information is automatically calculated, so should only be used as an approximation.
REMEMBER TO SUBSCRIBE TO our FREE Oh Sweet Basil NEWSLETTER AND RECEIVE EASY RECIPES DELIVERED INTO YOUR INBOX EVERY DAY!
When you try a recipe, please use the hashtag #ohsweetbasil on INSTAGRAM for a chance to be featured in our stories! FOLLOW OH, SWEET BASIL ON FACEBOOK | INSTAGRAM | PINTEREST | TWITTER FOR ALL OF OUR LATEST CONTENT, RECIPES AND STORIES.