
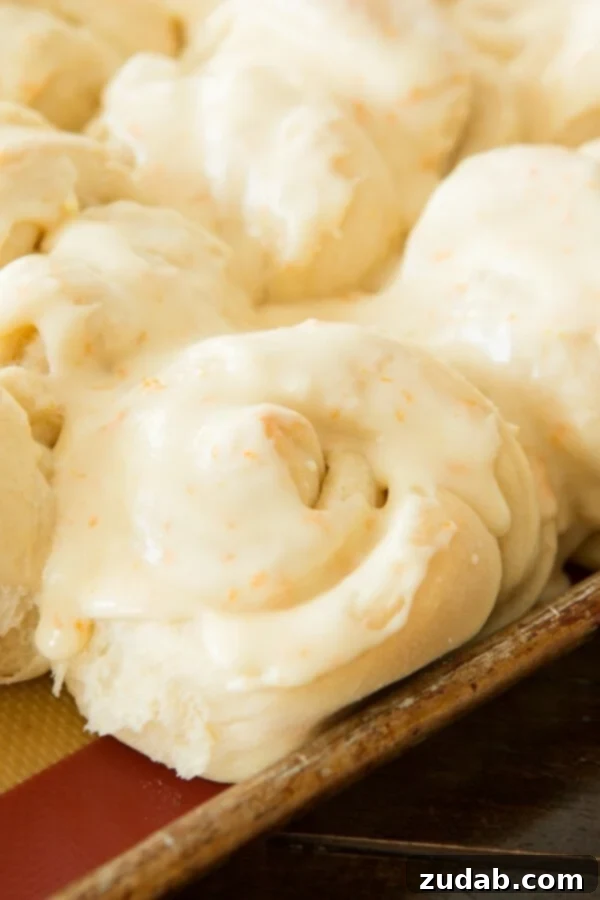
Prepare to be enchanted by the **ultimate orange rolls** – a recipe that truly stands out as the best you’ll ever encounter! Imagine biting into rolls that are so exceptionally soft and wonderfully fluffy, perfectly complemented by an vibrant **orange glaze** that is absolutely divine. These aren’t just rolls; they’re an experience, a delightful fusion of tender texture and bright, zesty flavor that will leave a lasting impression.
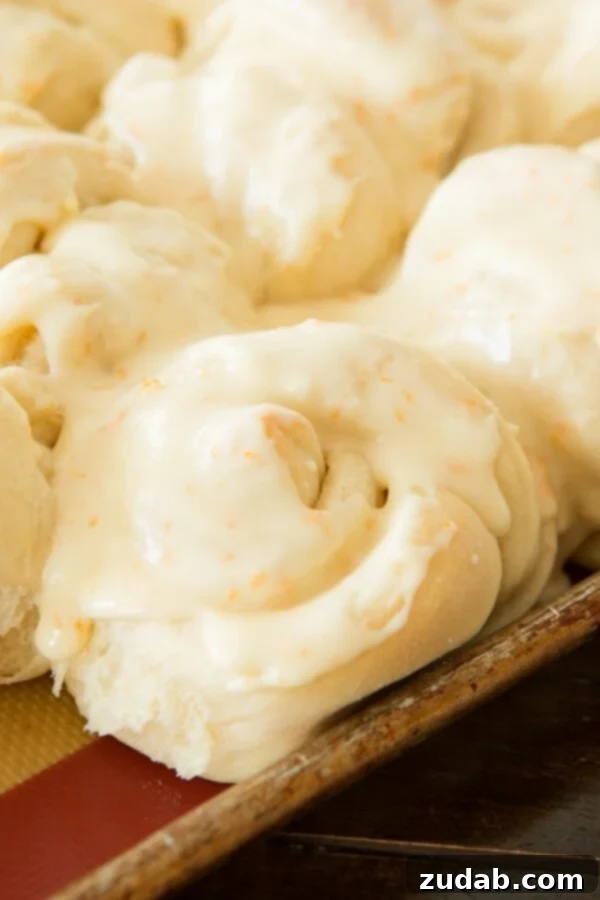
These **homemade orange rolls** are truly fantastic in every sense. They are incredibly light and airy, offering a fresh taste that makes them irresistibly appealing. What’s more, this recipe is surprisingly straightforward to master, even for novice bakers. Once you adorn them with the generous, luscious **orange glaze**, your family and friends will undoubtedly hail you as a culinary genius, recognizing you for serving the most delectable and impressive rolls at any gathering. Get ready for compliments galore!
Unveiling the Secret Behind Our Irresistible Orange Rolls
The journey to these exquisite **sweet orange rolls** begins with a cherished foundation: our renowned potato roll recipe. Passed down through generations, this original recipe forms the backbone of their incredible texture. We’ve artfully adapted it, infusing the dough with the bright, citrusy essence of fresh oranges, transforming classic potato rolls into these phenomenal orange-infused delights. This subtle adaptation makes all the difference, elevating a beloved staple into something truly extraordinary.
One of the key techniques that contributes to the unparalleled fluffiness of these rolls is the use of scalded milk. While the scientific intricacies behind this method might seem complex, the results are consistently evident: rolls made with scalded milk are undeniably lighter, airier, and more flavorful. Scalding milk involves gently heating it until small bubbles form around the edges and a thin skin begins to appear on the surface – it’s crucial not to let it boil. This process alters the milk proteins, preventing them from interfering with the gluten development in the dough, ultimately leading to a more tender and pliable crumb. It’s a simple step that yields profound improvements in texture.
After scalding, the milk is combined with potato flakes, butter, sugar, and salt, then allowed to cool to a lukewarm temperature. This cooling step is vital to protect the yeast, ensuring it remains active and ready to perform its magic. Once the mixture reaches the ideal temperature, the yeast, eggs, and the bright zest of a large orange are incorporated. The fresh orange zest is particularly important here, as it releases aromatic oils that infuse the dough with a deep, authentic citrus flavor, setting these rolls apart from any other.
Mastering the Dough: From Mixing to Shaping Perfect Orange Rolls
Crafting the perfect dough for these **fluffy orange rolls** is an art that begins with careful mixing. We recommend starting with six cups of flour, gradually incorporating it until the dough just comes together. It’s important to note that this is not a stiff bread dough; it should remain slightly sticky and soft. This characteristic stickiness is intentional, contributing to the final tender crumb of the rolls. While you might be tempted to add more flour to make it less sticky, resist the urge! An extra half-cup of flour can be reserved for dusting your work surface and the dough later, ensuring easy handling without compromising the desired texture.
Once your dough is mixed, it’s time for the first rise, a crucial period where the yeast works its magic. Allow the dough to rest in a warm, draft-free place for about one hour, or until it has noticeably doubled in size. This initial rise develops flavor and creates the airy structure that makes these rolls so delightful.
After the first rise, gently punch down the dough to release the air, then divide it into three manageable portions. On a lightly floured surface (using that reserved half-cup of flour), roll out each portion to approximately half an inch thick. The next step is a delightful one: generously butter half of the rolled-out dough. The butter not only adds richness but also helps create distinct layers and a wonderfully soft interior. Fold the unbuttered half over the buttered half and gently press to seal the edges, creating a double layer of dough. This simple technique enhances the texture and ensures a buttery goodness throughout each roll.
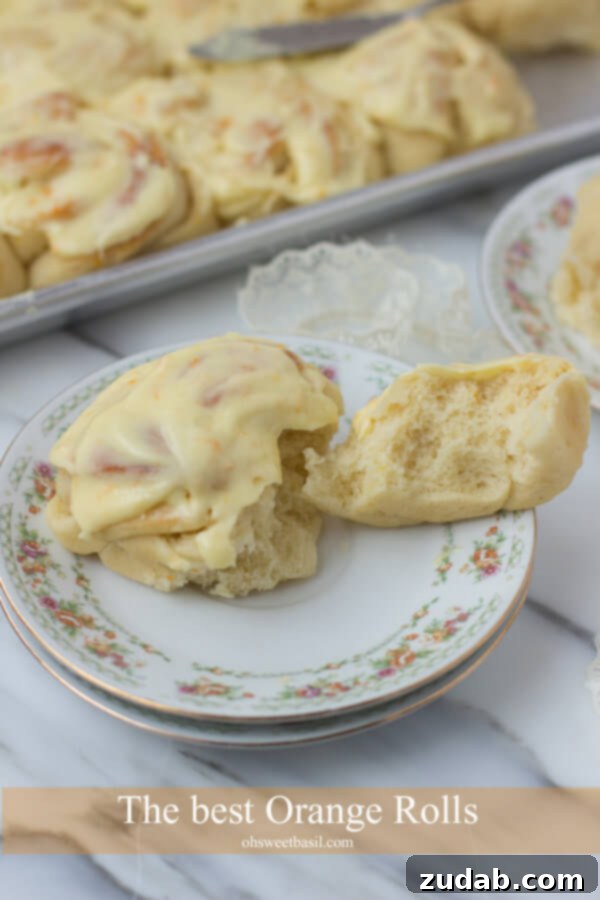
Now comes the fun part: shaping your **homemade orange rolls**. While you could opt for classic crescent shapes, we find that tying them into charming knots creates a more elegant and appealing presentation. Simply cut the folded dough into one-inch wide strips, then gently tie each strip into a loose knot, tucking the ends underneath. As they bake, these knots will expand beautifully, becoming large, golden, and irresistibly fluffy. Arrange your shaped rolls on a baking sheet, allowing space for them to rise further, and let them undergo their second rise for another one to two hours, or until they look puffy and light.
Bake these beauties in a preheated oven at 350°F (175°C) until they turn a glorious golden brown, typically between 14 to 20 minutes. Keep a close eye on them to prevent overbaking, as this can lead to dry rolls. The goal is a perfectly golden exterior and a tender, moist interior.
The Zesty Crown: Crafting the Perfect Orange Glaze
No **orange roll** is complete without its signature glaze. This vibrant, zesty topping is incredibly simple to prepare yet utterly transforms the rolls from delicious to extraordinary. Our recipe calls for a blend of softened butter, powdered sugar, fresh orange zest, a generous four tablespoons of fresh orange juice, and just a pinch of salt to balance the sweetness. The key is to mix all these ingredients thoroughly until a thick, smooth, and pourable glaze forms. The fresh orange zest and juice are non-negotiable here; they provide that authentic, bright citrus punch that makes these rolls truly shine.
Once your **fluffy orange rolls** have emerged from the oven and cooled slightly – just enough to be handled but still warm – it’s time to apply the glaze. Drizzle or brush it generously over each roll, allowing the warmth of the rolls to slightly melt the glaze, creating a shimmering, sticky, and utterly delectable coating. The aroma alone will be enough to draw everyone to the kitchen, eager to dig in!
Freezing Orange Sweet Rolls: Convenience Without Compromise
One of the fantastic advantages of these **sweet orange rolls** is their freezer-friendly nature, allowing you to enjoy their fresh taste long after baking. There are two primary methods for freezing, depending on your preference and future plans:
- **Baked but Unfrosted Rolls:** This is an excellent option for make-ahead convenience. Bake the rolls as directed, but skip the glazing step. Allow them to cool completely to room temperature. Once cool, arrange them in a single layer on a baking sheet and flash freeze until solid. Transfer the frozen rolls to an airtight freezer-safe container or heavy-duty freezer bags, ensuring as much air as possible is removed to prevent freezer burn. They can be stored for up to 2-3 months. When ready to serve, thaw the rolls overnight in the refrigerator or at room temperature. Gently warm them in a preheated oven (around 300°F/150°C for a few minutes) and then apply the orange glaze while they are still warm for that fresh-baked experience.
- **Completely Iced and Finished Rolls:** For ultimate ease, you can freeze the rolls after they have been fully glazed. Allow the glaze to set completely at room temperature. Then, cover the rolls tightly with plastic wrap, followed by a layer of aluminum foil, or place them in an airtight freezer container. Freezing glazed rolls works well for shorter storage periods, typically up to 1 month, to maintain the glaze’s texture. To enjoy, thaw them overnight in the refrigerator. Reheat gently in the microwave for a few seconds if desired, or let them come to room temperature. Note that the glaze’s texture might be slightly softer after thawing.
These flexible freezing options make these **homemade orange rolls** perfect for meal prepping, holiday baking, or simply ensuring you always have a delightful treat on hand.
Orange Rolls: A Versatile Delight for Any Meal
Are **orange rolls** a breakfast item, a dinner roll, or a decadent dessert? The wonderful answer is: all of the above! Their light sweetness and bright citrus flavor make them incredibly versatile. Start your day with them alongside a cup of coffee or fresh fruit for a truly special breakfast. Serve them warm as an elegant accompaniment to your dinner spread, where their subtle sweetness beautifully complements savory dishes. Or, embrace their inherent sweetness and present them as a delightful dessert, perhaps with a scoop of vanilla ice cream or a sprinkle of toasted nuts for added texture. No matter when you choose to enjoy them, these **sweet orange rolls** are guaranteed to be a hit.
Yeast Essentials: Instant Yeast vs. Active Dry Yeast
For home bakers, two types of yeast are most commonly encountered: active dry yeast and instant (or rapid-rise) yeast. Understanding the differences between them can be key to successful baking, especially for recipes like these **fluffy orange rolls**.
- **Active Dry Yeast:** This type of yeast typically comes in granular form and requires “proofing” before use. This means you need to dissolve it in lukewarm water (around 105-115°F or 40-46°C) and let it sit for about 5-10 minutes. This process rehydrates the yeast and activates it, confirming its viability. If it bubbles and becomes foamy, your yeast is active and ready to go! If not, it’s best to discard it and get new yeast.
- **Instant Yeast (Rapid-Rise Yeast):** As its name suggests, instant yeast is designed for convenience. It has finer granules than active dry yeast and can be mixed directly into your dry ingredients without prior proofing. It also tends to cause dough to rise more quickly, hence the “rapid-rise” designation. This makes it a popular choice for busy bakers.
While the two yeasts can often be used interchangeably in recipes (with slight adjustments in quantity and rising times), our recipe for **homemade orange rolls** specifies instant yeast for its ease of use. If you only have active dry yeast, simply proof it first with a portion of the lukewarm milk from the recipe before adding it to the rest of the ingredients. Always check your yeast’s expiration date to ensure optimal rising power!
Orange Rolls: The Full Recipe
⭐
⭐
⭐
⭐
⭐
Perfect Homemade Orange Rolls
Print Recipe
Ingredients
Potato Rolls
- 3/4 Cup Sugar
- 3/4 Cup Butter or shortening, plus extra for buttering the dough, about 1/3 cup extra butter
- 3 Cups Scalded Milk * see note
- 1 Cup Potato Flakes
- 1 Tablespoon Salt
- 1 Tablespoon SAF Instant Yeast or 2 Tablespoons Fleishmans yeast, we use fleishman
- 4 Eggs
- Zest of 1 large Orange
- 7 Cups Flour
Glaze
- 2 Tablespoons Butter, softened
- 2 Cups Powdered Sugar
- 2 teaspoons Orange Zest
- 4 Tablespoons Orange Juice
- Pinch Salt
Instructions
Potato Rolls
-
Mix the sugar, butter or shortening, scalded milk, potato flakes, and salt until lukewarm.3/4 Cup Sugar, 3/4 Cup Butter or shortening, 3 Cups Scalded Milk * see note, 1 Cup Potato Flakes, 1 Tablespoon Salt
-
Add the yeast and let sit for 1 minute and then whisk in the eggs and zest.1 Tablespoon SAF Instant Yeast or 2 Tablespoons Fleishmans yeast, 4 Eggs, Zest of 1 large Orange
-
Add 6 cups of the flour and stir until the dough has come together, but is still soft. You may need to add an extra 1/2 cup, but reserve the last 1/2 cup for heavily flouring the counter and dough when it’s time to roll them out. This is not like a bread dough; it is a slightly sticky dough.7 Cups Flour
-
Let dough rise for one hour in a warm, draft-free place.
-
Gently deflate the dough and divide it into 3 equal parts.
-
Flour your counter generously and lightly dust the top of the dough.
-
Roll out each portion of dough to 1/2″ thick and generously butter half of the rolled dough.
-
Fold the unbuttered half of the dough over the buttered half and gently press to seal. Cut the folded dough into 1″ wide strips.
-
Tie each strip into a loose knot and place them on a greased baking sheet, leaving some space between each roll for expansion.
-
Let the shaped rolls rise for another 1-2 hours, or until they look visibly puffy and light.
-
Bake at 350°F (175°C) until golden brown, which typically takes between 14-20 minutes.
Orange Glaze
-
In a medium bowl, mix together the softened butter, powdered sugar, orange zest, orange juice, and a pinch of salt until a thick, smooth glaze forms.2 Tablespoons Butter, 2 Cups Powdered Sugar, 2 teaspoons Orange Zest, 4 Tablespoons Orange Juice, Pinch Salt
-
Once the rolls have cooled slightly (they should still be warm to the touch), generously glaze them.