
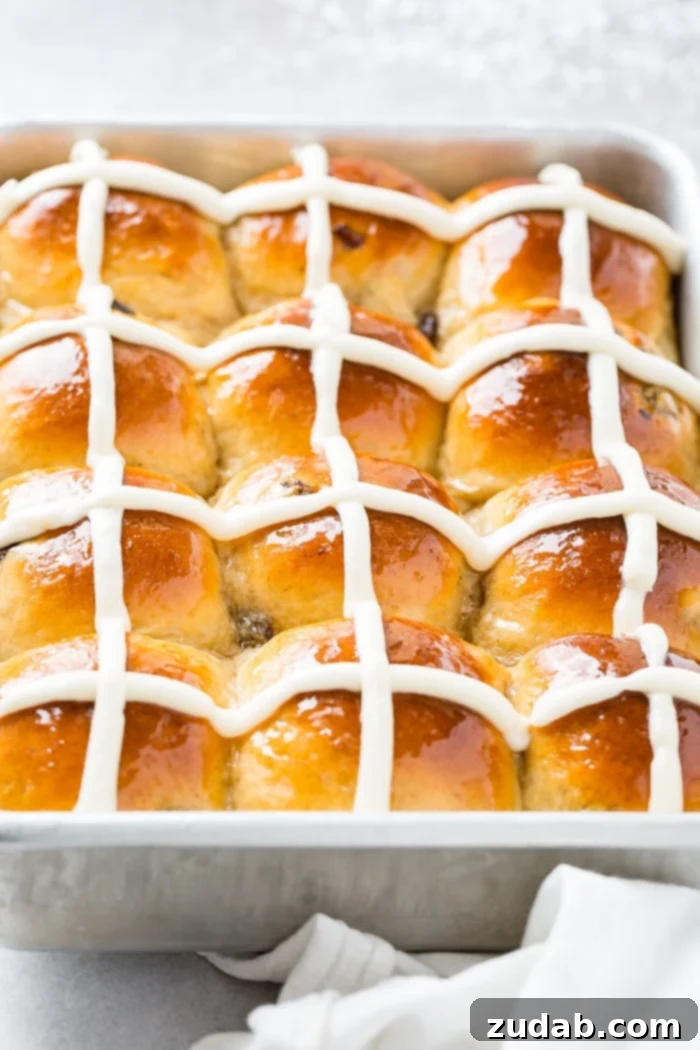
Easter traditions are rich with meaning and flavor, and few treats capture the essence of the season quite like **Hot Cross Buns**. These delightful, softly spiced sweet buns, adorned with their iconic cross, are more than just a seasonal indulgence – they are a culinary cornerstone of Easter celebrations. Forget dry, dense versions; this recipe promises the absolute **softest Hot Cross Buns** you’ve ever experienced, so tender and fragrant they’ll melt in your mouth. Perfect for a festive Easter breakfast, a comforting afternoon snack, or a delightful dessert, these homemade buns are destined to become a cherished part of your family’s holiday menu.
What Are Hot Cross Buns? Exploring Their Rich History and Symbolism
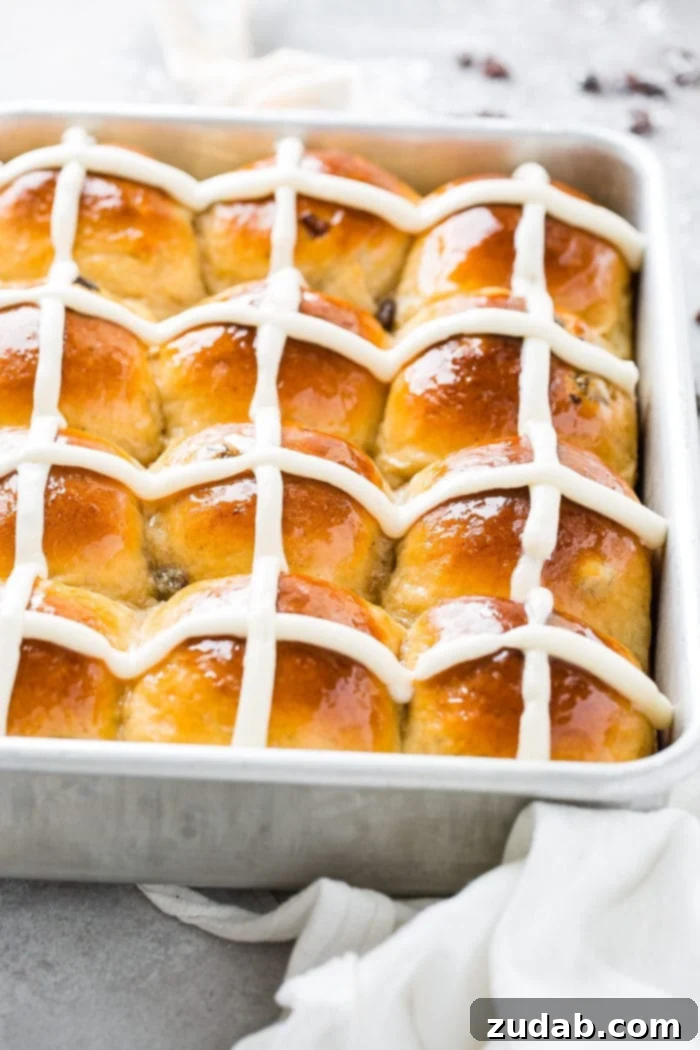
Hot Cross Buns are sweet, spiced yeast buns traditionally baked and eaten on Good Friday in various Christian countries. Their origins are deeply rooted in history, with some food historians tracing similar spiced bread traditions back to ancient pagan rituals celebrating spring and new life. However, it was within the Christian tradition that the Hot Cross Bun truly found its enduring symbolism, becoming inextricably linked with Easter.
Each element of the **traditional Hot Cross Bun** carries significant meaning. The most recognizable feature, the cross piped on top, directly symbolizes the crucifixion of Jesus Christ. Historically, this cross was often etched into the dough before baking, or later, applied with a paste of flour and water, then finished with frosting or icing after baking. The aromatic spices infused within the bun – typically cinnamon, nutmeg, and sometimes allspice or cloves – are said to represent the spices used to embalm Jesus’ body after his death, preparing him for burial. The dried fruits, most commonly raisins or currants, are sometimes interpreted as symbols of the ingredients used to make bitter herbs palatable during the Jewish Passover, which predates and often coincides with Easter.
Beyond their religious significance, Hot Cross Buns hold a nostalgic place in many cultures. The popular nursery rhyme, “Hot cross buns, Hot cross buns, One a penny, Two a penny, Hot cross buns,” highlights their status as a familiar street vendor cry in historical London. This rhyme has echoed through generations, making the bun not just a food item, but a piece of cultural heritage. For many families, including ours, baking **homemade Hot Cross Buns** with children around Easter is a cherished annual ritual. It’s a wonderful opportunity to share these stories and traditions, connecting younger generations to the rich history and symbolism behind their favorite Easter treats. These buns pair perfectly with our incredibly popular Empty Tomb Rolls, another meaningful and delicious Easter bake your kids will adore. Don’t forget to try the apple version too!
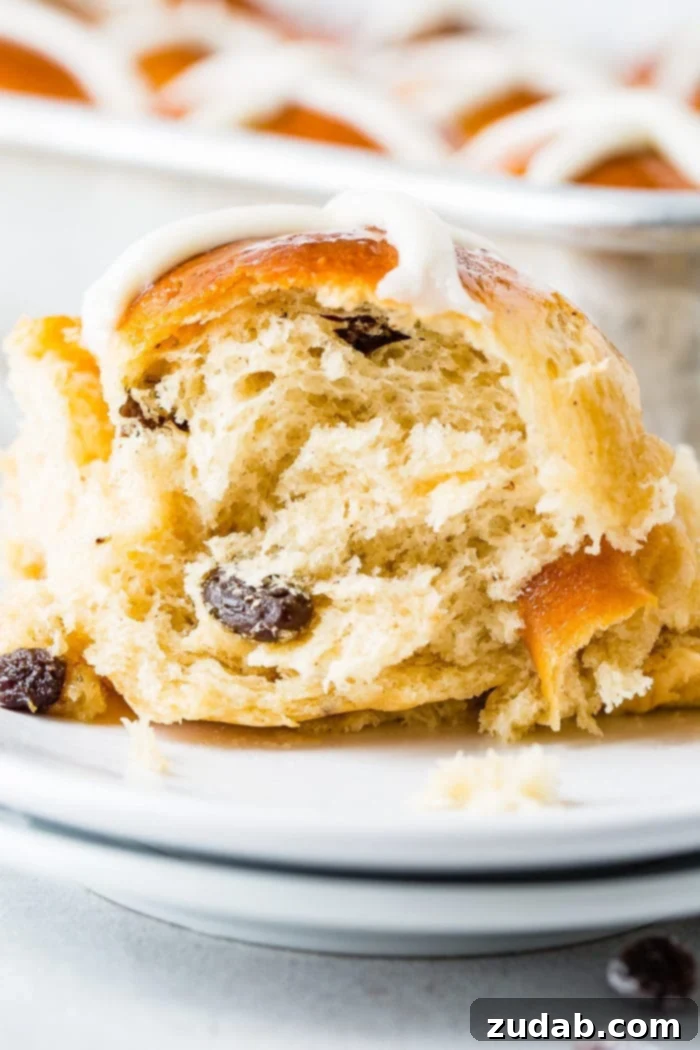
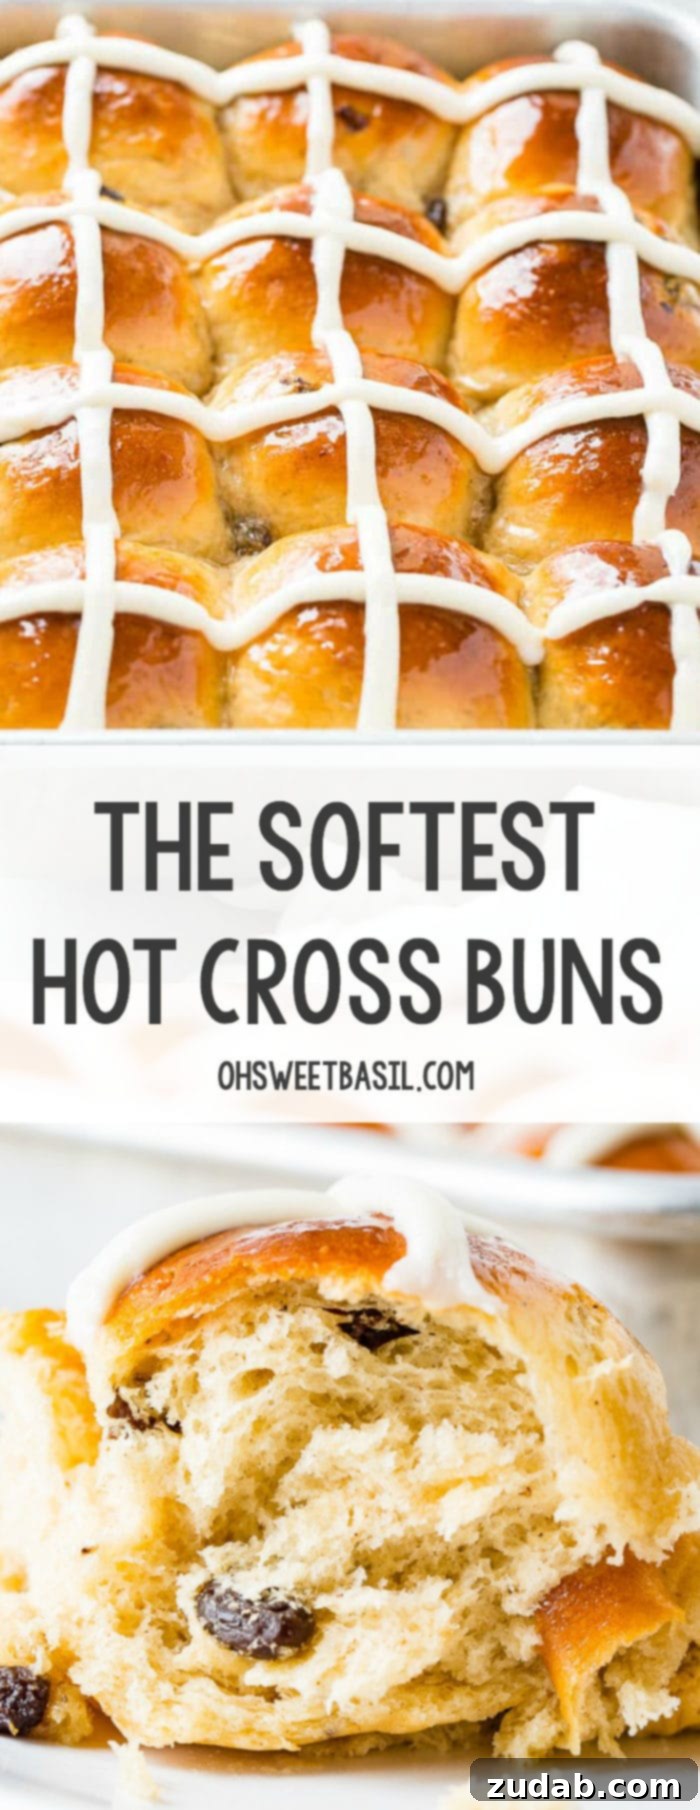
The gentle sweetness from the plump raisins and the delicate shine of the sugar syrup glaze elevate these soft buns beyond mere bread. When eaten warm, they offer a truly comforting and delightful experience, a perfect blend of tradition and deliciousness. This recipe ensures your **Easter Hot Cross Buns** are not just symbolic, but also exquisitely soft, light, and incredibly flavorful, making them irresistible to all.
Essential Ingredients for The Softest Hot Cross Buns
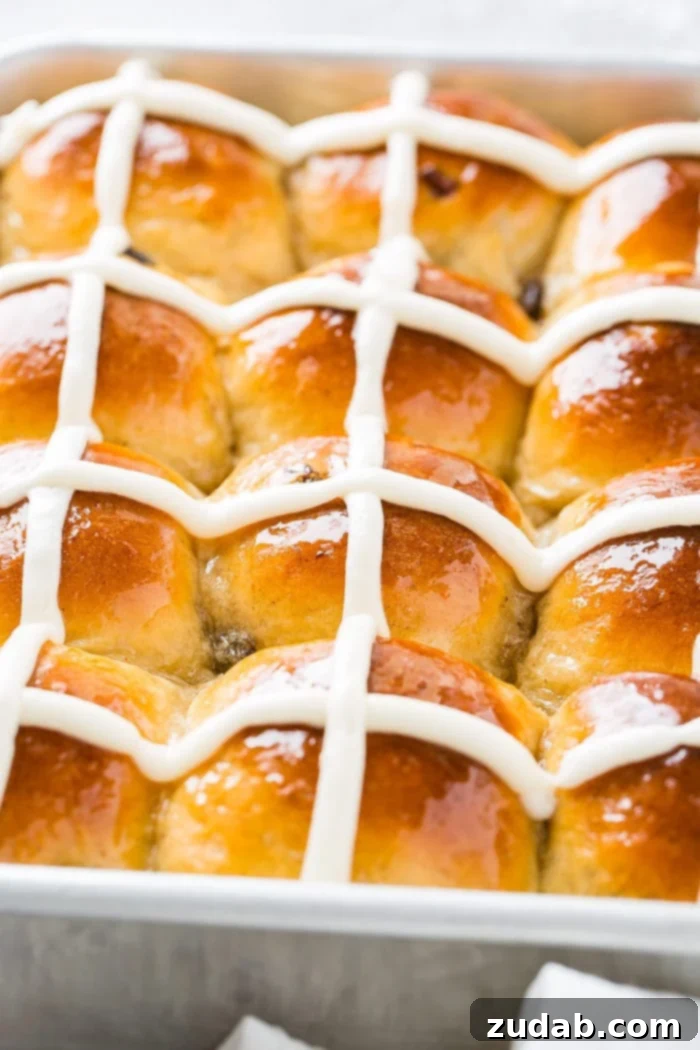
Creating these remarkably soft and flavorful Easter Hot Cross Buns involves three main components: the tender, spiced dough; a shimmering sugar syrup glaze; and a creamy, delicate cream cheese icing for the cross. Each ingredient plays a crucial role in achieving the perfect texture and taste that makes this recipe stand out.
Here’s a detailed look at what you’ll need, and why each ingredient is important for crafting the **best homemade Hot Cross Buns**:
- Whole Milk: The foundation of our incredibly soft dough. Whole milk provides richness and fat, contributing significantly to the tender crumb and delicate flavor of the buns. Scalding the milk, as instructed in the recipe, is a vital step that further enhances the dough’s texture.
- Granulated Sugar: Sweetens the dough and provides food for the yeast, helping it activate and create a beautiful rise. It also contributes to the golden-brown crust during baking and is essential for the sweet syrup glaze.
- Instant Yeast: Our preferred leavening agent for consistent and reliable results. Instant yeast is finely ground and doesn’t require proofing beforehand, making the baking process quicker and more straightforward. It ensures your buns rise beautifully, resulting in a light and airy texture.
- All-Purpose Flour: The primary structural component of the buns. Using good quality all-purpose flour ensures the right balance of gluten development for a soft yet chewy texture. Measure accurately for best results!
- Nutmeg and Cinnamon: These classic spices are central to the signature aroma and flavor of Hot Cross Buns. They evoke warmth and tradition, making each bite a truly festive experience. Feel free to adjust the quantities or add a pinch of allspice or cloves for an extra layer of complexity.
- Salt: A crucial ingredient that balances the sweetness, enhances flavor, and regulates yeast activity. Don’t skip it!
- Eggs: Add richness, color, and structure to the dough. The protein in eggs helps create a tender crumb, while the yolks contribute to a beautiful golden hue.
- Unsalted Butter: Softened butter enriches the dough, making it incredibly tender and moist. Using unsalted butter allows you to control the overall salt content of the recipe.
- Raisins: The traditional dried fruit for Hot Cross Buns, providing bursts of natural sweetness and chewiness. Boiling them with baking soda beforehand plumps them up, ensuring they remain soft and juicy within the baked bun.
- Water: Used to plump the raisins and also for the simple sugar syrup, which gives the baked buns their characteristic shiny, slightly sticky finish.
- Baking Soda: A small amount is used when boiling the raisins to help them plump up more effectively, neutralizing some acidity and allowing them to absorb water better.
- Powdered Sugar: The base for our smooth and pipeable cream cheese icing, essential for forming the iconic white crosses on top of the buns.
- Cream Cheese: Adds a delightful tang and creamy texture to the icing, complementing the spiced buns beautifully. Ensure it’s softened for a smooth consistency.
- Vanilla Extract: Enhances the sweetness and depth of flavor in the cream cheese icing.
PRO TIP for Perfect Bakes: Precision is key in baking, especially when working with yeast and temperature-sensitive ingredients. An instant-read thermometer, such as a Thermapen ONE, is an invaluable tool. It allows you to accurately check the temperature of the scalded milk (critical for yeast activation) and the internal temperature of your baked buns (ensuring they are perfectly cooked through at 190°F / 88°C). I use mine constantly for reliable baking and cooking!
Crafting Perfection: A Step-by-Step Guide to Making Hot Cross Buns
Baking these delightful Hot Cross Buns is a rewarding process, and while it involves several steps, none are overly complicated. The journey begins with scalding milk, a technique that might sound intimidating but is incredibly simple and crucial for achieving the buns’ signature softness. Let’s walk through each stage to create these pillowy, spiced masterpieces.
Make the Dough:
- Scald the Milk: Pour the whole milk into a small saucepan and place it over medium-low heat. Stir frequently to prevent scorching on the bottom. You’ll know it’s scalded when you see steam rising from the milk and tiny bubbles forming around the edges of the pan. A thin skin may form on top; simply remove it or stir it back in. Immediately remove the pan from the heat.
- Cool the Milk: Transfer the scalded milk to a bowl or a glass measuring cup. Allow it to cool to approximately 105-115°F (41-46°C). This temperature is vital for activating the yeast without killing it. I often place the bowl in the fridge for a few minutes to speed up cooling, but be careful not to let it get cold. Use your Thermapen ONE to ensure accuracy.
- Plump the Raisins: While the milk cools, combine the water, baking soda, and raisins in a separate small saucepan. Bring to a gentle boil over medium heat and let them simmer for about 2 minutes. The raisins should become visibly plump and juicy. Drain them thoroughly in a strainer, then give them a quick, light rinse under cool water to stop the cooking process and cool them slightly. Set aside.
- Activate the Yeast: In a small bowl, combine the lukewarm scalded milk with the granulated sugar and instant yeast. Stir gently to combine, then let the mixture rest on your counter for 5-10 minutes. It should become foamy on the surface, indicating the yeast is active and ready to work its magic.
- Combine Dry Ingredients: In the bowl of a stand mixer (or a large mixing bowl if kneading by hand), add the all-purpose flour, salt, nutmeg, and cinnamon. Whisk these dry ingredients together briefly to ensure they are well combined.
- Mix Wet into Dry: To the foamy yeast mixture, add the eggs and softened unsalted butter. Stir until the butter is mostly melted and incorporated. Pour this wet mixture over the dry ingredients in the mixer bowl.
- Knead the Dough: Using the dough hook attachment on your stand mixer, mix on medium speed for about 5-7 minutes. The dough will be quite sticky initially, but as it kneads, it should start to pull away from the sides of the bowl. If it remains excessively sticky after 5 minutes, you can gradually add up to an additional ¼ cup of flour, one tablespoon at a time, until it reaches a manageable consistency – still soft, but less adhesive. If kneading by hand, work the dough on a lightly floured surface until it becomes smooth and elastic, about 10-15 minutes.
- Incorporate Raisins: Add the plumped and drained raisins to the dough and continue mixing (or kneading) for another minute, just until they are evenly distributed throughout the dough.
Let the Dough Rise:
- First Rise: Lightly oil a large bowl. Using a bench scraper, transfer the sticky dough into the oiled bowl, turning it once to coat all sides with oil. Cover the bowl tightly with plastic wrap or a clean kitchen towel. Place the bowl in a warm, draft-free spot and let the dough rise for approximately 1.5 to 2 hours, or until it has doubled in size. This first rise is critical for flavor development and a light texture.
Shape and Bake the Buns:
- Prepare Baking Pan: Preheat your oven to 375°F (190°C). Line a 9×13-inch baking pan with parchment paper, leaving an overhang on the sides for easy removal. Lightly spray the parchment paper with nonstick cooking spray.
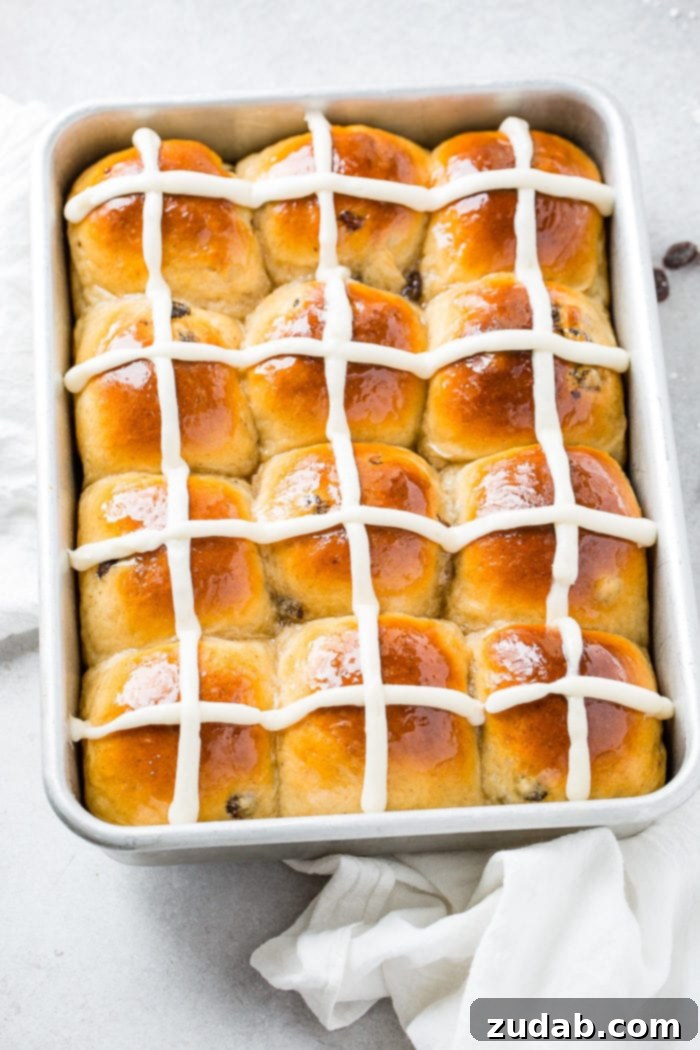
- Shape the Buns: Gently punch down the risen dough to release the air. Transfer it to a lightly floured surface. Divide the dough into 12 equal pieces. For consistent size, you can weigh them. Roll each piece into a smooth, tight ball. Arrange the dough balls evenly in the prepared 9×13-inch pan.
- Second Rise: Cover the pan loosely with a clean kitchen towel and let the shaped buns rise again in a warm place for another 30-45 minutes, or until they look visibly puffy and have nearly doubled in size. This second rise ensures a light and airy texture in the final product.
- Bake the Buns: Bake for 20 to 25 minutes, or until the buns are golden brown on top and reach an internal temperature of 190°F (88°C). Again, use your Thermapen ONE for precise temperature checking.
- Prepare Sugar Syrup: While the buns are baking, make the sugar syrup. In a small saucepan, combine ¼ cup water and ¼ cup granulated sugar. Heat over medium heat, stirring constantly until the sugar dissolves completely. Bring the syrup to a gentle boil and continue to boil for about 1 minute, or until it slightly thickens. Remove from heat and set aside.
- Glaze and Cool: Once baked, remove the buns from the oven and let them rest in the pan for 5 minutes. While still warm, generously brush the tops of the buns with the prepared sugar syrup. This adds shine, sweetness, and helps keep them moist. Let the buns cool completely on a wire rack before icing.
For the Icing:
- Make the Cream Cheese Icing: In a medium bowl, whisk together the powdered sugar, softened cream cheese (2 oz plus 2 Tablespoons), 1 tablespoon softened unsalted butter, 1 teaspoon vanilla extract, and ½ tablespoon water until smooth and creamy. The icing should be thick enough to hold its shape when piped. If it’s too thick, add a tiny bit more water; if too thin, add more powdered sugar.
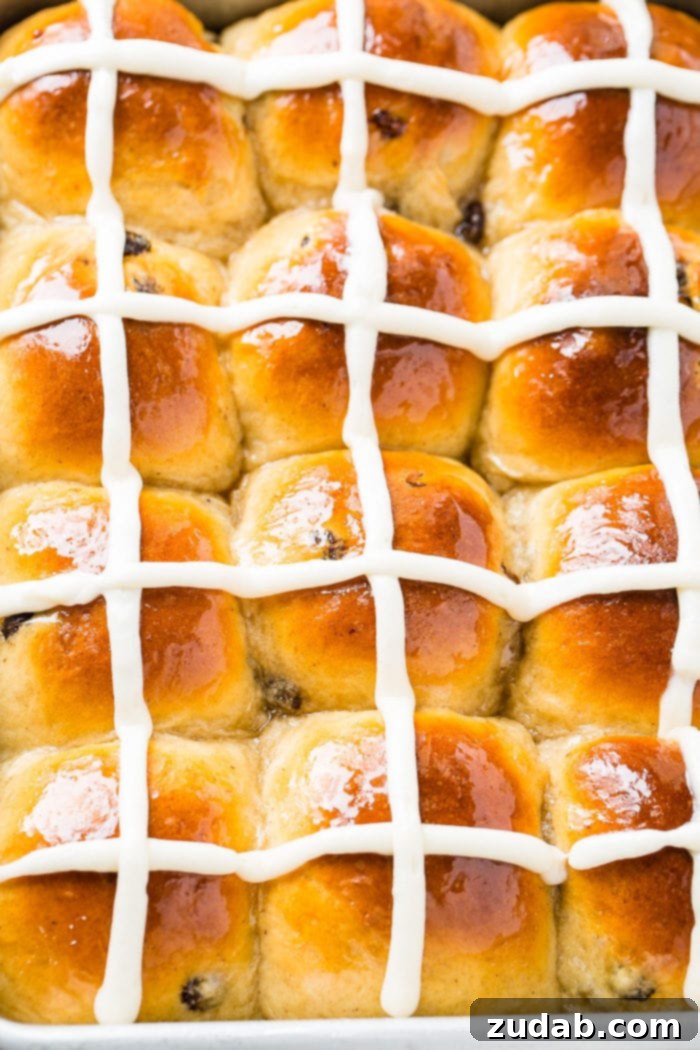
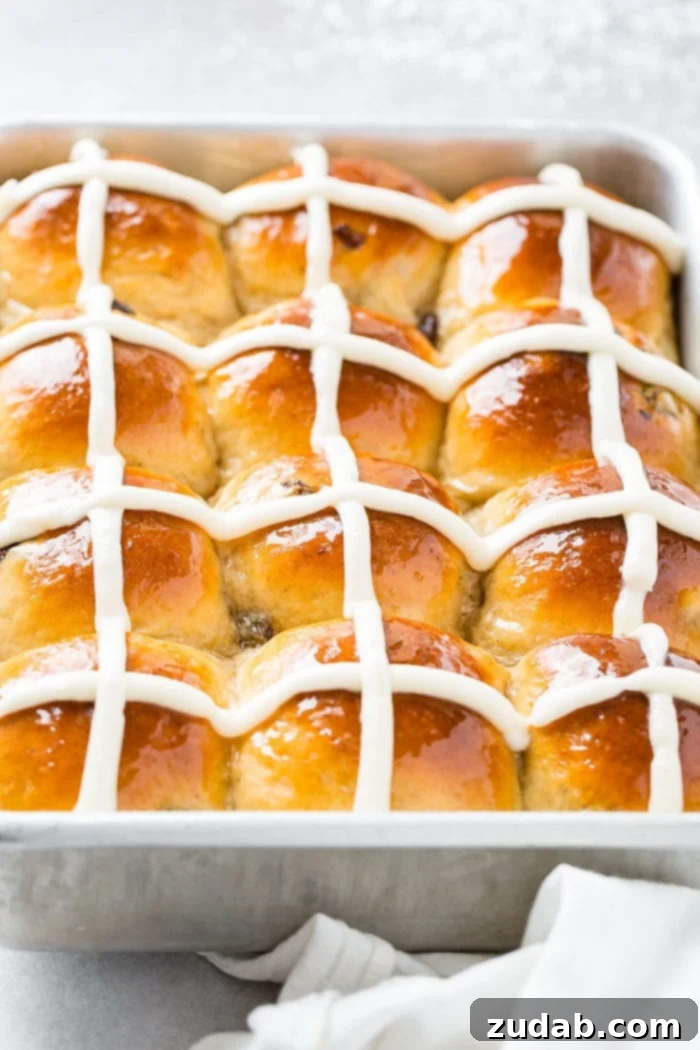
- Pipe the Crosses: Spoon the icing into a piping bag fitted with a small round tip (or a Ziploc bag with a corner snipped off). Once the buns are completely cooled, pipe a cross down the center of each row, then across each row, forming a distinct cross on top of each bun.
- Serve: These **softest Hot Cross Buns** are truly best enjoyed warm!
Do I Have to Scald the Milk for Hot Cross Buns?
In short, yes, scalding the milk is a traditional and highly recommended step when making yeast breads like Hot Cross Buns, especially for achieving that desirable light and fluffy texture. But why is it necessary? Historically, scalding milk was crucial because raw milk contained enzymes that could interfere with gluten development and inhibit yeast activity, resulting in dense or poorly risen bread. Heating the milk to a high temperature (just below boiling) denatures these problematic enzymes, neutralizing their effects.
Even with pasteurized milk, which has already undergone heat treatment, scalding still offers benefits. The heating process changes the protein structure in the milk, which helps to create a more stable gluten network in the dough. This stable network allows the bread to rise higher and maintain a more open, tender crumb. Additionally, using warm, scalded milk aids in efficiently dissolving sugar and activating the yeast, providing an optimal environment for fermentation. The result is a bread that is not only lighter and fluffier but also often boasts an extended shelf life and improved flavor profile. So, while it adds a few extra minutes to the prep, scalding milk is a small effort that yields significant rewards in the quality of your homemade Hot Cross Buns.
Understanding Yeast: Choosing the Best for Your Hot Cross Buns
Many home bakers find yeast a daunting ingredient, but there’s no need to fear! Yeast is a living organism, a microscopic fungus, that consumes sugars and produces carbon dioxide and alcohol, which causes dough to rise and develops complex flavors. The world of baked goods, from artisan loaves to our beloved Hot Cross Buns, wouldn’t be the same without it. However, the variety of yeast types can be confusing: active dry, instant, rapid rise, bread machine yeast… which one is right for you?
For most home baking, including this **Hot Cross Buns recipe**, the two most common types are active dry yeast and instant yeast. The key difference lies in how they are processed and how they are used in recipes.
- Active Dry Yeast: This type comes in granular form and requires “proofing” before being added to dry ingredients. This means dissolving it in a warm liquid (usually water or milk, typically around 105-115°F / 41-46°C) with a pinch of sugar for 5-10 minutes. If it becomes foamy, it’s active and ready to use. If not, your yeast might be old or dead, and it’s best to start with a fresh batch.
- Instant Yeast (also known as Rapid Rise or Bread Machine Yeast): This yeast is processed into finer granules and can be added directly to your dry ingredients without prior proofing. It’s designed to activate quickly and provides a faster rise time. Because of its convenience and reliability, instant yeast is often preferred by many bakers, especially for recipes like these Hot Cross Buns where you want a smooth, efficient process.
For this **soft Hot Cross Buns recipe**, we almost always recommend and use instant yeast, and our preferred brand is Red Star. The process of adding it to the lukewarm scalded milk with a little sugar, as outlined in the recipe, allows it to activate beautifully and quickly, ensuring your dough rises perfectly. Don’t let yeast intimidate you; once you understand its role, it opens up a world of delicious baking possibilities! For a comprehensive guide to all things yeast, check out my detailed post on yeast types and usage.
Can I Prepare Hot Cross Buns in Advance? Make-Ahead Tips
Yes, absolutely! Hot Cross Buns are a fantastic make-ahead treat, which is incredibly helpful when you’re preparing for a busy Easter holiday. Preparing them in advance allows you to enjoy freshly baked buns without the early morning rush. There are a couple of ways you can prep this recipe ahead of time:
- Overnight Refrigeration (Unbaked Dough): You can prepare the dough through the step where you shape it into 12 individual balls and place them into your greased 9×13-inch baking pan. Instead of letting them undergo their second rise at room temperature, cover the pan tightly with plastic wrap and transfer it to the refrigerator overnight. The cold temperature will significantly slow down the yeast activity, allowing the buns to slowly proof over several hours. The next day, simply remove the pan from the fridge and let the buns come to room temperature and complete their final rise. This usually takes about 30 to 60 minutes, depending on the warmth of your kitchen. Once they are puffy and ready, bake them as usual according to the recipe instructions. This method ensures you have freshly baked, warm Hot Cross Buns ready for your Easter breakfast or brunch with minimal effort on the day of.
- Freezing Unbaked Dough: For an even longer head start, you can freeze the shaped, unbaked buns. After forming the 12 dough balls and placing them in the greased pan, instead of letting them rise, cover the pan tightly with plastic wrap and freeze until solid. Once frozen, you can transfer the individual buns to a freezer-safe bag or airtight container for up to 2-3 weeks. When you’re ready to bake, arrange the frozen buns in a greased baking pan, cover them, and let them thaw and rise at room temperature (this might take 3-5 hours or even overnight in the fridge) before baking as usual.
- Freezing Baked Buns: Baked Hot Cross Buns also freeze beautifully. Once completely cooled (and before icing, if desired), wrap them individually in plastic wrap and then place them in a freezer-safe bag or container for up to 1-2 months. To reheat, thaw them at room temperature, then warm them in a moderate oven (around 300°F / 150°C) for 10-15 minutes, or until heated through.
These make-ahead options offer excellent flexibility, allowing you to enjoy homemade Hot Cross Buns with ease, even during the busiest holiday seasons.
Top Tips for Baking Truly Amazing Easter Hot Cross Buns
Achieving the perfect batch of **soft, flavorful Hot Cross Buns** is incredibly satisfying. Here are some key tips and tricks to ensure your Easter baking is a resounding success:
- Always Scald the Milk: This is arguably the most crucial step for achieving ultra-soft bread. Scalding milk changes its protein structure, preventing it from interfering with gluten development and yeast activity. Even with pasteurized milk, this step helps create a more tender, airy crumb and better overall rise. Don’t skip it – it makes all the difference!
- Accurate Temperature Control for Yeast: Yeast is a living organism that thrives within a specific temperature range. Ensure your scalded milk has cooled to 105-115°F (41-46°C) before adding the yeast. Too hot, and you’ll kill the yeast; too cold, and it won’t activate properly. An instant-read thermometer is your best friend here.
- Don’t Fear the Sticky Dough: The dough for these Hot Cross Buns is designed to be quite sticky – this stickiness contributes to the incredibly soft and moist final product. Resist the urge to add too much extra flour during kneading. A well-oiled bowl for rising and a bench scraper for handling will be your allies in managing this wonderfully soft dough. Only add flour in small increments (1 tablespoon at a time) if the dough is impossible to handle after several minutes of kneading.
- Give Your Dough Time to Rise: Yeast breads require patience. Allow your dough to complete both its first and second rises in a warm, draft-free environment. Rushing the rising process can result in dense buns. Look for the dough to visibly double in size. If your kitchen is cool, consider placing the bowl in a slightly warm oven (turned off, with the light on) or near a sunny window.
- Achieve the Perfect Internal Temperature: While a golden-brown crust is a good indicator, the most reliable way to know if your buns are fully baked is to check their internal temperature. They should reach 190°F (88°C) when tested with an instant-read thermometer. This ensures they are cooked through without being dry.
- Brush with Syrup While Warm: The simple sugar syrup glaze should be brushed onto the buns shortly after they come out of the oven. The warmth of the buns helps them absorb the syrup, adding moisture, sweetness, and that characteristic glossy finish.
- Cool Completely Before Icing: For neat, defined crosses, allow the buns to cool completely before piping on the cream cheese icing. If the buns are warm, the icing will melt and spread, blurring the cross shape.
- Storage and Reheating: These **homemade Hot Cross Buns** are truly at their peak when enjoyed warm, fresh from the oven. Leftovers are still delicious the next day. Store them in an airtight container at room temperature for up to 2-3 days. To reheat, wrap them in foil or place them in a plain paper bag (sprinkled lightly with water) and warm them in a preheated oven at 300°F (150°C) for about 5-10 minutes. This will revive their softness and warmth beautifully.
- Experiment with Variations: While traditional, Hot Cross Buns can be customized! Consider adding citrus zest (orange or lemon) to the dough for a bright flavor, or substituting some of the raisins with other dried fruits like cranberries, chopped apricots, or candied peel. For a richer flavor, you could even try a hint of cardamom or allspice in addition to cinnamon and nutmeg.
By following these tips, you’re well on your way to baking the **best Hot Cross Buns** that will impress everyone at your Easter table!
More EASTER RECIPES to Complete Your Holiday Feast:
No Easter celebration is complete without an array of delicious dishes to share with family and friends. Beyond these amazing Hot Cross Buns, we have a collection of beloved recipes perfect for your holiday spread. From savory mains to delightful sides and more sweet treats, these recipes are tried-and-true family favorites:
- Best Deviled Eggs: A classic appetizer that’s always a crowd-pleaser.
- Garlic Honey Mustard Ham: A succulent main course with a perfect balance of sweet and savory.
- Empty Tomb Rolls: Another symbolic and fun Easter bake for the kids, teaching about the true meaning of the holiday.
- Easy Ham Dipping Sauces: Elevate your ham with these simple yet flavorful sauces.
- Best Potato Rolls: Soft, fluffy rolls perfect for soaking up gravies and juices.
- World’s Best Brown Sugar Ham: A truly unforgettable ham glazed to perfection.
- Apple Empty Tomb Rolls: A delicious fruity twist on the popular Easter rolls.
- Texas Roadhouse Loaded Sweet Potato: A hearty and flavorful side dish inspired by a restaurant favorite.
- Cheesy Potato Casserole: Comfort food at its finest, rich with cheese and potatoes.
- ALL OF OUR EASTER RECIPES!: Explore our full collection for even more holiday inspiration.
The Softest Hot Cross Buns: Recipe Card
Here’s a detailed recipe to make your own incredibly soft and delicious Hot Cross Buns at home. This recipe yields 12 servings.
Ingredients
For the Buns:
- 1 ½ Cups Whole Milk
- 1 ½ Cups Water
- 1 teaspoon Baking Soda
- 1 Cup Raisins
- ½ Cup Granulated Sugar
- 1 Tablespoon Instant Yeast
- 4 ¼ Cups All-Purpose Flour
- ½ teaspoon Salt
- ½ teaspoon Nutmeg
- ½ teaspoon Cinnamon
- 2 Large Eggs
- 4 Tablespoons Unsalted Butter, softened
For the Sugar Syrup:
- ¼ Cup Water
- ¼ Cup Granulated Sugar
For the Cream Cheese Icing:
- ¾ Cup Powdered Sugar
- 2 Ounces Cream Cheese, plus 2 Tablespoons, softened
- 1 Tablespoon Unsalted Butter, softened
- 1 teaspoon Vanilla Extract
- ½ Tablespoon Water
Instructions
Make the Dough:
- In a small saucepan over medium-low heat, scald the milk by gently warming it until it becomes frothy around the edges and steam appears. Remove from heat.
- Pour the milk into a bowl or glass measuring cup and allow it to cool to warm (105-115°F / 41-46°C).
- Meanwhile, heat 1 ½ cups water, 1 teaspoon baking soda, and 1 cup raisins in a small saucepan over medium heat until boiling. Boil gently for 2 minutes until raisins are plump. Drain in a strainer and rinse lightly under cool water. Set aside to cool.
- In a small bowl, combine the lukewarm milk, ½ cup granulated sugar, and 1 tablespoon instant yeast. Stir gently and let rest until foamy (about 5-10 minutes).
- In the bowl of your mixer, add 4 cups of flour, ½ teaspoon salt, ½ teaspoon nutmeg, and ½ teaspoon cinnamon. Mix until combined.
- Add the 2 large eggs and 4 tablespoons softened butter to the yeast mixture and stir until butter is mostly melted.
- Pour the yeast mixture over the flour mixture. Using the dough hook attachment, mix for about 5-7 minutes at medium speed. If the mixture is still too sticky after 5 minutes, add up to ¼ cup more flour, 1 tablespoon at a time.
- Add the plumped raisins and continue mixing for another minute until evenly incorporated.
Let the Dough Rise:
- In a large, lightly oiled bowl, place the dough, rolling it around to coat with oil. The dough is sticky, a bench scraper is helpful here.
- Cover the bowl with plastic wrap or a clean towel. Let the dough rise in a warm, draft-free place for about 1.5 to 2 hours, or until doubled in size.
Shape and Bake the Buns:
- Preheat oven to 375°F (190°C). Line a 9×13-inch pan with parchment paper, then spray with nonstick spray.
- Gently punch down the dough. Cut it into 12 equal pieces and roll each one into a smooth ball. Place the rolls in the prepared pan.
- Cover the pan with a clean towel and let them rise once more for another 30-45 minutes until doubled in size.
- Bake for about 20 to 25 minutes or until golden brown and the internal temperature reaches 190°F (88°C) using a ThermaPen ONE.
- While baking, make the sugar syrup: In a small saucepan, heat ¼ cup water with ¼ cup granulated sugar over medium heat, stirring until sugar is dissolved. Bring to a boil and boil for about 1 minute until slightly thickened. Set aside.
- Remove the rolls from the oven and let them rest for 5 minutes.
- Brush the tops generously with the sugar syrup and let them cool completely on a wire rack (about 5-10 minutes) before icing.
For the Icing:
- Whisk together ¾ cup powdered sugar, 2 ounces cream cheese (plus 2 tablespoons), 1 tablespoon softened butter, 1 teaspoon vanilla extract, and ½ tablespoon water until smooth.
- Spoon the icing into a piping bag fitted with a small round tip (or a Ziploc bag with a corner snipped off). Refrigerate briefly if the icing is too soft.
- Once the buns are completely cooled, pipe a cross down the center of each row, and then across each row, creating a cross on each bun. Serve warm!
Recipe Notes
- For best results, the milk should be 105-115°F (41-46°C) when added to the yeast.
- The best way to reheat Hot Cross Buns is to place them in a plain paper bag, sprinkle the bag lightly with water, and place in a hot oven (around 300°F / 150°C) for 3 to 5 minutes before serving.
Nutrition
- Serving: 1 bun
- Calories: 569kcal
- Carbohydrates: 111g
- Protein: 12g
- Fat: 9g
- Saturated Fat: 5g
- Cholesterol: 52mg
- Sodium: 279mg
- Potassium: 313mg
- Fiber: 4g
- Sugar: 31g
- Vitamin A: 302IU
- Vitamin C: 1mg
- Calcium: 63mg
- Iron: 5mg
Nutrition information is automatically calculated, so should only be used as an approximation.
REMEMBER TO SUBSCRIBE TO our FREE Oh Sweet Basil NEWSLETTER AND RECEIVE EASY RECIPES DELIVERED INTO YOUR INBOX EVERY DAY!
When you try a recipe, please use the hashtag #ohsweetbasil on INSTAGRAM for a chance to be featured in our stories! FOLLOW OH, SWEET BASIL ON FACEBOOK | INSTAGRAM | PINTEREST | TWITTER FOR ALL OF OUR LATEST CONTENT, RECIPES AND STORIES.