
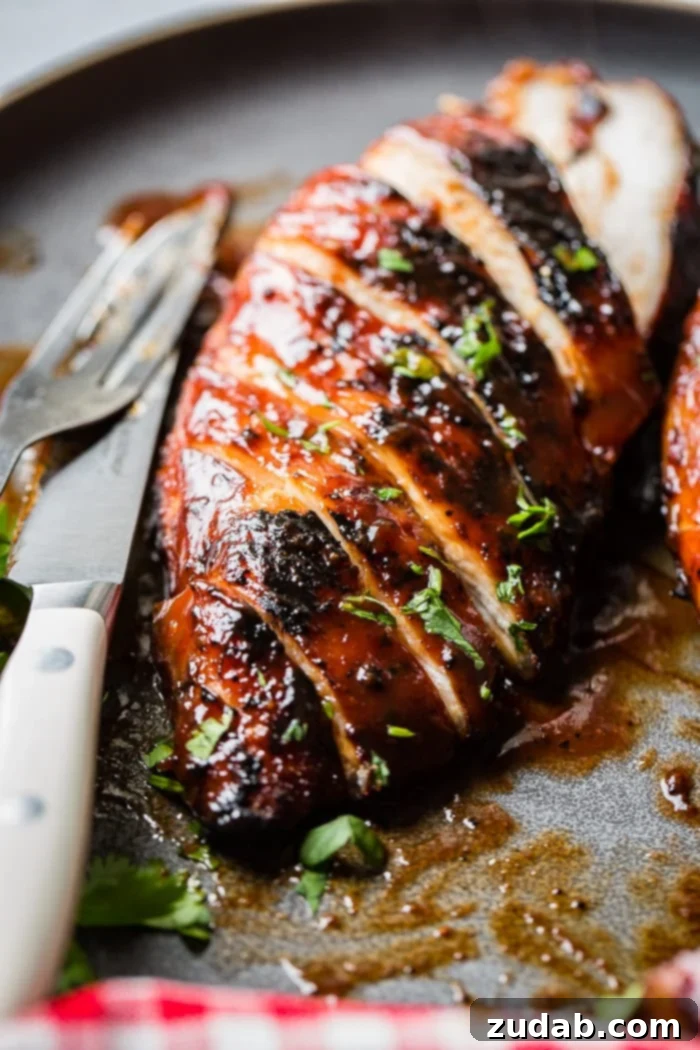
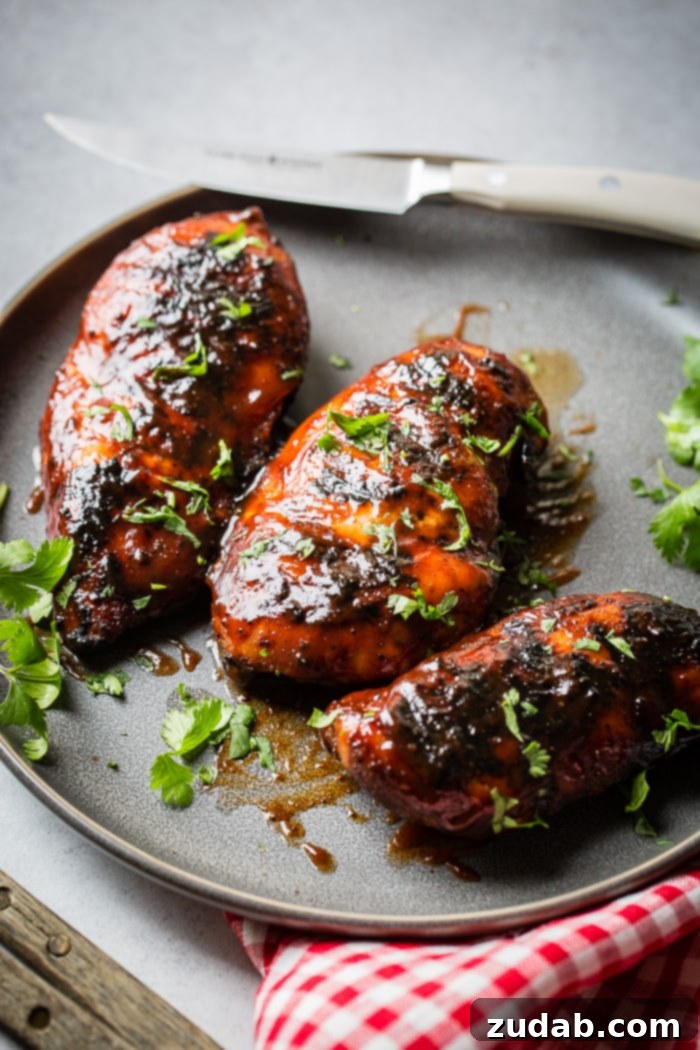
Unlock the secrets to incredibly flavorful and effortlessly delicious BBQ chicken! This recipe combines the smoky depth of a homemade dry rub with the tangy sweetness of your favorite barbecue sauce, delivering a taste sensation that’s perfect for any occasion. Whether you’re planning a casual backyard gathering, a quick weeknight dinner, or simply craving that irresistible grilled chicken taste, this recipe promises juicy, tender chicken every single time. It pairs beautifully with classic sides like baked beans, fresh grilled vegetables, or a crisp, simple salad, making it a versatile staple for your culinary repertoire.
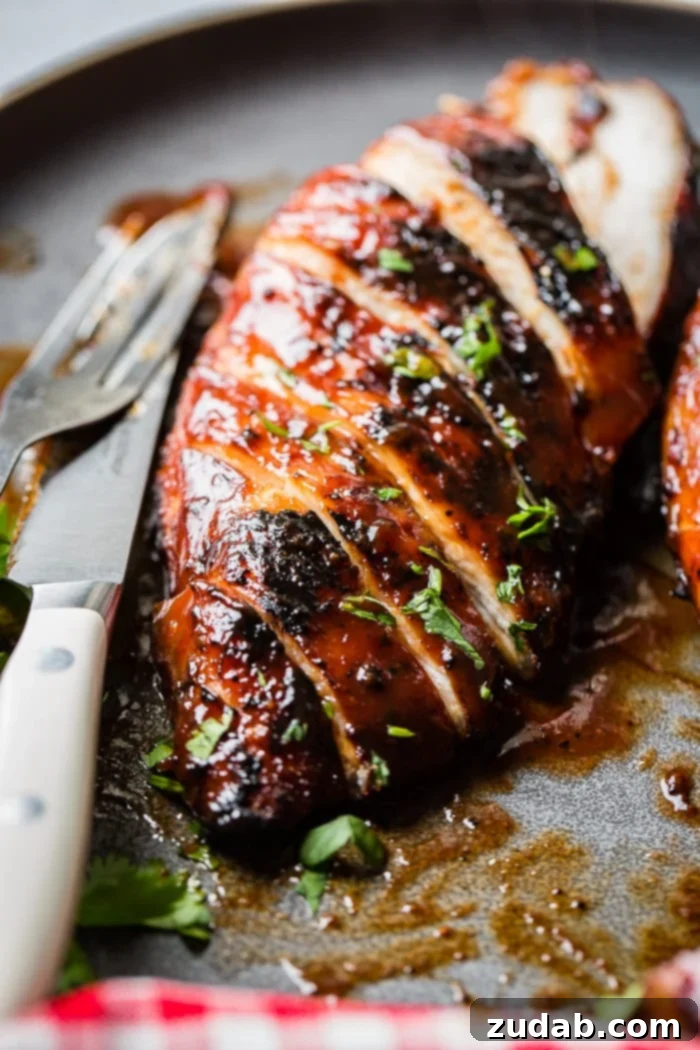
Mastering the Art of Flavorful Grilled BBQ Chicken
What makes a truly exceptional grilled BBQ chicken recipe? It’s a question many home cooks ponder, often resulting in chicken that’s good, but not *great*. We’re here to reveal a simple yet transformative technique that elevates ordinary grilled chicken to extraordinary. The secret isn’t complicated, yet it’s often overlooked by most – and it starts long before your chicken ever hits the grill.
Forget the notion of simply drenching raw chicken in BBQ sauce and hoping for the best. While a sauce marinade might seem appealing, it rarely allows the flavors to truly penetrate the meat. Our game-changing trick ensures deep, smoky flavor from the inside out, guaranteeing tender and succulent results.
Each year, as summer arrives, we find ourselves hosting numerous BBQ potlucks. The constant debate over what to serve is a familiar one. While a perfectly cooked burger is always a crowd-pleaser (and you absolutely must try our Homemade Hamburger recipe for a truly life-changing experience), sometimes you crave something different. For those moments when you want an easy, delicious alternative for a “Bring Your Own Meat” (BYOM) potluck, but plain BBQ chicken just won’t cut it, this recipe is your answer.
Traditionally, many find plain BBQ chicken lacking in robust flavor. Our solution? A potent BBQ dry rub, generously applied to the chicken breasts with a drizzle of olive oil to help it adhere. Placed in a sealed bag and left to marinate in the refrigerator for several hours (ideally up to 24 hours), this dry rub works its magic, infusing the chicken with an incredible depth of flavor that a mere sauce could never achieve. It’s a simple step that makes all the difference, creating a chicken dish so flavorful, you’ll wonder how you ever grilled without it.
Essential Ingredients for Your Ultimate Grilled BBQ Chicken
Crafting truly delicious grilled BBQ chicken breasts requires a few key components. Here’s a breakdown of what you’ll need to gather:
- Homemade BBQ Chicken Dry Rub: This is the cornerstone of our recipe, providing a complex, smoky, and savory base flavor that permeates the chicken. We highly recommend making your own for unparalleled taste.
- Olive Oil: A light drizzle of olive oil helps the dry rub stick to the chicken, creating a flavorful crust and contributing to that beautiful golden-brown char on the grill.
- Skinless Chicken Breasts: Lean and quick-cooking, chicken breasts are ideal for this recipe. You can also adapt this method for thighs or other cuts, adjusting cooking times accordingly.
- BBQ Sauce: The final touch! Whether you opt for our rich homemade BBQ sauce or your favorite high-quality store-bought brand, the sauce provides that classic sticky, sweet, and tangy finish.
Can I Use a Store-Bought BBQ Rub for This Recipe?
Absolutely, you can certainly use your preferred store-bought seasoning blend for BBQ chicken. However, after extensive testing and refinement, we genuinely believe we’ve perfected our Smoky BBQ Rub. We love it so much, we keep a large batch stored in a mason jar year-round, ready for any grilling adventure. While any rub will add flavor, our signature blend delivers an exceptional smoky profile and balanced seasoning that truly elevates the chicken. We encourage you to try it; you might just find it becomes your new year-round favorite!
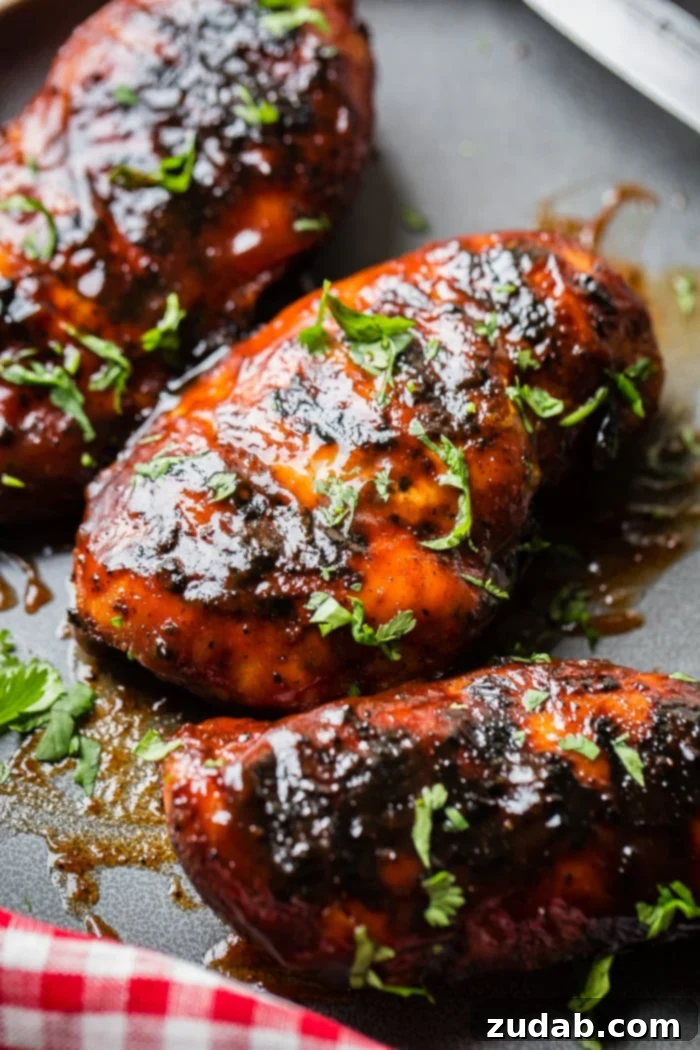
Your Guide to Making Irresistible BBQ Chicken
Creating mouth-watering BBQ sauce chicken is simpler than you might think, especially when you follow our proven method. We’ve outlined detailed, step-by-step instructions in the recipe card below, but here’s an overview of the fundamental process:
- The Essential Pre-Grill Prep: Begin by combining our renowned Smoky BBQ Rub, a generous drizzle of olive oil, and the skinless chicken breasts in a durable Ziploc bag. Ensure each piece of chicken is thoroughly coated with the rub by massaging the bag. Then, place the sealed bag in the refrigerator, allowing the flavors to meld and deepen for a minimum of a few hours, or ideally, up to 24 hours. This dry marination is the key to moist, flavorful chicken.
- Bringing to Temperature and Preheating the Grill: Approximately 5-10 minutes before you plan to cook, remove the chicken from the fridge and let it rest on the counter. During this short period, preheat your grill to high heat. A properly preheated grill is crucial for achieving those desirable sear marks and preventing the chicken from sticking.
- Grilling for Perfection: Searing and Slow Cooking: Once your grill is piping hot, carefully place the seasoned chicken breasts onto the grates. Immediately reduce the grill temperature to medium heat, or even medium-low if you prefer a slightly slower cook. This technique allows you to achieve a beautiful, caramelized crust and distinct grill marks on the surface, while the lower subsequent heat ensures the chicken cooks through evenly, remaining incredibly juicy and tender on the inside.
How Long Do You Grill Chicken Breasts for Optimal Juiciness?
Knowing the precise grilling time is essential for avoiding dry chicken. Our method involves a few strategic flips to ensure even cooking and perfect caramelization. First, grill the BBQ chicken breasts for 4-6 minutes on one side, or until they easily release from the grill grates. This initial sear creates a fantastic crust. Next, flip the chicken and grill for another 3 minutes. For the final stage, flip the chicken one last time and grill for an additional 3 minutes. In total, your chicken should be perfectly cooked in approximately 10-12 minutes, depending on thickness and grill temperature. Always prioritize internal temperature for safety and doneness.
Is Preheating Your Grill Truly Necessary?
The answer is an emphatic YES! Preheating your grill is not just a suggestion; it’s a critical step for successful grilling. Simply turning on the gas or lighting the charcoal doesn’t instantly bring your grill to the ideal cooking temperature. Think of it like baking in a cold oven – the results would be disastrous. A hot grill ensures that the chicken sears immediately, creating those beautiful char marks and preventing the meat from sticking to the grates. Without proper preheating, you risk uneven cooking, sticking, and a less-than-perfect texture and flavor. Always allow your grill to reach the desired temperature before placing any food on it.
Ensuring Your Grilled Chicken Is Perfectly Done and Safe
When it comes to determining if your grilled chicken is done, relying solely on visual cues like color can be misleading. The USDA clearly states that color alone is not a reliable indicator of doneness, especially with BBQ chicken, where rubs and smoke can often leave a pinkish hue on the meat even when fully cooked. The most accurate and safest way to confirm your chicken is ready is to use a meat thermometer.
Insert an instant-read thermometer into the thickest part of the chicken breast, making sure it doesn’t touch any bone. The chicken is safely cooked when it reaches an internal temperature of 165 degrees Fahrenheit (74 degrees Celsius). This guarantees that any potential harmful bacteria have been eliminated, ensuring a safe and delicious meal.
Can You Grill Chicken Directly from Frozen?
It is generally not recommended to grill BBQ chicken from a frozen state, particularly chicken breasts. Grilling at higher temperatures means that the exterior of the chicken will cook much faster than the still-frozen center. This can lead to several undesirable outcomes: the outside might burn or become excessively dry and tough, while the inside remains dangerously undercooked. Uneven cooking also compromises the texture and overall eating experience. For the best results in terms of both safety and flavor, always thaw your chicken completely in the refrigerator before applying the dry rub and grilling.
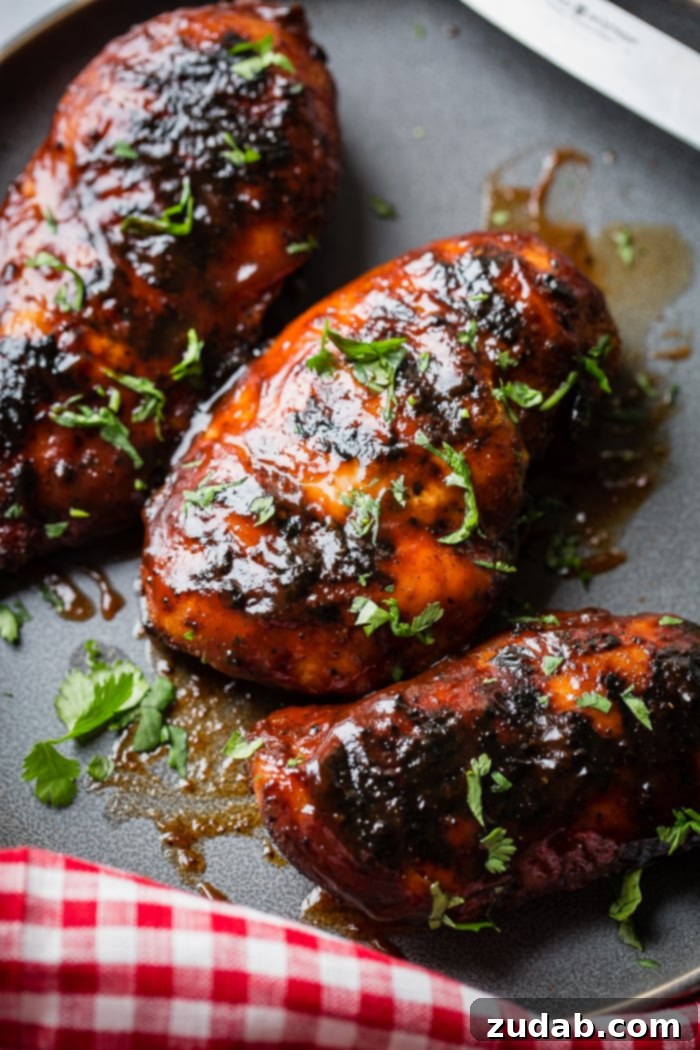
Bringing the BBQ Indoors: Making Chicken in the Oven
Don’t have a backyard grill, or live in a city like NYC where outdoor grilling isn’t always an option? No problem! You can still enjoy fantastic BBQ chicken right from your oven. There are two excellent methods to achieve that smoky, saucy goodness indoors:
1) Fully Cook in the Oven: This straightforward method involves placing your seasoned chicken breasts in a baking pan. Bake them at 350°F (175°C) for approximately 30 minutes. For the last 10 minutes of cooking, baste the chicken generously with your favorite BBQ sauce to allow it to caramelize and create that signature sticky glaze. This is a simple, hands-off approach that yields tender results.
2) Stove Top Sear, Oven Finish: For an extra layer of flavor and a beautiful caramelized crust, I highly recommend starting your chicken on the stove top. Begin by heating a sauté pan or a grill pan over high heat. Sear the seasoned chicken breasts until a rich, golden-brown color is achieved on both sides. This process locks in juices and develops a wonderful depth of flavor. Once browned, transfer the chicken to a baking pan and finish cooking in a preheated oven at 350°F (175°C) for an additional 15 to 20 minutes, or until an internal temperature of 165°F (74°C) is reached. Baste with BBQ sauce during the last 5-10 minutes of oven time for that perfect glaze. This two-step method truly mimics the char and flavor of outdoor grilling.
Freezing and Storing Your Delicious BBQ Chicken
Planning ahead makes mealtime much easier, and our BBQ chicken recipe is perfectly suited for freezing!
Freezer Meal Prep (Uncooked Chicken): You can absolutely prepare freezer-friendly BBQ chicken by applying the dry rub to your chicken breasts and then freezing them in a sealed bag. If using a Food Saver or a high-quality freezer-safe bag, this raw, seasoned chicken can be stored for up to 2 months. When ready to cook, simply thaw it in the refrigerator overnight and proceed with grilling or baking as usual.
Freezing Cooked Chicken: While you can freeze cooked BBQ chicken, it requires a bit more care to preserve its flavor and texture. For optimal results, ensure your cooked chicken is completely cooled before packaging. Using a Food Saver is highly recommended to eliminate air and prevent freezer burn. Without proper vacuum sealing, cooked chicken can quickly lose its moisture and flavor, becoming tough and less appealing when reheated. Properly sealed, cooked BBQ chicken can be frozen for up to 1 month.
How Long Will Cooked BBQ Chicken Last in the Fridge?
For best quality and food safety, cooked BBQ chicken will last in the refrigerator for up to 3-4 days when properly stored. To keep it fresh, always transfer leftover chicken to an airtight container and refrigerate promptly after cooling. This helps to maintain its flavor and tenderness, making it great for quick lunches or another easy dinner.
What Pairs Perfectly With BBQ Chicken?
The beauty of BBQ chicken lies in its versatility, making it a fantastic centerpiece for any meal. But what truly makes the meal complete? The sides, of course! Picking the right accompaniments can be as delightful as the main course itself. Don’t fret about choosing; I’ve got you covered with a selection of delicious BBQ chicken sides that will perfectly complement the smoky, sweet, and tangy flavors:
- Pasta Salad Recipes: A cool, creamy, or zesty pasta salad offers a wonderful textural and flavor contrast to grilled chicken. We have a wide variety to suit every taste!
- Easy Green Beans with Bacon: The savory crunch of bacon combined with crisp-tender green beans adds a simple yet elegant vegetable side.
- Southern Mac ‘N Cheese: A rich, comforting, and creamy macaroni and cheese is a classic BBQ pairing, offering indulgent satisfaction.
- Pesto Butter Veggie Foil Packets: For effortless grilling, these foil packets offer tender, flavorful vegetables cooked right alongside your chicken, minimizing cleanup.
- Fruit Salad with Lemon Dressing: A bright, refreshing fruit salad provides a light and sweet counterpoint, cutting through the richness of the BBQ.
- Best Broccoli Salad: This creamy, crunchy salad is always a hit, offering a wholesome and tangy side dish.
- Grilled Corn on the Cob: A quintessential summer side, sweet grilled corn on the cob provides that perfect smoky-sweet flavor that complements BBQ chicken beautifully.
Common Questions About BBQ Chicken
Is BBQ Chicken a Healthy Meal Option?
While BBQ chicken is often considered a lighter protein option compared to red meats, its overall health profile depends heavily on the ingredients used in the rub and sauce. Given the typical presence of sugar in both BBQ rubs and sauces, it’s not entirely sugar-free. However, when compared to heavier dishes like creamy chicken pasta or deep-fried alternatives, a simple grilled BBQ chicken breast is generally a healthier choice. To make it even healthier, opt for low-sugar BBQ sauces and rubs, and load up on fresh, grilled vegetable sides.
Can BBQ Chicken Be Part of a Keto Diet?
For those following a ketogenic diet, BBQ chicken can be made keto-friendly with some thoughtful modifications. Traditional BBQ rubs and sauces often contain a significant amount of sugar, which is a no-go for keto. However, by selecting a low-sugar or sugar-free BBQ sauce and crafting a keto-compliant dry rub (focusing on spices like paprika, garlic powder, onion powder, chili powder, and erythritol or stevia as sweeteners), you can absolutely enjoy this delicious dish while staying true to your dietary goals.
Is BBQ Chicken Gluten-Free?
Generally, yes! Most natural chicken breasts and homemade dry rubs (made from individual spices) are inherently gluten-free. The primary concern usually lies with the BBQ sauce. While many commercial BBQ sauces are gluten-free, some brands might use gluten-containing thickeners or flavorings. Always double-check the ingredient list and certifications on your store-bought BBQ sauce to ensure it aligns with a gluten-free diet. If you make your own sauce, you have full control over the ingredients, ensuring it remains gluten-free.
Is BBQ Chicken Paleo-Friendly?
Unfortunately, traditional BBQ chicken, with its reliance on added sugars in both the rub and the sauce, is typically not considered Paleo-friendly. The Paleo diet emphasizes whole, unprocessed foods that would have been available to our ancient ancestors, and refined sugars do not fit into this category. However, similar to the keto diet, you could create a Paleo-friendly version by making your own sugar-free rub and sauce, using natural sweeteners like dates or honey sparingly (if tolerated on a stricter Paleo approach), or focusing on vinegar and spice-based sauces without added sugars.
Expert Tips for the Best BBQ Chicken Every Time
Achieving perfectly grilled, juicy, and flavorful BBQ chicken is an art form, but with these expert tips, you’ll master it in no time:
- The Golden Rule of BBQ Sauce Application: This is perhaps the most crucial tip! Do not apply BBQ sauce to the chicken until after you’ve flipped it for the first time on the grill. The high sugar content in most BBQ sauces will burn rapidly over direct heat, resulting in a charred, bitter crust rather than a beautifully caramelized glaze.
- Strategic Basting for Maximum Flavor: Once you’ve flipped the chicken for the first time, generously baste that cooked side with your chosen BBQ sauce. Allow it to cook for about 3 minutes to let the sauce caramelize. Then, flip the chicken again, baste the newly exposed side, and quickly flip it back over. Baste the first side one more time for good measure. This rapid basting and flipping in the final minutes ensures a rich, sticky glaze without burning. Feel free to add a little more sauce right before serving for an extra burst of flavor.
- Prioritize Grilling Safety and Hygiene: When working with raw and cooked meats, it’s essential to maintain proper food safety. Always have separate plates and tongs for raw and cooked chicken by the grill. This prevents cross-contamination. Additionally, ensure there is ample space between pieces of meat on the grill, allowing for even cooking and preventing raw juices from contaminating other pieces.
- Don’t Overcrowd the Grill: Give your chicken pieces space! Overcrowding the grill lowers the temperature and steams the chicken instead of searing it, preventing that beautiful crust and char. Cook in batches if necessary.
- Rest Your Chicken: Once the chicken is cooked through, transfer it to a clean plate or cutting board and tent it loosely with foil. Let it rest for 5-10 minutes before slicing or serving. This allows the juices to redistribute throughout the meat, ensuring every bite is incredibly tender and moist.
- Experiment with Sauce Variations: While our Classic BBQ Sauce is fantastic, don’t hesitate to experiment! Our Vinegar-Based BBQ Sauce offers a tangier profile. Explore different regional BBQ styles, from spicy Texas sauces to sweet Kansas City varieties, to find your perfect match.
More Irresistible Grilled Chicken Recipes to Try:
If you’re anything like us, you’re always on the hunt for delicious and easy chicken recipes! Once you’ve mastered this BBQ chicken, be sure to explore these other fantastic grilled chicken creations:
- Grilled Hawaiian Chicken
- Grilled Huli Huli Chicken
- Garlic Parmesan Grilled Chicken Wings
- Grilled Honey Lemon Basil Chicken
- Quick Oregano Grilled Chicken
- Balsamic Grilled Chicken Salad
- Grilled Sweet and Sour Chicken
- Tuscan Grilled Chicken Kabobs
- Explore ALL OF OUR GRILLING RECIPES!
Favorite BBQ Chicken
Ingredients
- 6 Tablespoons Smoky BBQ Rub
- 4 Chicken Breasts, skinless
- Olive Oil, drizzle
- BBQ Sauce, homemade or your favorite store brand
Instructions
-
Add the Smoky BBQ Rub, chicken breasts, and a small drizzle of olive oil to a large Ziploc bag. Seal the bag and massage the chicken to ensure all sides are thoroughly coated with the rub. Place the bag in the fridge and let it marinate for at least 2 hours, or ideally, up to 24 hours for maximum flavor.
-
About 5 minutes before grilling, remove the chicken from the fridge to allow it to come slightly closer to room temperature while you preheat the grill.
-
Preheat your grill to high heat. Once hot, use oil-drizzled paper towels (held with tongs) to carefully brush the grates, ensuring they are well-oiled to prevent sticking.
-
Place the chicken breasts onto the hot grill, presentation side down, then immediately reduce the grill heat to medium.
-
Cook for 4-6 minutes, or until the chicken easily releases from the grill grates and has developed beautiful char marks.
-
Flip the chicken to the other side and generously baste with BBQ sauce.
-
Cook for 3-4 minutes. Flip the chicken once more, baste the other side with BBQ sauce, and then quickly flip it back to finish cooking for an additional 3 minutes, or until an internal temperature of 165 degrees F (74°C) is reached.
-
Remove the cooked chicken to a clean plate, tent it loosely with foil, and let it rest for 5 minutes before slicing and serving. This helps retain the juices.
Recipe Notes
Nutrition
Nutrition information is automatically calculated, so should only be used as an approximation.
REMEMBER TO SUBSCRIBE TO our FREE Oh Sweet Basil NEWSLETTER AND RECEIVE EASY RECIPES DELIVERED INTO YOUR INBOX EVERY DAY!
When you try a recipe, please use the hashtag #ohsweetbasil on INSTAGRAM for a chance to be featured in our stories! FOLLOW OH, SWEET BASIL ON FACEBOOK | INSTAGRAM | PINTEREST | TWITTER FOR ALL OF OUR LATEST CONTENT, RECIPES AND STORIES.