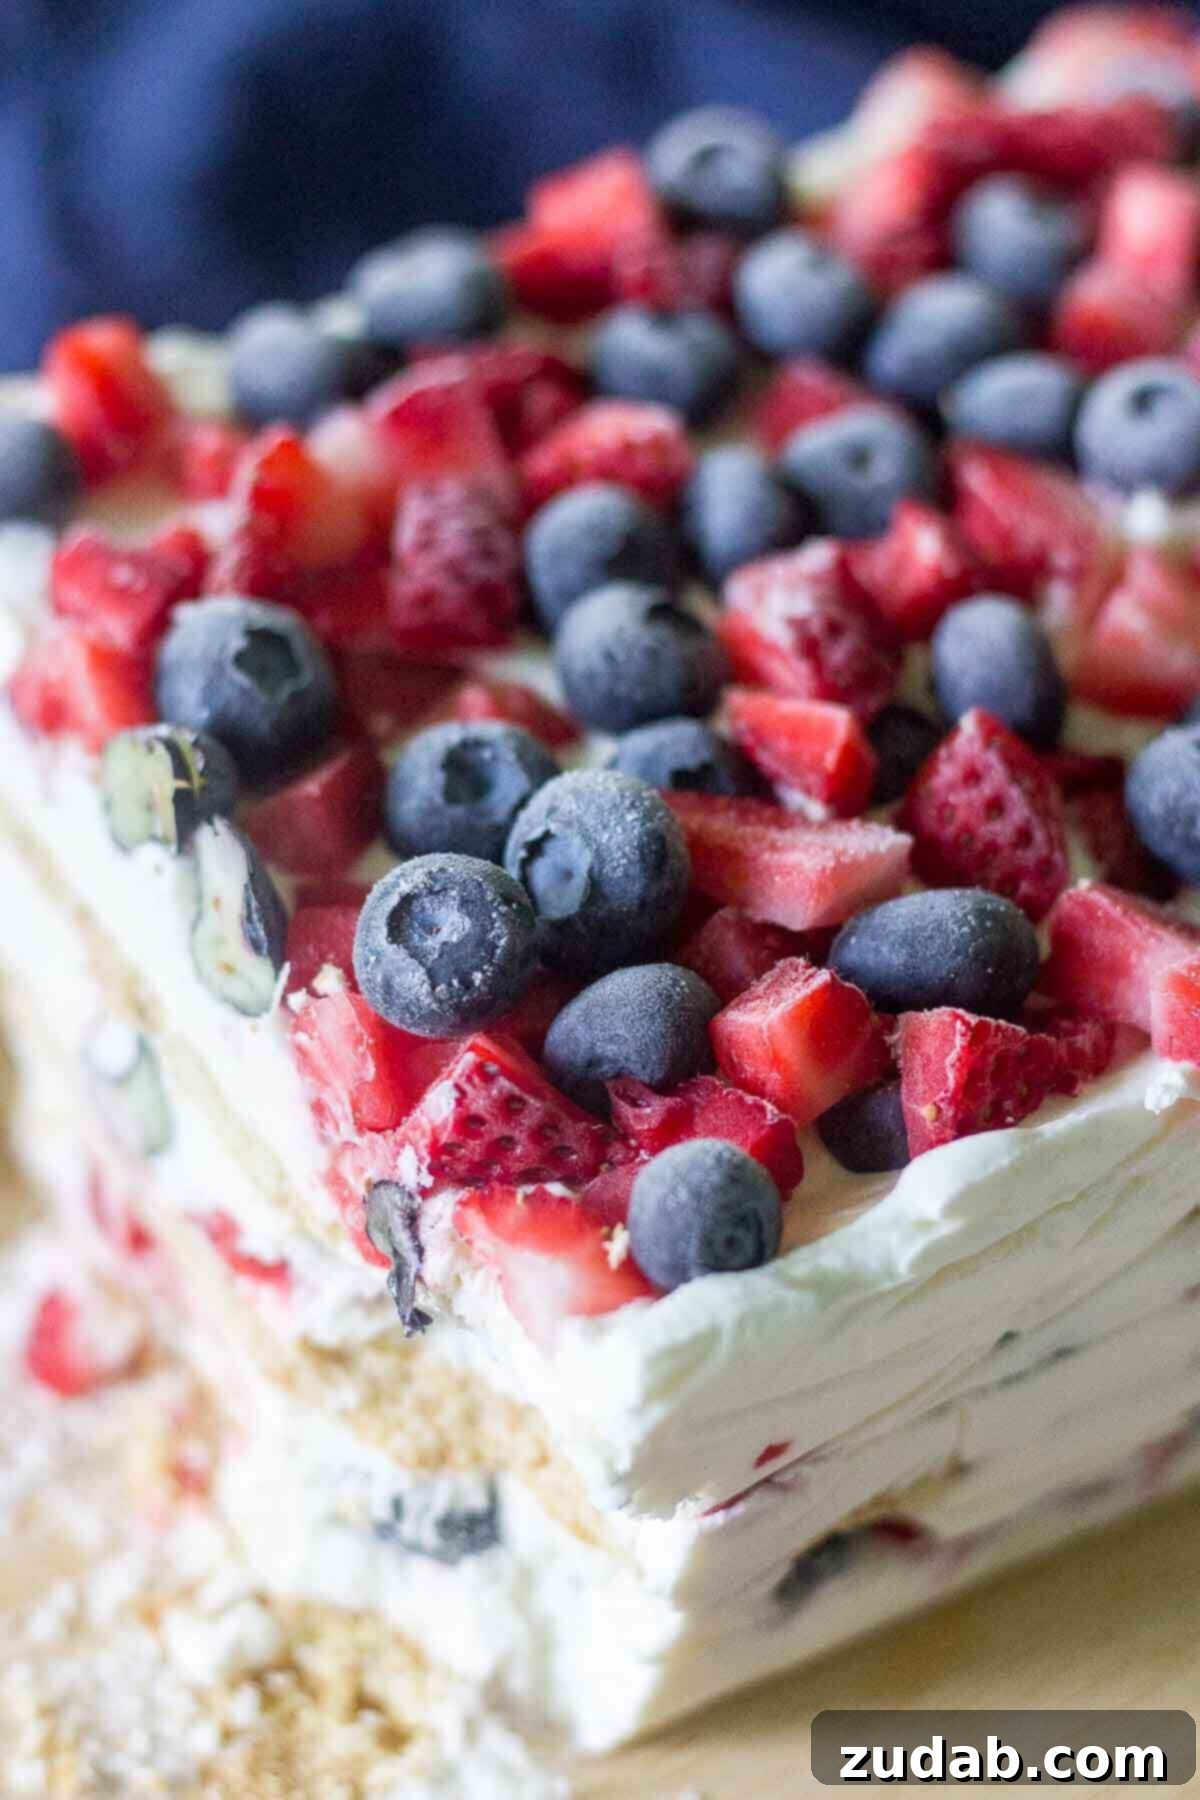
As the Fourth of July approaches, the quest for the perfect patriotic dessert often begins. Look no further! This Red, White, and Blue Icebox Cake stands out as the ultimate 4th of July dessert – a deliciously simple, vibrant, and utterly refreshing treat that’s guaranteed to be a crowd-pleaser. Forget turning on your oven during the sweltering summer heat; this no-bake dessert requires minimal effort and only a few fundamental ingredients to assemble into a show-stopping centerpiece. Its effortless elegance and burst of fresh, patriotic flavors make it an ideal choice for any summer gathering, from backyard barbecues to festive holiday celebrations.
What Makes This Red, White, and Blue Icebox Cake So Special?
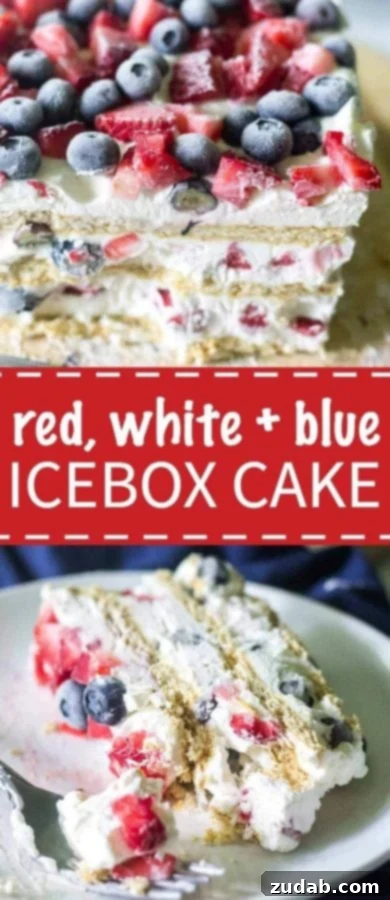
Icebox cakes are experiencing a well-deserved resurgence in popularity, and for very good reason! Their charm lies in their simplicity and the magical transformation of humble ingredients into a luxurious, creamy dessert. This particular rendition elevates the classic icebox cake by incorporating the vibrant, patriotic colors of fresh strawberries and blueberries, making it visually spectacular and perfectly suited for national holidays such as the 4th of July, Memorial Day, or Labor Day. It’s not just a dessert; it’s a celebration on a plate, delivering a refreshing coolness that is absolutely essential for summer festivities. The combination of sweet, pillowy whipped cream, crisp graham crackers that soften to a cake-like consistency overnight, and the bright tang of berries creates a symphony of textures and flavors that will delight everyone.
The Enduring Charm of Icebox Cakes
For those unfamiliar, an icebox cake is a delightful no-bake dessert typically constructed from layers of whipped cream and crisp cookies or crackers, which soften as they chill in the refrigerator or “icebox.” This ingenious dessert gained popularity in the early 20th century when home refrigeration became more common, offering a convenient and refreshing alternative to baked goods, particularly during warmer months. The beauty of an icebox cake lies in its versatility. Once you master the basic technique of preparing the whipped cream and gathering your crunchy base (like graham crackers), the possibilities for customization are truly endless. You could infuse layers with a rich chocolate ganache, a zesty lemon curd, a tangy berry sauce, or even crushed pieces of your favorite candy bars. The core principle remains the same: allow time for the flavors to meld and the textures to soften into a cohesive, sliceable cake.
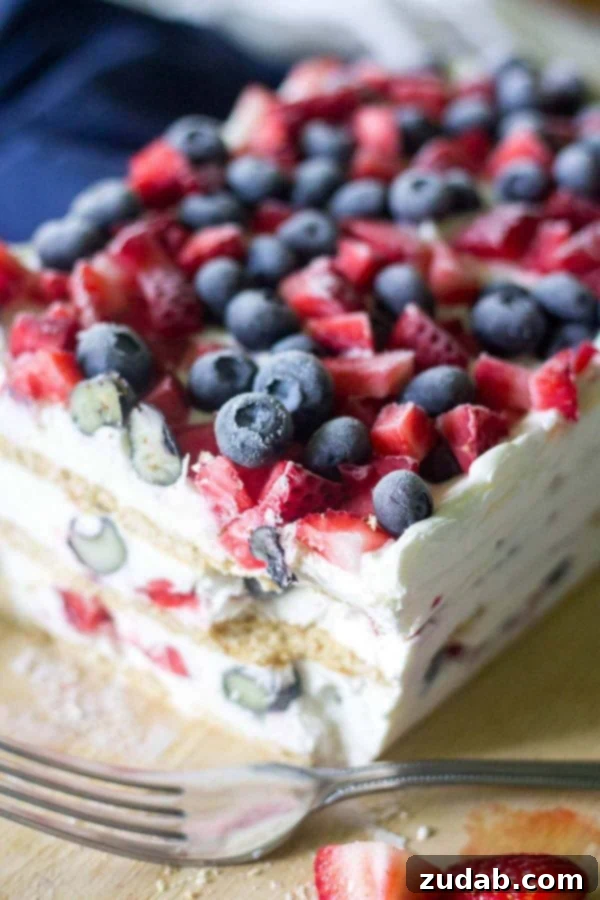
Our featured Red, White, and Blue Icebox Cake recipe beautifully showcases this versatility. It layers luscious homemade whipped cream with crispy graham crackers, interspersed with generous amounts of fresh, juicy strawberries and plump blueberries. Each spoonful offers a harmonious blend of creamy sweetness and fruity brightness, creating a dessert that is as delicious as it is aesthetically pleasing. This treat isn’t just perfect for patriotic holidays; it’s a fantastic solution for any summer occasion when you want a satisfying dessert without the heat of the oven. All you need is a mixer, a freezer, and a little patience while it sets, and you’ll have a delightful dessert ready to impress.
Crafting the Perfect Whipped Cream: The Heart of Your Icebox Cake
While the visual appeal of the red and blue berries is undeniable, the true magic of this Red White and Blue Icebox Cake largely depends on the quality of its whipped cream. Making fresh whipped cream at home is surprisingly straightforward and yields a far superior result compared to store-bought versions. You’ll need just three simple ingredients: very cold heavy cream (or heavy whipping cream), a touch of powdered sugar for sweetness, and a splash of vanilla extract for that irresistible aroma and flavor. The key to achieving light, fluffy, and stable whipped cream lies in careful mixing.
Using a hand mixer or a stand mixer fitted with a whisk attachment, begin beating the cold heavy cream, powdered sugar, and vanilla on medium-high speed. Keep a close eye on the mixture; it will first thicken, then begin to form soft peaks, where the cream holds its shape somewhat but still gently flops over when the whisk is lifted. Continue beating until stiff peaks form, meaning the cream holds its shape firmly and stands straight up when the whisk is removed. However, exercise caution: over-mixing can quickly turn your beautiful whipped cream into grainy, separated butter. If over-mixed, the texture of your frozen icebox cake might become undesirably crackly. Aim for that perfect balance – light, airy, and holding its form just right – to ensure a smooth, delightful texture in your finished dessert.
Layer by Layer: Assembling Your Red, White, and Blue Masterpiece
Don’t let the idea of multiple layers in this icebox cake with graham crackers intimidate you. While it might look complex, the assembly process is incredibly simple and follows a repetitive, easy-to-follow pattern. The visual impact of the vibrant layers is well worth the minimal effort!
Prepping Your Pan:
First, line a standard 9×5 inch loaf pan with plastic wrap, ensuring there’s enough overhang on all sides. This thoughtful step is crucial for effortlessly lifting the cake out of the pan once it’s set, making serving a breeze.
The Art of Layering:
With your perfectly whipped cream, fresh berries, and graham crackers at hand, it’s time to build your patriotic dessert. Here’s a simplified guide to creating those beautiful layers:
- **Whipped Cream Base:** Start by spreading a thin layer (a few tablespoons) of whipped cream evenly across the bottom of the plastic-lined loaf pan. This acts as an adhesive, helping the first layer of graham crackers stay in place.
- **Graham Cracker Layer 1:** Carefully arrange graham cracker sheets over the whipped cream. You might need to break some pieces to fit and cover the surface as evenly as possible. Don’t worry if there are small gaps; they will soften and fill in as the cake chills.
- **Whipped Cream Layer 2:** Spread approximately ¾ cup of whipped cream over the graham crackers. Aim for an even, smooth layer.
- **Berry Layer 1:** Generously sprinkle about ½ cup of chopped fresh strawberries and ½ cup of fresh blueberries over the whipped cream. These will provide both color and a delightful burst of flavor.
- **Whipped Cream Layer 3:** Add another ¾ cup of whipped cream, gently spreading it to cover the berries.
- **Graham Cracker Layer 2:** Place another layer of graham crackers on top of the whipped cream, breaking pieces as needed.
- **Whipped Cream Layer 4:** Spread another ¾ cup of whipped cream.
- **Berry Layer 2:** Repeat with another ½ cup of chopped strawberries and ½ cup of blueberries.
- **Whipped Cream Layer 5:** Spread a final ¾ cup of whipped cream over the fruit.
- **Graham Cracker Layer 3:** Add the last layer of graham crackers.
- **Final Whipped Cream Layer:** Top with the remaining whipped cream, ensuring the entire surface is covered smoothly.
- **Final Berry Topping:** Garnish the top with the rest of your fresh blueberries and strawberries for a stunning finish.
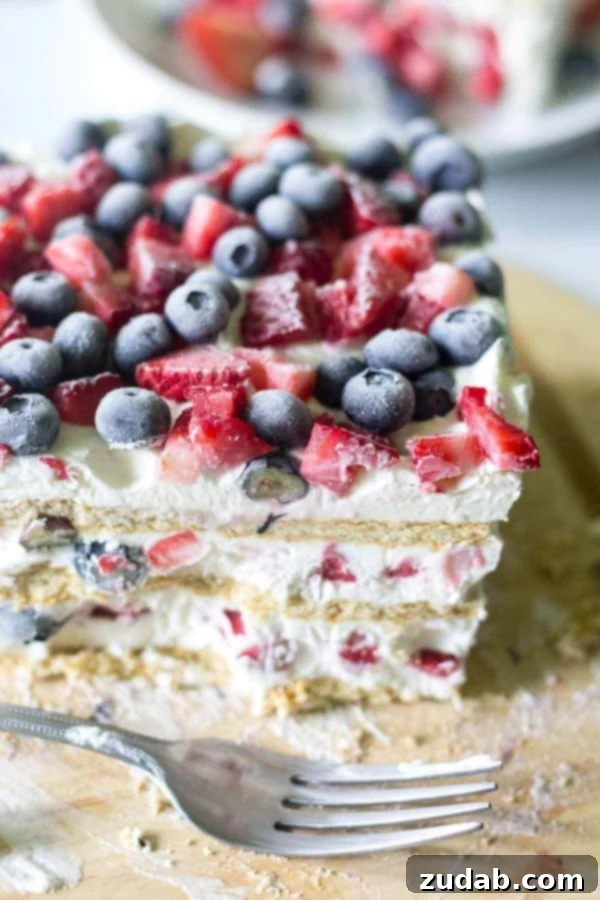
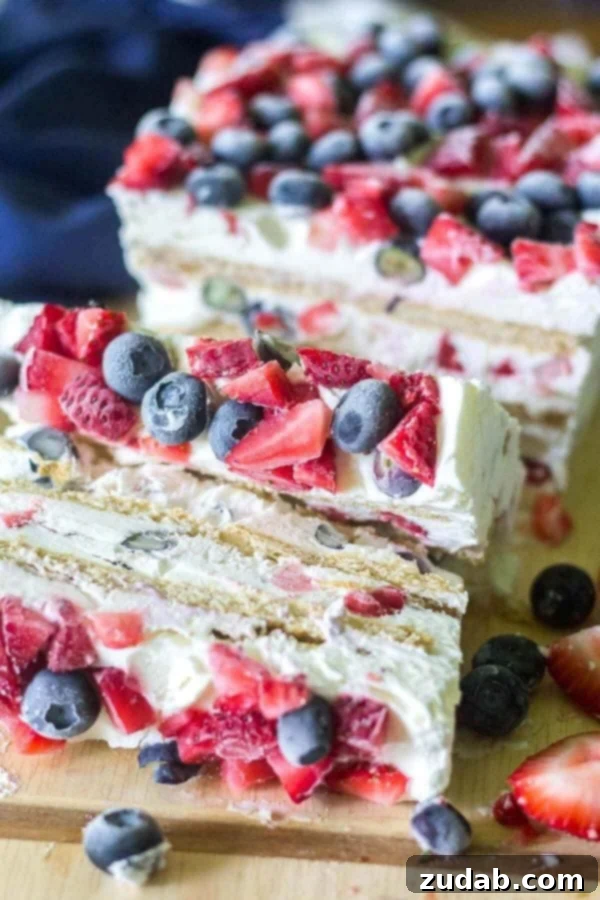
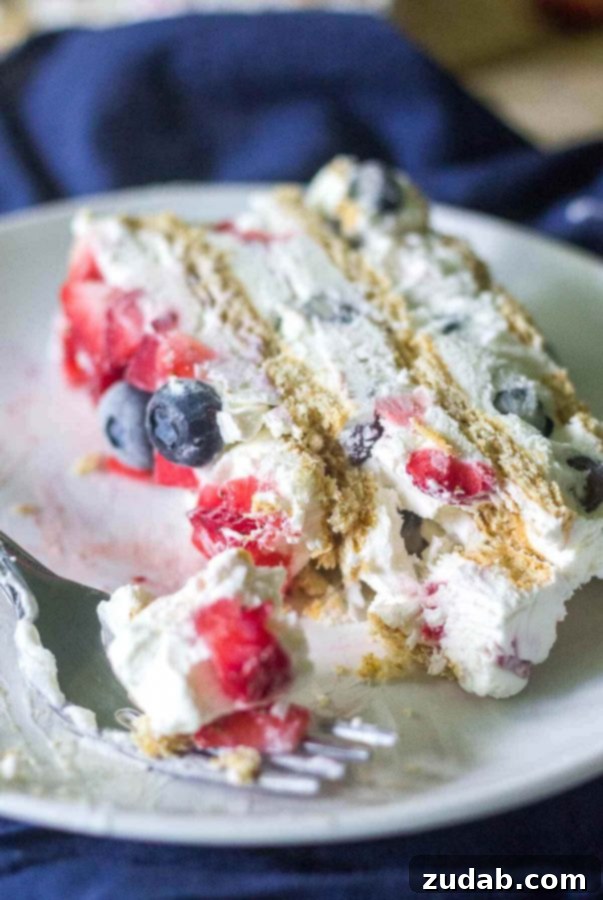
As you can see, the pattern is quite intuitive: a layer of whipped cream always encases the graham crackers and the berries. This systematic approach ensures an even distribution of flavors and a visually appealing cross-section when you slice into the cake.
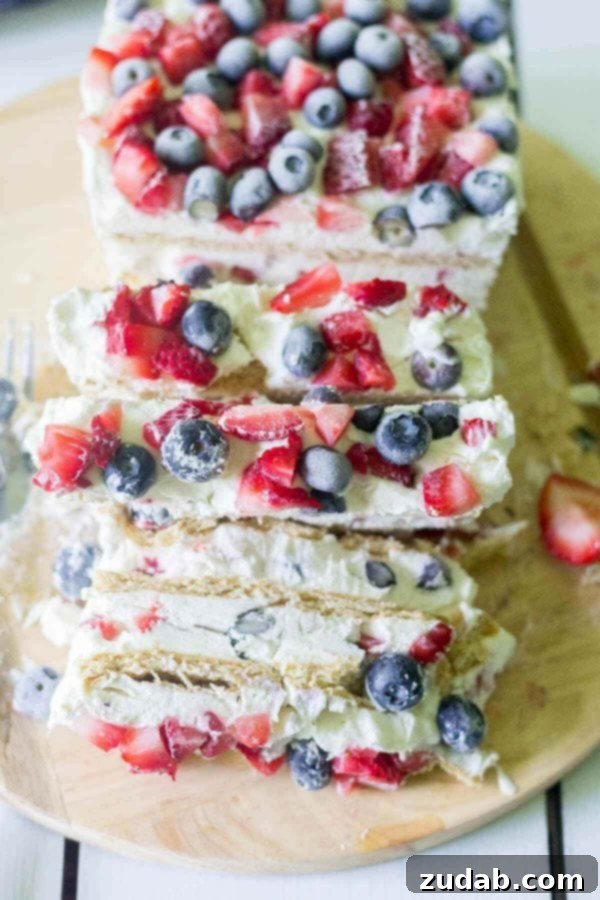
One of the greatest advantages of this easy icebox cake recipe is its incredible speed and make-ahead convenience. You can whip up the cream and layer this entire cake in under 20 minutes! This makes it an absolute lifesaver when you’re preparing for a holiday like the 4th of July and have a million other things to do. The cake freezes beautifully, so you can easily prepare it a few days in advance and have a delicious, festive dessert ready to go for your family and friends. Imagine enjoying the fireworks or playing with sparklers, knowing that a perfectly set, vibrant dessert is waiting for you – no last-minute fuss required! This recipe makes a generous amount, making it ideal for sharing with a large group, ensuring everyone gets a taste of this delightful summer treat.
Pro Tips for a Flawless Icebox Cake Experience
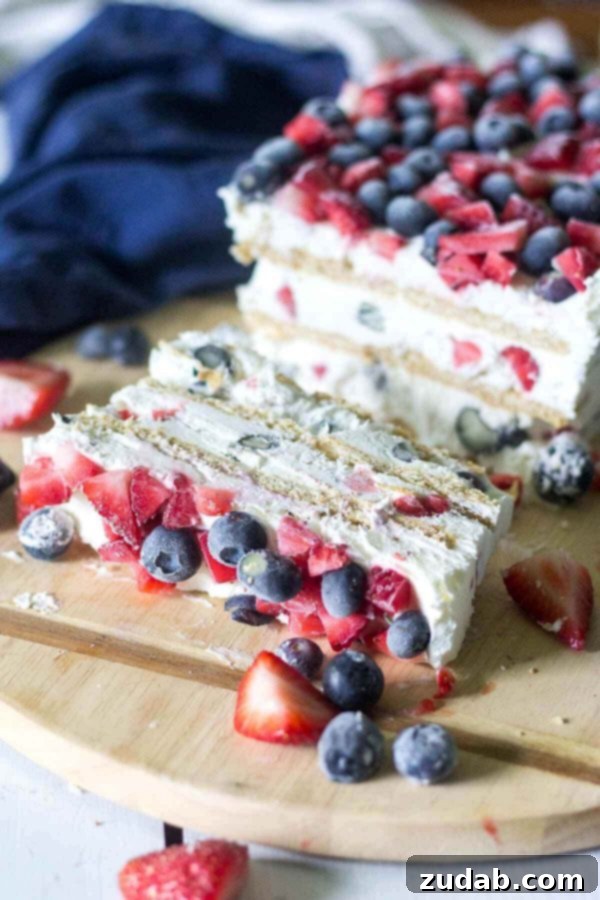
Just like slicing a perfectly frozen ice cream cake, there’s a simple trick to cutting your icebox cake to showcase its beautiful layers cleanly and effortlessly. This ensures every slice is picture-perfect and ready for admiration.
How to Cut Icebox Cake for Perfect Slices:
Before attempting to cut your chilled cake, remove it from the freezer and allow it to sit at room temperature for about 10-15 minutes. This brief softening period is key. Next, run a sharp knife under warm water, then wipe it dry. Use this warm knife to make your cuts. The warmth from the blade will momentarily melt the outer edge of the whipped cream and soften the graham cracker layers, allowing for a smooth, clean slice all the way through without tearing or smudging the layers. Repeat this warming process for each slice, and you’ll be rewarded with stunning, well-defined red, white, and blue layers that are as delightful to look at as they are to eat.
With just a few simple ingredients, approximately 20 minutes of active preparation time, and this clever cutting tip, you’re all set to create a truly memorable and festive Red, White, and Blue Icebox Cake. It’s the ideal way to add a touch of patriotic sweetness to your holiday celebrations!
We hope you and your loved ones have a safe, happy, and delicious holiday season! This cake is sure to bring smiles and a burst of patriotic joy to your table.
Red, White, and Blue Icebox Cake Recipe
By WhatMollyMade | Servings: 14 | Prep Time: 20 minutes | Chill Time: 4+ hours
Ingredients
- 2 Cups Cold Heavy Cream or Heavy Whipping Cream
- 1/4 Cup Powdered Sugar
- 2 teaspoons Vanilla Extract
- 7-8 Full-Sheet Graham Crackers (about 1 standard sleeve)
- 2 Cups Fresh Strawberries, hulled and quartered
- 2 Cups Fresh Blueberries
Instructions
- Line a 9×5 inch standard loaf pan with plastic wrap, ensuring a generous overhang over the edges to easily lift the cake out. Set aside.
- **Make the whipped cream:** Using a hand mixer or a stand mixer with a whisk attachment, beat the cold heavy cream, powdered sugar, and vanilla extract on medium-high speed until soft peaks form, approximately 3 minutes. Be careful not to over-beat, as this can make the cream grainy.
- **Assemble the cake:** Spread a few tablespoons of whipped cream into a thin layer on the bottom of the prepared pan. This helps the first layer of graham crackers adhere.
- Layer graham crackers on top of the cream, breaking them up as needed to create an even layer. Small gaps are acceptable.
- Spread approximately ¾ cup of whipped cream over the graham crackers.
- Evenly distribute ½ cup of chopped strawberries and ½ cup of blueberries over the whipped cream.
- Add another ¾ cup of whipped cream, spreading it gently over the fruit.
- Place another layer of graham crackers.
- Spread ¾ cup of whipped cream.
- Add another layer of ½ cup chopped strawberries and ½ cup blueberries.
- Spread ¾ cup of whipped cream.
- Add the final layer of graham crackers.
- Top with the remaining whipped cream and garnish with the rest of the fresh blueberries and strawberries.
- Cover the icebox cake tightly with plastic wrap and place it in the freezer for at least 4 hours, or ideally, overnight, to allow it to set completely.
- **To serve:** Allow the cake to soften at room temperature for 10-15 minutes. For clean slices, run a sharp knife under warm water and wipe it dry before cutting each piece.
Recipe Notes
Leftovers should be stored in an airtight container in the freezer and are best enjoyed within 2-3 days for optimal freshness and texture.
Nutrition (Approximate)
Serving: 1g, Calories: 189kcal, Carbohydrates: 15g, Protein: 2g, Fat: 14g, Saturated Fat: 8g, Polyunsaturated Fat: 5g, Cholesterol: 41mg, Sodium: 50mg, Fiber: 1g, Sugar: 9g
Creative Variations and Serving Suggestions
While the Red, White, and Blue Icebox Cake is a masterpiece on its own, its simple foundation allows for endless creative variations. For different holidays or personal preferences, consider swapping out the berries for other fruits like sliced peaches, raspberries, or even banana slices. A drizzle of chocolate syrup or caramel between layers could transform it into a decadent treat. For an adult-friendly version, you could even lightly brush the graham crackers with a berry liqueur before layering. When serving, a dollop of extra fresh whipped cream or a scattering of mint leaves can add a gourmet touch. This versatile dessert pairs beautifully with a light summer cocktail, a glass of iced tea, or simply as a refreshing end to a hearty barbecue meal.
Storing Your Delicious Creation
Proper storage is essential to keep your no-bake icebox cake tasting fresh and maintaining its delightful texture. After assembly and the initial chilling period, ensure the cake is tightly wrapped in plastic wrap. This prevents freezer burn and keeps unwanted odors from permeating the cake. Store it in the freezer for up to 2-3 days for the best quality. While it can last longer, the graham crackers might become excessively soft, and the berries might lose some of their fresh texture. When ready to enjoy leftovers, simply follow the slicing tip mentioned above: allow it to soften slightly at room temperature, then use a warm knife for perfect portions every time. This make-ahead friendly dessert ensures you always have a delightful treat ready to go.

Discover more delicious recipes and baking inspiration from WhatMollyMade:
WhatMollyMade Blog | Facebook | Pinterest| Instagram | Twitter
Looking for another easy summer treat? Try this:
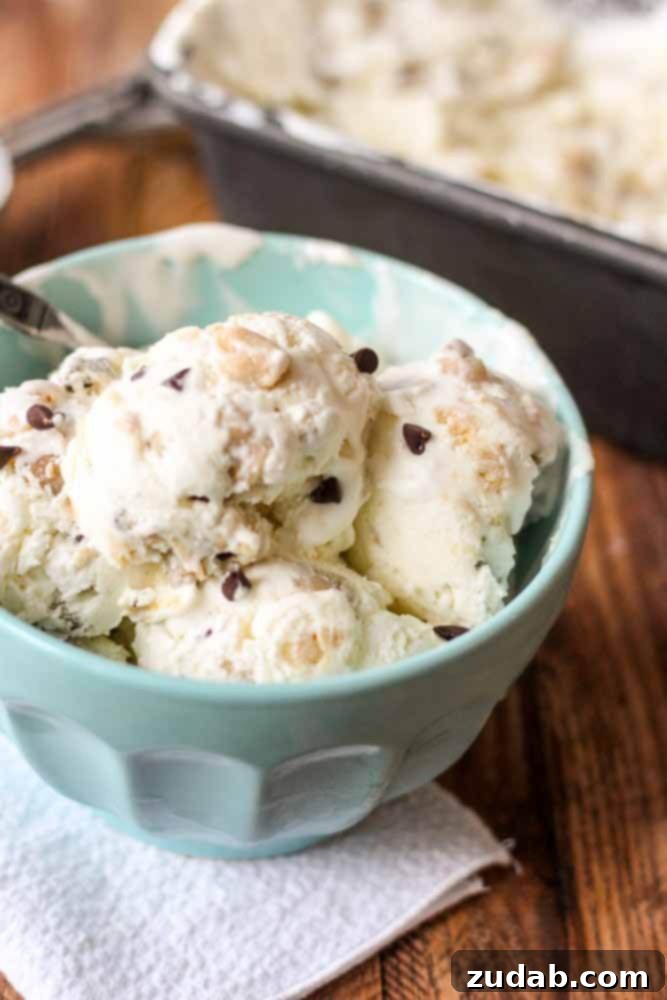
No-Churn Chocolate Chip Cookie Dough Ice Cream
Got a hankering for rich, creamy ice cream but don’t have an ice cream maker? This no-churn ice cream recipe is absolutely perfect for you, delivering all the flavor with none of the hassle!