
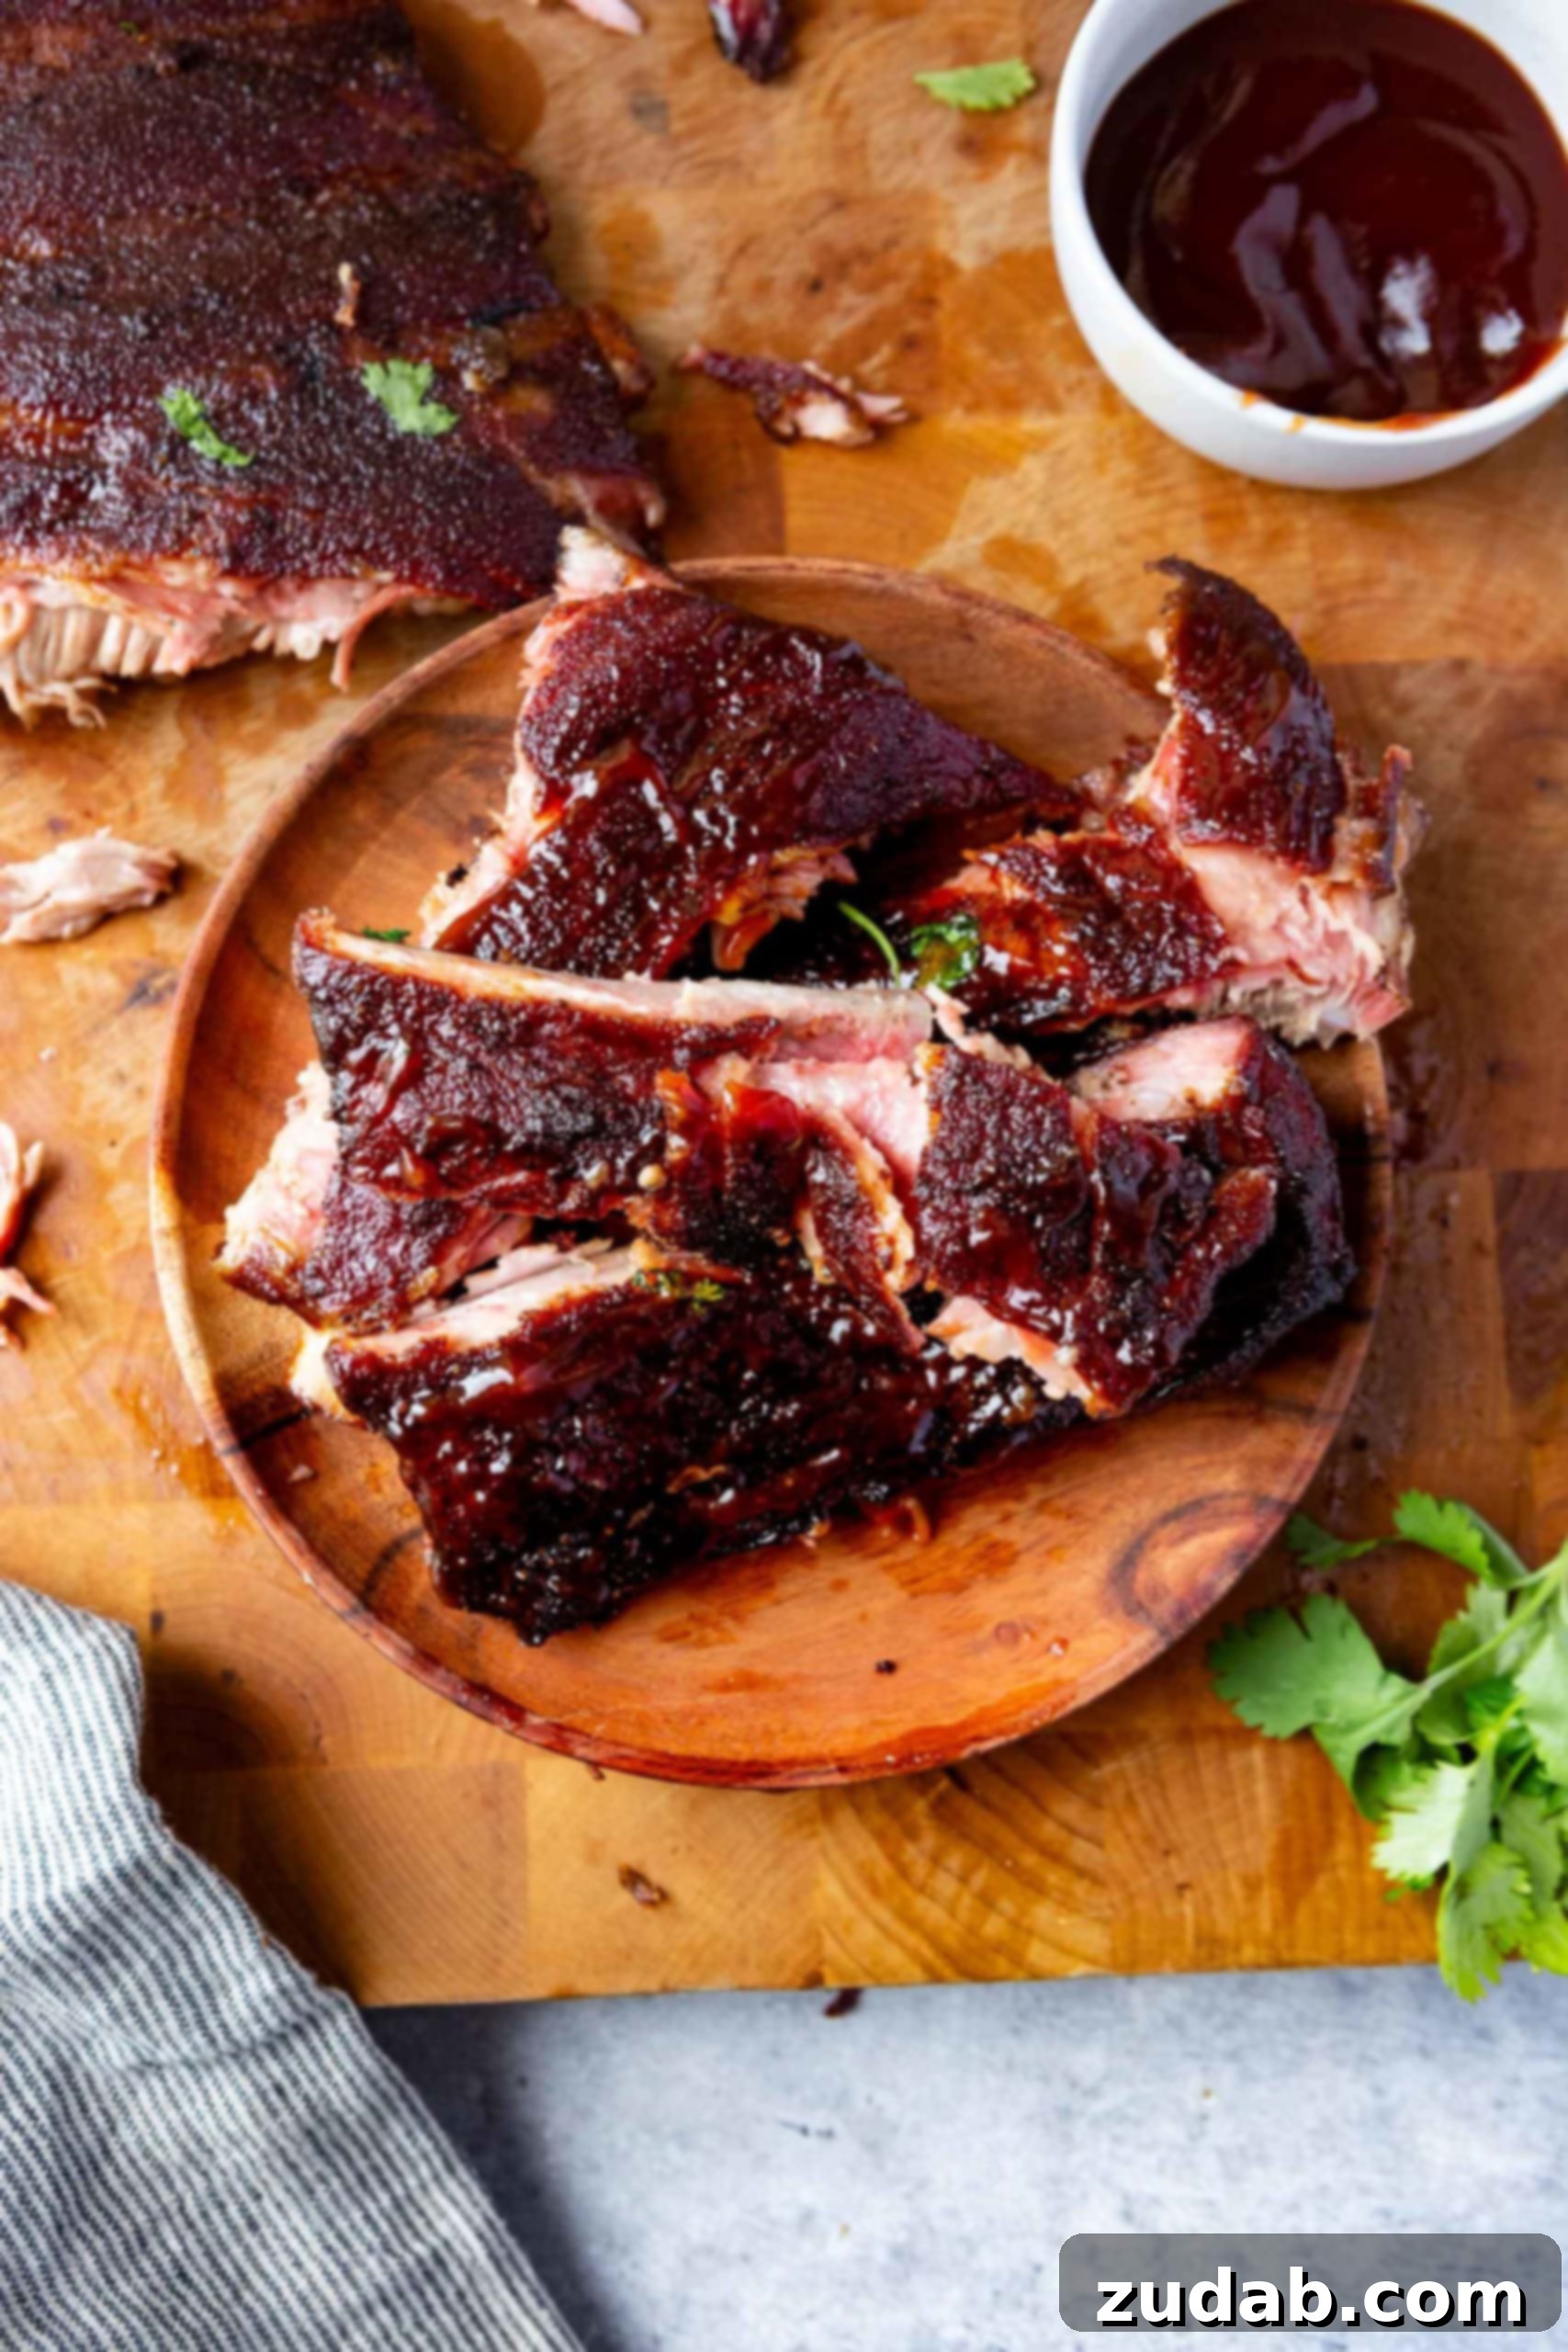
The Ultimate Guide to Fall-Off-The-Bone BBQ Spare Ribs: Master the Art of Low and Slow Grilling
Imagine sinking your teeth into succulent BBQ spare ribs, so tender the meat effortlessly falls from the bone, bursting with rich, smoky flavor. This isn’t just a dream – it’s an achievable reality with our incredibly simple grilling method. The secret lies in a careful, patient approach, combined with the superior heat and moisture retention provided by Reynolds Wrap® Heavy Duty Foil. Prepare to transform your backyard grilling into a culinary triumph, delivering consistently perfect ribs every single time.
Why These BBQ Spare Ribs are a Game Changer for Your Grilling Season
For years, perfectly cooked ribs felt like an elusive quest. Summertime cookouts always featured ribs, but achieving that melt-in-your-mouth tenderness seemed impossible. We tried countless techniques, hoping for meat that would practically detach itself from the bone with just a glance. Despite our efforts, that ideal “fall-off-the-bone” texture remained out of reach. That all changed when we discovered the power of low and slow cooking, amplified by the protective embrace of Reynolds Wrap® Heavy Duty Foil.
This recipe isn’t just about cooking ribs; it’s about unlocking their full potential. We are delighted to partner with Reynolds Wrap® Foil for this post, a product that truly makes this recipe foolproof. The Heavy Duty Foil is thicker and more durable, making it ideal for the demanding conditions of grilling and ensuring your ribs cook to perfection without any leaks or tears. It’s truly essential for creating the juiciest, most tender grilled spare ribs you’ve ever tasted.
The Core Secrets to Achieving Perfect Fall-Off-The-Bone Ribs
Unlocking the secret to ribs that are incredibly tender and fall off the bone isn’t complicated. It boils down to three fundamental elements that, when combined, guarantee an unforgettable BBQ experience.
-
Choosing the Right Ribs: Spare Ribs for Superior Tenderness
While baby back ribs often get a lot of attention for their meatiness, we consistently find that spare ribs (or St. Louis style ribs, which are spare ribs trimmed for a more uniform shape) yield a much more tender result when cooked low and slow. The natural composition of spare ribs allows them to break down beautifully over a longer cooking period, leading to that coveted “fall-off-the-bone” texture. While baby back ribs can certainly be made tender with extended cooking and resting times, they often require a significantly longer commitment – sometimes upwards of 13 hours – which isn’t always practical for a backyard barbecue.
-
The Magic of Reynolds Wrap® Heavy Duty Foil: Locking in Moisture and Flavor
This is where the real magic happens. Wrapping your ribs tightly in Reynolds Wrap® Heavy Duty Foil creates a miniature steam oven right on your grill. This ingenious technique traps all the precious moisture and juices, preventing the ribs from drying out and instead infusing them with tenderness. The heavy-duty nature of the foil is paramount here, as it resists tearing and punctures, ensuring a consistently moist cooking environment and an incredibly easy cleanup once you’re done.
-
The Art of “Low and Slow” Cooking & Resting: Patience is Key
Time is arguably the most critical ingredient in this recipe. Achieving truly tender, fall-off-the-bone ribs isn’t just about cooking them until they’re done; it’s about giving them ample time for the connective tissues to slowly break down. This prolonged, gentle cooking at a consistent, low temperature (hence “low and slow”) transforms tough cuts into buttery-soft perfection. Furthermore, a crucial resting period after cooking allows the meat fibers to relax and reabsorb juices, resulting in an even more succulent and tender final product. Rush this step, and you compromise on tenderness – so be patient!
Essential Ingredients for Your Grilled Spare Ribs Masterpiece
Crafting the perfect rack of grilled spare ribs requires a thoughtful selection of ingredients. Beyond the star of the show – the ribs themselves – a robust dry rub and a flavorful liquid base are key. And, of course, Reynolds Wrap® Heavy Duty Foil is indispensable for achieving that signature fall-off-the-bone texture. Here’s your complete grocery list:
Crafting the Perfect Dry Rub
Our dry rub is a balanced blend of sweet, savory, and smoky notes designed to penetrate the meat and build incredible depth of flavor. Each ingredient plays a vital role:
- Kosher Salt: Essential for seasoning and bringing out natural flavors.
- Brown Sugar: Adds a touch of sweetness that caramelizes beautifully during grilling, creating a delicious crust.
- Black Pepper: Provides a classic savory bite.
- Garlic Powder: Offers an aromatic, earthy base.
- Onion Powder: Complements the garlic with another layer of savory depth.
- Chili Powder: Delivers mild heat and a complex, earthy flavor profile.
- Smoked Paprika: Infuses a rich, smoky aroma and vibrant color.
- Dried Thyme: Adds herbaceous notes that brighten the rub.
- Ground Cumin: Contributes a warm, slightly spicy, and earthy undertone.
- Pinch of Nutmeg: A surprising, subtle addition that rounds out the spice blend, adding warmth and complexity.
The Ribs and the Flavor Enhancers
Beyond the dry rub, these ingredients prepare the ribs for their low and slow journey:
- Spare Ribs (or St. Louis Style): The star, chosen for its inherent tenderness.
- Apple Juice: Adds moisture and a hint of sweetness, contributing to tenderness.
- Apple Cider Vinegar: Provides acidity that helps to break down muscle fibers and brightens the overall flavor.
- Yellow Mustard: Acts as a binder for the dry rub, ensuring it adheres perfectly to the meat, while also adding a subtle tangy kick.
- Reynolds Wrap® Heavy Duty Foil: The non-negotiable tool for steaming the ribs to perfection and locking in all those incredible juices.
Specific measurements for each ingredient can be found in the comprehensive recipe card located at the conclusion of this article.
Step-by-Step Guide: How to Grill Fall-Off-The-Bone Spare Ribs
Get ready to impress your family and friends with the easiest, most delicious grilled ribs you’ve ever prepared! These detailed instructions, also available in the recipe card below, will guide you through every step to ensure success.
Selecting and Preparing Your Ribs
The journey to perfect ribs begins with selecting quality meat and preparing it properly.
First, source high-quality spare ribs. As discussed, we prefer spare ribs over baby back ribs for their superior meat content and the exceptional tenderness they achieve through low and slow grilling. Look for ribs with good marbling and a consistent thickness.
Next, it’s crucial to prep the meat by removing the membrane (also known as the silver skin) from the back of the rack. This thin, silverskin-like tissue becomes tough and chewy when cooked and prevents the rub from penetrating the meat. To remove it, flip the ribs over, meat-side down. Using a small knife or the tip of a spoon, gently pierce the membrane at one end and lift a small corner. Grab the loosened membrane with a paper towel (for better grip) and slowly pull it off the entire rack. It should come off in one piece if done carefully.
The Flavor Infusion: Mustard Base & Dry Rub Application
This two-step process builds layers of flavor and ensures the dry rub adheres perfectly.
In a small bowl, combine the yellow mustard, apple juice, and apple cider vinegar. This mixture forms a tangy and slightly sweet base that moistens the ribs and acts as an excellent adhesive for the dry rub. Generously slather this liquid mixture all over both sides of the ribs, ensuring an even coating.
Now, prepare your dry rub. In a jar or airtight container, combine all the dry rub ingredients. Shake well to ensure they are thoroughly mixed. You can prepare this rub in advance and store it for up to two months, making future rib cookouts even quicker.
Massage the flavorful spice rub generously onto both sides of the ribs, pressing gently to ensure it adheres to the mustard base. While it might be tempting to use all the rub, remember our Pro Tip: only apply as much rub as naturally sticks to the ribs. Any excess that falls off after a good massage means you’ve over-seasoned. The backside of the ribs technically doesn’t need as much rub, but a light application won’t hurt. A good rule of thumb is to apply a visible, even layer without caking it on.
The “Low and Slow” Grill Process with Reynolds Wrap®
This is the heart of the “fall-off-the-bone” technique.
Preheat your grill to a consistent 225°F (107°C). For optimal results, utilize indirect heat. If your grill allows, only light half of the burners and place the ribs on the side where the burners are off. This prevents direct charring and allows for a gentle, even cook. Close the lid and maintain the temperature around 225°F, checking it every hour or so. Allow the ribs to cook in this manner for 4 hours. This initial phase helps to render fat and tenderize the meat.
After 4 hours, it’s time to introduce the Reynolds Wrap® Heavy Duty Foil. This crucial step prevents further browning or caramelization while trapping all the moisture and juices. Lay out a large sheet of Heavy Duty Foil (or two overlapping sheets for extra-large racks). Carefully transfer the ribs onto the foil. Wrap the ribs tightly, sealing all edges to create a secure packet. This creates that essential steaming environment. Return the foil-wrapped ribs to the indirect heat section of the grill and continue cooking for an additional 1 to 3 hours, depending on the thickness of your meat. Thicker ribs will require more time.
PRO TIP for Doneness: To test if your ribs have reached the perfect fall-off-the-bone stage, carefully remove them from the grill (still in foil if desired, or carefully unwrap one end). Using tongs, gently lift the ribs. If they are ready, the rack should bend significantly, and you should feel the bones become loose within the meat, with the meat threatening to break apart. This indicates supreme tenderness.
The Unbeatable Benefits of Reynolds Wrap® Heavy Duty Foil
As a proud Reynolds Wrap® Ambassador, I’m thrilled to emphasize just how vital Heavy Duty Foil is to this recipe’s success. It’s more than just a wrap; it’s a key component in achieving perfectly tender ribs.
The primary benefit is its ability to create a sealed environment, effectively locking in all the juices and moisture. This prevents the ribs from drying out during the long cooking process, resulting in incredibly succulent and flavorful meat. Furthermore, its superior strength and durability mean it won’t tear easily, even with heavier cuts like ribs, ensuring a flawless cooking process and a remarkably easy cleanup afterwards – simply discard the foil!
I used to double-wrap my ribs with standard foil, but once I discovered the Heavy Duty variant, there was no turning back. It’s perfectly engineered for cooking substantial foods like ribs, making double wrapping unnecessary. For those grilling enthusiasts, Reynolds Wrap® Heavy Duty Foil is also conveniently available in an 18-inch wider roll, which is fantastic for accommodating larger racks of ribs without hassle.
To use it, simply place your prepared ribs in the middle of a generous sheet of Heavy Duty Foil. Bring the sides up and over the ribs, then roll and crimp the edges together tightly to create a secure, sealed packet. This ensures maximum moisture retention, guaranteeing those glorious fall-off-the-bone results. Plus, Reynolds Wrap® has recently innovated with a new easy-open and close tab on every box, making storage a breeze once you’re done wrapping your delicious ribs. Look for the distinctive blue Heavy Duty Foil packaging!
FAQs for Perfect BBQ Ribs
What are the Best Ribs for Grilling?
For this low and slow grilling method, spare ribs or St. Louis style ribs are unequivocally the best choice. They offer more meat and inherently become more tender than baby back ribs with this cooking approach. While baby back ribs can be used, they often require a longer cooking duration to reach the same level of tenderness.
Can I Prepare Ribs Ahead of Time?
Yes, ribs can be prepared a few hours in advance, though they are always at their absolute best when served fresh off the grill. If you need to keep them warm for a short period, wrap the cooked ribs tightly in a fresh sheet of foil, then wrap them in two thick towels, and place them in an insulated cooler. This method will keep them warm and juicy until you’re ready to serve.
What is the Membrane on Ribs and Why Remove It?
The membrane, often called “silver skin,” is a tough, thin layer of connective tissue found on the underside (bone side) of a rack of ribs. It’s crucial to remove this membrane before cooking because it does not break down or soften during cooking; instead, it becomes chewy and unpleasant to eat. Removing it also allows your dry rub and flavors to penetrate the meat more effectively, leading to a more tender and flavorful result.
How Long do Cooked Ribs Last?
Once cooked, if stored properly in an airtight container, leftover grilled ribs will maintain their quality and freshness in the refrigerator for approximately 4-5 days. They can also be frozen for longer storage, typically up to 2-3 months.
Can I Make Ribs in a Slow Cooker or Oven?
Absolutely! If you don’t have access to a grill or prefer an indoor method, ribs can be wonderfully prepared in both a slow cooker and an oven. For slow cooker ribs, simply apply your chosen rub, then cook on high for about 4 hours or on low for 8 hours until they are nearly falling off the bone. Finish them with your favorite BBQ sauce. Our Asian sticky ribs recipe is a fantastic slow cooker option!
For an oven-baked method, prepare the ribs as instructed for grilling. Preheat your oven to 275°F (135°C). Wrap the ribs tightly in Reynolds Wrap® Heavy Duty Foil (using a top and bottom piece for easier handling and a tighter seal). Place the foil-wrapped ribs on a baking sheet, meat side up, and bake for 3.5 to 4 hours. For a crispy exterior, remove the ribs from the foil, increase the oven temperature to 500°F (260°C), and cook for an additional 1-4 minutes, watching closely to prevent burning.
It’s time to conquer grilling spare ribs! While they might seem intimidating, by following this comprehensive recipe and harnessing the power of Reynolds Wrap® Heavy Duty Foil, you are guaranteed to produce the most tender, juicy, and flavor-packed ribs every single time. Get ready for your next unforgettable BBQ!
More Irresistible Ribs Recipes to Explore:
- Traeger Smoked Ribs
- Smoky BBQ Instant Pot Ribs
- Instant Pot Country Style Ribs
- Easy Beef Short Ribs (Oven Braised)
- Sticky Instant Pot Bone-In Beef Short Ribs
- Asian Sticky Slow Cooker Ribs
- Mustard Carolina BBQ Sauce Instant Pot Beef Short Ribs
- Korean Oven Braised Short Ribs
- Blackberry Hoisin BBQ Ribs
Easy BBQ Ribs
Ingredients
Rub
- 1/4 Cup Kosher Salt
- 2 Tablespoons Brown Sugar
- 1 Tablespoon Pepper
- 1 1/2 teaspoons Garlic Powder
- 1 1/2 teaspoons Onion Powder
- 1 Tablespoon Chili Powder
- 1 Tablespoon Smoked Paprika
- 1 teaspoon Thyme
- 1 1/2 teaspoons Cumin
- 1 Pinch Nutmeg
Ribs
- 1 Rack Spare Ribs (or St. Louis Style), Pork
- 1/4 Cup Mustard
- 1/4 Cup Apple Juice
- 1/4 Cup Apple Cider Vinegar
- Reynolds Wrap® Heavy Duty Foil
Instructions
For The Rub
-
Combine all the ingredients in a jar, and give it a good shaking.1/4 Cup Kosher Salt, 2 Tablespoons Brown Sugar, 1 Tablespoon Pepper, 1 1/2 teaspoons Garlic Powder, 1 1/2 teaspoons Onion Powder, 1 Tablespoon Chili Powder, 1 Tablespoon Smoked Paprika, 1 teaspoon Thyme, 1 1/2 teaspoons Cumin, 1 Pinch Nutmeg
-
It doesn’t matter what order you go in. Make sure you label the jar with the date you made the rub. Typically two months is a good shelf life for your homemade rubs. Enjoy!
For The Ribs
-
Flip the ribs over and using a knife, pierce the silver skin of the ribs and pull it up a little. Use a paper towel and a firm grip to pull off the membrane.1 Rack Spare Ribs (or St. Louis Style)
-
In a small bowl, mix together the mustard, apple juice, and apple cider vinegar.1/4 Cup Apple Juice, 1/4 Cup Apple Cider Vinegar, 1/4 Cup Mustard
-
Slather the ribs in the mustard mixture then coat evenly with spices. Do not use all of the dry rub as it makes a lot. Just save the rest in a jar for another day.
-
Heat the grill to 225 degrees F. If you can have indirect heat by not lighting certain burners on your grill, this is best. Add the ribs and close the lid, checking every 30-60 minutes just to maintain the heat. Cook the ribs for 4 hours, then wrap in Reynolds Wrap® Heavy Duty Foil and cook an additional 1-3 hours, depending on how thick the meat is.Reynolds Wrap® Heavy Duty Foil
-
To test if the ribs are done, use tongs to lift the ribs and bend them. You should feel the bones loose in the meat and see the meat easily bend and break apart.
-
If you need to keep the ribs warm, wrap in foil, then in two towels and place in a cooler until time to eat.
Oven Baked Method
-
If you do not have access to a grill you can use the oven. Prepare the ribs per above. Heat the oven to 275 degrees Fahrenheit. Wrap the ribs tightly in Reynolds Wrap® Heavy Duty Foil. Use a top and a bottom piece for easier opening. Place the ribs on a baking sheet.
-
Cook the ribs, meat side up for 3 1/2- 4 hours.
-
Remove the ribs from the foil, increase oven temp to 500 and cook the ribs until the outside is crispy, about 1-4 minutes.
Recipe Notes
Nutrition
Nutrition information is automatically calculated, so should only be used as an approximation.
REMEMBER TO SUBSCRIBE TO our FREE Oh Sweet Basil NEWSLETTER AND RECEIVE EASY RECIPES DELIVERED INTO YOUR INBOX EVERY DAY!
When you try a recipe, please use the hashtag #ohsweetbasil on INSTAGRAM for a chance to be featured in our stories! FOLLOW OH, SWEET BASIL ON FACEBOOK | INSTAGRAM | PINTEREST | TWITTER FOR ALL OF OUR LATEST CONTENT, RECIPES AND STORIES.