
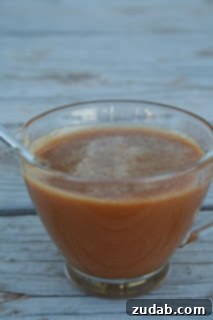
Unlock the Magic of Homemade Caramel Sauce: A Sweet Basil Classic Recipe
There’s an undeniable charm and superior taste that comes with homemade creations, especially when it comes to sweet treats like caramel sauce. Eschewing store-bought, processed alternatives in favor of making things from scratch not only ensures you’re using the freshest ingredients but often proves to be more cost-effective. Beyond the practical benefits, there’s immense satisfaction in crafting something truly delicious with your own hands. Our homemade caramel sauce recipe embodies this philosophy perfectly, delivering a rich, buttery, and utterly irresistible topping that will elevate any dessert or snack. Forget the artificial flavors and preservatives; once you taste this velvety, smooth caramel, you’ll never go back to the jarred stuff.
This versatile **homemade caramel sauce** is an absolute game-changer. Whether you’re topping a scoop of vanilla ice cream, drizzling it over apple slices, or adding a touch of sweetness to your morning coffee, its decadent flavor profile will shine through. It’s surprisingly simple to make, requiring just a few basic ingredients and a little bit of patience. Join us as we explore the nuances of this delightful confection, address common questions, and guide you through creating your very own batch of liquid gold.
Caramel Sauce vs. Butterscotch: Understanding the Delicious Difference
A common culinary query often arises: are caramel sauce and butterscotch the same thing? While both are rich, sweet, and often amber-colored, they are indeed distinct confections with different flavor profiles and primary ingredients. Understanding this difference is key to appreciating their unique qualities.
- Caramel: The classic caramel, as featured in our recipe, is primarily made from granulated white sugar, which is cooked until it melts and caramelizes, developing its characteristic rich, nutty flavor. To this base, heavy whipping cream, butter, and a dash of vanilla extract are added. The resulting taste is a complex balance of sweet, buttery, and slightly burnt sugar notes.
- Butterscotch: In contrast, butterscotch uses brown sugar as its base instead of white granulated sugar. This fundamental ingredient swap imparts a deeper, molasses-rich flavor that is distinctly different from caramel. While butterscotch also typically includes butter and often cream, the prominent brown sugar note defines its unique taste. Think of it as a cousin, similar in texture but with a different lineage of sweetness.
So, while both are utterly delicious and can be used in similar applications, their distinctive sugar bases mean they offer different flavor experiences. For a pure, classic, and deeply satisfying sweet and buttery taste, caramel is your go-to choice.
Storing Your Homemade Caramel Sauce: Refrigeration and Shelf Life
Once you’ve whipped up a batch of this luscious homemade caramel sauce, you’ll want to ensure it stays fresh and delicious for as long as possible. Proper storage is crucial for maintaining its quality and extending its shelf life. Here’s how to do it:
- Cool Down First: After cooking, allow your caramel sauce to cool completely to room temperature. This is important to prevent condensation from forming inside your storage container, which can lead to a watery texture or even spoilage.
- Airtight Container: Transfer the cooled caramel sauce into a clean, airtight glass jar or container. Glass is preferred as it doesn’t absorb odors or colors and is easy to sanitize.
- Refrigeration is Key: Caramel sauce, especially homemade versions containing dairy, must be refrigerated. Storing it in the refrigerator helps inhibit bacterial growth and maintains its rich flavor and texture.
- Shelf Life: When stored correctly in an airtight container in the refrigerator, your homemade caramel sauce will keep beautifully for up to 1 month. Always use clean utensils when scooping out the sauce to avoid introducing contaminants.
Before serving, you might find the refrigerated caramel has thickened considerably. To restore its pourable consistency, simply warm it gently in a saucepan over low heat or in a microwave-safe bowl in short intervals, stirring frequently, until it reaches your desired consistency.
Can You Freeze Homemade Caramel Sauce? Long-Term Storage Solutions
If you’ve made a larger batch of homemade caramel sauce or simply want to extend its usability beyond the typical one-month refrigeration period, freezing is an excellent option. Freezing caramel sauce is straightforward and ensures you always have this delightful topping on hand for future cravings.
- Preparation for Freezing: Ensure the caramel sauce has cooled completely to room temperature. Portion the sauce into freezer-safe airtight containers or heavy-duty freezer bags. If using bags, squeeze out as much air as possible before sealing. You can also freeze smaller portions in an ice cube tray, then transfer the frozen caramel cubes to a freezer bag once solid.
- Freezer Storage: Properly stored, homemade caramel sauce can be kept in the freezer for up to 3 months. Clearly label your containers or bags with the date of freezing to keep track of freshness.
- Thawing and Reheating: When you’re ready to use your frozen caramel sauce, transfer it from the freezer to the refrigerator and let it thaw overnight. Alternatively, for quicker thawing, you can place the sealed container or bag in a bowl of cool water. Once thawed, gently reheat the caramel sauce in a saucepan over low heat, stirring occasionally, until it’s smooth and warm. If it seems a little thick, you can add a tablespoon of heavy cream or milk during reheating to achieve your preferred consistency.
Freezing is a fantastic way to enjoy the convenience of store-bought sauces without sacrificing the homemade quality and flavor. It means you can always have a stash of this versatile treat ready for any occasion.
Endless Possibilities: What to Do with Your Homemade Caramel Sauce
The beauty of homemade caramel sauce lies not only in its exquisite taste but also in its incredible versatility. Beyond the obvious delight of drizzling it over a simple scoop of ice cream, this luscious condiment can transform a wide array of dishes and beverages. Here are just a few ideas to inspire your culinary creativity:
- Dessert Topping: The quintessential use! Drizzle generously over vanilla ice cream, apple pie, cheesecakes, brownies, or warm bread pudding.
- Fruit Pairing: A match made in heaven with fresh apple slices, pear slices, or bananas. It’s also fantastic over baked apples or pears.
- Beverage Enhancer: Stir a spoonful into your morning coffee or hot chocolate for a gourmet twist. Blend it into milkshakes or smoothies for a rich, sweet treat.
- Breakfast & Brunch: Elevate your pancakes, waffles, French toast, or crepes with a warm caramel drizzle. Mix it into oatmeal or yogurt for a decadent start to your day.
- Baking & Confections: Use it as a filling for tarts, cakes, and cupcakes. Swirl it into brownie batter or blondies for pockets of gooey caramel. It can also be incorporated into frosting recipes for a caramel buttercream.
- Savory Pairings: While less common, a hint of caramel can complement certain savory dishes, particularly those with pork or chicken, adding a touch of sweet and salty depth.
- Salted Caramel Variation: To make salted caramel sauce, simply increase the amount of salt slightly (to about 1/2 to 1 teaspoon, or to taste) in our recipe. The combination of sweet and salty is truly divine!
With a jar of homemade caramel sauce in your fridge, you’re always just a drizzle away from turning an ordinary dish into an extraordinary indulgence. Experiment and discover your favorite ways to enjoy this liquid gold!
Troubleshooting Common Caramel Sauce Problems
Making homemade caramel sauce is rewarding, but like any culinary endeavor, it can sometimes present challenges. Don’t be discouraged if your first attempt isn’t perfect; mastering caramel requires a bit of practice and an understanding of common pitfalls. Here’s a guide to troubleshooting some of the most frequent problems:
-
Crystallization: This is arguably the most common issue, where the sugar mixture turns grainy instead of smooth.
Cause: Sugar crystals on the side of the pan can fall back into the syrup and cause the entire batch to crystallize. Stirring the sugar too early or too much can also trigger crystallization.
Solution: To prevent this, ensure your saucepan is impeccably clean. Once the sugar and water are boiling, avoid stirring. If crystals appear on the sides of the pan, use a pastry brush dipped in water to gently wash them down into the syrup. A lid can also be used for the first few minutes of boiling, allowing steam to wash down the sides.
-
Burning: Caramel can go from perfectly golden to burnt in a matter of seconds.
Cause: High heat or simply walking away from the stove.
Solution: Use a heavy-bottomed saucepan for even heat distribution. Always cook sugar over medium heat and never leave it unattended, especially once it starts to change color. If it burns, unfortunately, there’s no saving it; you’ll have to discard it and start over. The smell and taste of burnt sugar are unmistakable.
-
Too Thin or Too Thick: Achieving the perfect consistency is key.
Cause: Too thin usually means the caramel wasn’t cooked long enough or didn’t cool sufficiently. Too thick might mean it was cooked too long, or the proportions of cream/butter to sugar were off.
Solution: If your cooled caramel is too thin, gently reheat it and simmer for a few more minutes, stirring, until it slightly thickens. Remember it will thicken significantly as it cools. If it’s too thick, gently reheat it and whisk in a tablespoon or two of warm heavy cream or milk until it reaches your desired consistency.
-
Separation or Graining After Adding Cream: The mixture looks curdled or splits.
Cause: Adding cold cream to hot caramel can shock the mixture, causing it to seize or separate. Not stirring enough during or after adding cream can also be a factor.
Solution: Always warm your heavy cream before adding it to the hot caramel. This helps prevent seizing and ensures a smooth emulsification. Add the cream slowly and stir continuously until fully incorporated. If it does separate, sometimes gentle reheating and vigorous whisking can bring it back together, but it’s not always guaranteed.
Patience, careful observation, and a good quality saucepan are your best allies in making flawless homemade caramel sauce. Don’t be afraid to try again, each attempt brings you closer to perfection!
Tips for Making the Best Homemade Caramel Sauce
Achieving that perfectly smooth, rich, and flavorful homemade caramel sauce is easier with a few expert tips. These insights will help you avoid common pitfalls and ensure a consistently delicious result every time you step into the kitchen to make this sweet confection.
- Use a Heavy-Bottomed Pot: This is perhaps the most crucial tip. A heavy-bottomed saucepan distributes heat much more evenly, which prevents the sugar from burning in spots while other areas are still melting. This uniform heating is essential for a smooth, even caramelization.
- Patience is Key: Don’t rush the process, especially during the initial sugar dissolving phase and the caramelization stage. Medium-low to medium heat allows the sugar to melt and caramelize gradually, developing deep flavor without burning.
- Avoid Stirring Early: Once the sugar and water mixture comes to a boil, resist the urge to stir. Stirring can introduce air and cause sugar crystals to form on the sides of the pan, leading to crystallization. If you see crystals, gently brush them down with a wet pastry brush.
- Warm Your Cream: Before adding the heavy cream to the hot caramel, ensure it’s warmed. Cold cream can cause the hot caramel to seize up and harden, making it difficult to achieve a smooth texture. Gently warm the cream in a separate saucepan or microwave until just warm to the touch, not boiling.
- Be Cautious When Adding Cream: When it’s time to add the warm cream, do so slowly and carefully. The mixture will bubble up vigorously and release a lot of steam. Pour it in a thin, steady stream while continuously stirring. This helps the caramel to emulsify smoothly.
- Consider a Candy Thermometer: While not strictly necessary for this recipe, a candy thermometer can provide precision. For a rich amber caramel, aim for a temperature of about 320-350°F (160-175°C) before adding the cream. If you don’t have one, rely on visual cues – a deep amber color, but not so dark it smells burnt.
- A Pinch of Salt: Don’t skip the salt! Even if you’re not making “salted” caramel, a small pinch of salt enhances the sweetness and depth of flavor, balancing the richness of the caramel.
By following these simple tips, you’ll be well on your way to crafting professional-quality homemade caramel sauce that will impress everyone who tastes it. Enjoy the journey to caramel perfection!
Sweet Basil’s Irresistible Homemade Caramel Sauce Recipe
Homemade Caramel Sauce
Prep Time: 1 hr 5 mins |
Cook Time: 20 mins |
Total Time: 1 hr 35 mins |
Servings: 4
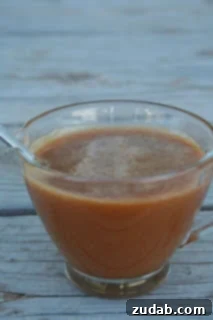
Indulge in the rich, buttery sweetness of this classic homemade caramel sauce. Perfect for drizzling over ice cream, stirring into coffee, or enhancing any dessert. This recipe from Sweet Basil is simple to follow and yields a truly irresistible result.
Ingredients
- 1/3 Cup Water
- 2 Cups Granulated Sugar
- 1 3/4 Cups Heavy Cream
- A pinch of salt (or more for salted caramel)
- 1 teaspoon Vanilla Extract
Instructions
- Prepare the Sugar Syrup: In a medium, heavy-bottomed saucepan, combine the 1/3 cup water and 2 cups granulated sugar. Heat the mixture over medium-low heat, stirring occasionally with a heat-resistant spatula or wooden spoon, until the sugar is completely dissolved and the mixture appears clear.
- Caramelize the Sugar: Increase the heat to medium and bring the sugar syrup to a boil. Allow it to boil without stirring. Observe the color carefully; the syrup will gradually turn from clear to light amber, then a beautiful rich caramel color. This typically takes about 5-10 minutes. Crucial Step: Do not walk away from the stove during this stage, as sugar can burn very quickly.
- Carefully Add Cream: Once the sugar syrup reaches a deep amber (caramel) color, immediately turn off the heat. Slowly and very carefully, pour in the 1 3/4 cups of heavy cream. Be extremely cautious as the mixture will bubble up vigorously and release a lot of steam. Stir continuously as you add the cream until it is fully incorporated and the mixture is smooth.
- Season the Caramel: Add the pinch of salt and the 1 teaspoon of vanilla extract to the caramel sauce. Stir vigorously until all ingredients are well combined and the salt is dissolved.
- Simmer to Perfection: Return the saucepan to very low heat. Allow the sauce to simmer gently for another 1-3 minutes, stirring constantly, to ensure it becomes perfectly smooth and all flavors meld together.
- Cool and Thicken: Remove the saucepan from the heat and allow the homemade caramel sauce to cool down completely. It will thicken significantly as it cools, transforming into its characteristic rich, viscous consistency. This process typically takes 1-3 hours at room temperature.
Recipe Notes
For optimal freshness and taste, store your delicious homemade caramel sauce in an airtight glass jar or container with a lid. Refrigerate it for up to one month. If the sauce becomes too firm when chilled, gently warm it over low heat or in the microwave until it reaches your desired pourable consistency.
Nutrition Information (Approximate per serving)
Based on 4 servings:
- Serving: 1g
- Calories: 749kcal
- Carbohydrates: 103g
- Protein: 2g
- Fat: 39g
- Saturated Fat: 24g
- Cholesterol: 143mg
- Sodium: 42mg
- Potassium: 82mg
- Sugar: 100g
- Vitamin A: 1531IU
- Vitamin C: 1mg
- Calcium: 69mg
- Iron: 1mg
Nutrition information is automatically calculated and should be used as an approximation only. Actual values may vary based on ingredients and preparation methods.
Conclusion: Your Journey to Caramel Perfection
Embarking on the journey of making homemade caramel sauce is a delightful culinary adventure. Not only does it allow you to control the quality of your ingredients and avoid unnecessary additives, but it also offers a taste and texture that simply cannot be matched by store-bought varieties. The process, while requiring attention, is immensely rewarding, culminating in a velvety, golden elixir that promises to elevate everything it touches.
From the moment you dissolve the sugar to the final drizzle over your favorite dessert, each step contributes to creating a truly magical confection. We hope this comprehensive guide and Sweet Basil’s cherished recipe empower you to create your own batches of this versatile treat with confidence. So go ahead, don your apron, gather your ingredients, and prepare to be amazed by the sheer joy of homemade caramel!
Love this recipe? Share your thoughts and experiences in the comments below! We’d love to hear from you!