
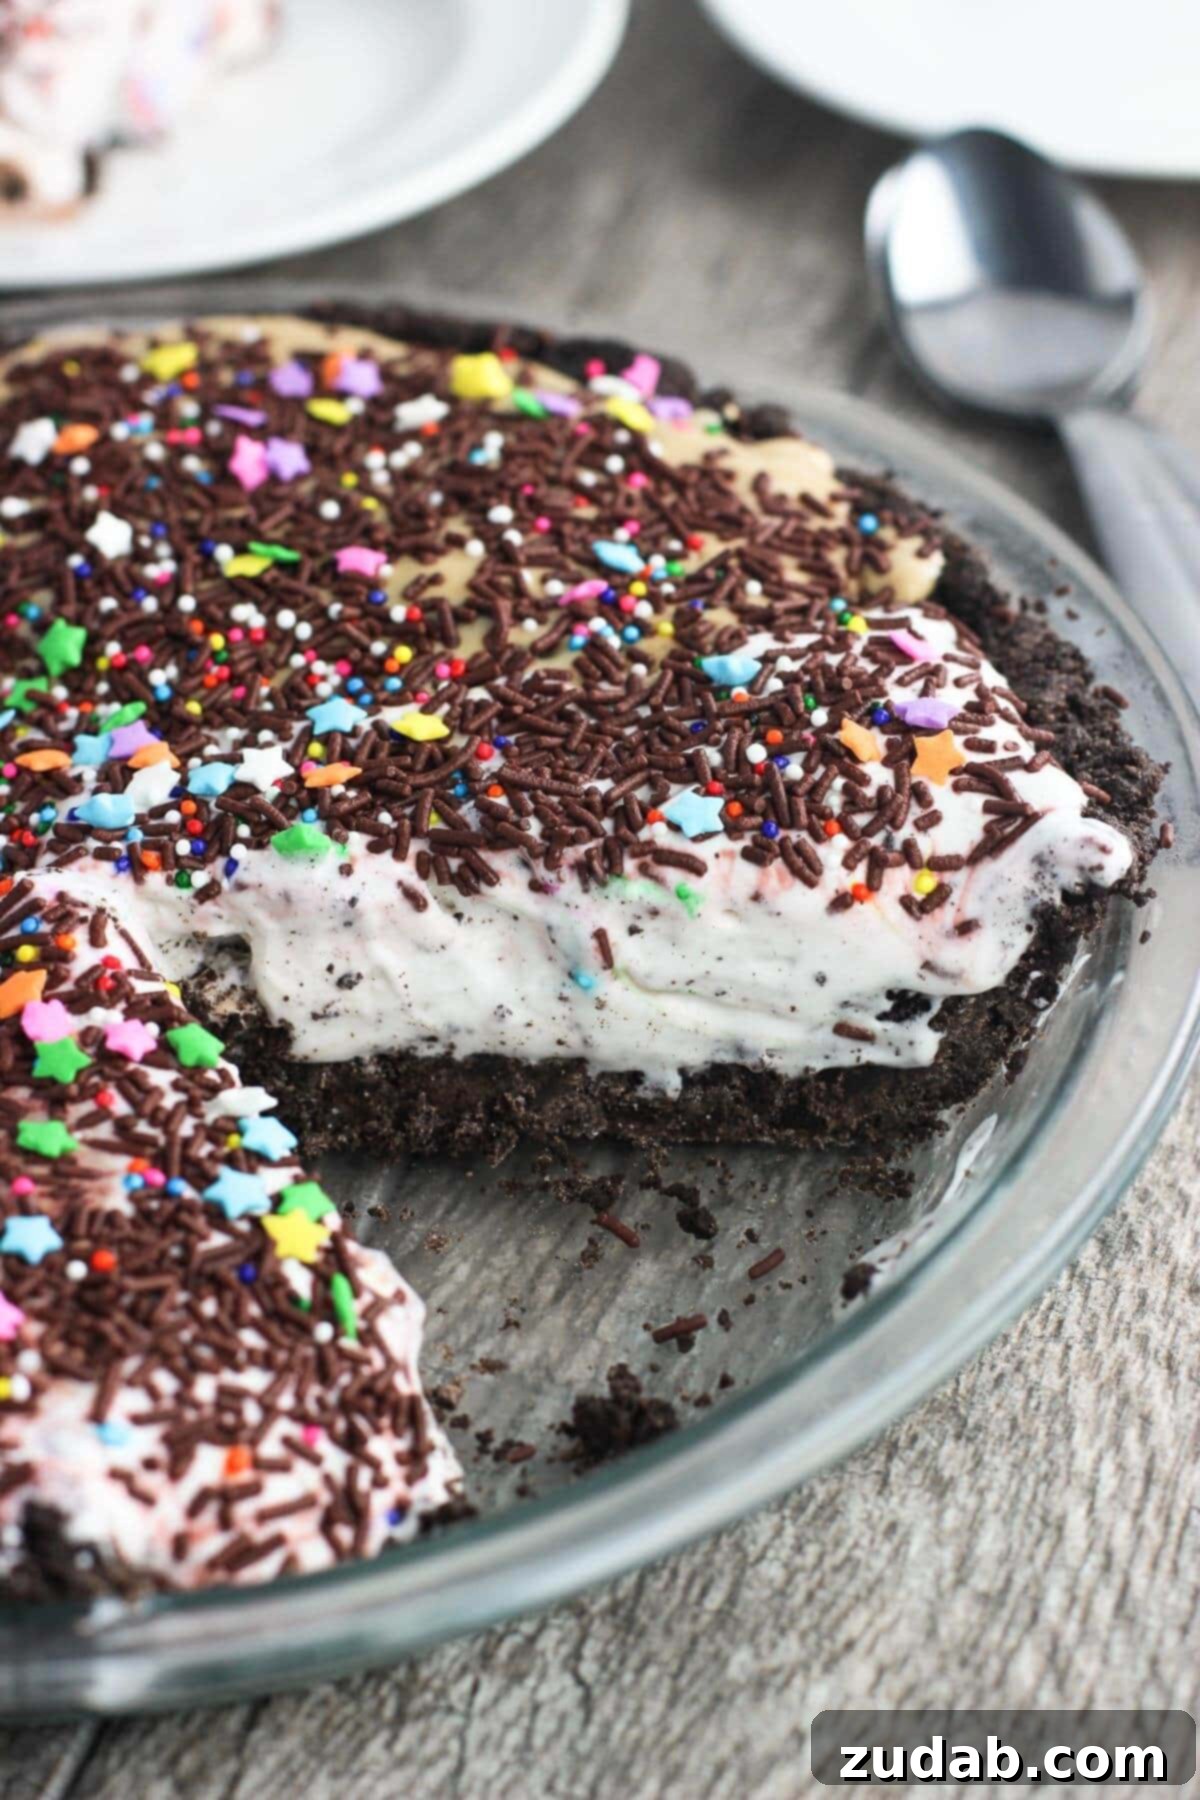
Indulge in the ultimate summer treat with this effortlessly delicious ice cream pie featuring a classic cookie crust. This no-bake marvel is a dream come true for pie lovers, cookie enthusiasts, and ice cream aficionados alike, promising a delightful dessert experience that will keep you cool and satisfied all season long.
The Ultimate No-Bake Ice Cream Pie: Your Go-To Summer Dessert
Hello there, fellow dessert lovers! It’s an absolute joy to share with you today an incredibly simple yet utterly satisfying no-bake dessert that is destined to become your summer staple. As the days grow longer and the temperatures rise, the last thing many of us want to do is turn on the oven. Whether you’re busy with home projects, enjoying outdoor adventures, or simply seeking a quick and delicious escape from the heat, a no-bake dessert is a true lifesaver. This easy ice cream pie perfectly fits the bill, offering a refreshing escape without any culinary fuss.
Imagine a dessert that requires minimal effort but delivers maximum flavor and enjoyment. This ice cream pie with a cookie crust is exactly that. It’s the kind of treat you can whip up in minutes, pop into the freezer, and then present as a show-stopping centerpiece at any gathering or simply enjoy with your family on a relaxed evening. Its versatility and simplicity make it an ideal choice for any occasion, from casual backyard barbecues to festive holiday celebrations. Get ready to impress with this delightful creation!
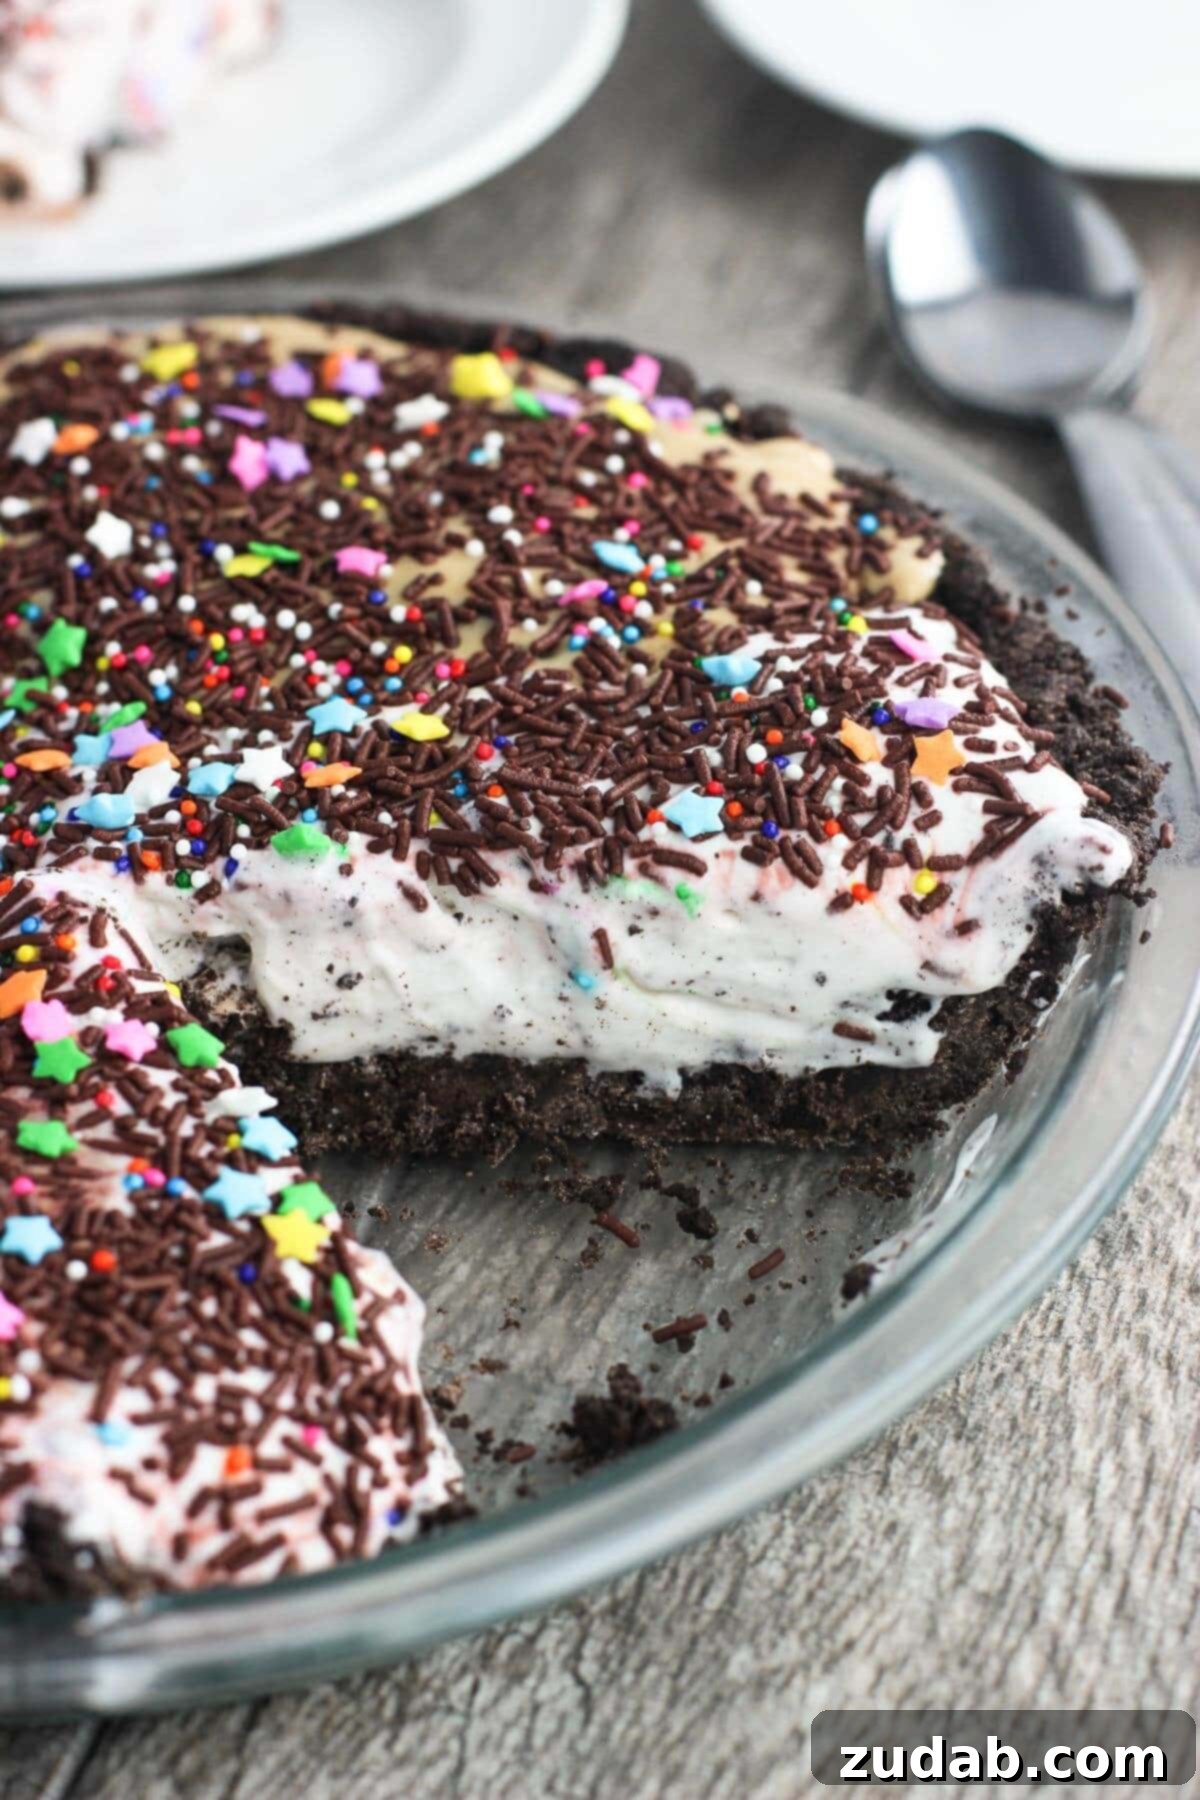
Why a No-Bake Ice Cream Pie is Your Summer Essential
The beauty of a no-bake dessert, especially in the warmer months, cannot be overstated. When the sun is shining brightly and every room feels a little too warm, the thought of preheating an oven can be enough to deter even the most ardent baker. This is where the magic of our no-bake ice cream pie truly shines. It eliminates the need for any oven time, keeping your kitchen cool and your energy levels high. This simple fact alone makes it an invaluable addition to your summer recipe repertoire.
Beyond the obvious benefit of keeping cool, a no-bake ice cream pie is also incredibly time-efficient. With just a few basic ingredients and minimal prep time, you can create a luxurious dessert that tastes like it took hours to prepare. This means more time enjoying the summer weather, spending moments with loved ones, or simply relaxing, rather than being confined to the kitchen. It’s the perfect solution for busy individuals or anyone who appreciates a delicious shortcut.
Furthermore, the simplicity of this recipe makes it accessible to cooks of all skill levels. Whether you’re a seasoned chef or a complete novice in the kitchen, you’ll find this recipe incredibly straightforward. There’s no complex baking science, no delicate doughs to handle, just simple steps that guarantee a fantastic result every time. This easy ice cream pie is truly a testament to how wonderful desserts can be without requiring extensive culinary expertise.
Crafting the Perfect Cookie Crust: Simple, Crunchy, Delicious
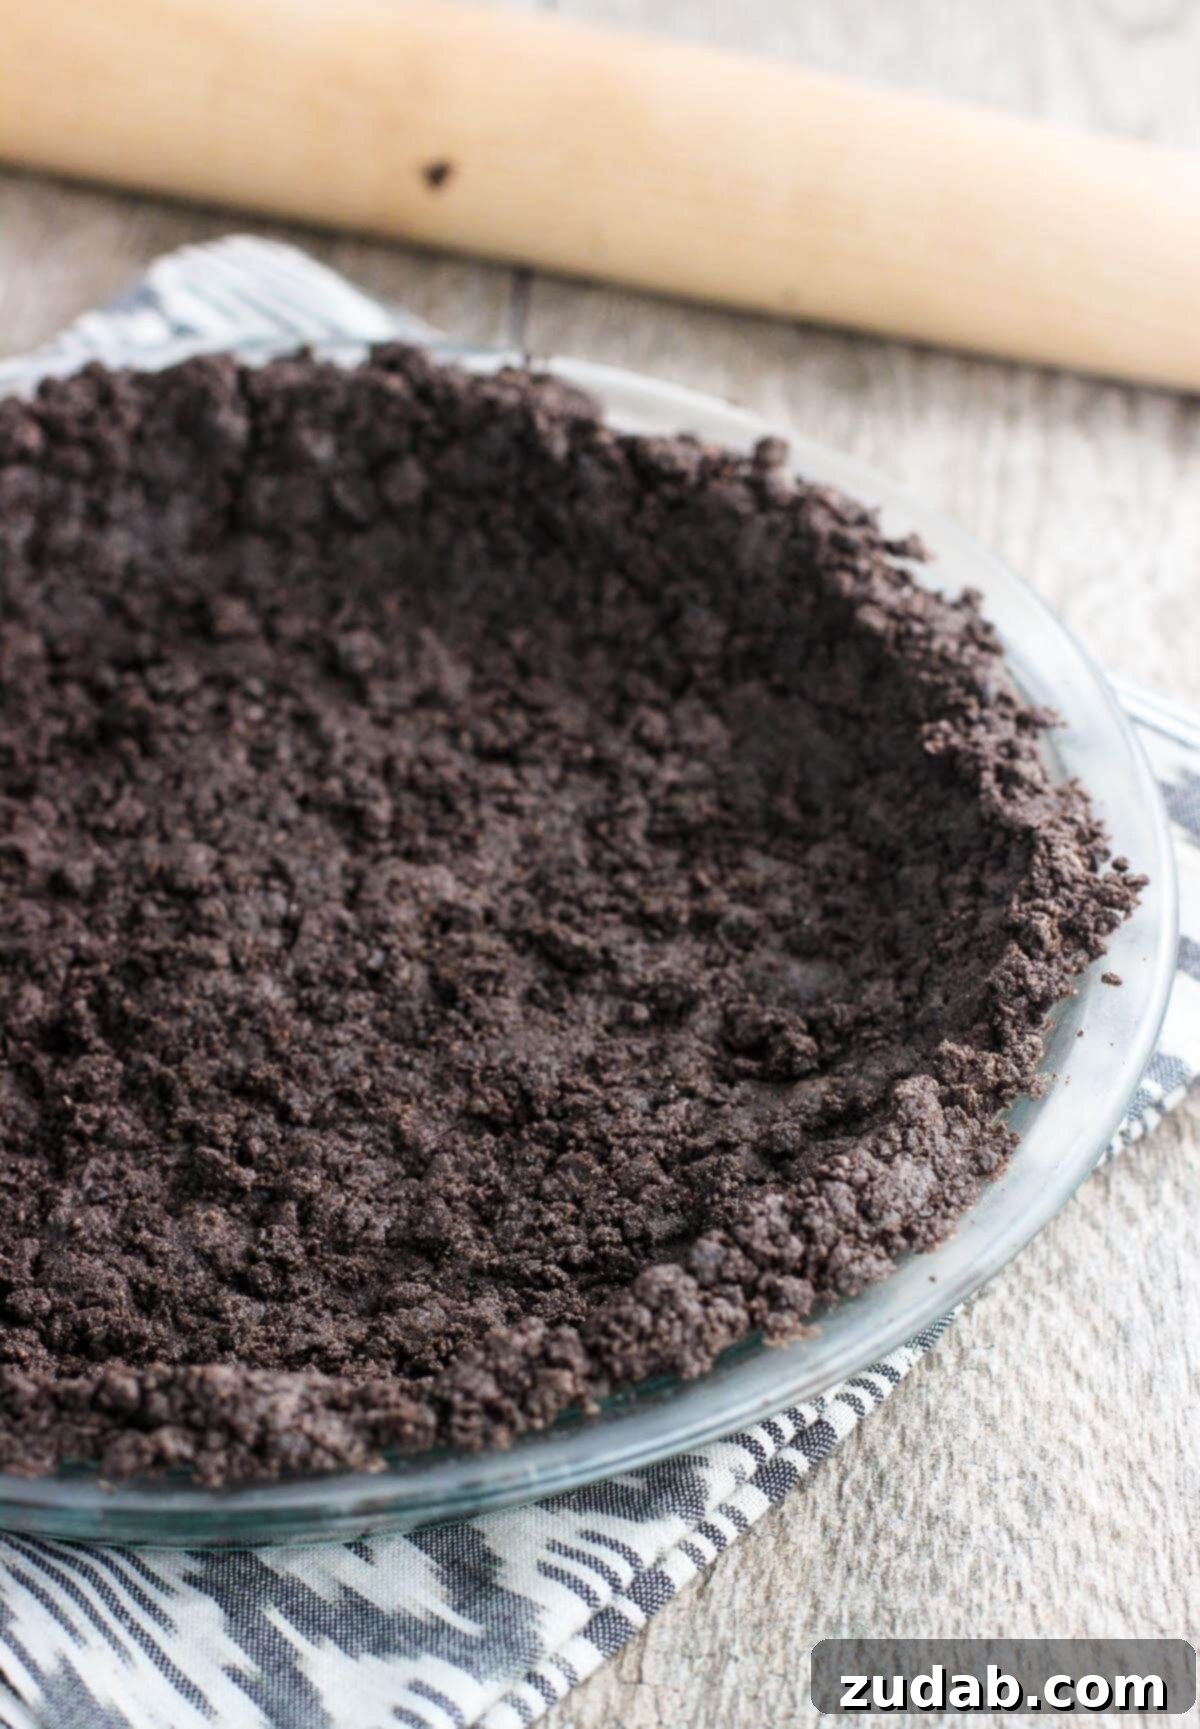
Every great pie starts with an exceptional crust, and this easy ice cream pie is no exception. Our no-bake crust is crafted from the irresistible combination of crushed Oreo cookies and a touch of melted unsalted butter. This dynamic duo creates a rich, chocolatey, and perfectly crunchy foundation that complements the creamy ice cream filling beautifully. The best part? It comes together in minutes with minimal fuss.
To prepare the crust, simply add a package of your favorite Oreo cookies to a food processor and pulse until they form fine, even crumbs. For those without a food processor, a sturdy ziploc bag and a rolling pin work just as effectively. Once the cookies are finely crushed, combine them with melted butter. The butter acts as a binder, ensuring the crumbs hold their shape when pressed into a pie plate. You’ll know the mixture is just right when it holds together easily when squeezed.
Once mixed, press the cookie crumb mixture evenly along the bottom and sides of a 9-inch round pie plate. Use the back of a spoon or your fingers to create a firm, compact crust. This step is crucial for preventing a crumbly crust when slicing. After forming the crust, pop it into the freezer for about 10-15 minutes. This chilling period allows the butter to solidify, creating a sturdy base for your ice cream pie. While the crust chills, it’s the perfect time to take your ice cream out of the freezer to soften slightly, making it easier to spread.
The beauty of this cookie crust is its endless customization. While classic Oreos are a fantastic choice, feel free to experiment with different Oreo flavors like Golden Oreos, Mint Oreos, or even Peanut Butter Oreos for an extra layer of flavor. Beyond Oreos, you could also use graham cracker crumbs for a more traditional pie crust flavor, or shortbread cookies for a buttery, delicate base. The choice is entirely yours, allowing you to tailor the crust to your preferred taste profile.
Your Flavor Adventure: Customizing the Ice Cream Filling
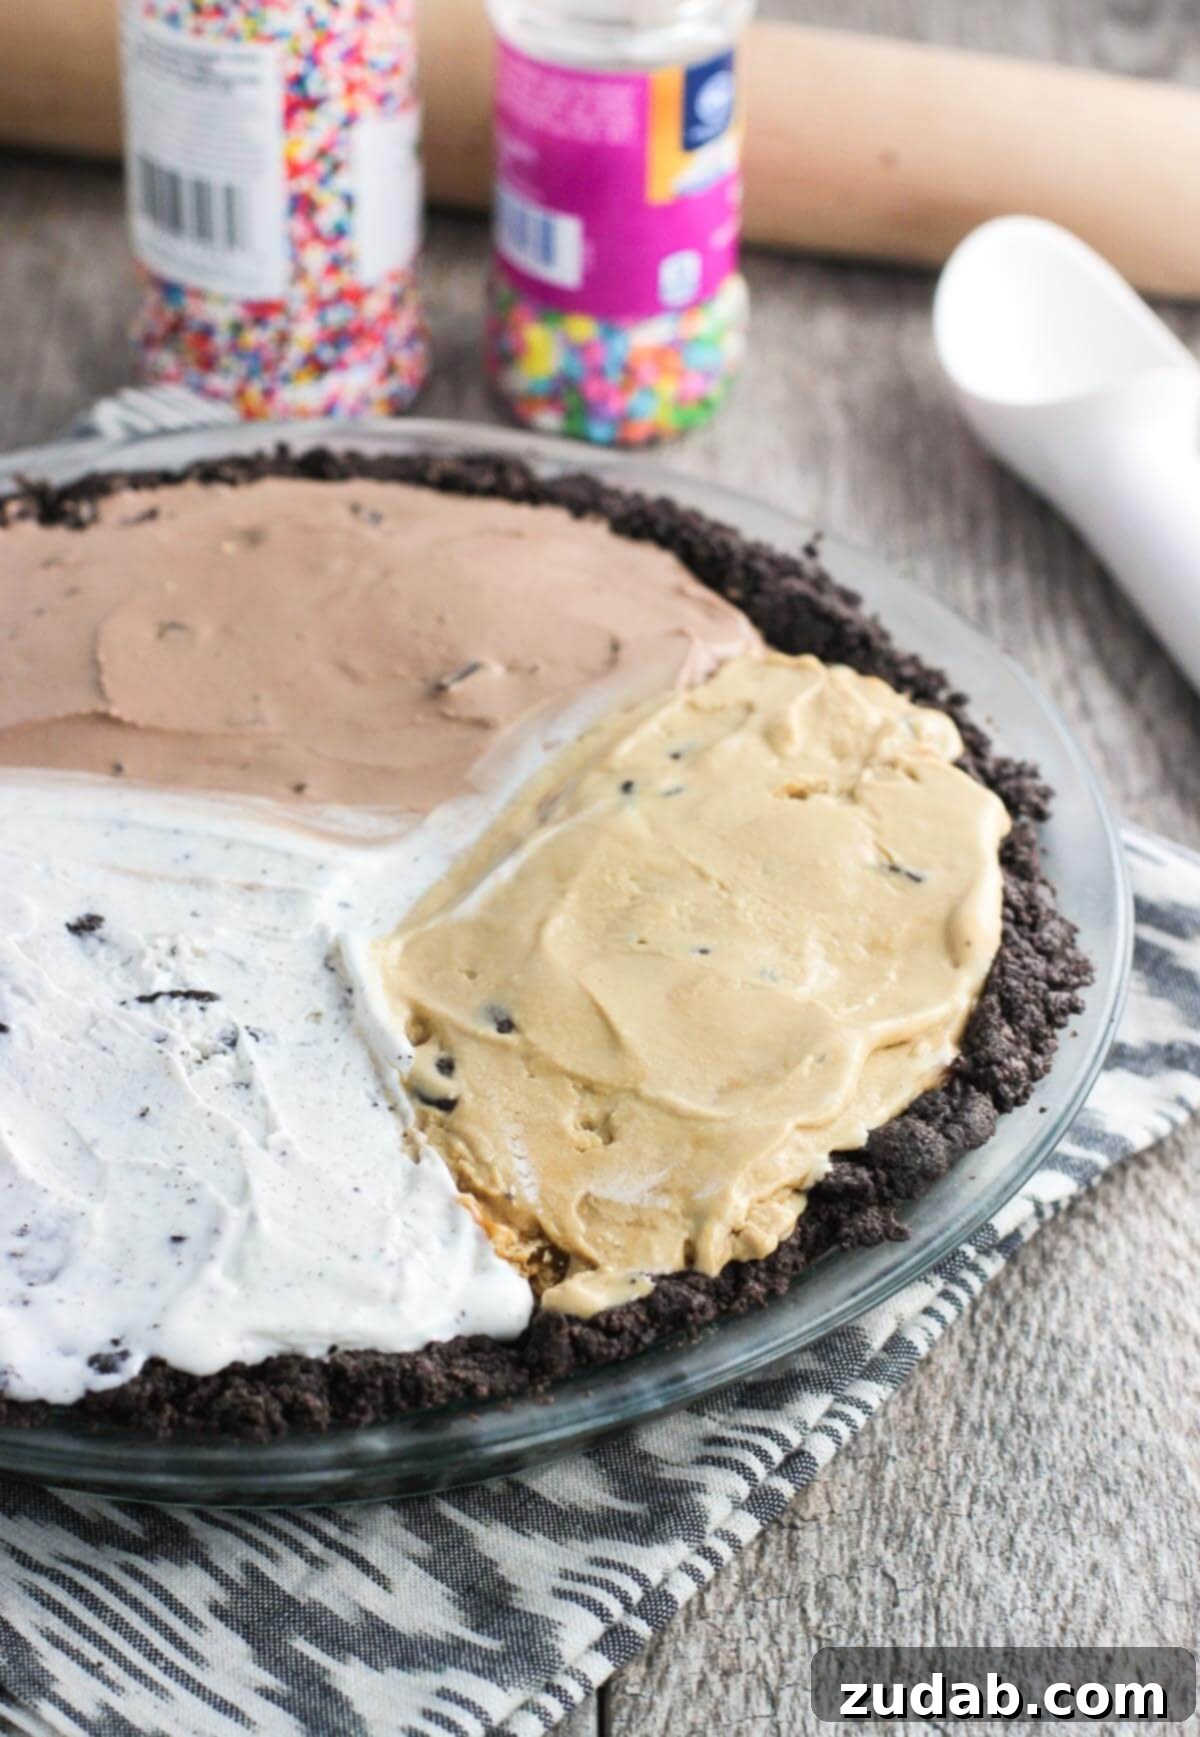
The true magic of this easy ice cream pie lies in its incredible customizability. This isn’t just a dessert; it’s a canvas for your favorite frozen delights! The original recipe suggests three delightful flavors: chocolate gelato, cookies and cream, and a caramel swirl. This combination offers a rich, varied experience with every slice, catering to different cravings and preferences within a single dessert.
However, don’t feel limited to these suggestions. This pie is designed for you to express your creativity. Consider classic combinations like vanilla bean, strawberry, and chocolate for a neapolitan-inspired treat. Or, for a more adventurous twist, try pairing mint chocolate chip with coffee ice cream and a swirl of dark cherry. The possibilities are truly endless!
When selecting your ice cream, think about variety in texture as well as flavor. Gelato offers a denser, richer experience, while a traditional ice cream is lighter and airier. You could even incorporate sherbet or sorbet for a fruity, tangy layer that cuts through the richness. For those with dietary restrictions, many excellent dairy-free ice cream options are now available, ensuring everyone can enjoy a slice of this magnificent pie.
Layering the ice cream is an art in itself. Once your crust is chilled and firm, gently scoop and spread your first flavor. Don’t worry about perfection; a slightly rustic look adds to the homemade charm. If you’re using multiple flavors, aim for distinct sections or swirl them together for a marbled effect. Ensure the ice cream is softened enough to spread easily but not so melted that it becomes soupy. Once all your ice cream layers are in place, smooth the top and prepare for the final flourish.
Elevate Your Pie: Toppings and Festive Decorations
No ice cream pie is complete without a crown of delectable toppings and a touch of festive decoration. While the original recipe highlights the effortless charm of sprinkles, this is another area where you can truly let your imagination run wild. Sprinkles are indeed a fantastic choice, especially for holidays! Imagine vibrant red, white, and blue sprinkles for Memorial Day or Fourth of July celebrations, transforming your pie into an instant patriotic showstopper. For birthdays, a medley of colorful sprinkles can bring an extra layer of joy.
Beyond sprinkles, consider a variety of other toppings to enhance both the flavor and visual appeal of your ice cream pie. A drizzle of warm fudge or luscious caramel sauce creates an indulgent finish. For a textural contrast, sprinkle on chopped nuts like pecans or walnuts, or add crushed candy bar pieces for an extra burst of sweetness and crunch. Fresh fruit, such as sliced strawberries, raspberries, or blueberries, can add a refreshing tartness and beautiful natural colors.
Whipped cream is another classic topping that adds a light, airy touch. You can pipe it artistically around the edges or create generous dollops across the surface. For a more sophisticated look, grate some dark chocolate over the top, or adorn it with chocolate curls. Edible glitter or a dusting of cocoa powder can also add an elegant flair, making your easy ice cream pie suitable for even the most formal dessert tables.
When decorating, remember that presentation is key. Even simple additions can make a huge difference. A beautifully decorated ice cream pie not only tastes amazing but also looks incredibly inviting, making it an unforgettable end to any meal. Don’t be afraid to experiment with different combinations until you find your signature style!
Frequently Asked Questions About Ice Cream Pies
Can Oreo Pie Crust be Made Ahead And Frozen?
Absolutely! Preparing your Oreo pie crust in advance is a fantastic time-saving tip. Once you’ve pressed the crushed cookies and melted butter into your pie plate, simply wrap it tightly in plastic wrap. For extra protection against freezer burn, you can then place the wrapped pie plate into a large freezer bag. This prepared crust can be stored in the freezer for up to one month, allowing you to have a ready-to-fill base whenever a craving strikes or unexpected guests arrive. When you’re ready to assemble your pie, simply remove the crust from the freezer and proceed with adding your favorite ice cream flavors.
Can Ice Cream Pie be Refrozen?
Refreezing ice cream, including ice cream pie, is generally safe if it has only slightly melted and remained cold. The primary concern with refreezing is the potential for bacterial growth if the ice cream has been left at room temperature for an extended period, or if it has completely melted. If your ice cream pie has only softened a bit, perhaps during assembly or transport, and is still distinctly cold, it’s usually safe to refreeze. However, be aware that the texture might change slightly after refreezing. Ice cream that has melted and refrozen can sometimes become grainier or icier due to the formation of larger ice crystals. For the best quality and texture, it’s ideal to serve the pie after its initial freeze or to refreeze only if absolutely necessary and when it hasn’t completely thawed.
How Long Will Ice Cream Pie Keep?
When properly stored, an ice cream pie can maintain its quality in the freezer for an impressive amount of time. For optimal taste and texture, it’s best consumed within 1 to 2 months. To ensure longevity and prevent freezer burn, make sure your ice cream pie is tightly wrapped. After its initial freeze, cover the pie completely with several layers of plastic wrap, pressing it down directly onto the surface of the ice cream to minimize air exposure. An additional layer of aluminum foil or placing the wrapped pie in an airtight freezer-safe container can provide even better protection. This meticulous wrapping helps preserve the pie’s creamy texture and delicious flavors, allowing you to enjoy slices of summer goodness for weeks to come.
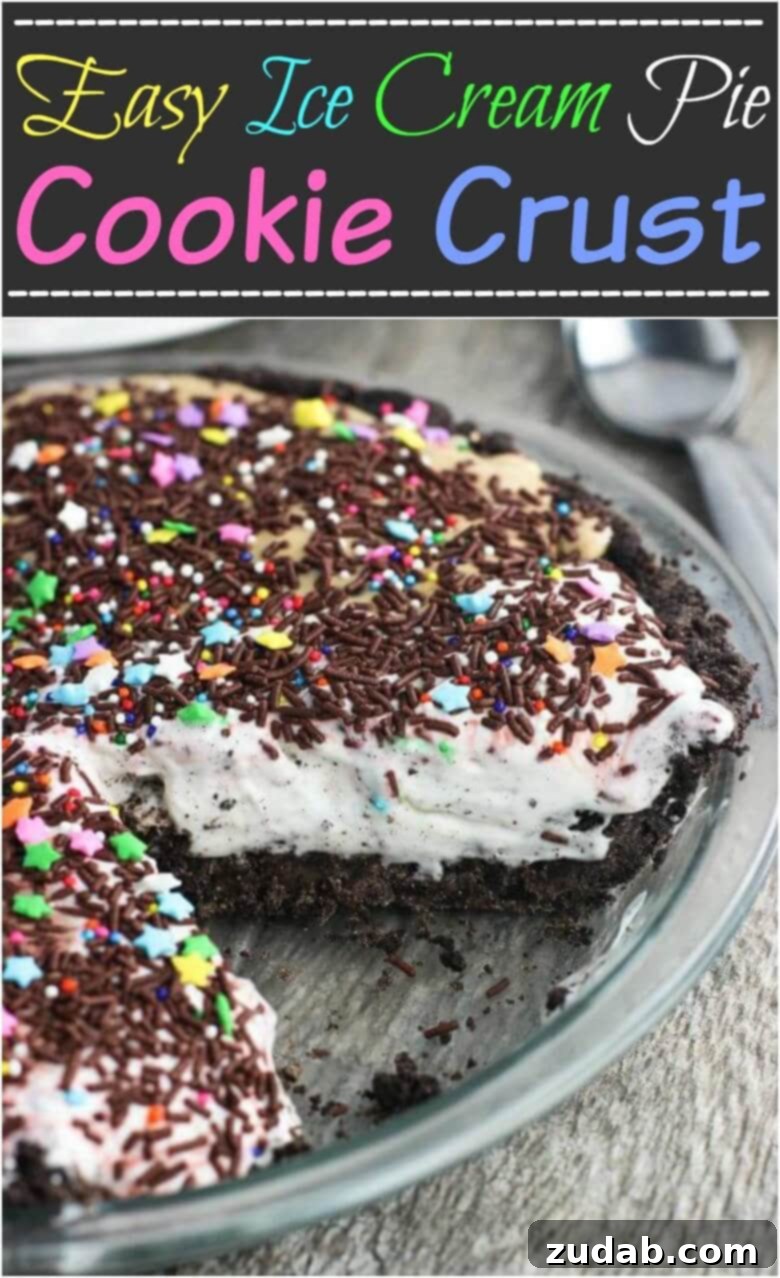
Easy Ice Cream Pie with a Cookie Crust Recipe
Easy Ice Cream Pie with a Cookie Crust
By: Sweet Basil
Prep Time: 10 minutes
Total Time: 1 hour 10 minutes (plus freezing time)
Yields: 8 servings
This easy ice cream pie with a cookie crust is a simple, no-bake dessert perfect for summer! It’s a delightful treat for pie, cookie, and ice cream enthusiasts alike, designed to bring joy and coolness to your warmest days.
Ingredients
- 1 Package Oreo Cookies (about 30 cookies)
- 2 1/2 Tablespoons Unsalted Butter, melted
- 1 Quart Ice Cream, your preferred flavor(s), softened
- Sprinkles for Decoration (optional)
Instructions
- Add Oreo cookies to the bowl of a food processor and process until they are in small crumbs.
- Pour in melted butter and stir to moisten the crumbs evenly. The mixture should hold its shape when you press into it.
- Pour the Oreo/butter mixture into a 9-inch round pie plate and evenly press mixture along the bottom and sides of the plate to form the crust.
- Place the pie plate in the freezer for about 10-15 minutes to harden the crust.
- In the meantime, remove your ice cream from the freezer to melt slightly and become easier to spread.
- Once the ice cream is spreadable to your liking, remove the pie plate from the freezer. Scoop and spread the softened ice cream into the crust. If using multiple flavors, layer them in sections as desired.
- Decorate with sprinkles or your chosen toppings.
- Place the assembled ice cream pie back in the freezer to harden completely (at least 4 hours, or overnight for best results). Remove about 10-15 minutes before serving so that it is easier to slice.
Recipe Notes
Feel free to get creative here! Use your favorite Oreo flavor or another cookie type for the crust. Experiment with one or more of your favorite ice cream flavors, and don’t hesitate to add extra toppings for a personalized touch.
The pie will keep well for up to 2 months in the freezer when covered tightly. For best texture and flavor, consume within 1-2 months.
Nutrition (Approximate per serving)
- Serving Size: 1 slice
- Calories: 539 kcal
- Carbohydrates: 68 g
- Protein: 7 g
- Fat: 27 g
- Saturated Fat: 13 g
- Polyunsaturated Fat: 3 g
- Monounsaturated Fat: 10 g
- Trans Fat: 1 g
- Cholesterol: 61 mg
- Sodium: 315 mg
- Potassium: 369 mg
- Fiber: 2 g
- Sugar: 48 g
- Vitamin A: 608 IU
- Vitamin C: 1 mg
- Calcium: 164 mg
- Iron: 7 mg
Nutrition information is automatically calculated, so should only be used as an approximation.
Like this recipe? We’d love to hear from you!
Leave a comment below and share your experience, or tag us on social media with your delicious creations!
More Irresistible Ice Cream Desserts to Enjoy
If you’ve fallen in love with the simplicity and deliciousness of this easy ice cream pie, you’re in for a treat! We have an array of other fantastic frozen desserts that are sure to hit the spot, whether you’re looking for another quick cool-down or a fun project for the weekend. Explore these tempting recipes and expand your summer dessert repertoire:
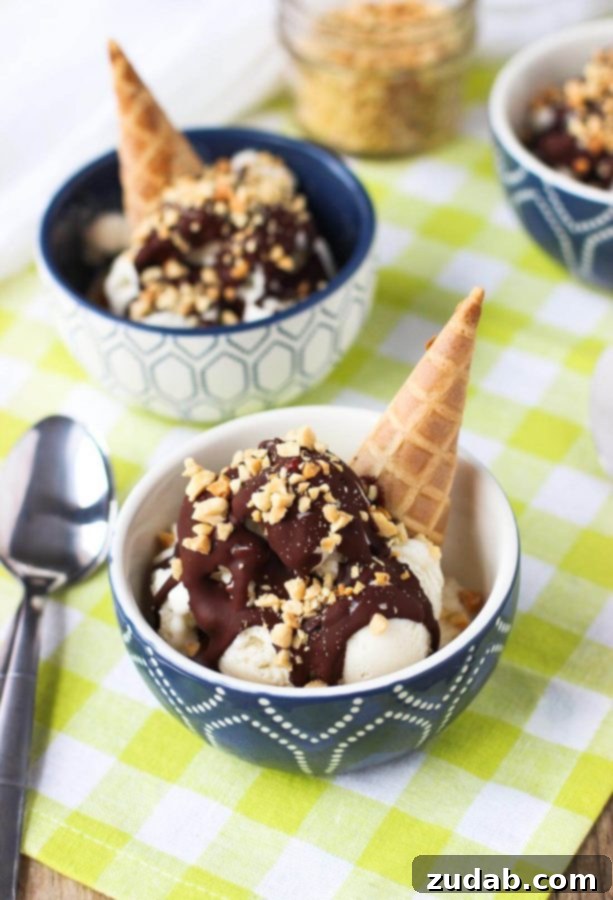
Deconstructed Drumstick Ice Cream Sundae
Craving the nostalgic taste of a classic drumstick but with a gourmet twist? This deconstructed sundae takes all the elements you love – crunchy cone, creamy ice cream, and chocolate coating – and reimagines them in a stunning, easy-to-assemble dessert. It’s perfect for individual servings and offers a playful yet elegant presentation.
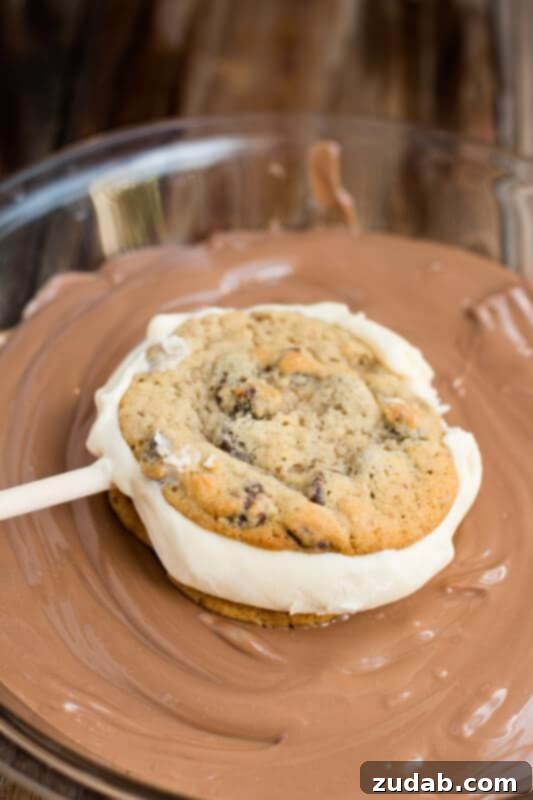
Chocolate Chip Cookie Ice Cream Sandwiches
Nothing beats the combination of soft, chewy chocolate chip cookies and creamy ice cream. These homemade ice cream sandwiches are incredibly satisfying and fully customizable. Use your favorite cookie recipe and pair it with any ice cream flavor for a treat that’s far superior to store-bought versions. Dipping them in chocolate takes them to another level!
Double Chocolate Mint Chip Ice Cream
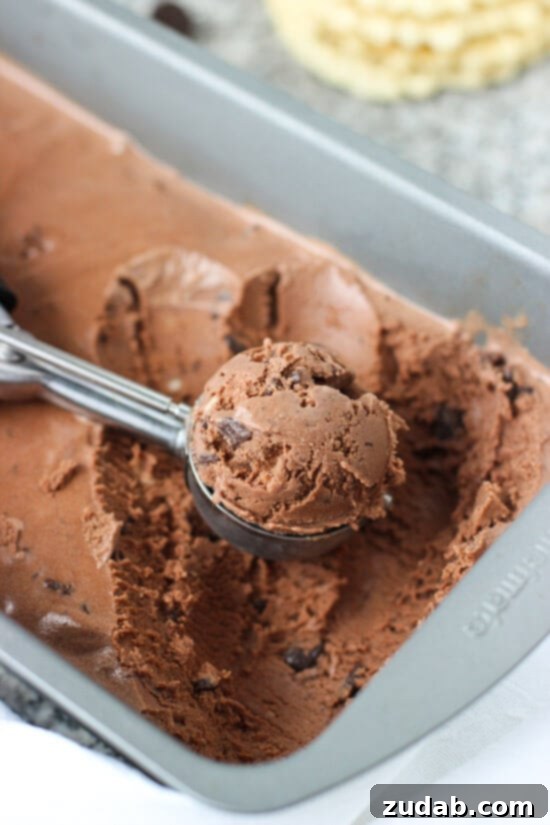
For fans of the refreshing mint and rich chocolate pairing, this homemade double chocolate mint chip ice cream is a must-try. It’s intensely flavorful, packed with chocolate goodness and a cool minty kick. Perfect for making in an ice cream maker, this recipe yields a velvety smooth treat that’s hard to resist.
Cake Batter Ice Cream Balls
Combine two beloved desserts into one delightful bite with these fun cake batter ice cream balls. Featuring the playful flavors of cake batter ice cream, often studded with sprinkles, these treats are rolled into perfect spheres and can be coated in chocolate or extra sprinkles. They are ideal for parties or a unique sweet snack.

Embrace the Ease and Joy of This Summer Dessert
This easy ice cream pie with a cookie crust is more than just a recipe; it’s an invitation to simplify your summer entertaining and indulge in pure, unadulterated joy. With its no-bake convenience, customizable flavors, and endless topping possibilities, it caters to every palate and occasion. Whether you’re cooling down after a long day, celebrating a holiday, or simply enjoying a sweet moment with loved ones, this pie delivers on all fronts.
So, gather your favorite cookies, pick out your most beloved ice cream flavors, and get ready to create a dessert that will be remembered long after the last bite. This simple yet sophisticated treat proves that sometimes, the most extraordinary pleasures come from the easiest creations. Enjoy every spoonful, and make this summer truly delicious!