There’s an undeniable magic to a homemade pie, a dessert that speaks of comfort, tradition, and love. Yet, despite its universal appeal, pie often makes a less frequent appearance on our dessert tables compared to cakes or cookies. For many home bakers, the primary barrier lies in mastering the pie crust. The thought of creating that perfect, flaky, golden base can seem incredibly daunting, a culinary challenge that often leads to pre-made alternatives. I certainly experienced this apprehension myself. Growing up, my mom had a seemingly effortless way with pie crusts. I’d assist her, mostly by crafting delightful little cinnamon sugar crisps from the leftover dough – a sweet reward for my minor contributions. But as I ventured into baking independently, I found many recipes inconsistent, leading to frustration and lackluster results.
It was then that I turned back to my mom, who generously shared the secret to Great Grandma’s foolproof old fashioned raspberry pie. This incredible recipe transformed my baking experience, allowing me to create beautiful, delicious pies without any stress. Now, in collaboration with Driscoll’s Berries, as part of our “Made with Love” program, we’re thrilled to share this treasured family recipe with you. Our goal is to empower every home baker to confidently create a truly exceptional raspberry pie that will undoubtedly become a cherished part of your family’s culinary heritage.
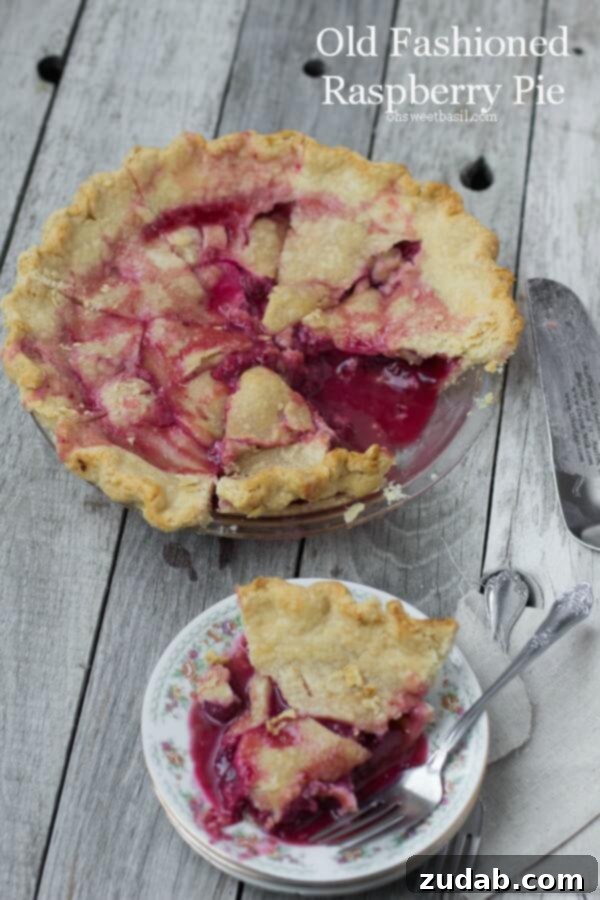
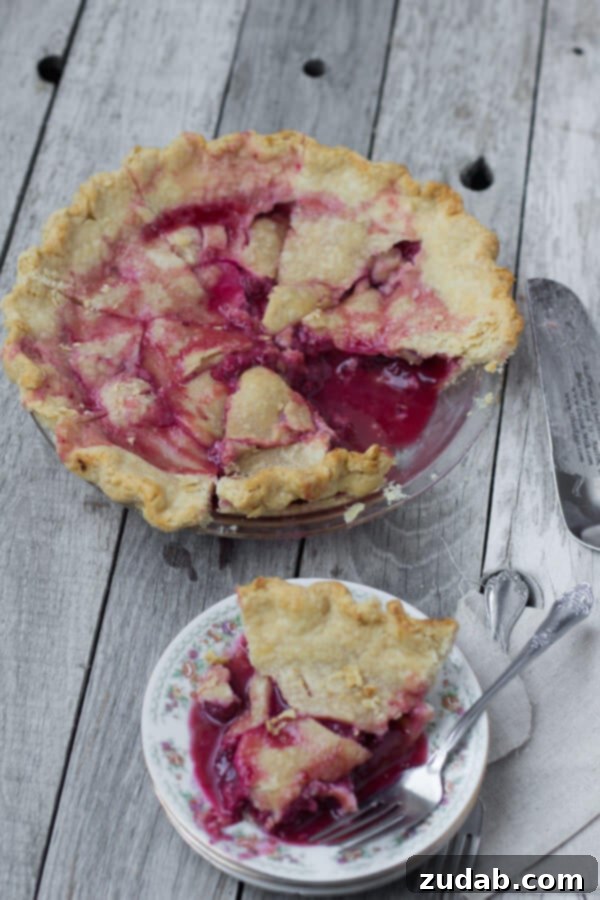
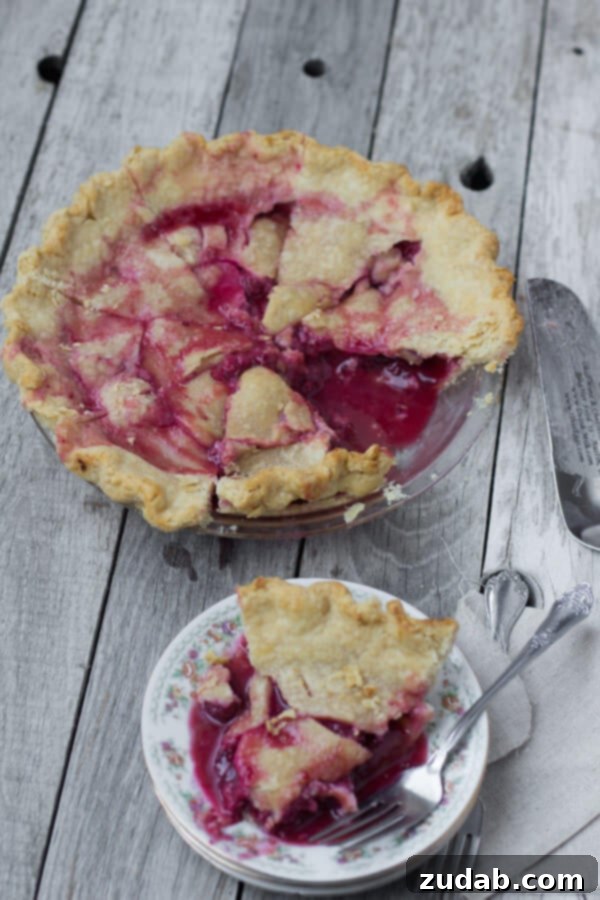
Isn’t this an absolutely gorgeous pie? One of my favorite tricks for achieving its rustic elegance is to gently swirl the hot pie immediately after it emerges from the oven. This subtle movement encourages the rich, ruby-red raspberry juices to beautifully leak out and create a stunning, natural pattern on the top crust, eliminating the need for intricate lattice work or elaborate decorations. The beauty of this homemade raspberry pie lies in its simplicity and the vibrant flavors it delivers.
Speaking of decorating pies, it brings to mind a particular memory – a seemingly silly yet profoundly sweet moment that holds immense significance for me. It revolves around a simple little smiley face. Before I delve into that story, a quick heads-up: Driscoll’s is currently hosting an exciting sweepstakes where two grand prize winners will receive a coveted KitchenAid mixer and a year’s supply of fresh berries! Additionally, four second-place winners will enjoy berries for a year. One grand prize and two second-place winners are selected at the end of each month. Who wouldn’t want to win a KitchenAid and endless delicious berries?
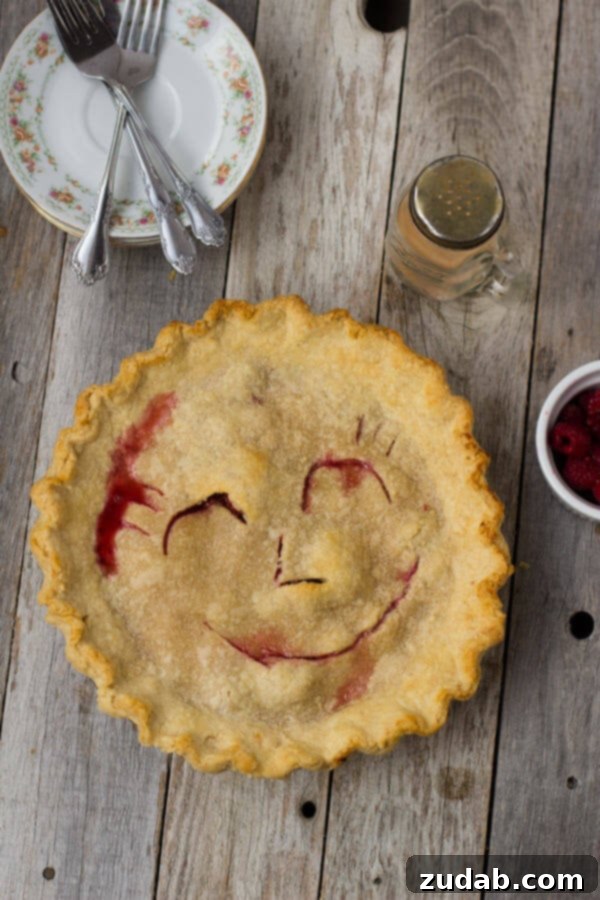
Now, back to that special memory. My mom, and yes, I admit I’m a bit biased, is truly one of the most tenderhearted, hardworking, patient, and genuine individuals I’ve ever known. I have never once heard her belittle anyone, whether within our family or outside of it, even in the privacy of our home. She embodies honesty, truth, mindfulness, and forgiveness in every action. However, she has one peculiar culinary quirk: she absolutely despises cooked apples. I know, it’s quite ridiculous, and perhaps her only tiny flaw! (Sorry, Mom, you know it’s true!) Our childhood was filled with joy and freedom. Every year, we’d visit our grandparents’ houses, allowed to run around like carefree little hooligans. Mom always encouraged us to embrace our youth; we were never pressured to meet adult standards until we were genuinely ready – a parenting philosophy I strive to implement with my own children. We were always invited to help in every possible way, making us feel included and valued.
Thanksgiving was always a bustling affair, brimming with friends and family, and my mom invariably made homemade pies from scratch. It was certainly a labor of love, but we eagerly helped, with her gentle guidance. The warmth of the oven, perpetually on throughout the day, filled our entire home with intoxicating aromas, creating an atmosphere of cozy anticipation. Mom always handled the intricate details of the pie lid herself, and if you knew her, you could immediately identify the type of pie it was without ever needing to cut into it. Her signature pie decorations were a secret language of love, a delicious hint that made every dessert feel deeply personal and special.
As I mentioned, Mom doesn’t particularly care for cooked apples, but she absolutely adores her Mamma’s raspberry pie. Since the rest of the family cherished apple pie, she would, of course, bake one. However, she always made her feelings subtly known through her crust artistry. The raspberry pie would proudly feature a charming little smiley face, a clear sign of her affection. In contrast, the apple pie would bear a face with a tiny “tongue” traced into its crust, as if the pie itself was playfully sticking its tongue out in disdain. As a child, I found this absolutely hilarious and so much fun. As an adult, it has evolved into a deeply sweet memory, a poignant reminder of the quietly silly, yet immensely sacrificing mother I am so fortunate to have.
It’s remarkable how the smallest, most unassuming details often end up carrying more meaning than anything else. Sometimes, I find myself reflecting on my upbringing, wondering what aspects of my life and parents I will cherish most when they are no longer here, and what memories my own children will hold of me. I would willingly give up everything I possess to mean as much to my children as my mom means to me, and to positively influence them in the profound way she has influenced me. How did I ever deserve someone so willing to do anything, always in the kindest, most loving manner, for her children and everyone around her? And how will I ever manage to emulate that unwavering dedication in my own family? It’s profoundly true: when you seek to understand yourself, you can look to your past and draw immense strength and clarity by discovering the legacy of those who came before you. I believe I need to strive a little harder, to be a little better, to honor that incredible legacy.
Mastering the Perfect Pie Crust: How to Avoid a Soggy Bottom
Fruit pies, especially juicy ones like this old fashioned raspberry pie, are notorious for developing a soggy bottom crust. This common baking predicament can easily be avoided with a few key techniques that ensure a crisp, golden base every time. The most effective method involves blind baking your pie crust. This process begins with both docking (pricking holes in the dough) and using pie weights, followed by an egg wash and a second round of baking to create a seal. For a comprehensive guide with all the intricate details on how to blind bake the bottom crust flawlessly, we encourage you to visit our Mom’s Lemon Meringue Pie post. While blind baking is totally optional for many recipes, if you have the time and desire a truly professional-quality pie, I wholeheartedly recommend this step for a truly perfect base.
What Makes Pie Crust Tough?
Achieving a tender, flaky pie crust is all about balancing ingredients and avoiding overworking the dough. Here’s what can lead to a tough pastry:
- Too Much Water: An excessive amount of water makes the pie crust overly sticky and promotes excessive gluten development, resulting in a dense, tough pastry that lacks that desirable delicate bite.
- Too Little Water: Conversely, insufficient water will leave your pastry dry and crumbly, making it difficult to roll out. This often leads to a crust that cracks and falls apart during handling and baking. The goal is just enough moisture to bring the dough together.
- Over-Kneading Pie Dough: Overworking the dough is arguably the most common culprit for a tough crust. Flour contains gluten, which develops elasticity when hydrated and kneaded. While some gluten development is necessary, too much creates a strong, chewy network, exactly what you want to avoid in a pie crust. The dry ingredients should only be mixed into the wet until the dough just barely holds together when squeezed into a ball, retaining a slightly shaggy appearance.
Why Does Pie Crust Shrink?
The frustration of a pie crust that shrinks from the edges of your pie plate is common, but it’s typically easily preventable:
- Insufficient Resting Time: The biggest reason pie crusts shrink is because the gluten, which has been stretched during rolling, hasn’t been given enough time to relax. After rolling out your dough, it’s crucial to let it rest, preferably in the refrigerator or freezer, for at least 20-30 minutes. This resting period allows the gluten strands to relax, preventing the dough from snapping back and shrinking significantly during baking.
- Dough Rolled Too Thin: If the dough is rolled too thinly, it becomes more delicate and prone to shrinking. A moderately thick crust provides enough structure to resist retraction during the heat of the oven.
Can Raspberry Pie Be Frozen Before It Is Baked?
Absolutely! Freezing fruit pies before baking is an excellent strategy for meal prep and enjoying fresh-tasting pie later. This method ensures that the pie retains its optimal flavor and texture when finally baked:
- If you plan to freeze fruit pies for later baking and serving, it is always best to freeze them before they are baked.
- A raspberry pie frozen prior to baking will taste just as fresh and delicious as a freshly made pie once it’s cooked.
- To prepare for freezing: assemble the pie completely, up to the point where it would normally go into the oven. Wrap the entire pie exceptionally well in several layers of plastic wrap, followed by a layer of aluminum foil to prevent freezer burn and protect its delicate flavors.
- Frozen pies can be stored in the freezer for up to 4 months without significant loss of quality.
- There is no need to thaw the pie before baking, which simplifies the process greatly.
- To bake from frozen: simply place the wrapped frozen pie onto a baking sheet. Preheat your oven to 400 degrees Fahrenheit (200°C) and bake for 30 minutes.
- After the initial 30 minutes, reduce the oven temperature to 350 degrees Fahrenheit (175°C) and continue baking for an additional 35-40 minutes, or until the crust is golden brown and the filling is bubbly and tender.
Old Fashioned Raspberry Pie: A Timeless Recipe
Old Fashioned Raspberry Pie
Ingredients
For the Crust
- 3 Cups All-Purpose Flour
- 1 teaspoon Salt
- 1 Cup Lard, I use shortening for convenience, but traditional lard yields an even flakier crust.
- 1 Large Egg
- 1 Tablespoon White Vinegar
- 1/4 Cup Very Cold Water, mixed with egg and vinegar; add to dry ingredients until dough moistens and holds together.
For the Raspberry Filling
- 1 Cup Granulated Sugar, adjust up to 1/4 cup more depending on raspberry tartness
- 1/2 teaspoon Ground Cinnamon
- 4 Cups Fresh or Frozen Raspberries
- 1/4 Cup Cornaby’s Ultra Gel
- 4 Tablespoons Unsalted Butter, chopped into small pieces
Instructions
For the Pie Crust
-
In a large mixing bowl, combine the flour and salt thoroughly.
-
Cut the lard (or shortening) into 1/4-inch pieces and scatter them into the flour mixture.
-
Using two knives or a pastry cutter, cut the fat into the flour until the mixture resembles coarse meal with pea-sized pieces of fat remaining. Avoid overmixing.
-
In a glass measuring cup, whisk together the egg and vinegar.
-
This liquid mixture should measure approximately 1/4 cup. Add very cold water to this mixture until the total volume reaches 1/2 cup.
-
Gradually add a few tablespoons of the liquid mixture at a time to the flour and fat mixture. Use a fork to gently combine. (Refer to the notes below for more detail).
-
Continue mixing until the dough just comes together, but is still a little shaggy. It should hold together when you gently squeeze a portion into your fist. Do not overmix.
-
Divide the dough ball into two equal pieces.
-
Place each piece of dough onto a separate sheet of plastic wrap and wrap tightly.
-
Chill the wrapped dough in the freezer for 20-30 minutes, or in the refrigerator for at least 1 hour, to allow the gluten to relax.
-
On a lightly floured surface, roll out one piece of dough into a circle large enough to fit your pie dish with some overhang.
-
To transfer, gently place your rolling pin at one end of the rolled dough, lift the edge over the pin, and roll the dough around it.
-
Carefully unroll the dough over your pie dish, allowing it to gently fall into the bottom rather than stretching or pushing it into place, which can cause shrinkage.
-
At this stage, you may choose to blind bake the bottom crust if you desire to prevent a soggy bottom. (See recipe notes below for guidance).
For the Raspberry Filling & Assembly
-
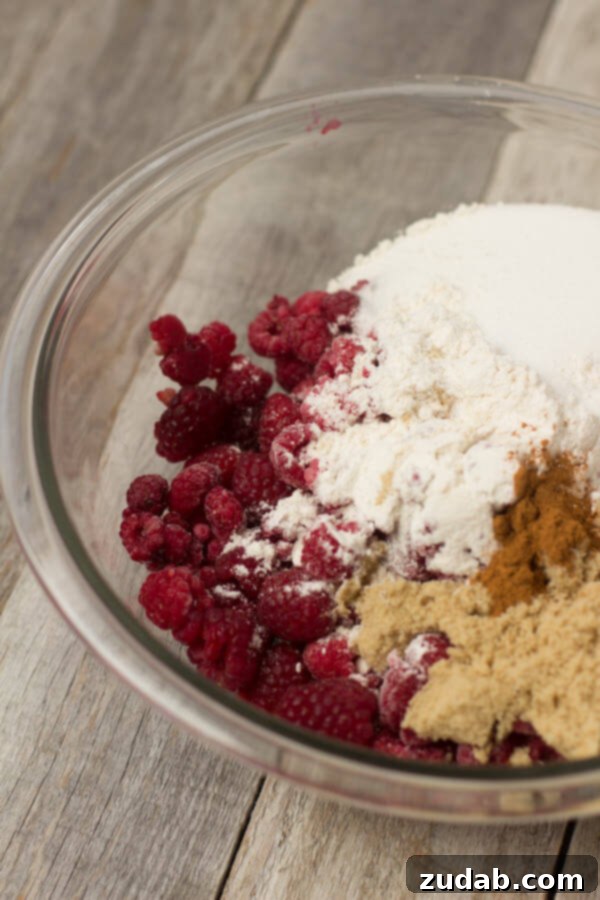
In a separate mixing bowl, combine the granulated sugar, Ultra Gel, cinnamon, and fresh or frozen raspberries.
-
Gently fold the ingredients together to combine, being careful not to crush the delicate raspberries.
-
Pour the raspberry filling into the prepared bottom pie crust and dot the top evenly with 2 tablespoons of chopped butter.
-
Roll out the second piece of dough for the top crust. Place it over the berries, seal the edges, and cut several slits into the top to allow steam to escape. (For a beautiful golden-brown finish, I often brush the top crust with a little milk and sprinkle it lightly with cinnamon sugar.)
-
Preheat your oven to 450°F (232°C). Bake the pie for 10 minutes at this high temperature.
-
After 10 minutes, reduce the oven temperature to 375°F (190°C) and continue baking for another 20-25 minutes, or until the crust is golden and the filling is bubbly. If the crust browns too quickly, you can loosely tent it with foil.
-
Allow the pie to cool completely on a wire rack before slicing and serving. This allows the filling to set properly.
Recipe Notes
We highly recommend using Ultra Gel for its superior thickening properties in fruit pies, as it keeps the filling bright and clear without making it gummy. However, if you must substitute, try using 1/3 to 1/2 cup of all-purpose flour as a thickener. If your raspberries are particularly juicy, you might need to increase the flour to 3/4 to 1 cup.
*For detailed instructions on how to blind bake a pie crust to prevent a soggy bottom, please refer to our Mom’s Lemon Meringue Pie post.
To freeze this raspberry pie:
Prepare the pie completely, assembling both crusts and filling, but do not bake it. Wrap the unbaked pie thoroughly in plastic wrap, followed by a layer of aluminum foil to protect it from freezer burn.
Frozen, unbaked pies can be kept for up to 4 months in the freezer.
There is no need to thaw the pie before baking. Simply place the frozen pie on a baking sheet and bake as directed in the recipe instructions above, starting with the higher temperature.
Nutrition
Calories: 478kcal,
Carbohydrates: 91g,
Protein: 9g,
Fat: 9g,
Saturated Fat: 5g,
Cholesterol: 47mg,
Sodium: 468mg,
Potassium: 211mg,
Fiber: 7g,
Sugar: 37g,
Vitamin A: 600IU,
Vitamin C: 23mg,
Calcium: 50mg,
Iron: 4mg
Nutrition information is automatically calculated and should only be used as an approximation.
Serving Suggestions for Your Raspberry Pie
Once your glorious Old Fashioned Raspberry Pie has cooled and set, it’s ready to be savored. This pie is absolutely divine on its own, allowing the bright, tart flavors of the raspberries and the tender, flaky crust to shine. However, for an extra touch of indulgence, consider serving it with a scoop of premium vanilla bean ice cream, a dollop of freshly whipped cream, or even a light dusting of powdered sugar. The contrast of the warm, fruity filling with a cold, creamy topping is simply irresistible, making it the perfect dessert for any occasion, from a casual family dinner to a festive holiday gathering. Don’t be afraid to experiment with different pairings to find your favorite way to enjoy this classic treat!
Like this recipe? We’d love to hear from you! Leave a comment below and share your baking success stories.
Explore Mom’s Lemon Meringue Pie Recipe