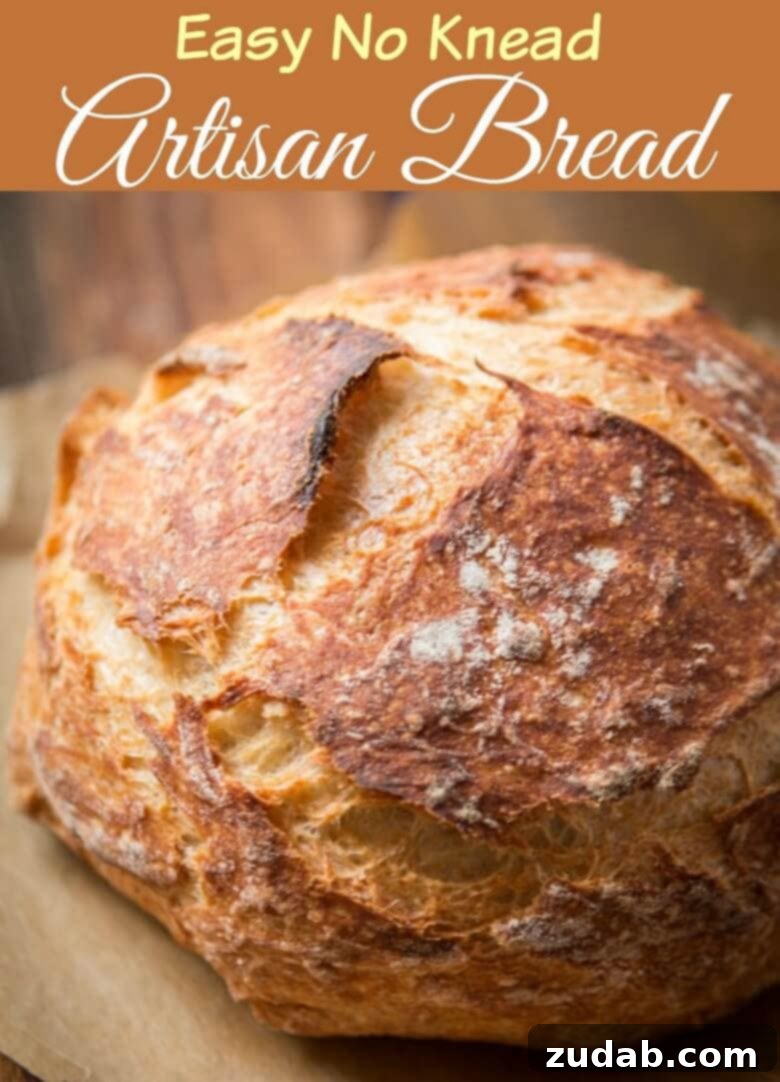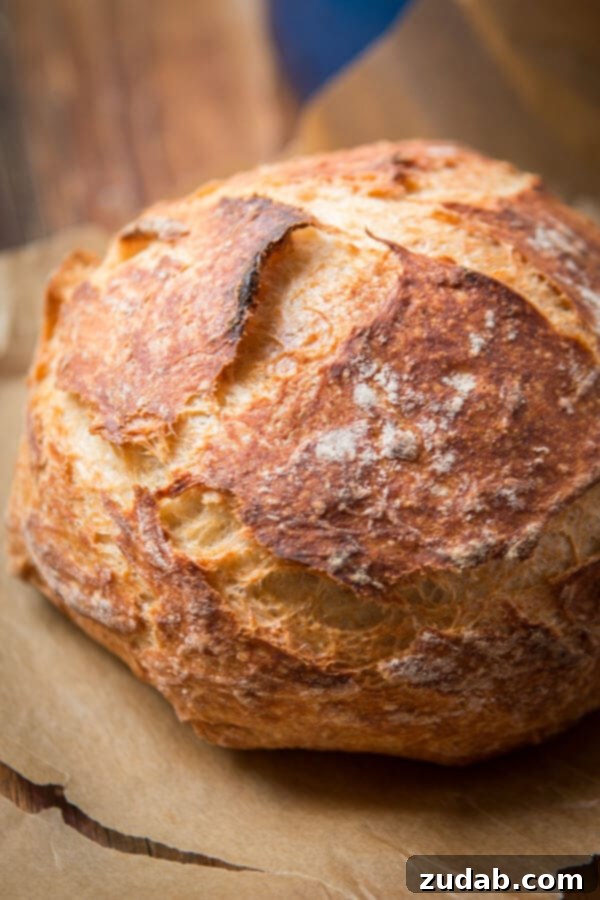
Craving the artisanal charm of a bakery-fresh loaf right from your own kitchen? Discover the secret to effortlessly creating delicious, crusty No-Knead Artisan Bread at home. This simple yet incredibly rewarding recipe yields a loaf with a perfectly golden-brown, crisp exterior and a wonderfully soft, airy interior. It’s ideal for soaking up the rich broth of your favorite soup, accompanying a hearty lasagna, or simply enjoyed with a pat of butter. While the process begins a day in advance, the actual hands-on time is minimal, making this an accessible recipe for bakers of all skill levels. Follow our comprehensive guide to bake a truly exceptional loaf that will impress everyone.
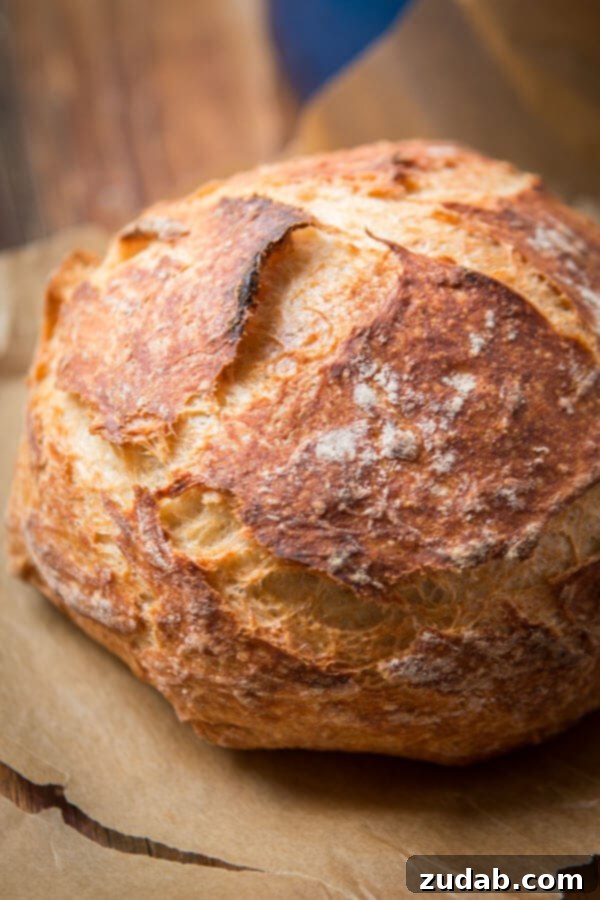
There’s an undeniable magic in the aroma of fresh bread baking, isn’t there? It transports you, evokes feelings of warmth and comfort. I vividly remember a visit to San Francisco many years ago, walking along the boardwalk as the intoxicating scent of freshly baked bread filled the air. That beautiful, golden, crispy crust, the soft, pillowy interior, and the smell that brings a profound sense of peace – it’s an experience unlike any other. It’s right up there with the invigorating smell of fresh-cut grass after a summer rain, a scent I grew to cherish growing up in Washington state.
While we cherish homemade bread, and Cade’s dad is a masterful bread maker, sometimes you desire more than just a sandwich loaf. You crave true artisan bread – a loaf with character, depth, and a satisfying chew. The exciting news is that achieving this gourmet quality is incredibly simple, requiring minimal effort and just about 5 minutes of active preparation time for this fantastic no-knead bread recipe.
What Exactly is Artisan Bread?
If you’re new to baking, the term “artisan bread” might seem a bit intimidating, but it simply refers to bread made using traditional methods and high-quality, natural ingredients. Unlike mass-produced bread, artisan bread typically avoids artificial preservatives, flavorings, and unnecessary additives. The hallmark of true artisan bread, especially a no-knead variety, is its reliance on a long, slow fermentation process. This extended resting period allows the yeast to work its magic over time, developing a complex, slightly nutty flavor profile and an open, airy crumb. Furthermore, this slow fermentation can make the bread easier to digest for many people. It’s about honoring the simplicity and natural qualities of bread, creating a loaf that’s both flavorful and wholesome.
Simple No-Knead Artisan Bread Ingredients
One of the most appealing aspects of this dutch oven no-knead bread is its incredibly short ingredient list. You only need five pantry staples to create this masterpiece: flour, sugar, salt, yeast, and water. That’s it! This simplicity ensures that the natural flavors truly shine through.
- Flour: Good old regular all-purpose flour is all you need for this recipe. Its protein content provides enough structure for a beautiful rise without requiring extensive kneading.
- Sugar: A small amount of sugar acts as a food source for the yeast, helping to activate it and encourage a more vigorous rise. This often results in a slightly fluffier interior texture. While beneficial, it can be omitted in a pinch if absolutely necessary, but we highly recommend including it for the best results.
- Salt: Far from just a seasoning, salt is crucial for enhancing all the other flavors in the bread. It also plays a vital role in controlling the yeast’s activity, preventing it from over-fermenting and ensuring a balanced rise.
- Yeast: The magical ingredient that gives your bread its lift, creating that soft, airy, and pillowy texture inside. We’ll delve deeper into different types of yeast shortly.
- Water: This essential liquid binds all the dry ingredients together, forming the dough, and is also vital for activating the yeast. The temperature of the water is important – warm, but not hot – to encourage yeast activity without killing it.
Exact measurements for each ingredient, along with detailed instructions, are conveniently located in the recipe card at the conclusion of this post.
How to Master Artisan Bread with No Kneading
The beauty of this no-knead bread recipe lies in its minimal effort. The dough requires an overnight rise on your countertop, allowing time to do the work traditionally done by kneading. This method requires patience rather than strenuous labor, resulting in an incredibly flavorful and textural loaf. Here’s a straightforward guide to making no-knead artisan bread in your own kitchen:
- Combine Dry Ingredients: In a large mixing bowl, thoroughly whisk together the flour, salt, sugar, and yeast. Ensuring these are well combined prevents pockets of unmixed ingredients and helps the yeast distribute evenly.
- Add Warm Water: Pour the warm water into the dry ingredients. Use a sturdy wooden spoon or spatula to mix everything until just combined. The dough will be shaggy and sticky – resist the urge to knead it! The long fermentation will develop the gluten structure naturally.
- Overnight Rest: Cover the bowl tightly with plastic wrap to prevent the dough from drying out. Leave it to rest at room temperature on your kitchen counter for 12 to 18 hours. This slow fermentation is where the magic happens, developing the bread’s deep flavor and airy texture. You’ll notice the dough will have significantly expanded and become bubbly.
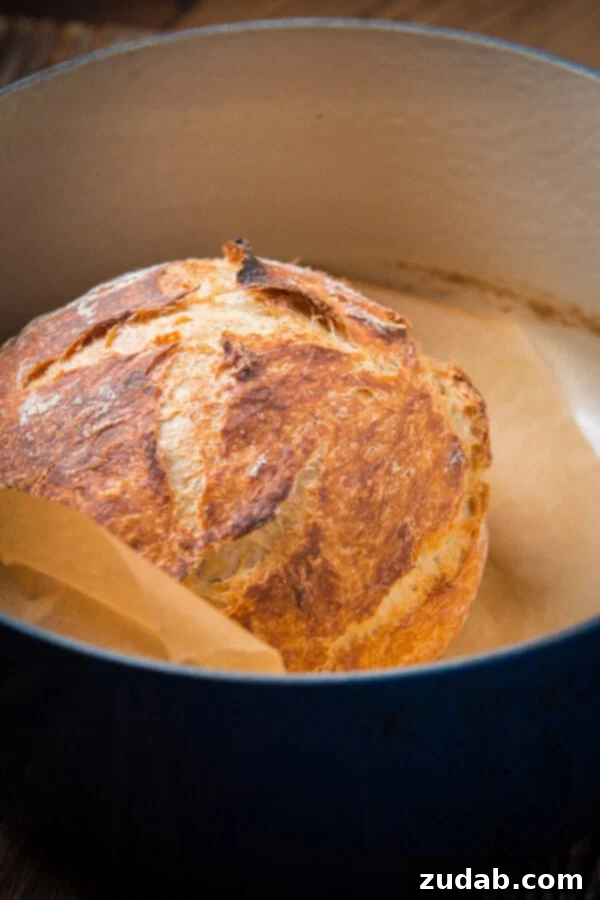
- Prepare for Baking: The next day, about 30 minutes before you plan to bake, place your empty Dutch oven (without the lid) into your cold oven. Preheat the oven to 450°F (230°C). Heating the Dutch oven ensures a quick burst of heat to the dough, creating that signature crispy crust. Once the oven and Dutch oven are fully preheated, carefully remove the hot pot. Line the bottom with a piece of parchment paper, then gently transfer your risen dough into the Dutch oven.
- Bake to Perfection: Place the lid back on the Dutch oven and return it to the hot oven. Bake for 30 minutes with the lid on. This traps steam around the dough, promoting a fantastic rise and preventing the crust from setting too quickly. After 30 minutes, remove the lid and continue baking for another 10-15 minutes, or until the crust is a deep golden brown and sounds hollow when tapped.
- Cool Completely: This step is crucial! Although tempting to slice into immediately, allow the artisan bread to cool completely on a wire rack before cutting. Cooling allows the internal structure to set and prevents the steam from making the crumb gummy.
For your convenience, all these detailed instructions are also available in the printable recipe card below, where you can easily save or print the recipe.
Possible Variations to Customize Your Loaf
This bread recipe is truly outstanding as written – a simple slice with a spread of butter is pure heaven. However, its versatility allows for endless customization. Feel free to experiment with adding other ingredients to elevate the flavor profile:
- Fresh Herbs: Incorporate finely chopped rosemary, thyme, or chives for an aromatic touch.
- Cheese Chunks: Fold in cubes of your favorite cheese like sharp cheddar, nutty Gruyere, creamy Swiss, pungent Asiago, or savory Parmesan for a delightful cheesy interior.
- Garlic Infusion: Add minced fresh garlic or roasted garlic cloves for a robust flavor.
- Sun-Dried Tomatoes: Chop and mix in oil-packed sun-dried tomatoes for a sweet and tangy Mediterranean twist.
- Everything Bagel Seasoning: Sprinkle a generous amount of everything bagel seasoning on top of the dough before baking for a savory, textured crust.
- Spice Blends: Experiment with other seasoning blends you enjoy, such as Italian seasoning, smoked paprika, or a touch of red pepper flakes for heat.
Remember to gently fold in your chosen additions during the initial mixing stage, ensuring they are evenly distributed throughout the dough.
Choosing the Best Dutch Oven for Artisan Bread
Since we first shared this dutch oven no-knead bread recipe, we’ve received numerous inquiries about our preferred Dutch ovens and the ideal size for baking bread. A good quality Dutch oven is truly key to achieving that perfect crust and internal texture.
We absolutely adore our Cobalt Blue Le Creuset 5 1/2 Qt Dutch Oven. It’s an investment, but its exceptional heat retention and durability make it incredibly versatile for everything from our Perfect Pizza Sauce and Favorite Homemade Spaghetti Sauce to Cade’s Poblano Braised Beef Tacos. For bread, its even heating creates consistent results every time.
If you’re not quite ready for a Le Creuset, the Lodge Enameled Cast Iron Dutch Oven is an excellent, more budget-friendly alternative that still performs beautifully. While our 5 1/2-quart model works well for our family, a slightly smaller Dutch oven might be more appropriate if you typically bake smaller loaves or for a smaller household.
Essential FAQs About Using Yeast
Yeast is a living organism, and understanding how it works is fundamental to successful bread baking. While we can’t cover every single nuance, here’s a breakdown to help you feel confident and successful with yeast. It’s not as daunting as it seems; a couple of tries, and you’ll be a pro!
What is Instant Yeast?
Instant yeast, also known as Rapid Rise or Bread Machine Yeast, is designed for convenience. Its granules are smaller and more porous than active dry yeast, meaning it dissolves and activates more quickly. You can often add instant yeast directly to your dry ingredients without proofing it first (mixing it with warm water to activate). This type of yeast also generally leads to a shorter rising time for the dough. However, we still often proof our instant yeast. It serves as a quick way to confirm that the yeast is still fresh and active, ensuring your bread will rise properly and avoid any disappointment.
What is Active Dry Yeast?
Active dry yeast consists of larger, coarser granules that require rehydration and activation before being mixed into the dry ingredients. This process is called “proofing.” To proof active dry yeast, you typically dissolve it in warm water (around 105-115°F or 40-46°C) with a pinch of sugar for 5-10 minutes. If the mixture becomes foamy and bubbly, your yeast is active and ready to use. If it doesn’t foam, your yeast may be old or dead, and it’s best to start with a fresh packet. Active dry yeast generally requires a longer rise time than instant yeast, so plan for an additional hour or more of fermentation. Always ensure your water is warm, not hot, as excessively hot water can kill the yeast.
How to Store Yeast
Because yeast is a living organism, it does have a shelf life and can go bad. Proper storage is crucial for maintaining its potency. We recommend keeping a larger bag of yeast in the freezer and a smaller, working amount in an airtight glass jar in your refrigerator. The colder temperatures significantly extend its shelf life, ensuring your yeast remains active and reliable for all your baking adventures.
How to Store No-Knead Artisan Bread for Lasting Freshness
Artisan breads, with their distinct crusty exteriors, have different storage needs than softer sandwich loaves or rolls. They thrive on breathing, so storing your dutch oven no-knead bread in a paper bag, possibly wrapped in a clean cloth or kitchen towel, is the best method to preserve its characteristic crust. Stored this way, it will remain delicious at room temperature for up to 2 days.
If you anticipate not eating the entire loaf within a day or two, you can store it in a plastic bag to prevent it from drying out, but never refrigerate artisan bread. The cool, dry air of a refrigerator will quickly stale the bread and ruin its texture. When you’re ready to serve a loaf that has been stored for a day or two, simply wrap it loosely in aluminum foil and warm it in a 425°F (220°C) oven for about 10-15 minutes. This will heat it through and crisp up the crust beautifully.
For longer storage, freezing is an excellent option that we frequently use. To freeze your bread, wrap the cooled loaf tightly first in plastic wrap, then in aluminum foil, and place it in the freezer. For even longer storage (beyond a week or two), add an extra layer of protection by placing the foil-wrapped loaf into a freezer-safe plastic bag. This method helps prevent freezer burn and keeps the bread fresh for several weeks.
Expert Tips for Baking Your Best No-Knead Artisan Bread
Even with a simple recipe, a few key tips can elevate your no-knead artisan bread from good to extraordinary:
- Room Temperature Matters: One of the biggest factors influencing yeast breads is the ambient temperature of your home. If your house is too cold, the yeast will be sluggish, and your dough won’t rise as effectively. Aim for a consistently warm spot on your countertop for the overnight rise.
- Proof Your Yeast (Even Instant!): While instant yeast doesn’t technically *require* proofing, doing so with a pinch of sugar in warm water is a foolproof way to ensure your yeast is fresh and active. This small step guarantees a successful rise and a well-textured loaf.
- Keep Salt and Yeast Apart (Initially): Salt can inhibit or even kill yeast if they come into direct contact for an extended period. When mixing dry ingredients, try to keep the salt and yeast on separate sides of the bowl initially, allowing the flour to act as a buffer before everything is thoroughly combined.
- Use Plastic Wrap, Not a Towel: Always cover your rising dough tightly with plastic wrap. A kitchen towel, while breathable, will allow the surface of the dough to dry out, forming a crust that can hinder a smooth rise and lead to an uneven texture.
- Don’t Rush the Cooling: As mentioned earlier, patience during the cooling phase is critical. Slicing into a hot loaf can result in a gummy interior because the starches haven’t fully set. Allow it to cool completely for the best texture and flavor.
- Listen to Your Dough: The exact rising time can vary based on your home’s temperature and yeast activity. Look for visual cues: the dough should be significantly expanded, bubbly, and generally doubled in size.
What to Enjoy with Your Fresh No-Knead Artisan Bread
This versatile bread is the perfect accompaniment to a wide array of dishes. Here are some of our favorite pairings:
- Instant Pot Chili
- My Favorite Lasagna
- Cheesy Southwestern Chicken Tortilla Soup
- Chicken Pesto Lasagna
- Best Chicken Tortilla Soup
Master the art of baking truly delicious, crusty artisan bread with this incredibly easy no-knead recipe. It’s perfectly suited for beginners and anyone seeking a quick, flavorful, and satisfying homemade bread option that tastes like it came straight from a gourmet bakery.
More Delicious Bread Sides You’ll Love:
- Herbed Focaccia Bread
- Easy Hoagie Rolls
- Best Potato Rolls
- Homemade Naan
- Garlic Parmesan Focaccia
- French Bread
- Buttermilk Biscuits
- Skillet Cornbread
- One Hour Rolls
- 7-Up Biscuits
- All Our Bread Recipes Here!
Easy No-Knead Artisan Bread
Sweet Basil
40
15
40
8
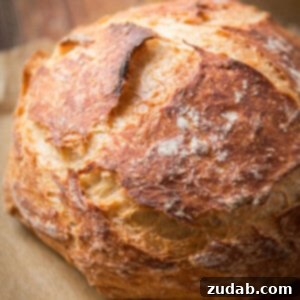
Learn how to make a loaf of No-Knead Artisan Bread that rivals your favorite local bakery. It all starts a day ahead, but the process is incredibly simple and rewarding.
Ingredients
- 3 Cups All-Purpose Flour
- 1 1/2 teaspoons Salt
- 1/2 teaspoon Sugar
- 1 teaspoon Instant Yeast
- 1 1/2 Cups Warm Water
Instructions
- In a large bowl, whisk together the flour, salt, sugar, and yeast.
- Pour in the warm water and stir with a wooden spoon until all ingredients are just combined. The dough will be shaggy and sticky, and no kneading is needed.
- Once combined, cover the bowl tightly with plastic wrap and let it sit on your kitchen counter overnight (12-18 hours) to rise.
- The next day, when the dough is done rising, place a Dutch oven (without the lid) inside your oven and preheat to 450°F (230°C) for 30 minutes.
- While the oven and Dutch oven preheat, gently turn the dough out onto a lightly floured surface and shape it into a round ball. Let it rest.
- After 30 minutes, carefully remove the hot Dutch oven. Line the bottom with parchment paper and gently place the dough ball into the center of the Dutch oven. Cover with the lid.
- Bake at 450°F (230°C) with the lid on for 30 minutes.
- After 30 minutes, remove the lid and continue baking for an additional 10-15 minutes, or until the bread is golden brown and crusty.
- Remove the bread from the oven and allow it to cool completely on a wire rack before slicing. Alternatively, tear the bread apart if you wish to enjoy it warm immediately.
Recipe Notes
Store your no-knead artisan bread in a paper bag in a cool, dry place for up to 2 days to maintain its crust. Avoid refrigeration.
Nutrition
Serving: 1g, Calories: 176kcal, Carbohydrates: 37g, Protein: 5g, Fat: 1g, Saturated Fat: 0.1g, Polyunsaturated Fat: 0.2g, Monounsaturated Fat: 0.1g, Sodium: 440mg, Potassium: 65mg, Fiber: 2g, Sugar: 0.4g, Vitamin C: 0.01mg, Calcium: 9mg, Iron: 2mg
Nutrition information is automatically calculated, so should only be used as an approximation.