
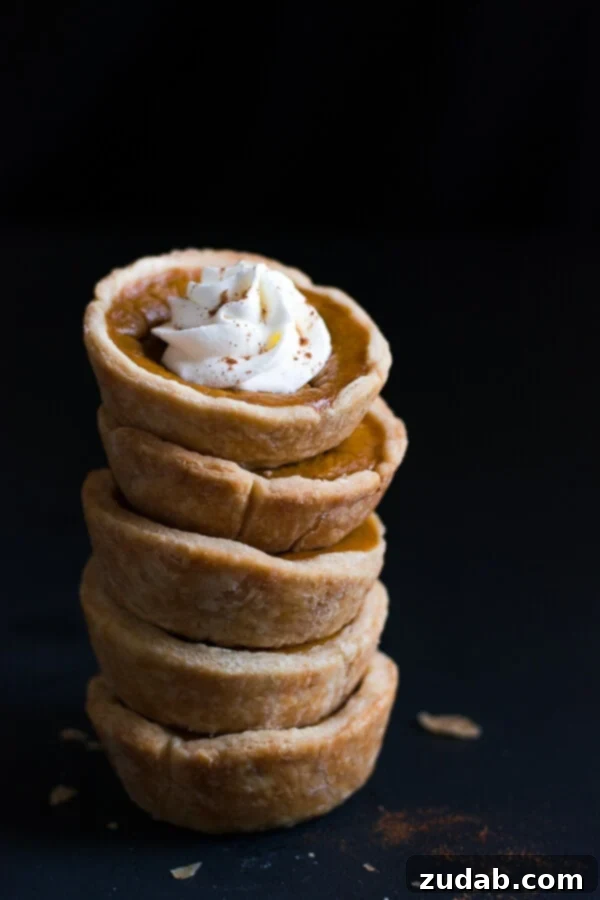
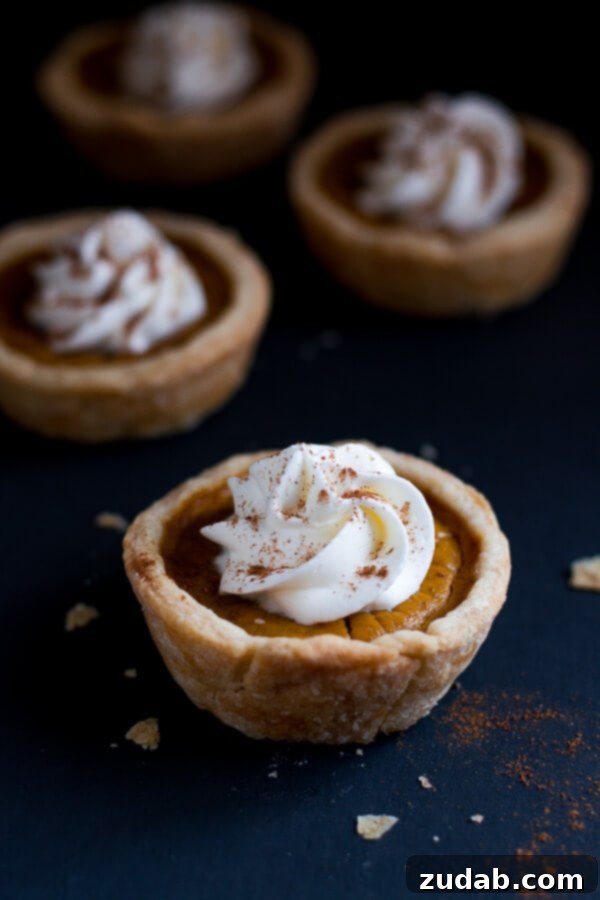
Love homemade pumpkin pie but never have enough room to eat an entire slice after your Thanksgiving dinner? This year, discover the delightful world of Mini Pumpkin Pies! These adorable, perfectly portioned desserts ensure everyone can enjoy the classic taste of Thanksgiving without feeling overwhelmed. You’ll find it easy to savor one, or even two, of these irresistible treats.
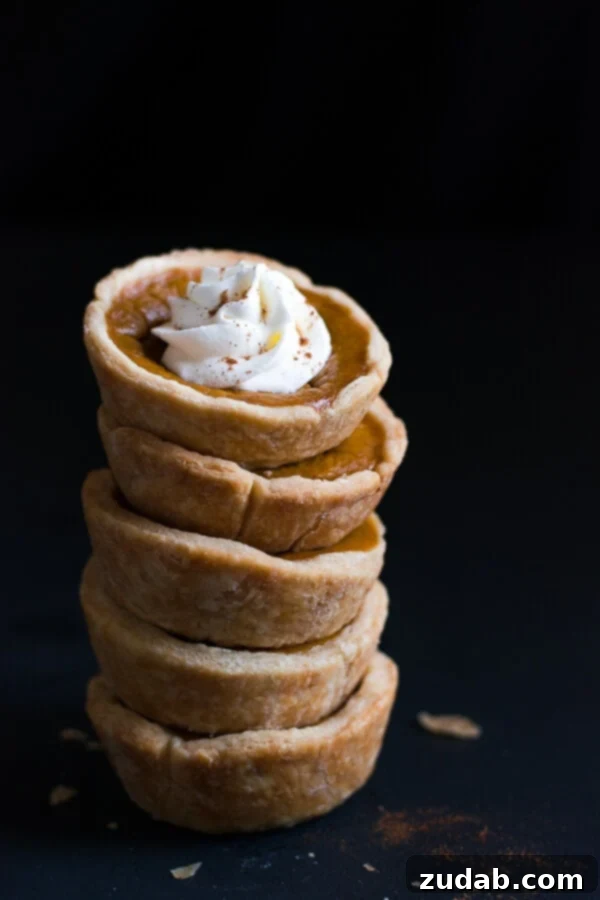
Bake the Best Mini Pumpkin Pies from Scratch: Your Ultimate Thanksgiving Dessert Guide
Hello again! Melanie from Garnish & Glaze here, thrilled to share a recipe that combines irresistible cuteness with incredible flavor – my signature Mini Pumpkin Pies! There’s something truly special about miniature versions of beloved classics, and these pies are no exception. Not only are they charming, but they’re also exquisitely delicious, making them the ideal dessert for any festive occasion.
Why Mini Pumpkin Pies Are Your New Favorite Holiday Treat
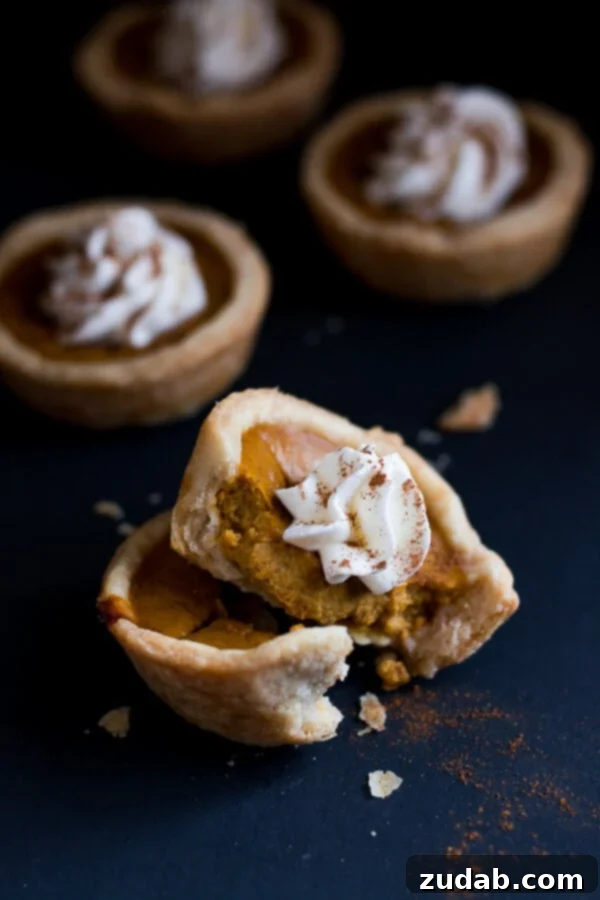
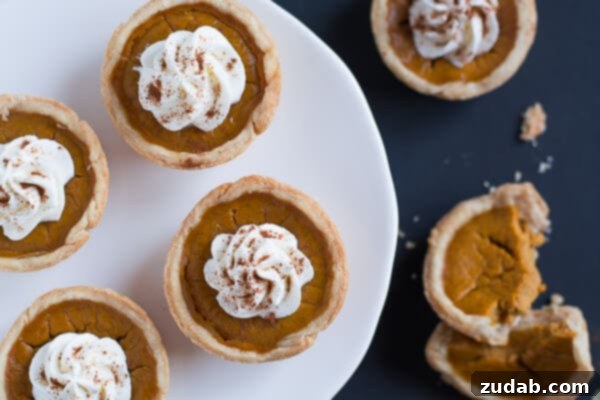
Imagine a pie crust that’s wonderfully light, tender, and impossibly flaky, perfectly cradling a rich, smooth pumpkin pie filling bursting with warm cinnamon and autumnal spices. Now, imagine that perfection in a bite-sized package. That’s what these mini pumpkin pies deliver! While they’re spectacular on their own, a dollop of freshly whipped cream and a sprinkle of extra cinnamon or pumpkin pie spice elevates them to gourmet status. Their gorgeous presentation makes them a standout on any dessert table.
These homemade delights are absolutely perfect for gatherings where a sprawling dessert buffet beckons, and you’re eager to sample every single one. Mini pies allow you to indulge in the quintessential taste of pumpkin pie without the commitment of a full slice. It’s the perfect sampling size, making it easy to grab another, and maybe even a third, to truly satisfy your sweet tooth without the guilt of overindulgence. Furthermore, they are fantastic for post-Thanksgiving dinner desserts. After a substantial feast, a small, manageable portion of pie is often exactly what everyone craves, leaving just enough room for this delightful treat.
Essential Ingredients for Homemade Mini Pumpkin Pies
Crafting these delectable mini pumpkin pies from scratch is a surprisingly simple process, especially if you’re familiar with traditional pumpkin pie. The ingredients list is straightforward, focusing on fresh, high-quality components that come together to create a harmonious symphony of flavors. Here’s a detailed look at what you’ll need to create these holiday masterpieces, ensuring each bite is pure bliss:
For the Irresistibly Flaky Crust:
- All-Purpose Flour: The foundation of our pie crust. Choose a good quality all-purpose flour for the best texture and structure. Its gluten content provides the necessary elasticity for rolling while contributing to the delicate flakiness.
- Salt: A pinch of salt is crucial in pie crusts. It enhances the flavor of the butter or shortening and balances the sweetness of the filling, making the crust taste richer and more complex.
- Shortening: The secret to an incredibly tender and flaky crust. Shortening, being 100% fat, doesn’t develop gluten like butter does, resulting in a remarkably tender crumb. Its higher melting point compared to butter also creates those distinct flaky layers as it steams during baking.
- Cold Water: Absolutely essential for a flaky crust. Cold water helps prevent the shortening from melting prematurely and inhibits gluten development, keeping the dough tender. Using ice-cold water is key to achieving that perfect texture.
For the Rich and Creamy Pumpkin Pie Filling:
- Pure Pumpkin Puree: The heart of your pumpkin pie. It’s vital to use pure pumpkin puree, not canned pumpkin pie filling. Pumpkin puree is simply cooked and mashed pumpkin, offering a neutral base for your spices and sweeteners. Canned pie filling, on the other hand, is pre-sweetened and spiced, which would make your mini pies excessively sweet and alter the intended flavor profile.
- Evaporated Milk: This unsweetened, concentrated milk provides a creamy, rich texture to the filling without adding excess moisture. It’s significantly thicker than regular milk but runnier than sweetened condensed milk, making it perfect for achieving that signature smooth custard consistency. Be sure not to confuse it with sweetened condensed milk, which would drastically change the sweetness of the recipe.
- Eggs: Eggs act as the primary binder and thickener for the pumpkin custard. They give the filling its smooth, set texture and contribute to the pie’s overall structure, ensuring it bakes up firm yet creamy.
- Brown Sugar: Adds a deep, molasses-rich sweetness and moisture that complements the pumpkin beautifully. Brown sugar’s subtle caramel notes enhance the autumnal spice profile of the pie.
- Spices (Cinnamon, Ginger, and optional Nutmeg/Cloves): These warm spices are what give pumpkin pie its iconic flavor. Cinnamon is prominent, while ginger adds a zesty warmth. You can also add a touch of nutmeg and cloves for a more traditional and complex pumpkin pie spice blend. Feel free to adjust the quantities to match your preferred level of spice intensity.
- Additional Salt: Just like in the crust, a small amount of salt in the filling helps to enhance and balance all the sweet and savory flavors, bringing out the best in the pumpkin and spices.
For the Decadent Topping (Optional, but Highly Recommended):
- Whipped Cream: A cloud of fluffy, homemade whipped cream is the quintessential topping for pumpkin pie. Its light, airy texture and delicate sweetness provide a perfect contrast to the rich, spiced filling.
- Cinnamon or Pumpkin Pie Spice: A final dusting over the whipped cream adds an elegant touch and reinforces the warm spice notes, making each mini pie a feast for both the eyes and the palate.
Crafting Your Mini Pumpkin Pies: A Step-by-Step Guide
Making these charming mini pumpkin pies involves two main components: a homemade, flaky pie crust and a rich, spiced pumpkin filling. Both are surprisingly straightforward to prepare, requiring minimal prep time for maximum flavor payoff. Follow these detailed steps for a successful and delicious batch of mini pies:
Creating the Perfect Homemade Pie Crust:
- Combine Dry Ingredients: In a large mixing bowl, whisk together the all-purpose flour and salt. This ensures even distribution of the salt, which is key for flavor.
- Cut in Shortening: Add the cold shortening (ensure it’s very cold, diced into small pieces) to the flour mixture. Using a pastry blender, your fingertips, or a food processor, cut the shortening into the flour until the mixture resembles coarse crumbs, with some pea-sized pieces of shortening remaining. These small pockets of fat are what create a flaky crust.
- Gradually Add Cold Water: Begin adding ice-cold water, one tablespoon at a time. Mix gently with a fork after each addition. The goal is to moisten the flour just enough for the dough to come together. Avoid overmixing, as this can develop too much gluten and result in a tough crust. Stop adding water as soon as the dough forms a loose ball.
- Chill the Dough: Gently gather the dough into a disc or ball, wrap it tightly in plastic wrap, and refrigerate for at least 30 minutes. Chilling allows the gluten to relax, making the dough easier to roll, and solidifies the shortening, contributing to flakiness.
Preparing the Irresistible Pumpkin Pie Filling:
- Mix Wet and Dry Ingredients: In a separate bowl, combine the pure pumpkin puree, evaporated milk, eggs, brown sugar, cinnamon, ginger, and a pinch of salt. Whisk everything together until the mixture is smooth and well combined. Ensure there are no lumps of brown sugar. Set this filling aside while you prepare the crusts.
Assembling and Baking Your Mini Pies:
- Preheat Oven: Preheat your oven to 425°F (220°C). This initial high heat helps to set the crust quickly and achieve a golden color before the filling overcooks.
- Roll Out Dough: Lightly flour a clean work surface. Unwrap your chilled pie dough and roll it out evenly. Aim for a thickness of a few millimeters (about 1/8 inch). Don’t worry if the dough looks slightly marbled; this is from the shortening and is a sign of a good, flaky crust.
- Cut Out Circles: Use a 3.5 to 4-inch diameter biscuit or cookie cutter (or even a glass rim) to cut out circles from the rolled-out dough.
- Utilize Scraps: Gently press any dough scraps together, re-roll, and cut out more circles until you’ve used most of the dough.
- Prepare Muffin Tin: Lightly grease a standard muffin tin. Press each dough circle carefully into the wells of the muffin tin, shaping them into individual mini pie crusts. Ensure the dough extends slightly up the sides to form a sturdy cup.
- Fill the Crusts: Pour the prepared pumpkin pie filling into each mini pie crust, filling them almost to the top (approximately 3 tablespoons per crust). Be mindful not to overfill, as the filling will expand slightly during baking.
- Bake: Bake the mini pumpkin pies for 10 minutes at 425°F (220°C). Then, reduce the oven temperature to 350°F (175°C) and continue baking for another 15-20 minutes, or until the filling is set. You can test for doneness by inserting a thin knife into the center of a pie; it should come out clean.
- Cool: Allow the mini pies to cool in the muffin tin for about 10 minutes before carefully removing them to a wire rack to cool completely. This prevents them from sticking and helps them firm up.
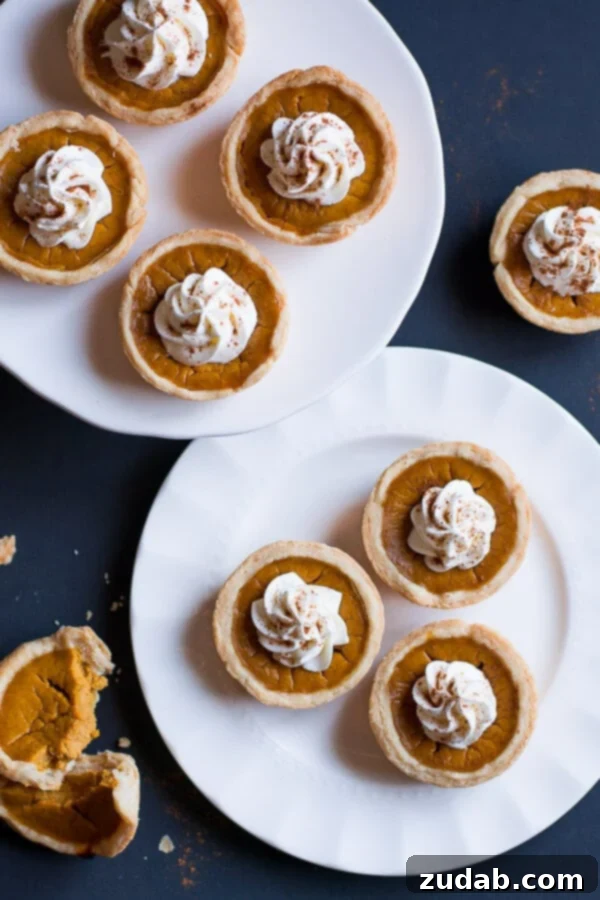
- Garnish and Serve: Once cooled, top your mini pumpkin pies with a generous swirl of whipped cream and a dusting of cinnamon or pumpkin pie spice for an elegant finish.
Making Pumpkin Puree from Fresh Pumpkin
While canned pure pumpkin puree is convenient and perfectly acceptable for this recipe, making your own from fresh pumpkin is a rewarding experience that yields an incredibly vibrant flavor. Yes, you can absolutely substitute fresh pureed pumpkin for canned pumpkin in equal amounts (1 cup fresh puree for 1 cup canned). Here’s how to create fresh pumpkin puree:
- Clean the Pumpkin: Wash the pumpkin thoroughly under cool water and dry it well with a clean towel.
- Prepare for Cooking: Carefully cut the pumpkin in half (or into smaller pieces for easier handling and faster cooking). Scoop out all the seeds and stringy fibrous insides. Don’t discard the seeds; they can be roasted for a delicious snack!
- Cook the Pumpkin: You have a few options for cooking until tender:
- **Roasting:** Place pumpkin halves (cut side down) on a baking sheet lined with parchment paper. Bake at 350°F (175°C) for 45-60 minutes, or until very tender when pierced with a fork.
- **Boiling:** Cut the pumpkin into smaller 2-inch pieces. Place them in a pot, cover with water, and boil gently until tender, typically around 20 minutes.
- **Steaming:** Place pumpkin pieces in a steamer basket over boiling water. Steam for about 20 minutes, or until fork-tender.
- Cool and Peel: Once tender, remove the pumpkin pieces and place them on a flat surface to cool slightly. When cool enough to handle but still warm, peel off the skin. The flesh should separate easily.
- Puree the Flesh: Scoop the cooked pumpkin flesh into a food processor, food mill, or use a hand-held immersion blender. Process until completely smooth, scraping down the sides as needed.
- Drain Excess Moisture: Fresh pumpkin naturally holds a lot of moisture, which can make your pie filling watery. Before using or storing, line a sieve or fine-mesh colander with several layers of cheesecloth or a coffee filter. Set it over a deep bowl and let the pumpkin puree drain for at least 2 hours, stirring occasionally. This step is crucial for a perfectly set pie. Once drained, your homemade fresh pumpkin puree is ready to be used in these delightful mini pumpkin pies!
Important FAQs for Perfect Mini Pumpkin Pies
Does Pumpkin Pie Have to Be Refrigerated?
Yes, absolutely! Due to the egg and milk content in the filling, homemade pumpkin pie, including these mini versions, is considered a custard and is highly perishable. For food safety, it must be refrigerated. Do not leave pumpkin pie out on the counter for more than two hours at room temperature. Always store it in the refrigerator to prevent bacterial growth and maintain freshness.
How Long Do Mini Pumpkin Pies Last?
When properly stored, loosely covered, in the refrigerator, your delicious mini pumpkin pies will retain their quality for up to 3-4 days. For optimal taste and texture, it’s best to consume them within this timeframe. If you add whipped cream, it’s generally best to do so just before serving, as whipped cream can deflate or weep when refrigerated for extended periods.
Can Pie Dough Be Frozen?
Yes, pie dough freezes exceptionally well, making it a fantastic prep-ahead option for busy bakers! You can freeze it in a couple of ways:
- As a Disc: Form your pie dough into a ball or disc, wrap it tightly in several layers of plastic wrap, and then place it in a freezer-safe bag. It can be stored in the freezer for up to 3 months. When you’re ready to use it, thaw the dough completely in the refrigerator before rolling it out and using it as normal.
- Pressed into Muffin Tins (for mini pies): Roll out your dough, cut out the circles, and press them into the wells of a muffin tin. You can then freeze these unbaked mini crusts. Once frozen solid, remove them from the tin and stack them with parchment paper in between, then store in a freezer bag. When ready to bake, you can often bake them directly from frozen, adding a few minutes to the baking time, or allow them to thaw slightly first.
Can You Freeze Baked Pumpkin Pie?
Absolutely! Freezing baked pumpkin pie is a wonderful way to extend its shelf life and enjoy these treats long after baking. To freeze your mini pumpkin pies:
- Cool Completely: Ensure the baked pies are entirely cool on a wire rack before freezing. Any residual warmth can lead to ice crystals and a soggy crust.
- Wrap Tightly: Once cool, individually wrap each mini pie tightly in plastic wrap. Then, place the wrapped pies in a freezer-safe bag or an airtight container. This double-layer protection helps prevent freezer burn.
- Freeze: Freeze for up to 2 months.
- Thawing and Reheating: To serve, thaw the frozen mini pies in the refrigerator overnight. You can enjoy them chilled, or gently warm them in a low oven (around 300°F/150°C) for about 10-15 minutes to revive the crust. Add fresh whipped cream just before serving.
Pro Tips for Making Your Mini Pumpkin Pies Shine
Achieving pumpkin pie perfection is all about attention to detail. Keep these expert tips in mind to ensure your mini pumpkin pies are nothing short of spectacular:
- Pure Pumpkin Puree is Non-Negotiable: This is perhaps the most critical tip. Always purchase pure pumpkin puree, which contains only pumpkin. Do NOT use canned pumpkin pie filling, as it is already sweetened and spiced. Using pie filling will result in an overly sweet and potentially oddly textured dessert, as the recipe is designed for unsweetened pumpkin.
- Evaporated Milk, Not Sweetened Condensed Milk: Another common pitfall is mistaking evaporated milk for sweetened condensed milk. Evaporated milk is unsweetened and has a thinner consistency, essential for the liquid balance in the filling. Sweetened condensed milk is thick and heavily sweetened, which would throw off the entire flavor profile and texture of your pies. Double-check your can before adding it!
- Spice it Up (or Down!): This recipe calls for a balanced amount of cinnamon and ginger. However, taste is personal! If you prefer a bolder, more intensely spiced pumpkin pie, feel free to increase the amount of cinnamon, or incorporate additional pumpkin pie spice, nutmeg, or cloves to the filling. Adjust to your best judgment and enjoy a pie tailored to your palate.
- Keep Your Pie Crust Ingredients Cold: For an exceptionally flaky crust, ensure your shortening and water are as cold as possible. This prevents the fat from fully incorporating into the flour, creating those desirable pockets that steam and separate during baking.
- Don’t Overwork the Dough: Handle the pie dough as little as possible. Overworking it develops gluten, which can lead to a tough, chewy crust instead of a tender, flaky one. Mix just until it comes together.
- Prevent a Soggy Bottom: To help prevent a soggy crust, you can blind bake the mini crusts for about 5-7 minutes before adding the filling, especially if you find your pies often have soft bottoms. Alternatively, ensure your muffin tin is adequately greased, and the oven is preheated to the correct temperature.
- Perfect Doneness: The knife test is your best friend. Insert a thin knife into the center of a mini pie. If it comes out clean, the pie is set. A slight jiggle in the very center is okay; it will continue to set as it cools. Overbaking can lead to a dry, cracked filling.
More Delicious Pie Recipes to Explore
If you’ve enjoyed making these mini pumpkin pies, you’re in for a treat! Our collection of pie recipes offers a wide array of flavors and styles, perfect for any occasion. Don’t forget to check out all of our Thanksgiving Recipes while you’re here for more holiday inspiration!
- Easy No-Bake Chocolate Pie
- Apple Cream Pie
- Simple Blueberry Pie
- Sweet Potato Pie with Cheesecake Filling
- Dulce de Leche Banana Cream Pie
- No-Bake Oreo Pie
- Homemade French Silk Pie
- …All of Our Pie Recipes!
Recipe Card: Mini Pumpkin Pies
Mini Pumpkin Pies
Love homemade pumpkin pie but never have enough room to eat an entire slice after your Thanksgiving dinner? Make Mini Pumpkin Pies this year instead!
Yields: 18 mini pies
Prep time: 25 mins
Cook time: 25 mins
Total time: 1 hr 30 mins (includes chilling)
Ingredients
For the Crust:
- 2 Cups All-Purpose Flour
- 1 teaspoon Salt
- 3/4 Cup Shortening, + 2 Tablespoons (very cold)
- 5-6 Tablespoons Cold Water (ice water is best)
For the Filling:
- 1 Can Pure Pumpkin Puree (15 ounce)
- 1 Can Evaporated Milk (12 ounce)
- 2 Eggs
- 1/3 Cup Brown Sugar
- 1 teaspoon Cinnamon
- 1/2 teaspoon Salt
- 1/4 teaspoon Ginger
For the Topping (Optional):
- Whipped Cream
- Cinnamon or Pumpkin Pie Spice (for dusting)
Instructions
- Prepare the Crust: In a large bowl, mix flour and salt. Use a pastry blender (or your fingers) to cut in the cold shortening until the mixture forms pea-sized crumbs.
- Form Dough: Add cold water one tablespoon at a time, mixing gently with a fork after each addition. Stop when the dough begins to come together and forms a loose ball.
- Chill Dough: Press the dough together into a disc, wrap it tightly in plastic wrap, and chill in the refrigerator for 30 minutes.
- Preheat Oven & Prepare Filling: Preheat oven to 425°F (220°C). While the dough chills, mix all filling ingredients (pumpkin puree, evaporated milk, eggs, brown sugar, cinnamon, salt, ginger) together in a separate bowl until smooth. Set aside.
- Roll & Cut Dough: On a lightly floured surface, roll out the chilled dough as thin as possible (a few millimeters thick). Use a 3.5 to 4-inch cookie or biscuit cutter to cut out circles. Gather scraps, re-roll, and cut more circles.
- Fill Muffin Tin: Press each dough circle into the wells of a lightly greased muffin tin, shaping them into mini pie crusts.
- Pour Filling: Fill each mini crust to the top with about 3 tablespoons of pumpkin pie filling.
- Bake: Bake at 425°F (220°C) for 10 minutes. Then, reduce the temperature to 350°F (175°C) and bake for another 15-20 minutes, or until a knife inserted into the center comes out clean.
- Cool & Serve: Let the pies cool in the muffin pan for 10 minutes, then carefully remove them to a wire rack to cool completely. Garnish with whipped cream and a dusting of cinnamon or pumpkin pie spice before serving.
Recipe Notes:
Store mini pumpkin pies in the refrigerator for up to 3-4 days. For best results, add whipped cream just before serving.
Nutrition (approximate per mini pie):
- Calories: 183 kcal
- Carbohydrates: 19g
- Protein: 4g
- Fat: 11g
- Saturated Fat: 3g
- Polyunsaturated Fat: 3g
- Monounsaturated Fat: 4g
- Trans Fat: 1g
- Cholesterol: 24mg
- Sodium: 225mg
- Potassium: 136mg
- Fiber: 1g
- Sugar: 7g
- Vitamin A: 3748 IU
- Vitamin C: 1mg
- Calcium: 67mg
- Iron: 1mg
Nutrition information is automatically calculated, so should only be used as an approximation.
Connect with Melanie:
Blog| Facebook| Twitter| Pinterest| Instagram