
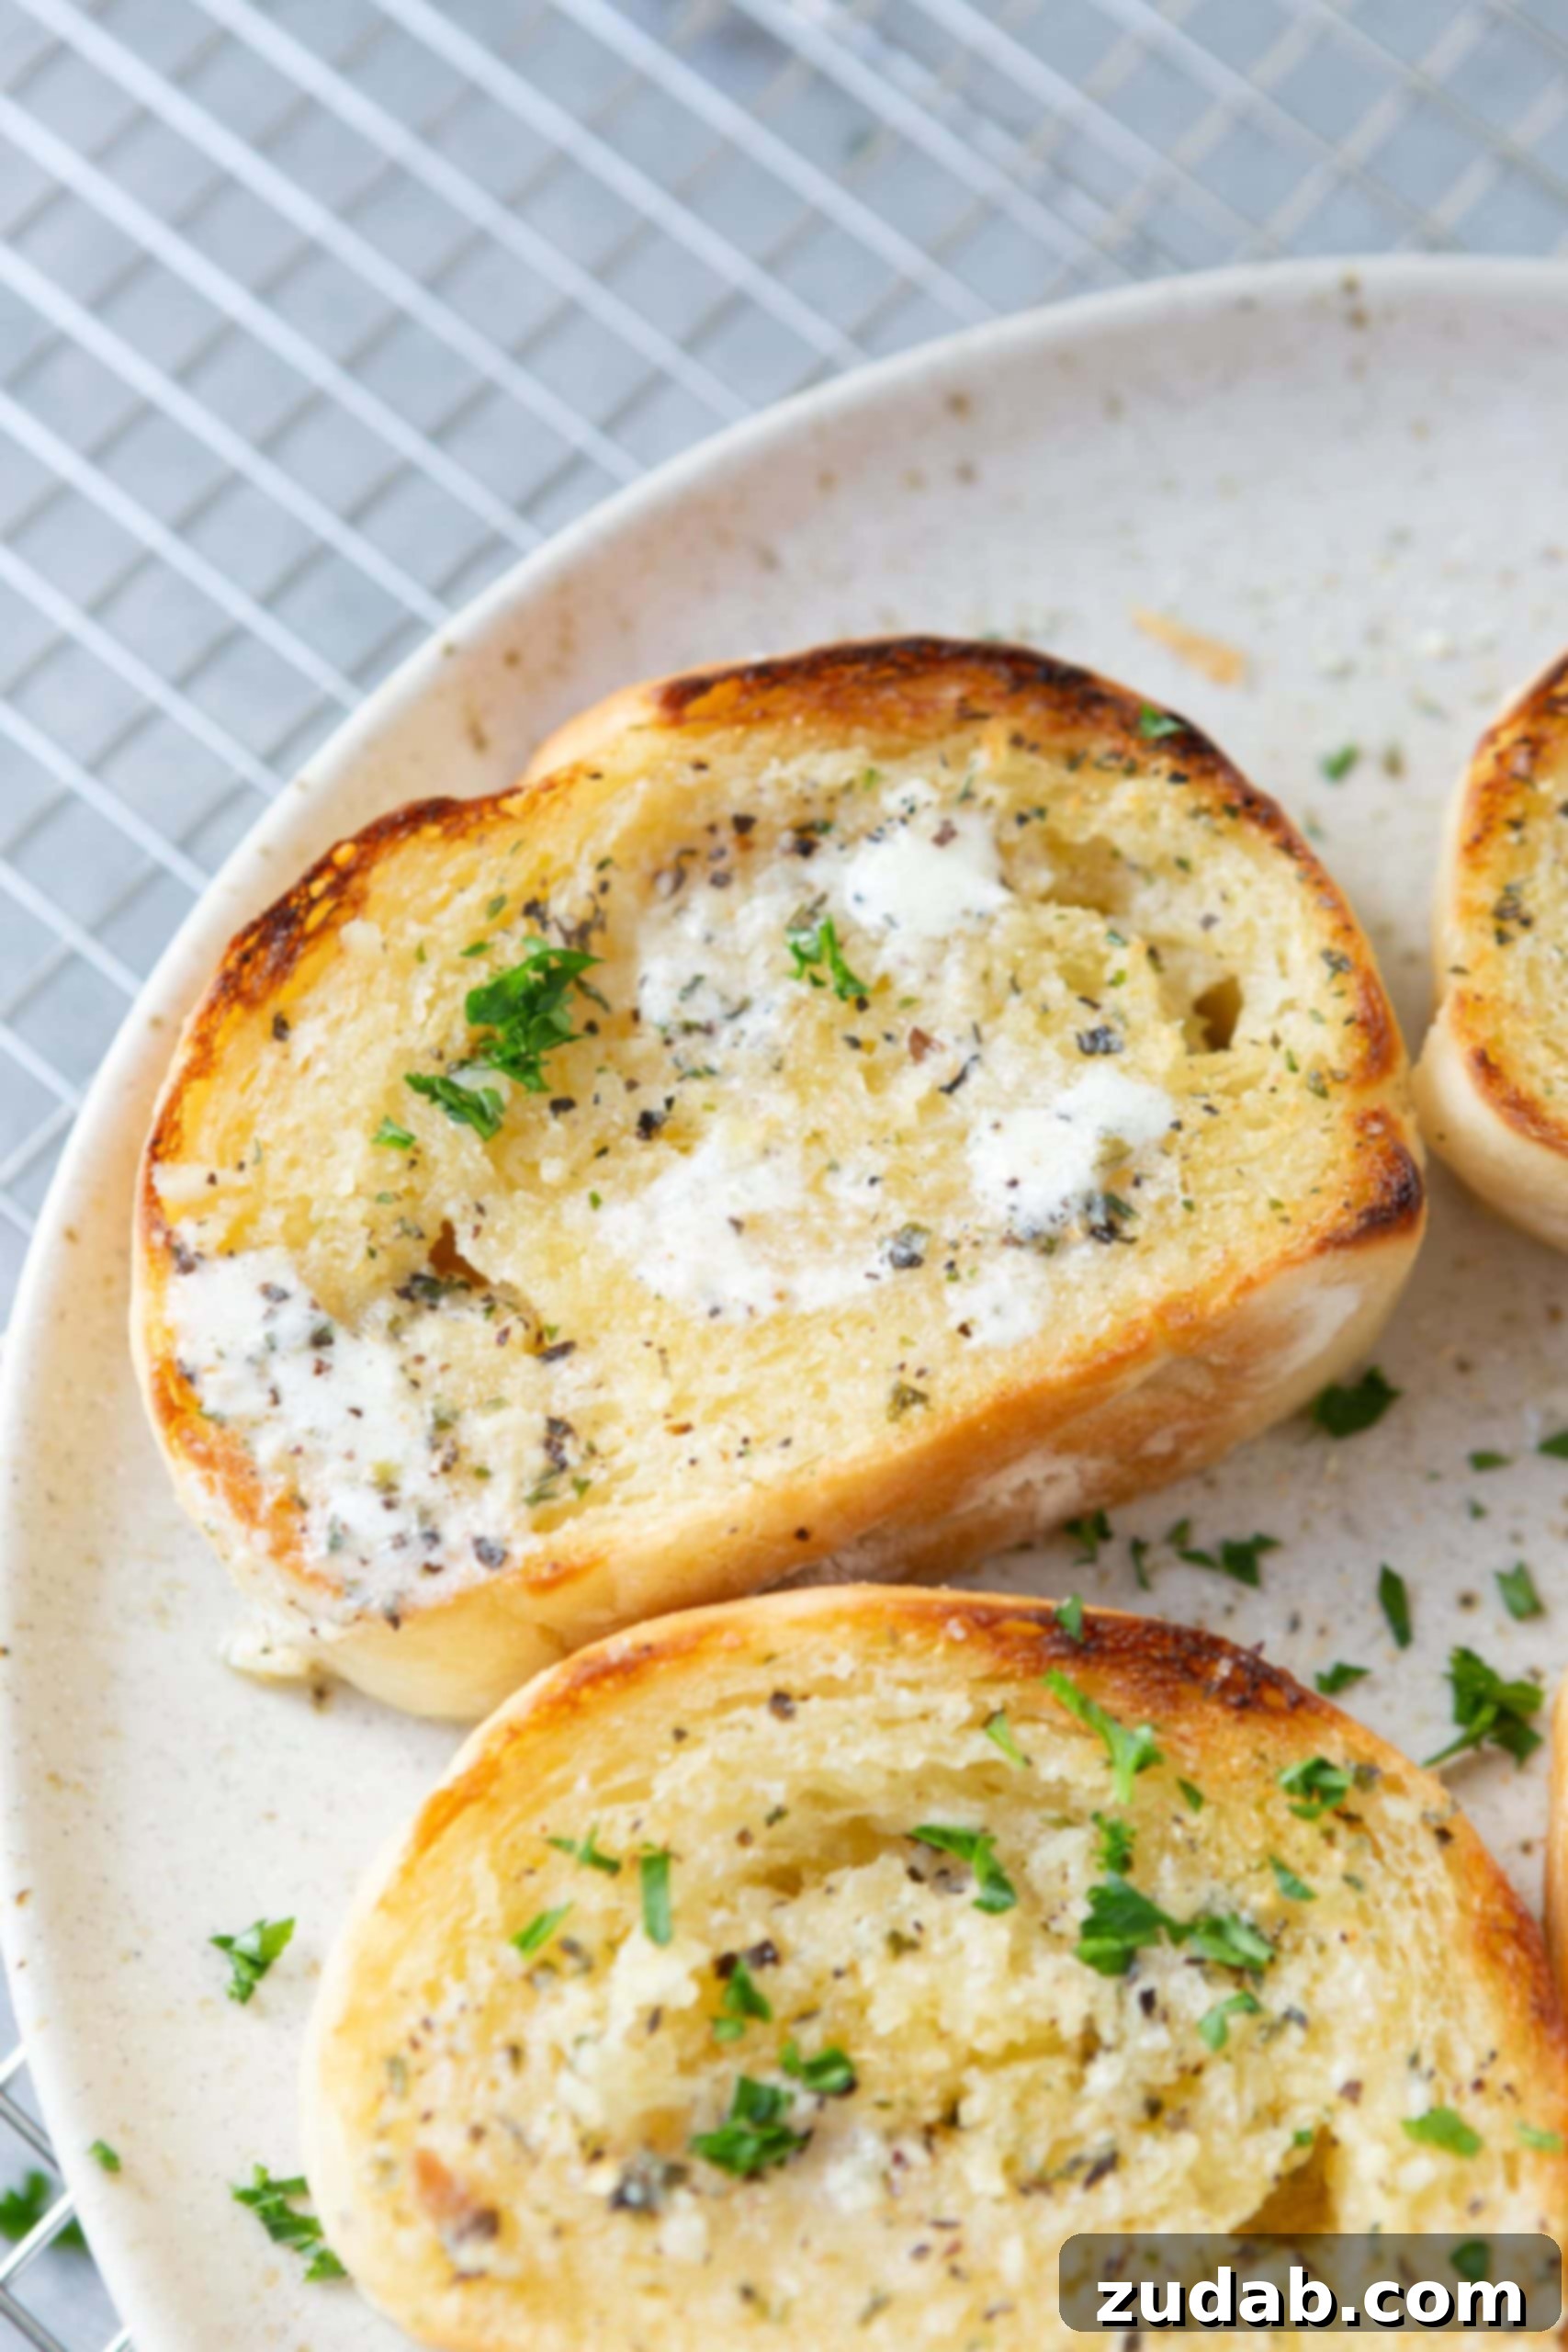
Imagine the aroma of freshly baked bread, generously slathered with rich, golden butter, infused with pungent garlic, and toasted to perfection. That irresistible, mouth-watering experience isn’t just a dream; it’s exactly what this garlic bread recipe delivers. Prepare yourself for the kind of garlic bread that vanishes from the plate almost as soon as it’s served – buttery, intensely garlicky, and utterly perfect in every bite. This isn’t just any recipe; it’s the one you’ll keep coming back to, whether you crave a crispy crunch or a soft, chewy texture. We’re about to unlock the secrets to creating the most delectable homemade garlic bread that will elevate any meal and become an instant family favorite.
Why This Garlic Bread Recipe Reigns Supreme
What makes a garlic bread truly exceptional? It boils down to a few fundamental principles: quality ingredients, a perfect balance of flavors, and the right technique to achieve your desired texture. This recipe has been meticulously crafted and tested to ensure every slice is a symphony of buttery, garlicky bliss. We avoid shortcuts that compromise flavor, focusing instead on simple steps that yield extraordinary results. Whether you’re a seasoned chef or a kitchen novice, you’ll find these instructions straightforward and rewarding, leading to garlic bread that surpasses any store-bought version.
From the moment the fragrant garlic butter hits the warm bread, you’ll understand why this particular method stands out. It’s designed to maximize flavor penetration and create that quintessential golden-brown crust or tender interior, depending on your preference. We’ll explore two distinct baking approaches, allowing you to customize your homemade garlic bread experience. Get ready to impress your family and friends with garlic bread so good, it might just steal the show from the main course!
Essential Ingredients for Irresistible Garlic Bread
Crafting phenomenal garlic bread doesn’t require a pantry full of exotic items. In fact, with a good loaf of French bread as your foundation, you only need a handful of additional ingredients to transform it into something truly magical. The key is in the quality and combination of these simple components. Here’s what you’ll need:
- French Bread: The cornerstone of great garlic bread. A crusty, fresh loaf that can hold its shape when sliced is ideal. You can use a store-bought baguette or, for an even more rewarding experience, try making your own easy French bread.
- Unsalted Butter: Good quality butter is non-negotiable here. It provides the rich, creamy base that carries the garlic flavor beautifully. Softened butter is crucial for easy mixing and spreading.
- Fresh Garlic Cloves: Forget the jarred stuff for this recipe! Freshly minced garlic delivers an unparalleled aroma and flavor. Two large cloves are a good starting point, but feel free to add more if you’re a true garlic enthusiast.
- Johnny’s Garlic Spread: This is our secret weapon! While optional, this spread takes the garlic flavor to an entirely new dimension. It’s a concentrated blend of garlic and herbs that adds an incredible depth you won’t get from just fresh garlic. We often find it at Costco, but it’s also conveniently available online.
- Fresh Parsley: Finely chopped fresh parsley isn’t just for garnish; it adds a pop of vibrant color and a fresh, herbaceous note that beautifully complements the rich garlic and butter.
Trust us on the Johnny’s Garlic Spread – it truly is pure magic! If you can’t find it, a pinch of garlic powder and a mix of dried herbs like oregano or basil can be a decent substitute, but for that truly “wow” factor, Johnny’s is the way to go. The precise measurements for each ingredient are provided in the detailed recipe card at the end of this post, ensuring you have everything you need for perfect proportions.
Mastering the Art of Homemade Garlic Bread: Two Delicious Methods
When it comes to baking your homemade garlic bread, you have an exciting decision to make: do you prefer a crispy, golden-brown crust with a satisfying crunch, or a softer, more pillowy texture that’s delightfully chewy? Both methods are incredibly simple and result in utterly delicious garlic bread, but they offer distinct experiences. Our personal preference leans towards the crispy and crunchy side, but our girls absolutely adore the soft and chewy version. Let’s explore how to achieve each style.
Method 1: Crispy and Golden Perfection
For those who love a robust crunch and a deeply toasted exterior, this method is your go-to. It results in individual slices of garlic bread that are perfect for dipping into soups or enjoying alongside a hearty pasta dish.
- Prepare the Garlic Butter: In a small bowl, combine one stick of unsalted, softened butter with two cloves of freshly minced garlic. Mix thoroughly until the garlic is evenly distributed throughout the butter. This aromatic blend is the heart of your garlic bread!
- Slice and Spread: Preheat your oven to 350°F (175°C). Take your loaf of French bread and slice it into approximately 1-inch thick pieces. Generously slather each slice with your homemade garlic butter mixture. Don’t be shy – the more butter, the more flavor! Then, for that extra layer of garlicky goodness, sprinkle a bit of Johnny’s Garlic Spread over each buttered slice.
- Initial Bake (Tented): Arrange the buttered and seasoned slices, butter-side up, on a baking sheet. Loosely tent the baking sheet with aluminum foil. This step helps to warm the bread through and melt the butter without browning the crust too quickly, ensuring the interior stays tender while the flavors meld.
- Broil for the Crispy Finish: Once the bread is warmed and the butter has fully melted (typically after about 10-12 minutes), carefully remove the foil. Change your oven setting to broil. Keep a very close eye on the bread during this stage, as broilers can brown quickly. Broil for 1-3 minutes, or until the edges are golden brown and slightly crispy. The intense heat creates that desirable crunch and toasted flavor.
- Final Touch of Happiness: Promptly remove the baking sheet from the oven. For an extra touch of decadence and flavor, you can spread a tiny bit more fresh butter on the hot slices (the residual heat will melt it beautifully). Finally, sprinkle with freshly chopped parsley for a burst of color and herbaceous freshness. So much butter, so much happiness indeed!
Method 2: Soft and Chewy Indulgence
If you prefer garlic bread that’s soft on the inside with a gently toasted exterior, perfect for tearing apart and soaking up rich sauces, this foil-wrapped method is for you. It locks in moisture, creating a tender, aromatic experience.
- Prepare the Garlic Butter: Just as with the crispy method, start by mixing one stick of softened unsalted butter with two cloves of freshly minced garlic in a small bowl until well combined.
- Halve and Slather: Preheat your oven to 350°F (175°C). Take your French bread loaf and cut it in half lengthwise. This creates two long halves. Generously slather the cut sides of both halves with the prepared garlic butter mixture. Ensure every nook and cranny is coated. Then, sprinkle a healthy amount of Johnny’s Garlic Spread over the buttered surfaces for maximum flavor.
- Wrap for Tenderness: Carefully press the two buttered halves back together, so the seasoned sides are facing each other. Wrap the entire loaf tightly in aluminum foil. This foil wrap is the secret to retaining moisture and achieving that soft, chewy texture.
- Bake to Perfection: Place the wrapped loaf directly onto the oven grate (or a baking sheet for easier handling) in your preheated oven. Bake for 15-20 minutes, allowing the butter to melt and infuse deeply into the bread, while the foil keeps it moist and tender.
- Serve Warm and Enjoy: Carefully remove the wrapped loaf from the oven. Be mindful of the steam when you open the foil. Let it cool for just a minute or two, then slice and serve. This is our girls’ favorite way to enjoy homemade garlic bread – tender, chewy, and bursting with flavor!
Which method are you going to try first? Both versions taste absolutely phenomenal, especially when dunked into a warm bowl of roasted tomato basil soup or alongside your favorite pasta dish! The detailed, step-by-step directions for both techniques are also conveniently located in the recipe card below, ensuring you have all the information you need at your fingertips.
Planning Ahead: Can You Make Garlic Bread in Advance?
One of the many advantages of this fantastic garlic bread recipe is its flexibility for make-ahead preparation. Whether you’re planning for a party, a busy weeknight meal, or simply want to minimize last-minute cooking, preparing your garlic bread ahead of time is a brilliant strategy. It allows the flavors to meld even further and ensures you have a delicious side dish ready to bake at a moment’s notice.
Prepping Ahead for Same-Day Baking
If you plan to bake your garlic bread within a few hours, you can prepare the loaf entirely, up to the point of baking. Simply cut your bread (either into slices or halved lengthwise), generously slather it with the garlic butter mixture and Johnny’s Garlic Spread, and then tightly wrap it in plastic wrap. Keep it at room temperature on your kitchen counter. When you’re ready to bake, unwrap it and follow the baking instructions for your preferred method (crispy or soft) as outlined above. The flavors will have had a little extra time to infuse, resulting in an even more delicious outcome.
Freezing Garlic Bread for Longer Storage
For longer storage, homemade garlic bread freezes beautifully, allowing you to have a ready-to-bake side dish for up to three months! This is perfect for meal prepping or unexpected dinner guests.
- Prepare and Wrap: Follow the same initial steps as if you were making it fresh: cut the bread (sliced or halved), apply the garlic butter, and sprinkle with Johnny’s Garlic Spread.
- Double Wrap for Protection: To prevent freezer burn and keep it fresh, first wrap the prepared bread tightly in plastic wrap. Then, add a second layer of protection by wrapping it securely in aluminum foil. Label with the date to keep track of its freshness.
- Freeze: Place the double-wrapped garlic bread in your freezer. It will maintain its quality for up to 3 months.
- Baking from Frozen: When you’re ready to enjoy, simply pull the prepared garlic bread from the freezer. There’s no need to fully thaw it, but allowing it to sit on the counter for about 30 minutes can help with more even cooking. Unwrap it and bake according to the instructions for your chosen method, adding a few extra minutes to the baking time to account for its frozen state. Keep an eye on it to ensure it browns nicely without burning.
Having frozen garlic bread on hand is a true game-changer for quick, delicious meals!
Reviving Leftovers: How to Reheat Garlic Bread
Garlic bread is undoubtedly at its absolute best when fresh out of the oven, with the butter still sizzling and the garlic aroma filling the air. However, if you happen to have any glorious leftovers (a rare occurrence with this recipe!), reheating them properly is key to maintaining their deliciousness and texture.
We highly recommend using the oven for reheating. Simply wrap your leftover garlic bread loosely in aluminum foil. Place it in a preheated oven at 350°F (175°C) for about 10-15 minutes, or until it’s heated through and feels warm and crisp again. The foil helps to prevent it from drying out while ensuring an even reheat.
A crucial tip: always avoid the microwave for reheating garlic bread. While convenient, the microwave’s rapid heating process tends to turn the bread soggy and diminishes its delightful texture, leaving you with a less-than-ideal experience. Stick to the oven for superior results!
Optimal Storage for Freshness
To keep your homemade garlic bread tasting its best, proper storage is essential. Once cooled, store garlic bread at room temperature. The best way to do this is in a plastic bag or an airtight container. This method will help maintain its freshness and prevent it from becoming stale too quickly. Stored this way, your garlic bread will typically keep for 2-3 days.
If you anticipate needing to store it for a longer period, it’s always best to transfer it to the freezer. As mentioned in the “Make Ahead” section, freezing is an excellent option for extending its shelf life significantly. Simply wrap it well and reheat from frozen (or partially thawed) following the instructions above for a delicious treat even weeks later.
Elevate Your Garlic Bread: Cheesy Variations
Feeling a little extra adventurous, or simply a fan of all things cheesy? Then you absolutely must try adding cheese to this already phenomenal garlic bread recipe! The addition of melted, gooey cheese takes this comfort food to an even higher plane of deliciousness, creating a truly irresistible treat that’s perfect for any occasion.
To create a delectable cheesy garlic bread, simply prepare your bread with the garlic butter and Johnny’s Garlic Spread as usual. Before baking, generously sprinkle about 1 cup of shredded mozzarella cheese and 1/4 cup of grated Parmesan cheese over the buttered and garlicked surfaces. These two cheeses offer a fantastic balance: the mozzarella provides that incredible, stretchy melt and creamy texture, while the Parmesan adds a sharp, salty depth of flavor.
Bake according to your preferred method (crispy or soft). If opting for the crispy method, be sure to keep a close eye on the cheese during the broiling stage, as it can brown quickly. You want it bubbly, golden, and slightly crisped at the edges, not burnt. The result is pure garlic cheesy bliss – a perfect harmony of rich garlic, savory butter, and warm, melty cheese that will have everyone reaching for another slice!
Perfect Pairings: What to Serve with Garlic Bread
Perhaps the better question is, what doesn’t go well with garlic bread? This incredibly versatile side dish truly complements almost any meal, especially those featuring rich sauces, hearty stews, or comforting soups. Its savory, garlicky flavor and satisfying texture make it a universal crowd-pleaser. Here are some of our absolute favorite pairings that turn a good meal into a great one:
- Authentic Bolognese: The perfect vehicle for soaking up that rich, meaty sauce.
- French Onion Soup: A natural partner for any bread, but garlic bread adds an extra layer of savory depth.
- Spaghetti Pie: An indulgent casserole that benefits from the garlicky crunch on the side.
- Pancetta Ravioli with Sun Dried Tomatoes and Spinach: A lighter pasta dish that still welcomes the robust flavors of garlic bread.
- Gnocchi Chicken Soup: A creamy, comforting soup that’s even better with a piece of garlic bread for dipping.
- Zuppa Toscana: A hearty, flavorful soup that cries out for a garlicky accompaniment.
Beyond these specific suggestions, homemade garlic bread genuinely pairs wonderfully with all kinds of soups, stews, pasta dishes, and even as a delightful accompaniment to grilled meats or a simple salad. Its ability to enhance a wide array of cuisines makes it an indispensable addition to your culinary repertoire. This is hands-down the best garlic bread recipe you’ll find, and it couldn’t be any easier to make! As a self-proclaimed carb lover, this bread is right at the very top of my list of indulgences that are always worth every single, glorious bite!
Frequently Asked Questions About Garlic Bread
We know you might have a few questions about achieving garlic bread perfection. Here are some common queries and our expert answers to help you along the way:
- What kind of bread is best for garlic bread? While a French baguette or Italian loaf is traditional and often preferred for its crusty exterior and soft interior, you can experiment with other breads. Sourdough, ciabatta, or even Texas toast can make excellent garlic bread, each offering a slightly different texture and flavor profile.
- Can I use pre-minced garlic from a jar? For the absolute best flavor, we strongly recommend using fresh garlic and mincing it yourself. Pre-minced garlic often lacks the pungency and vibrant flavor of fresh cloves and can sometimes have a slightly bitter taste.
- How can I make this garlic bread dairy-free? Easily! Simply substitute the unsalted butter with your favorite plant-based butter alternative. There are many excellent dairy-free butter sticks available today that perform beautifully in this recipe.
- What if I don’t have Johnny’s Garlic Spread? While it’s our secret ingredient for a reason, you can still make delicious garlic bread without it. In its place, you can add a pinch of garlic powder, a mix of dried Italian herbs (like oregano, basil, and thyme), or a touch of onion powder to your butter mixture for added depth.
- How do I prevent my garlic bread from getting soggy? The key is to avoid over-buttering the bread to the point of saturation, and to use the correct baking method. For crispy bread, ensuring the foil is removed and it gets a quick broil helps. For soft bread, wrapping it tightly in foil prevents excessive moisture loss while baking, rather than gaining it. Also, avoid stacking hot garlic bread, as steam can cause sogginess.
- Can I add other herbs? Absolutely! Fresh herbs like oregano, basil, or even a touch of fresh rosemary can be finely chopped and added to the garlic butter mixture for an extra layer of flavor.
How to Make the Best Garlic Bread
Ingredients
- 1 Stick Butter, unsalted, softened
- 2 Cloves Garlic, minced
- 1 Loaf French Bread
- Johnny’s Garlic Spread
- Fresh Parsley, Chopped
Instructions
Crispy and Crunchy
-
Preheat the oven to 350°F (175°C).
-
Mix 1 stick of softened unsalted butter with 2 cloves of minced garlic in a small bowl until well combined.
-
Slice 1 loaf of French bread into 1-inch thick slices. Slather each piece generously with the garlic butter and then sprinkle with Johnny’s Garlic Spread.
-
Place each buttered slice, butter-side up, on a baking sheet. Loosely tent the baking sheet with aluminum foil.
-
Bake for 10-12 minutes, or until the bread is warmed through and the butter has melted.
-
Remove the foil, and turn the oven to broil. Broil for 1-3 minutes until the bread begins to brown and crisp at the edges. Keep a very close eye on it, as it can brown quickly.
-
Remove from the oven, spread a little more butter (optional), and sprinkle with freshly chopped parsley. Serve immediately.
Soft and Chewy
-
Preheat the oven to 350°F (175°C).
-
Mix 1 stick of softened unsalted butter with 2 cloves of minced garlic in a small bowl until well combined.
-
Cut 1 loaf of French bread in half lengthwise. Generously slather both halves with the garlic butter mixture and then sprinkle with Johnny’s Garlic Spread.
-
Put the two halves back together with the buttered sides facing each other. Wrap the entire loaf tightly in aluminum foil.
-
Place the wrapped loaf directly on the oven grate (or a baking sheet) and bake for 15-20 minutes.
-
Remove from the oven and carefully open the foil (watch for steam). Let it cool for a few minutes before slicing and serving for a soft and chewy texture.
Nutrition
Approximate Nutritional Information Per Serving (1 Slice):
- Serving: 1 Slice
- Calories: 165 kcal
- Carbohydrates: 19g
- Protein: 4g
- Fat: 8g
- Saturated Fat: 5g
- Trans Fat: 1g
- Cholesterol: 20mg
- Sodium: 238mg
- Potassium: 47mg
- Fiber: 1g
- Sugar: 1g
- Vitamin A: 235IU
- Vitamin C: 1mg
- Calcium: 18mg
- Iron: 1mg
Nutrition information is automatically calculated and should only be used as an approximation.
Don’t miss out on more delicious recipes! REMEMBER TO SUBSCRIBE TO our FREE Oh Sweet Basil NEWSLETTER and receive easy recipes delivered into your inbox every day!
When you try a recipe, please use the hashtag #ohsweetbasil on INSTAGRAM for a chance to be featured in our stories! FOLLOW OH, SWEET BASIL ON FACEBOOK | INSTAGRAM | PINTEREST | TWITTER FOR ALL OF OUR LATEST CONTENT, RECIPES AND STORIES.