
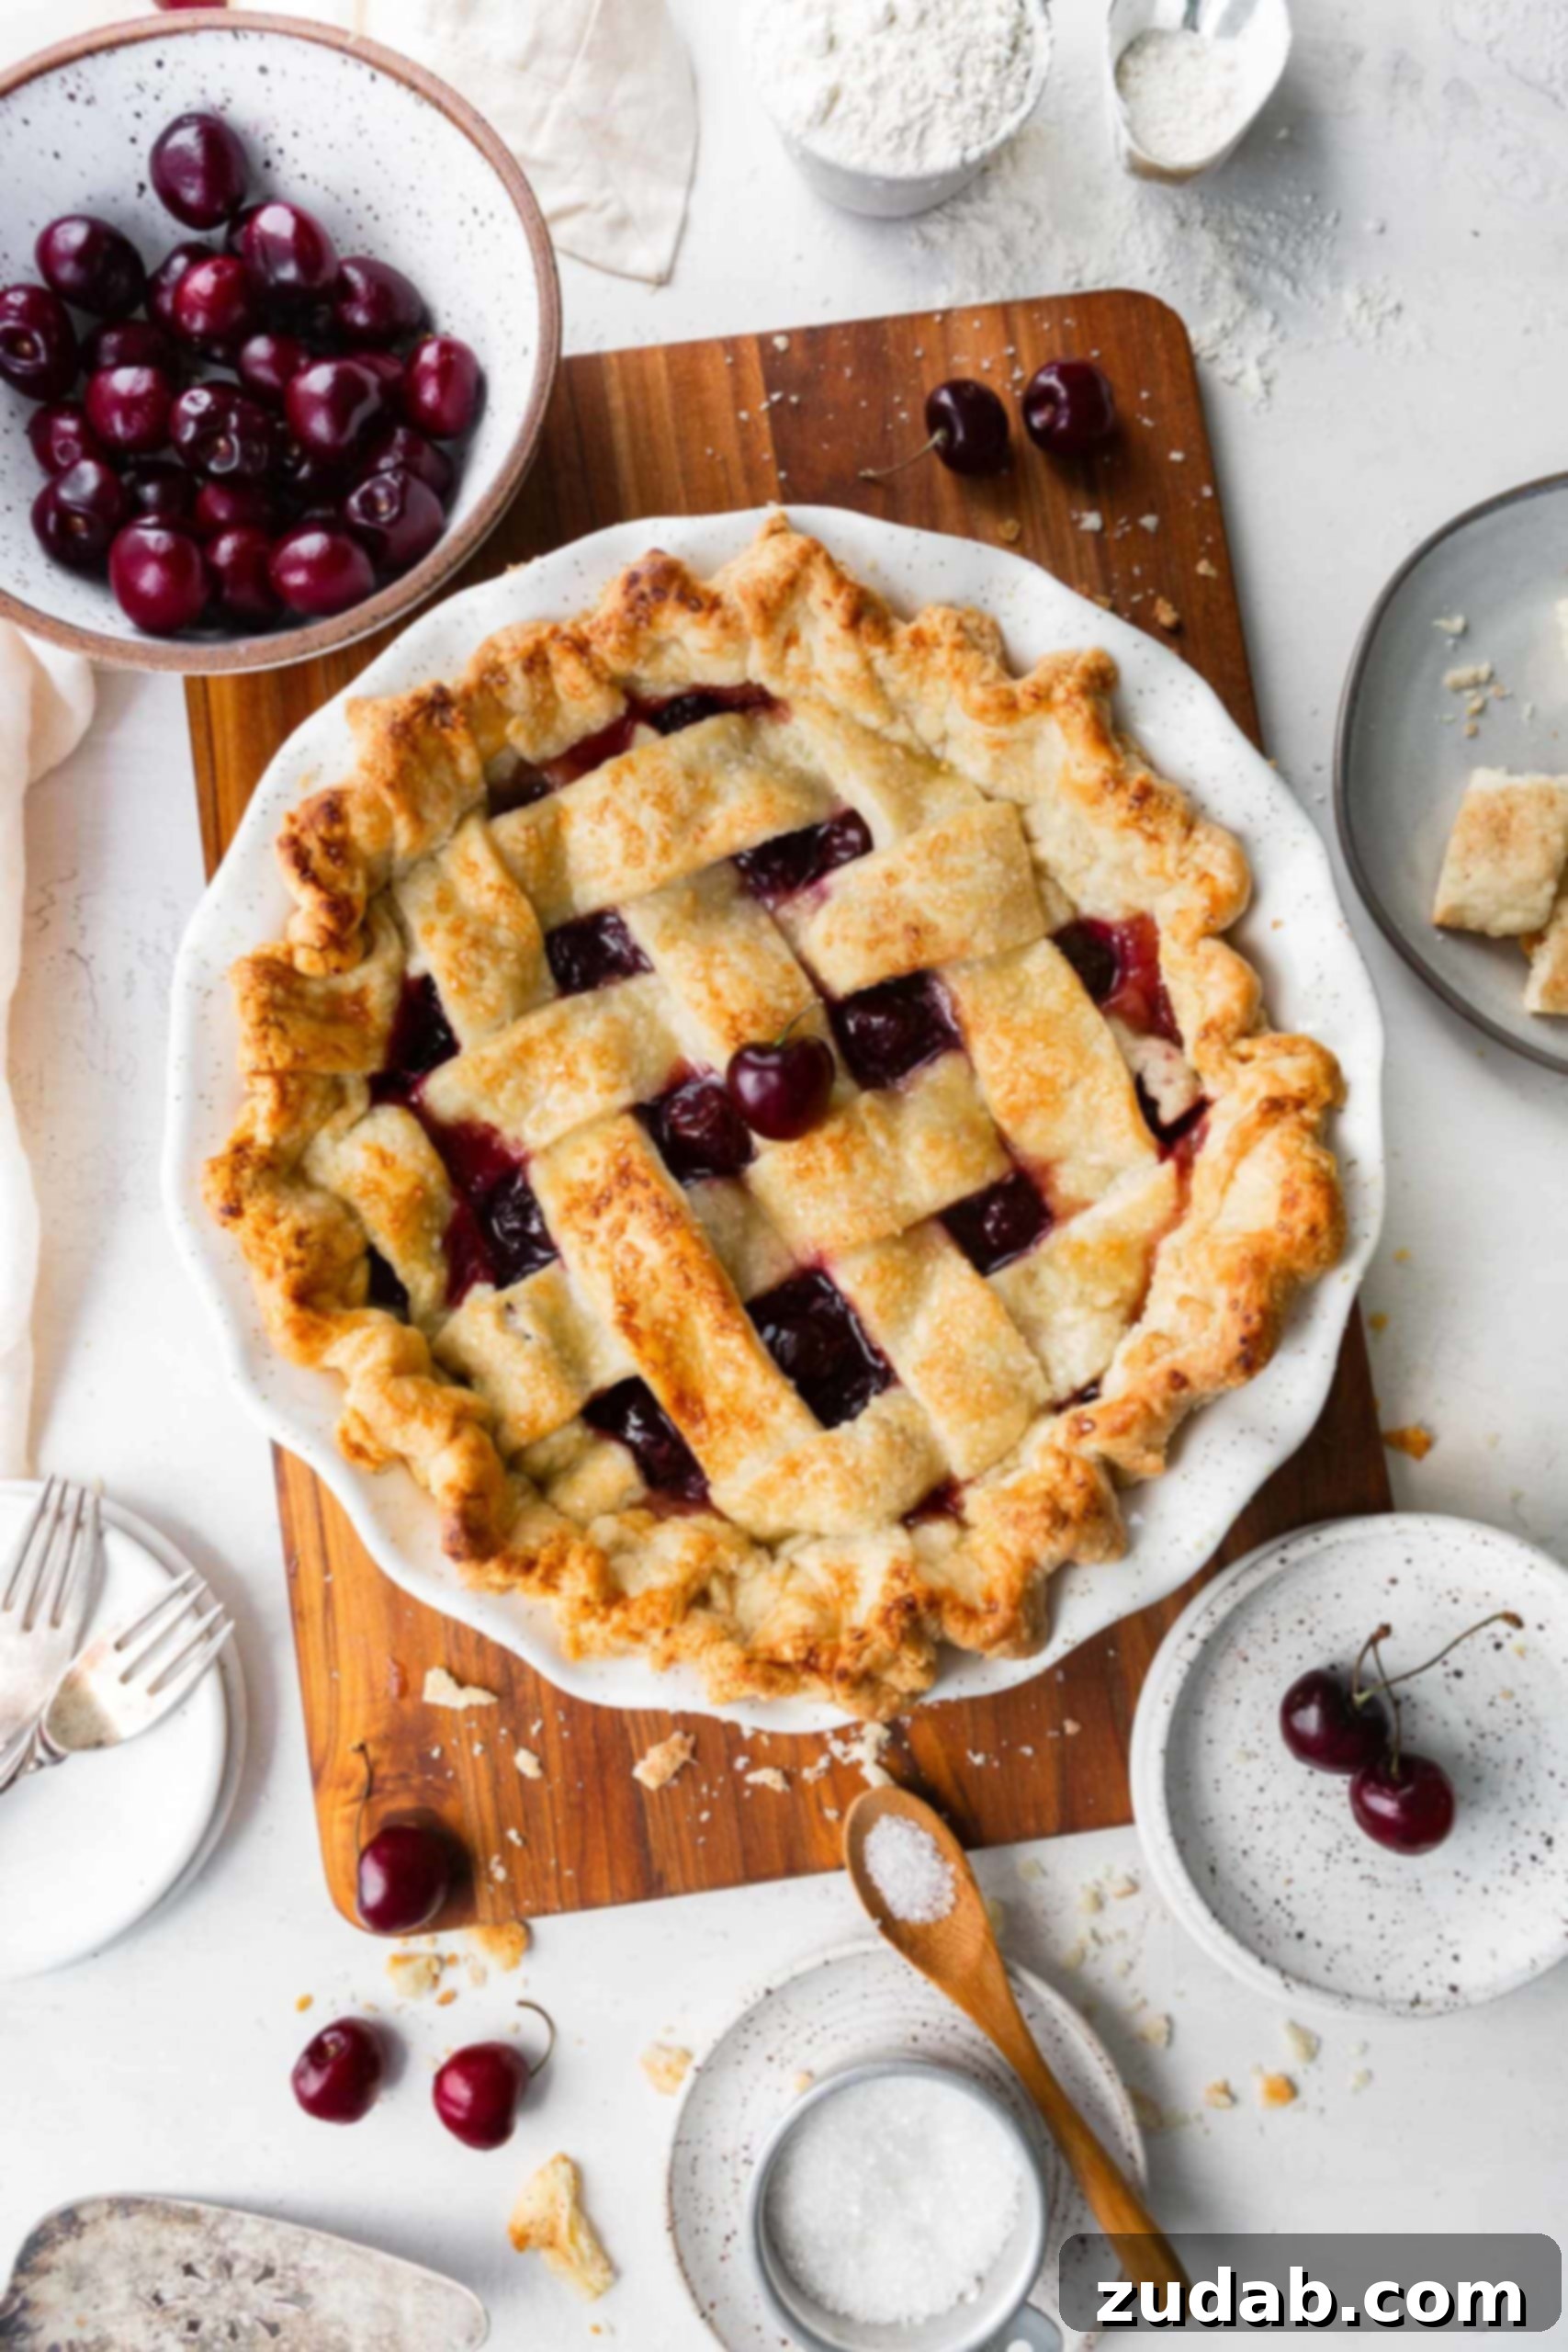
There’s nothing quite like a slice of perfectly baked, homemade cherry pie to capture the essence of summer. Imagine biting into a vibrant, luscious filling made from fresh, tart cherries, perfectly sweetened and nestled within a golden, impossibly flaky, buttery crust. This isn’t just a dessert; it’s a culinary masterpiece, a celebration of seasonal bounty that promises to delight with every forkful. Every summer truly *needs* a cherry pie.
For devoted pie lovers, a homemade pie represents the pinnacle of dessert perfection. It’s an indulgence in textures and flavors – the delicate crunch of a golden-brown crust, giving way to a gooey, sweet-tart fruit filling. It’s a sensory experience that brings immense satisfaction, making it a truly dream-come-true treat for any occasion, especially those warm summer gatherings.
The idea of baking a pie entirely from scratch, particularly a showstopping cherry pie, can sometimes feel daunting. However, we’re here to guide you through each step, ensuring a smooth and enjoyable baking process. The reward? A truly spectacular dessert that will utterly impress your family and friends, showcasing your culinary prowess with an undeniable touch of homemade charm.
The Ultimate Homemade Cherry Pie: A Summer Delight
Making a cherry pie from scratch offers a unique satisfaction that store-bought versions simply cannot replicate. From selecting the freshest cherries to rolling out your own buttery dough, every step contributes to a dessert that is brimming with flavor and personal touch. This recipe focuses on creating a harmonious balance between sweet and tart, ensuring a filling that’s vibrant and irresistible, all encased in a tender, golden crust that melts in your mouth. It’s the quintessential summer dessert, perfect for picnics, barbecues, or simply enjoying a quiet evening on the porch.
Why Choose Homemade? The Unmatched Flavor and Texture
The secret to an unforgettable cherry pie lies in its homemade components. A scratch-made crust, crafted with real butter, yields an incomparable flakiness and rich flavor that complements the fruit beautifully. The filling, prepared with fresh, peak-season cherries, offers a burst of natural sweetness and tanginess, far superior to canned alternatives. When you bake homemade, you control the quality of ingredients, the level of sweetness, and the perfect consistency, resulting in a pie that truly stands out and becomes a cherished memory.
Essential Ingredients for Your Perfect Cherry Pie
Crafting the perfect homemade cherry pie filling requires a selection of fresh, high-quality ingredients. While the pie crust itself has its own dedicated recipe (which we highly recommend you explore for detailed instructions), the filling is where the magic truly happens, transforming simple cherries into a luxurious, fruit-filled delight. For the crust, remember you’ll primarily need all-purpose flour, cold butter, a touch of salt, a pinch of sugar, and ice water.
For the Luscious Cherry Pie Filling and Assembly:
- **Homemade Pie Crust**: The foundation of your pie, providing that essential flaky texture.
- **Fresh Cherries**: The star of the show! We’ll discuss types and preparation in detail below.
- **Granulated Sugar**: To balance the tartness of the cherries and enhance their natural sweetness. The amount can be adjusted based on your cherries and personal preference.
- **Lemon Zest & Juice**: A secret weapon for brightening the cherry flavor and adding a subtle tang that elevates the entire pie.
- **Almond Extract**: This extract beautifully complements cherry flavor, adding a warm, subtle nuttiness that is simply divine. It’s often considered the perfect pairing for cherry desserts.
- **Sure Gel (or Cornstarch)**: Our preferred thickener for achieving that ideal, spoonable filling consistency without being too runny or overly gelatinous. Cornstarch is a readily available alternative.
- **Large Egg**: Whisked with milk, this creates a beautiful golden-brown wash for your pie crust, ensuring a professional, appetizing finish.
- **Milk**: Combined with the egg for the pie wash, adding richness and promoting even browning.
- **Sanding Sugar (optional)**: For a dazzling, sparkling top crust and a delightful textural crunch.
You’ll find the precise measurements for each of these ingredients in the comprehensive recipe section at the conclusion of this article.
Step-by-Step Guide to Baking Your Dream Cherry Pie
The process of assembling this magnificent pie is surprisingly straightforward, even for those new to pie baking. The key to success begins with your pie crust. We highly recommend starting with our all-butter pie crust recipe, which provides detailed instructions and tips to overcome any pie crust-making anxieties. Once your dough is ready, you’ll roll out the bottom crust and gently place it into your pie plate. Then, it’s time to prepare the star attraction: the cherry filling.
Crafting the Luscious Cherry Filling and Constructing the Pie:
- **Preheat Your Oven**: Preheat your oven to 400°F (200°C) to ensure it’s at the optimal temperature when your pie is ready for baking.
- **Prepare the Filling**: In a medium saucepan, combine all the ingredients for the pie filling (cherries, sugar, lemon zest and juice, almond extract, and thickener). Cook this mixture over medium heat, stirring gently, until the cherries just begin to release their juices and the mixture starts to thicken slightly. This pre-cooking step ensures the filling is perfectly set and flavorful.
- **Fill the Crust**: Carefully pour the warm, prepared cherry filling into your unbaked bottom pie crust, spreading it evenly.
- **Create the Lattice Top**: Now for the artistic part! Construct your beautiful lattice top crust (detailed instructions on this technique can be found in the section below). Once your lattice is in place, crimp the edges of the top and bottom crusts together to seal the pie. For a professional, golden finish, brush the entire top crust generously with the whisked egg and milk mixture. If desired, sprinkle a tablespoon or two of coarse sanding sugar over the top for added sparkle and a delightful crunch.
- **Bake to Perfection**: Place the pie in the preheated oven. Bake for an initial 20 minutes at 400°F (200°C). Then, reduce the oven temperature to 375°F (190°C) and continue baking for another 35-40 minutes, or until the crust is deeply golden brown and the filling is bubbling invitingly. If you notice the crust browning too quickly, gently tent the pie with aluminum foil.
- **Cool and Set**: This step is crucial for achieving the perfect pie texture. Once baked, allow the pie to cool completely at room temperature for at least 2-4 hours. For optimal slicing and a perfectly set filling, transfer the cooled pie to the refrigerator for a few additional hours, or even overnight. This patience will be amply rewarded with clean slices and a stable, delicious filling.
For more intricate details and specific timings, please refer to the comprehensive recipe card located at the end of this post.
Mastering the Art of the Lattice Top Pie Crust
A lattice top not only adds a touch of elegance to your homemade cherry pie but also allows steam to escape, preventing a soggy bottom crust. Creating a beautiful lattice might seem intricate, but it’s a simple weaving technique that becomes easier with practice. Here’s how to do it:
- **Cut Your Strips**: After rolling out your second pie crust dough, use a sharp knife or a pastry wheel to cut it into even strips, typically 1/2 to 3/4 inch wide. For a classic look, cut about 8-10 strips.
- **Lay Horizontal Strips**: Carefully lay half of your dough strips (e.g., 4 or 5) horizontally across the top of your pie filling, maintaining a small, consistent gap between each strip. Ensure the ends of the strips extend slightly beyond the edge of the bottom crust.
- **Start Weaving Vertically**: Fold back every other horizontal strip (e.g., the 1st, 3rd, and 5th strips) about halfway. Take one of your vertical strips and lay it across the unfolded horizontal strips. Once in place, fold the previously folded horizontal strips back over the vertical strip.
- **Continue the Pattern**: Now, fold back the *opposite* horizontal strips (e.g., the 2nd, 4th, and 6th strips) about halfway. Place another vertical strip parallel to the first one, then fold the horizontal strips back over it.
- **Repeat Until Complete**: Continue this weaving pattern, alternating which horizontal strips you fold back, and placing vertical strips, until the entire top of the pie is covered with a beautiful woven lattice. Trim any excess dough from the edges, leaving about a 1/2-inch overhang.
- **Crimp and Finish**: Press the overhanging lattice strips and bottom crust edges together firmly, then crimp them decoratively (you can use your fingers or a fork). This seals the pie and creates an attractive border.
Selecting the Best Cherries for Your Pie
The type of cherry you choose significantly impacts the flavor profile of your pie. Both sweet and tart cherries can be used, but for the classic, vibrant flavor of traditional cherry pie, tart cherries are undeniably the superior choice. Their natural acidity provides a crucial counterbalance to the sweetness of the sugar, resulting in a perfectly balanced and mouthwatering dessert.
However, finding fresh tart cherries can sometimes be a challenge, as they have a shorter season and are less commonly sold in many grocery stores. If you’re on the hunt, look for varieties often referred to as “Morello” or “Amarelle” cherries. These are the quintessential sour cherries known for their intense flavor.
If fresh tart cherries are unavailable, don’t despair! Sweet cherries like Rainier or Bing varieties work beautifully as well. Just be prepared to adjust your sugar content accordingly. Sweet cherries will naturally require less added sugar in the filling to achieve that harmonious sweet-tart balance. Always taste your cherries and adjust the sugar to your preference.
Effortless Cherry Pitting Techniques
Pitting cherries might seem like a tedious task, but it’s an essential step for a smooth, enjoyable pie-eating experience. Nobody wants to bite into a cherry pit! While you *could* painstakingly pit each cherry by hand, investing in a good quality cherry pitter will save you an incredible amount of time and effort. This simple tool is a game-changer in the kitchen, making quick work of even large batches of cherries. It’s so user-friendly that even little helpers can get involved, making pie prep a fun family activity!
If you don’t have a dedicated pitter, there are a few clever hacks you can try:
- **Chopstick Method**: Hold a cherry between your thumb and forefinger. Take a sturdy chopstick or a blunt straw and push it through the stem end of the cherry. The pit should pop out easily through the other side. This method is surprisingly effective and requires minimal tools.
- **Piping Tip Method**: Similar to the chopstick, you can use a small, round piping tip (like a Wilton 1A or a similar size) to push the pit out. Place the cherry over the narrow end of the piping tip, and push down firmly. The pit will be forced through the wider end.
Whichever method you choose, make sure to work over a bowl to catch the pits and any delicious cherry juice!
Can I Use Canned or Frozen Cherries for Cherry Pie?
Absolutely! While fresh cherries deliver the best flavor and texture, both canned and frozen cherries can be successfully used to make a delicious cherry pie, especially when fresh options are out of season or hard to find. It’s a convenient way to enjoy this beloved dessert year-round.
- **Using Canned Cherries**: If opting for canned cherries, it’s crucial to drain off as much juice as possible. Excess liquid will result in a runny pie filling. Once drained, combine them with the other filling ingredients as listed in the recipe, and proceed with the instructions. You might need to adjust the amount of sugar depending on whether your canned cherries are packed in syrup or water, and if they are sweet or tart.
- **Using Frozen Cherries**: For frozen cherries, allow them to thaw completely first. Then, drain off all the released liquid. This step is vital to prevent a watery pie. After thawing and draining, proceed with the filling preparation as outlined in the recipe instructions. Again, adjust the sugar to taste, as the sweetness of frozen cherries can vary.
Understanding Pie Thickeners: Sure Gel vs. Cornstarch
A perfectly set pie filling is essential for a delicious pie that holds its shape when sliced. This is where thickeners come into play. Our preferred choice for this homemade cherry pie is Sure Gel (also known as E-Z Gel), a specific type of food thickener that offers several advantages:
- **Sure Gel (E-Z Gel)**: This remarkable ingredient is designed to thicken sauces, gravies, and desserts without creating lumps, and it works effectively in both hot and cold liquids. It provides a consistently smooth and glossy finish to pie fillings, making it incredibly reliable. We’ve found it to be exceptional in various fruit pies, like our popular razzleberry pie, ensuring a perfectly set and spoonable filling every time.
- **Cornstarch**: A widely available and effective alternative to Sure Gel. If using cornstarch, you’ll typically need a bit more than Sure Gel to achieve the same thickening power. It’s best to mix cornstarch with a small amount of cold liquid (like water or cherry juice) to create a slurry before adding it to the warm cherry mixture. This prevents lumps and ensures even distribution. Be mindful that cornstarch-thickened fillings can sometimes break down if frozen and thawed, though for a fresh pie, it works beautifully.
The recipe card specifies the amount of thickener needed, but always be prepared to adjust slightly based on the juiciness of your cherries.
Freezing and Storing Your Homemade Cherry Pie
One of the fantastic benefits of making homemade cherry pie is its versatility in storage. This pie can be successfully frozen either before or after baking, allowing you to enjoy a taste of summer long after cherry season has passed. Both methods will keep well in the freezer for up to three months, making it a perfect make-ahead dessert.
- **Freezing an Unbaked Pie**: After assembling the pie (with the filling and lattice top), but before brushing with egg wash or sprinkling with sugar, wrap the entire pie tightly in at least two layers of plastic wrap, followed by a layer of aluminum foil. Place it in a large freezer-safe bag or container to protect it from freezer burn. When you’re ready to bake, remove the pie from the freezer and let it sit on the counter while your oven preheats. Do not thaw the pie completely before baking, as this can lead to a soggy crust. Place the frozen, unbaked pie directly into the preheated oven, adding approximately 10-20 minutes to the total baking time. You may need to tent it with foil sooner to prevent over-browning.
- **Freezing a Baked Pie**: Allow your baked cherry pie to cool completely at room temperature. Once entirely cool, wrap it tightly in two layers of plastic wrap, then a layer of aluminum foil. Place it in a freezer bag or container. To reheat, remove the pie from the freezer and let it sit on the counter while the oven preheats to 350°F (175°C). Place the frozen, baked pie in the oven and heat until warmed through, usually about 30-45 minutes. You might want to cover it loosely with foil to prevent the crust from over-browning during reheating.
Having a homemade cherry pie ready in the freezer is a wonderful convenience for unexpected guests or a spontaneous craving!
Every home baker deserves a reliable cherry pie recipe in their repertoire. There’s an unparalleled sense of accomplishment and immense satisfaction that comes from creating a dessert completely from scratch. This classic homemade cherry pie is truly a work of culinary art, embodying the flavors of summer in every delightful bite.
Homemade Cherry Pie Recipe
Here’s the complete recipe for making your perfect homemade cherry pie. Enjoy the process and the delicious results!
Cherry Pie
By Sweet Basil
Prep Time: 15 mins
Cook Time: 1 hr
Total Time: 3 hrs 15 mins (includes cooling/setting)
Servings: 8 slices
Ingredients
- 1 Pie Crust (for a double-crust pie)
- 5 Cups halved or whole fresh cherries, pitted
- 1/2 – 3/4 Cup Granulated Sugar (**see note)
- 1/2 Zested Lemon (and a squeeze of juice)
- 1/8 teaspoon Almond Extract
- 3 Tablespoons Sure Gel (or 1/4 Cup Cornstarch for thickening)
- 1 Large Egg (for egg wash)
- 1 Tablespoon Milk (for egg wash)
- Sanding Sugar (optional, for topping)
Instructions
- Preheat oven to 400°F (200°C).
- Prepare the pie crust: Roll out one half of the pie dough and place it into your pie plate. Set aside.
- Place all the filling ingredients (cherries, sugar, lemon zest/juice, almond extract, and thickener) into a saucepan and cook over medium heat until the juices just start to release from the cherries and the mixture begins to thicken.
- Pour the warm filling into the prepared bottom pie crust.
- Construct the lattice top crust (refer to the section above for detailed instructions). Crimp the edges of the top and bottom crusts together to seal.
- In a small bowl, whisk together the large egg and milk to create an egg wash. Brush the top crust generously with the egg wash. If desired, sprinkle the top with sanding sugar for a sparkling, crunchy finish.
- Bake the pie for 20 minutes at 400°F (200°C). Then, lower the oven temperature to 375°F (190°C) and continue baking for another 35-40 minutes, or until the crust is deeply golden brown and the filling is bubbling. If the crust begins to brown too quickly, loosely tent the pie with aluminum foil.
- Allow the pie to cool completely at room temperature for at least 2-4 hours. For best results and a perfectly set filling, place it in the fridge for an additional 2-4 hours, or even overnight, before slicing and serving.
Recipe Notes
* Tart cherries (like Morello or Amarelle) are best for classic cherry pie flavor, but they can be hard to find. Sweet cherries (like Rainier or Bing) also work well; just be prepared to adjust the sugar content.
** You may need to adjust the amount of sugar and thickener based on how tart and juicy your specific cherries are. Taste the filling mixture before baking and adjust accordingly.
Nutrition
Serving: 1 slice, Calories: 220kcal, Carbohydrates: 37g, Protein: 5g, Fat: 6g, Saturated Fat: 2g, Polyunsaturated Fat: 1g, Monounsaturated Fat: 3g, Trans Fat: 1g, Cholesterol: 21mg, Sodium: 101mg, Potassium: 232mg, Fiber: 3g, Sugar: 24g, Vitamin A: 90IU, Vitamin C: 10mg, Calcium: 24mg, Iron: 1mg
Nutrition information is automatically calculated, so should only be used as an approximation.
Like this delicious recipe? We’d love to hear from you! Leave a comment below and share your pie-making experience!
REMEMBER TO SUBSCRIBE TO our FREE Oh Sweet Basil NEWSLETTER AND RECEIVE EASY RECIPES DELIVERED INTO YOUR INBOX EVERY DAY!
When you try a recipe, please use the hashtag #ohsweetbasil on INSTAGRAM for a chance to be featured in our stories! FOLLOW OH, SWEET BASIL ON FACEBOOK | INSTAGRAM | PINTEREST | TWITTER FOR ALL OF OUR LATEST CONTENT, RECIPES AND STORIES.