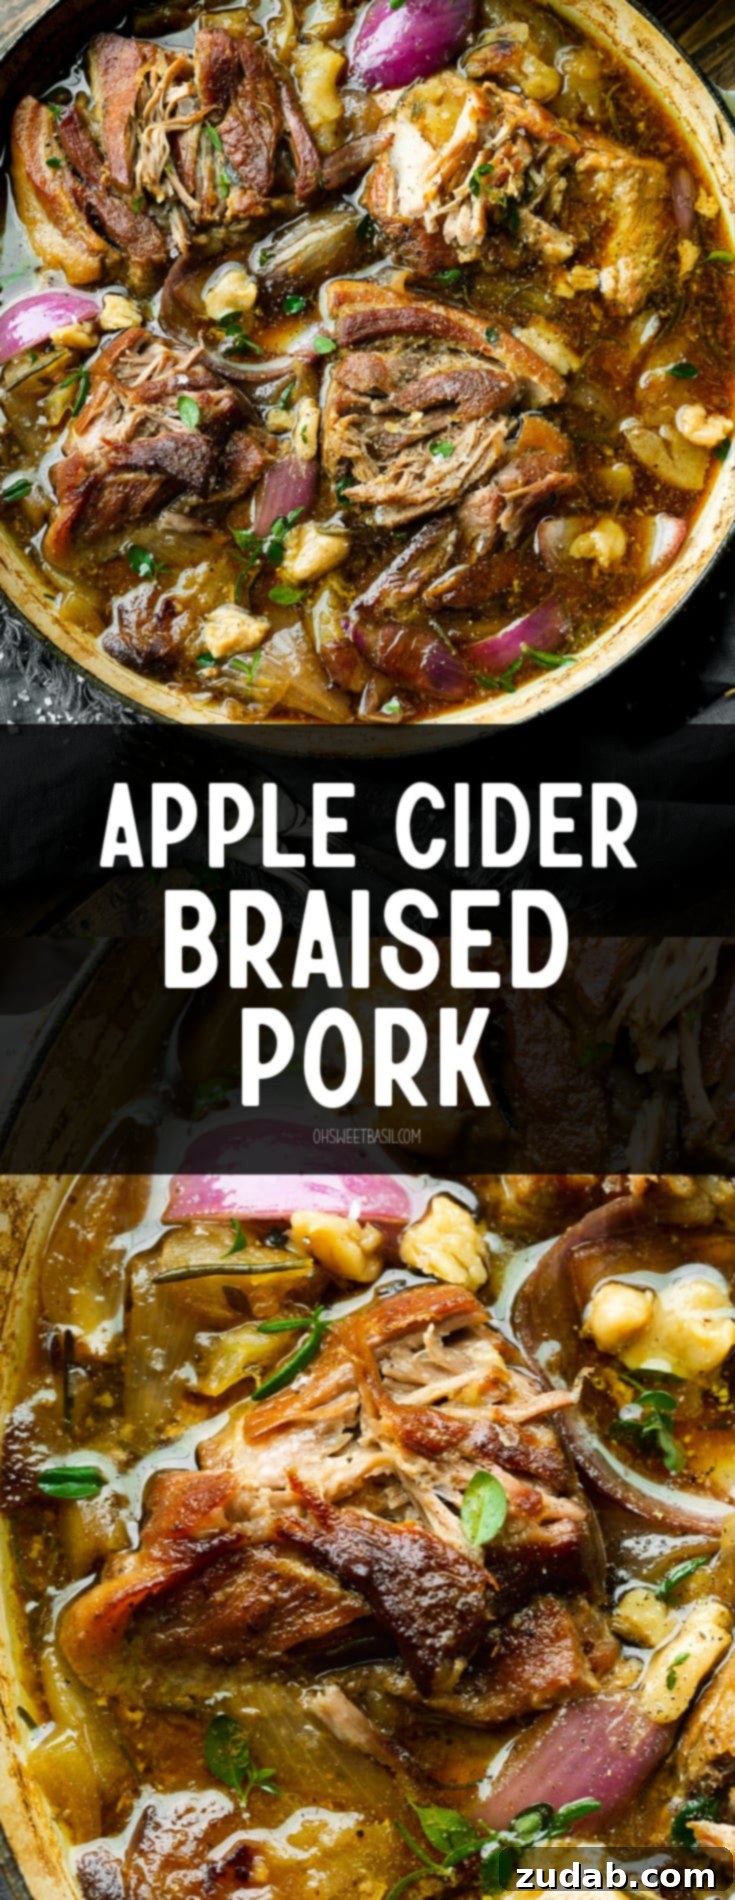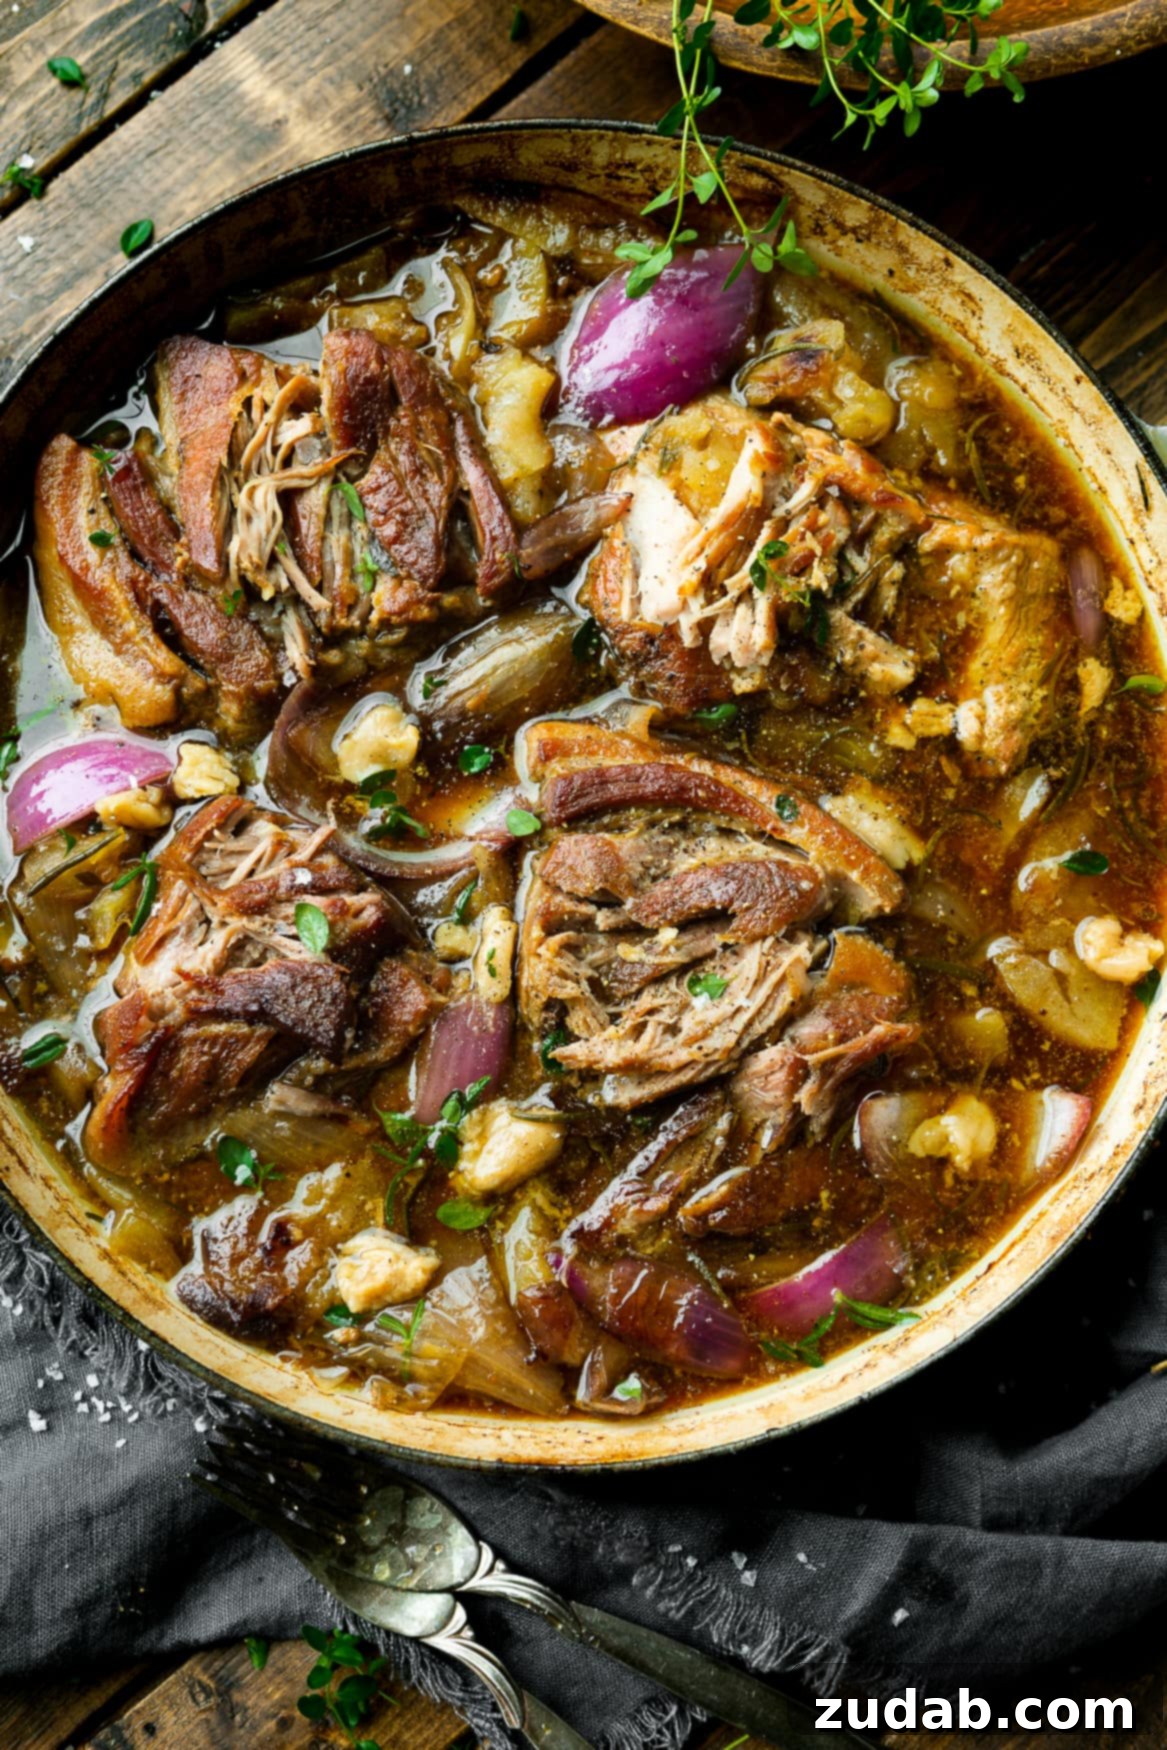
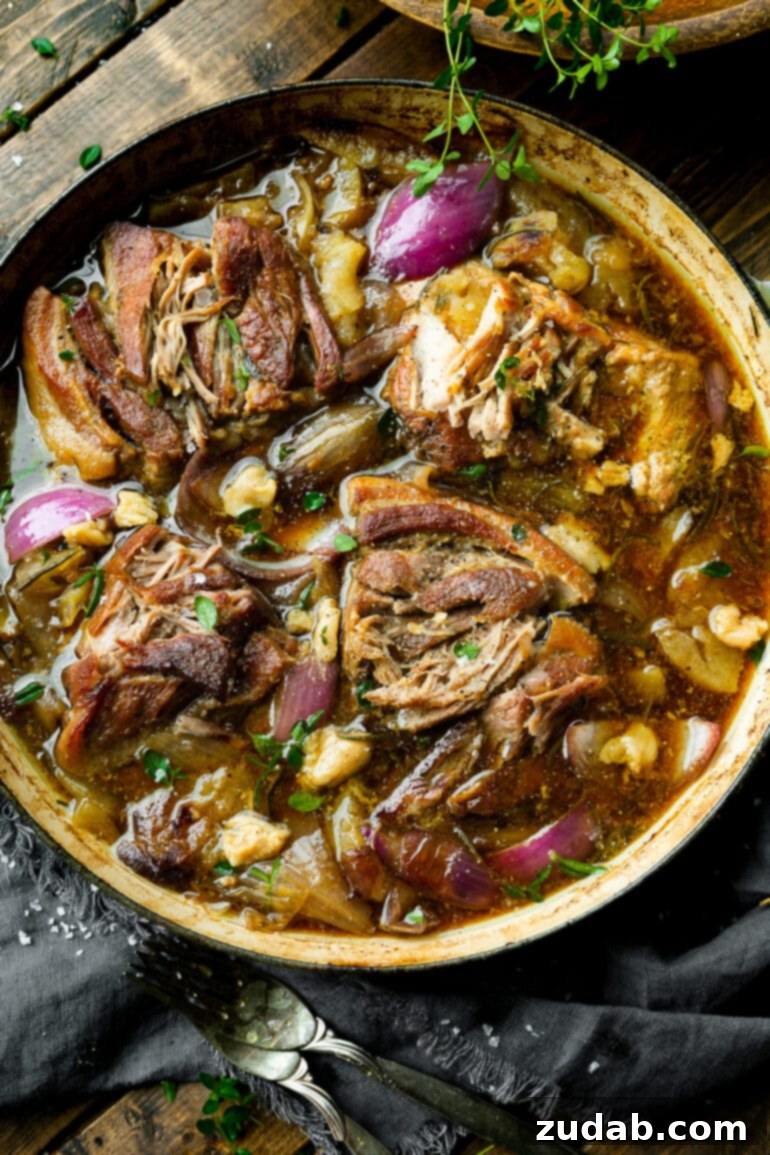
Indulge in the ultimate comfort food with this incredibly flavorful **Apple Cider Braised Pork recipe**. Imagine succulent pork shoulder, slow-cooked to fork-tender perfection in a rich, aromatic blend of sweet apple cider and savory chicken stock. Enhanced with fresh herbs, tender roasted garlic, and caramelized onions, this dish offers a depth of flavor that is both comforting and sophisticated.
The harmonious combination of savory pork with the crisp sweetness of apple cider and tender apple slices makes this a quintessential dish for a cozy fall or winter evening. It’s a culinary masterpiece that fills your home with an irresistible aroma and delivers a truly memorable dining experience.
Why You Will Love This Braised Pork Recipe
This isn’t just another pork recipe; it’s a culinary experience designed for ease, flavor, and pure satisfaction. Here’s why this **Apple Cider Braised Pork** will quickly become a cherished family favorite:
- Effortlessly Easy: Don’t let the exquisite flavor intimidate you. Beyond a simple initial browning of the pork, this is largely a “set it and forget it” recipe. All the magic happens in one pot, braising slowly in your oven for a few hours. This minimal effort yields maximum reward, making it perfect for busy weeknights or relaxed weekend cooking.
- Ultimate Comfort Food: There’s something inherently heartwarming about slow-cooked meat bathed in a rich, aromatic sauce. This dish embodies the essence of comfort, with tender pork, sweet apples, and fragrant herbs creating a symphony of flavors that warms both the body and soul. It’s the ideal meal to share with loved ones on a crisp evening.
- Budget-Friendly: Pork shoulder, often referred to as pork butt, is one of the most economical cuts of meat available. This recipe transforms this affordable cut into a gourmet-quality meal without breaking the bank. Most of the accompanying ingredients are pantry staples, further enhancing its budget-friendly appeal.
- Impressively Delicious: Despite its simple preparation, this **braised pork** looks and tastes like something you’d savor in a high-end restaurant. The deeply caramelized pork, infused with cider and herb flavors, presents beautifully, guaranteeing to impress your dinner guests. Only you will know how delightfully straightforward it was to create!
- Versatile Flavors: The apple and pork combination is a classic for a reason. The sweetness and acidity of the cider and apples beautifully cut through the richness of the pork, creating a perfectly balanced flavor profile that is both robust and refreshing.
What is Braising? The Art of Tender Pork
Braising is a culinary technique revered for its ability to transform tougher cuts of meat into incredibly tender, flavorful dishes. It’s a two-step cooking method that combines both dry and wet heat:
- **Searing (Dry Heat):** Initially, the meat is seared at a high temperature on all sides, typically in a Dutch oven or heavy-bottomed pot. This crucial step, known as the Maillard reaction, creates a deeply browned, flavorful crust on the exterior of the pork, locking in juices and developing complex savory notes that form the foundation of the dish.
- **Slow Cooking (Wet Heat):** After searing, a small amount of liquid – in this case, a fragrant blend of apple cider and chicken stock – is added to the pot. The pot is then covered and slow-cooked at a lower temperature, either on the stovetop or, preferably, in the oven. This long, gentle cooking process, surrounded by moist heat, slowly breaks down the tough connective tissues (collagen) in the pork shoulder, rendering it incredibly tender, succulent, and “fall-apart” good. The liquid also infuses the meat with flavor and becomes a rich, delicious sauce.
Braising is an ideal method for cuts like pork shoulder or pork butt, which benefit greatly from extended cooking times. It’s a patient process, but the resulting deep, rich flavors and melt-in-your-mouth texture are always worth the wait.
Recommended Equipment for Braised Pork
To achieve the best results with this **Apple Cider Braised Pork recipe**, having the right tools can make all the difference. While alternatives exist, a good Dutch oven is highly recommended:
- Large Dutch Oven: A heavy, oven-safe pot with a tight-fitting lid is truly indispensable for braising. Its superior heat retention and even heat distribution ensure that your pork cooks uniformly and remains tender. The enamel coating also makes for easy cleanup. A 5-7 quart capacity is ideal for this recipe.
If you don’t have a Dutch oven, don’t worry! You can still make this delicious dish. (See the “What If I Don’t Have a Dutch Oven?” section below for alternative cooking methods.)
Before You Begin: Prepping Your Pork for Success
The initial steps are crucial for developing deep flavors in your **braised pork**. Don’t underestimate their importance:
Start by preparing your pork shoulder (or pork butt). Pat the large chunks of pork thoroughly dry with paper towels. This step is vital because excess moisture on the surface of the meat will prevent it from achieving a beautiful brown crust during searing. Once dry, generously season the pork pieces on all sides with kosher salt and freshly cracked black pepper.
Next, you will brown these seasoned pork chunks on all sides in a hot Dutch oven with a little oil. This searing process creates what’s known as the Maillard reaction – a chemical transformation that browns the amino acids and sugars on the meat’s surface, creating hundreds of new flavor compounds. This rich, caramelized crust adds incredible depth and complexity to the finished dish. Skipping this step means sacrificing a significant amount of flavor, so make sure to brown the pork thoroughly until each piece has a deep, golden-brown exterior.
Key Ingredients for Apple Cider Braised Pork
This **apple cider braised pork** relies on a thoughtful selection of ingredients to build its signature sweet and savory profile:
- Pork Butt (Pork Shoulder): This recipe calls for a bone-in pork butt, which many chefs prefer for its superior flavor and the added richness that the bone and fat pad contribute to the braising liquid. Cut the pork into large, manageable chunks (about 2-3 inches).
- PRO TIP: If you buy a large pork butt, you can easily cut it in half, remove the bone, and then quarter each half. This allows you to freeze portions for two separate rounds of this delicious braised pork, making future meal prep even easier.
- Canola Oil: A high-smoke-point oil like canola is essential for achieving a perfect, deep brown sear on the pork chunks without burning.
- Braising Liquid: This flavorful base is the heart of the dish:
- **Apple Cider:** Opt for a good quality, unsweetened apple cider (not apple juice) for the best depth of apple flavor and natural acidity.
- **Chicken Stock:** Adds savory umami and body to the sauce. You can use low-sodium to control the overall saltiness.
- **Apple Cider Vinegar:** A touch of vinegar brightens the sauce and adds a pleasant tang that balances the sweetness of the cider and brown sugar.
- **Dark Brown Sugar:** Contributes to the sweet-savory balance and helps with caramelization, enhancing the rich color of the sauce.
- **Dijon Mustard:** A secret weapon for braises, Dijon adds a subtle pungent kick and emulsifies slightly, helping to thicken the sauce and add depth without being overpowering.
- **Salt and Pepper:** Essential for seasoning the pork and the braising liquid, enhancing all other flavors.
- Aromatics: These foundational ingredients infuse the dish with fragrant, earthy notes:
- **Garlic:** A whole head of garlic, with the top sliced off, will roast slowly in the braising liquid, becoming incredibly sweet and mellow.
- **Rosemary and Thyme:** Fresh sprigs of these classic herbs impart a wonderful woodsy and herbaceous aroma that complements pork and apple beautifully.
- **Red Onion:** Sliced thickly, red onions soften and caramelize during braising, adding sweetness and a savory base.
- Butter: A tablespoon of butter added at the beginning provides extra richness and keeps the pork incredibly moist as it braises.
- Granny Smith Apples: These tart apples are added towards the end of the cooking process. Their firm texture allows them to hold their shape, and their vibrant acidity provides a lovely contrast to the rich pork and sweet sauce, making them a delicious accompaniment to the meal.
This list provides an overview of the key ingredients. For precise measurements and quantities, please refer to the detailed recipe card at the end of this post.
How to Make Apple Cider Braised Pork: A Step-by-Step Guide
One of the many delights of this **braised pork recipe** is that it’s a true **one-pot meal**! Everything, from searing to slow-cooking and even serving, can be done right in your trusty Dutch oven. Here’s a detailed breakdown of the steps:
- Preparation & Seasoning: Begin by preheating your oven to 325℉ (160°C). This ensures it’s ready when your pork is seared. Thoroughly pat the pork pieces dry with paper towels – this is critical for a good sear. Season them generously on all sides with kosher salt and freshly cracked black pepper.
- Searing the Pork: Heat 2 tablespoons of canola oil in your large Dutch oven over medium-high heat. Once the oil is shimmering and hot, carefully place the pork chunks in a single layer, ensuring not to overcrowd the pot (work in batches if necessary). Sear for 4-5 minutes per side until each piece is deeply browned and caramelized. This browning step is crucial for flavor development, so don’t rush it!
- Whisking the Braising Liquid: While the pork is searing, whisk together the apple cider, chicken stock, apple cider vinegar, dark brown sugar, Dijon mustard, and a pinch more of salt and pepper in a separate bowl. Set this flavorful mixture aside.
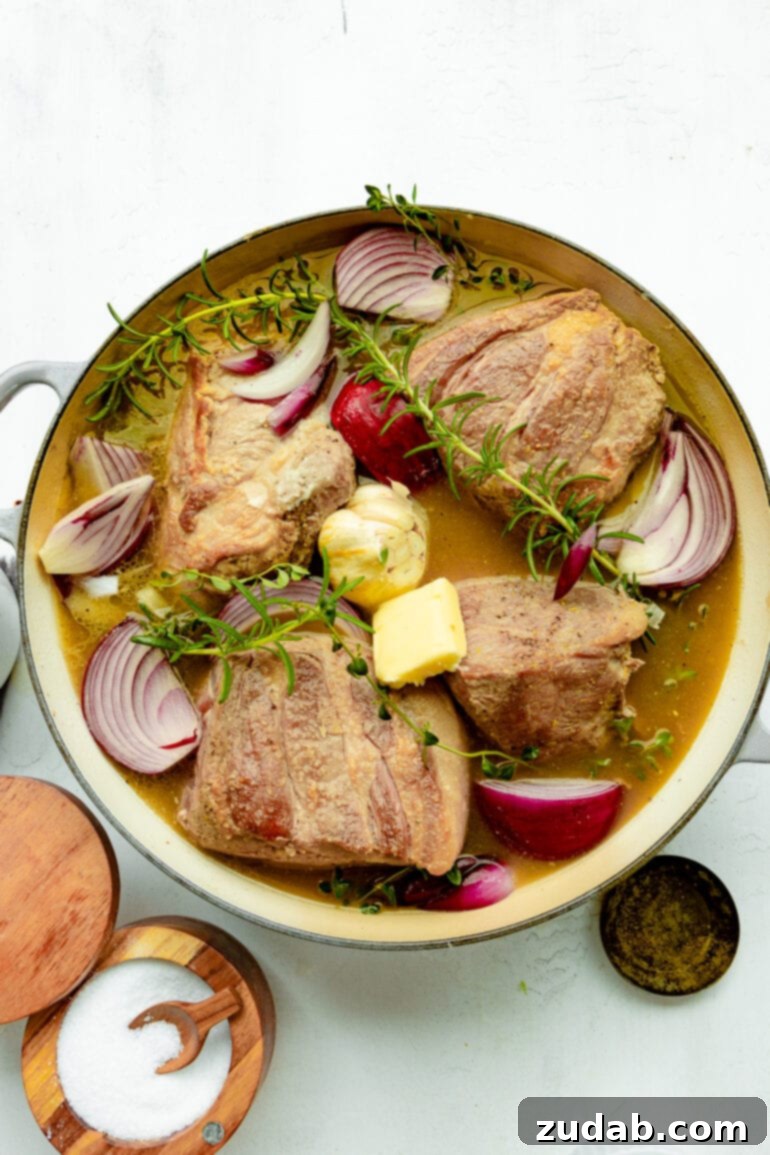
- Combining Ingredients: Once all the pork chunks have been beautifully seared on all sides, pour the prepared braising liquid into the Dutch oven. Arrange the fresh sprigs of rosemary and thyme, along with the thick slices of red onion, around the pork. Place the head of garlic (with the top sliced off) into the pot, and add the tablespoon of butter on top of the pork.
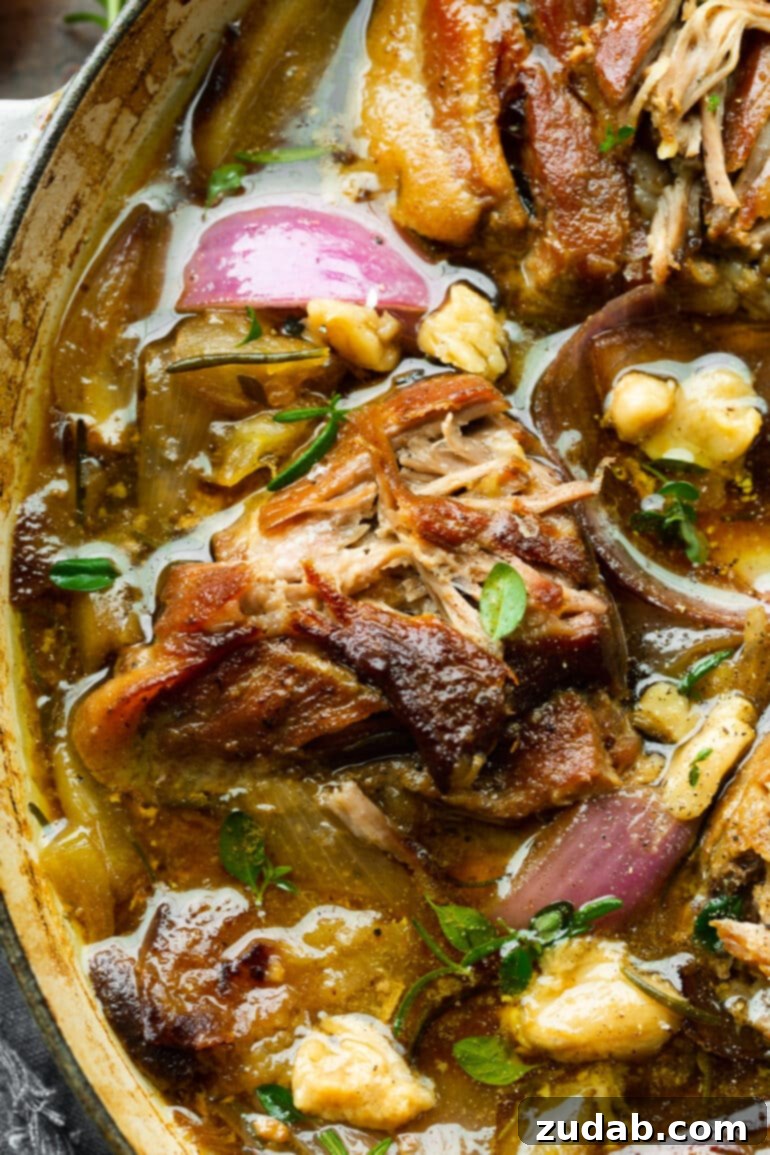
- The Braising Process: Cover the Dutch oven tightly with its lid and transfer it to your preheated oven. Allow the pork to braise low and slow for approximately 3 hours (check at 2.5 hours if using boneless pork). Halfway through the braising time (after about 1.5 hours), carefully flip the pork pieces to ensure even cooking and tenderness. The goal is incredibly tender, fall-apart pork.
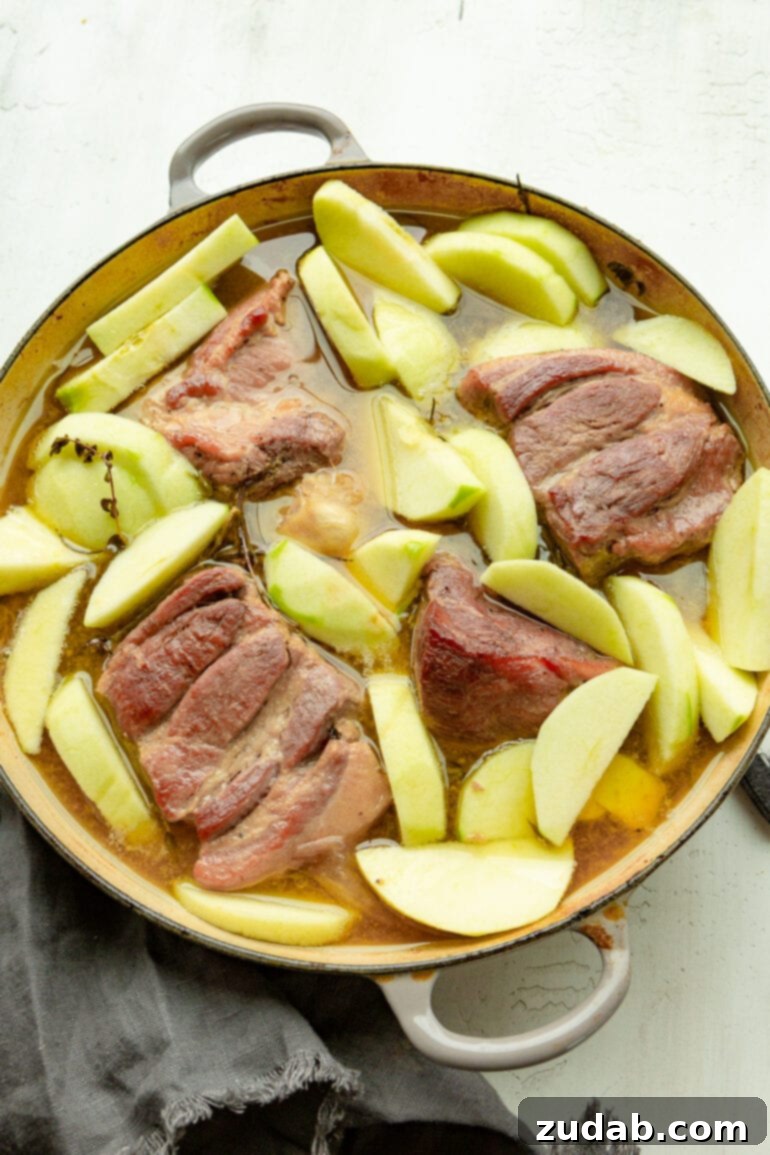
- Adding the Apples: Once the pork is just shy of fork-tender, remove the Dutch oven from the oven. Carefully peel, core, and slice the Granny Smith apples into wedges. Arrange these apple wedges around the pork in the pot. Re-cover the pot and return it to the oven to cook for another 50 minutes to 1 hour, allowing the apples to soften slightly and absorb the delicious braising liquid.
- Resting for Tenderness: After the full cooking time, the pork should be exceptionally tender. Remove the pot from the oven and, without uncovering, let the cooked pork rest in the hot sauce for about 20 minutes. This resting period allows the juices to redistribute throughout the meat, resulting in even more tender and moist pork.
- Final Flavor Touches: After resting, carefully squeeze the soft, roasted garlic cloves out of their peels into the sauce. Mash the cloves with a fork and stir them thoroughly into the braising liquid. This adds a sweet, mellow garlic flavor to the rich sauce.
- Serve with Joy: You can either slice the tender pork into thick pieces or easily shred it with two forks. Serve the glorious pork with the softened apple and onion slices, generously spooning the rich, flavorful sauce over the top.
The full, printable recipe card with exact measurements and detailed timing can be found at the very end of this post. You can also save or print the recipe from there for your convenience.
What If I Don’t Have a Dutch Oven?
No Dutch oven? No problem! You can still enjoy this incredible **braised pork recipe** with a few simple adjustments. The key is to replicate the searing and slow, covered cooking environment:
First, sear the pork chunks in a large, heavy-bottomed skillet or an oven-safe pan on your stovetop until deeply browned on all sides. Once seared, transfer the browned pork to a deep, oven-safe casserole dish or baking pan that has a lid, or that you can tightly cover with aluminum foil. Pour the prepared braising liquid over the pork, then add the herbs, garlic head, onions, and butter. Cover the dish tightly with its lid or aluminum foil, ensuring it’s sealed to trap the moisture. Bake in the preheated oven following the recipe directions for temperature and time. The result will still be wonderfully tender and flavorful braised pork.
Troubleshooting: Why is My Pork Shoulder Tough?
If you find your **pork shoulder** (or pork butt) tough after cooking, it’s a common issue with a straightforward solution: it simply needs more time. Pork shoulder is rich in connective tissue, particularly collagen. When cooked quickly or at too high a temperature, this collagen tightens, making the meat tough and chewy.
The magic of braising lies in its “low and slow” approach. Over an extended period of gentle, moist heat, the collagen slowly breaks down and converts into gelatin. This transformation is what creates that incredibly tender, fall-apart texture that is the hallmark of a perfectly braised dish. If your pork isn’t fork-tender, cover it back up and continue braising until it reaches that desirable melt-in-your-mouth stage. Patience is key to achieving succulent results!
Pork Shoulder vs. Pork Butt: Unveiling the Mystery
It’s a common point of confusion, but there’s a simple answer: **pork shoulder and pork butt are essentially the same cut of meat**, both coming from the shoulder of the pig! The seemingly contradictory name “pork butt” has an interesting historical origin.
Dating back to Colonial New England, particularly Boston, butchers would pack the less valuable cuts of pork (which included the upper part of the shoulder) into barrels for storage and transport. These barrels were called “butts.” Thus, the cut of meat packed in them became known as the “Boston butt” or simply “pork butt.” Today, “pork shoulder” typically refers to the lower part of the shoulder (often called picnic shoulder), while “pork butt” refers to the upper part, closer to the hog’s neck. Both are excellent choices for braising due to their rich fat content and connective tissue.
Here are some other names you might encounter for these versatile cuts:
- Picnic shoulder
- Boston butt
- Boston shoulder
- Fresh pork butt
- Boston butt roast
- Shoulder roast
Regardless of the name on the label, if it’s from the shoulder, it’s perfect for slow braising!
What to Serve with Apple Cider Braised Pork Butt?
This **Apple Cider Braised Pork Butt** is a hearty, rich dish that pairs beautifully with sides that can soak up its magnificent sauce and balance its flavors. Leaning into the comfort food theme, here are some perfect accompaniments:
- Creamy Mashed Potatoes: The absolute classic pairing! The smooth, buttery mashed potatoes are ideal for absorbing every drop of the luscious braising liquid, which essentially transforms into a heavenly gravy.
- Fluffy Potato Rolls: Warm, soft rolls are perfect for sopping up the savory-sweet sauce and complementing the rich pork.
- Fresh Spinach and Strawberry Salad with Poppy Seed Dressing: For a refreshing contrast, a light, vibrant salad offers a welcome acidic and crisp counterpoint to the richness of the pork.
- Roasted Honeynut Squash with Browned Butter and Sage: The natural sweetness of roasted squash harmonizes beautifully with the apples and cider in the braise, while sage adds an earthy, autumnal touch.
- Creamy Polenta or Grits: A wonderfully creamy base that serves similarly to mashed potatoes, offering a comforting texture and absorbing the flavorful sauce.
- Sautéed Green Beans or Asparagus: Simple, crisp-tender green vegetables provide a fresh bite and a pop of color to the plate.
Storing and Reheating Your Braised Pork
This **Apple Cider Braised Pork** tastes even better the next day as the flavors continue to meld! Proper storage and reheating ensure you can enjoy your leftovers safely and deliciously.
Storage: Store any leftover braised pork shoulder, along with its sauce, in an airtight container in the refrigerator. It will keep beautifully for 4-5 days. Ensure the pork is completely cooled before refrigerating to prevent bacterial growth.
This recipe also **freezes** exceptionally well. Once the pork and sauce have cooled completely, transfer them to a freezer-safe container or heavy-duty ziploc bag. For best results, lay the bag flat in the freezer to allow for quicker thawing. It will maintain its quality for up to 3 months. When ready to enjoy, let it thaw overnight in the refrigerator before reheating.
Reheating: To reheat refrigerated braised pork, transfer it to a Dutch oven or a saucepan on the stovetop over medium-low heat, or place it in an oven-safe dish in a preheated oven (around 300°F/150°C). Heat gently until it is warmed through. If the sauce seems too thick, add a splash of chicken stock or apple cider to loosen it to your desired consistency.
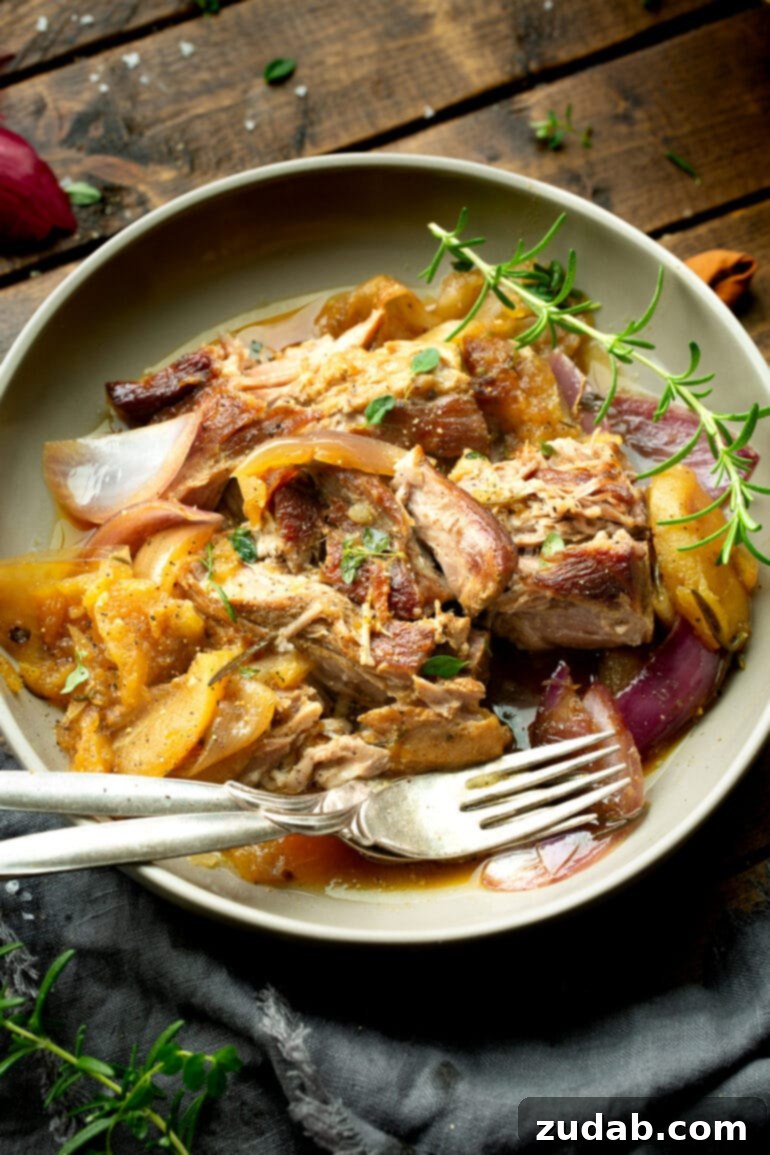
The timeless combination of pork and apple truly shines in this **Apple Cider Braised Pork recipe**. Each bite offers savory, meltingly tender pork infused with sweet apple cider, earthy fresh herbs, roasted garlic, and caramelized onions. This dish promises to be a comforting and delicious experience that your family and friends will rave about. It’s an easy way to bring gourmet flavors to your table!
More Delicious Pork Recipes to Try:
- Slow Cooker Kalua Pork
- Asian Sticky Slow Cooker Ribs
- Pork Carnitas
- Smoked Pulled Pork
- Cafe Rio Sweet Pork
- Smoked Ribs
- Pineapple Habanero Pork
Apple Cider Braised Pork Recipe
By Carrian Cheney
Prep time: 30 mins
Cook time: 4 hrs
Total time: 4 hrs 50 mins
Servings: 10
Ingredients
- 5 Pounds Pork Butt, bone-in, cut into large chunks (discard the bone – bone-in preferred for better flavor and fat pad)
- 2 Tablespoons Canola Oil
- 2 ½ Cups Apple Cider
- 1 ½ Cups Chicken Stock
- 2 Tablespoons Apple Cider Vinegar
- 2 Tablespoons Dark Brown Sugar
- 2 teaspoons Dijon Mustard
- 1 Head Garlic, top sliced off
- 3 Sprigs Fresh Rosemary
- 4 Sprigs Fresh Thyme
- 1 Red Onion, cut into thick slices
- 1 Tablespoon Butter
- 2 Granny Smith Apples, peeled and cut into wedges
- Kosher Salt, to taste
- Black Pepper, freshly cracked, to taste
Instructions
- Preheat an oven to 325℉ (160°C). Pat the pork pieces dry with a paper towel and season generously with kosher salt and black pepper.
- Heat the canola oil in a large Dutch oven over medium-high heat. Once the oil is hot, place the pork in a single layer (work in batches if necessary). Sear for 4-5 minutes per side until the pork is deeply browned. Repeat on each side until all pork is seared.
- While the pork is searing, whisk together the apple cider, chicken stock, apple cider vinegar, dark brown sugar, Dijon mustard, and a pinch of salt and pepper in a separate bowl. Set aside.
- Once all the pork is browned, pour the prepared braising liquid into the Dutch oven. Arrange the sprigs of rosemary and thyme, and the thick slices of red onion around the pork. Place the garlic head (top sliced off) in the pot, and add the butter on top of the pork. Cover the pot tightly.
- Braise in the preheated oven for 3 hours (start checking at 2 ½ hours if using boneless pork). Flip the pork halfway through the braising time.
- Once the pork is just shy of fork-tender, remove the Dutch oven from the oven. Arrange the peeled and sliced Granny Smith apples around the pork. Cover and return to the oven for another 50 minutes to 1 hour, or until apples are tender.
- The pork should now be very tender. Remove the pot from the oven and let it rest, covered, for 20 minutes before serving.
- Squeeze the roasted garlic cloves out of their peels, mash them, and stir them back into the broth.
- Slice or shred the tender pork and serve with the apples, onions, and plenty of the rich braising sauce spooned over the top.
Nutrition
Nutrition information is an approximation. Per serving:
- Calories: 413kcal
- Carbohydrates: 17g
- Protein: 44g
- Fat: 18g
- Saturated Fat: 6g
- Polyunsaturated Fat: 2g
- Monounsaturated Fat: 8g
- Trans Fat: 0.1g
- Cholesterol: 140mg
- Sodium: 223mg
- Potassium: 942mg
- Fiber: 1g
- Sugar: 13g
- Vitamin A: 77IU
- Vitamin C: 5mg
- Calcium: 53mg
- Iron: 3mg