
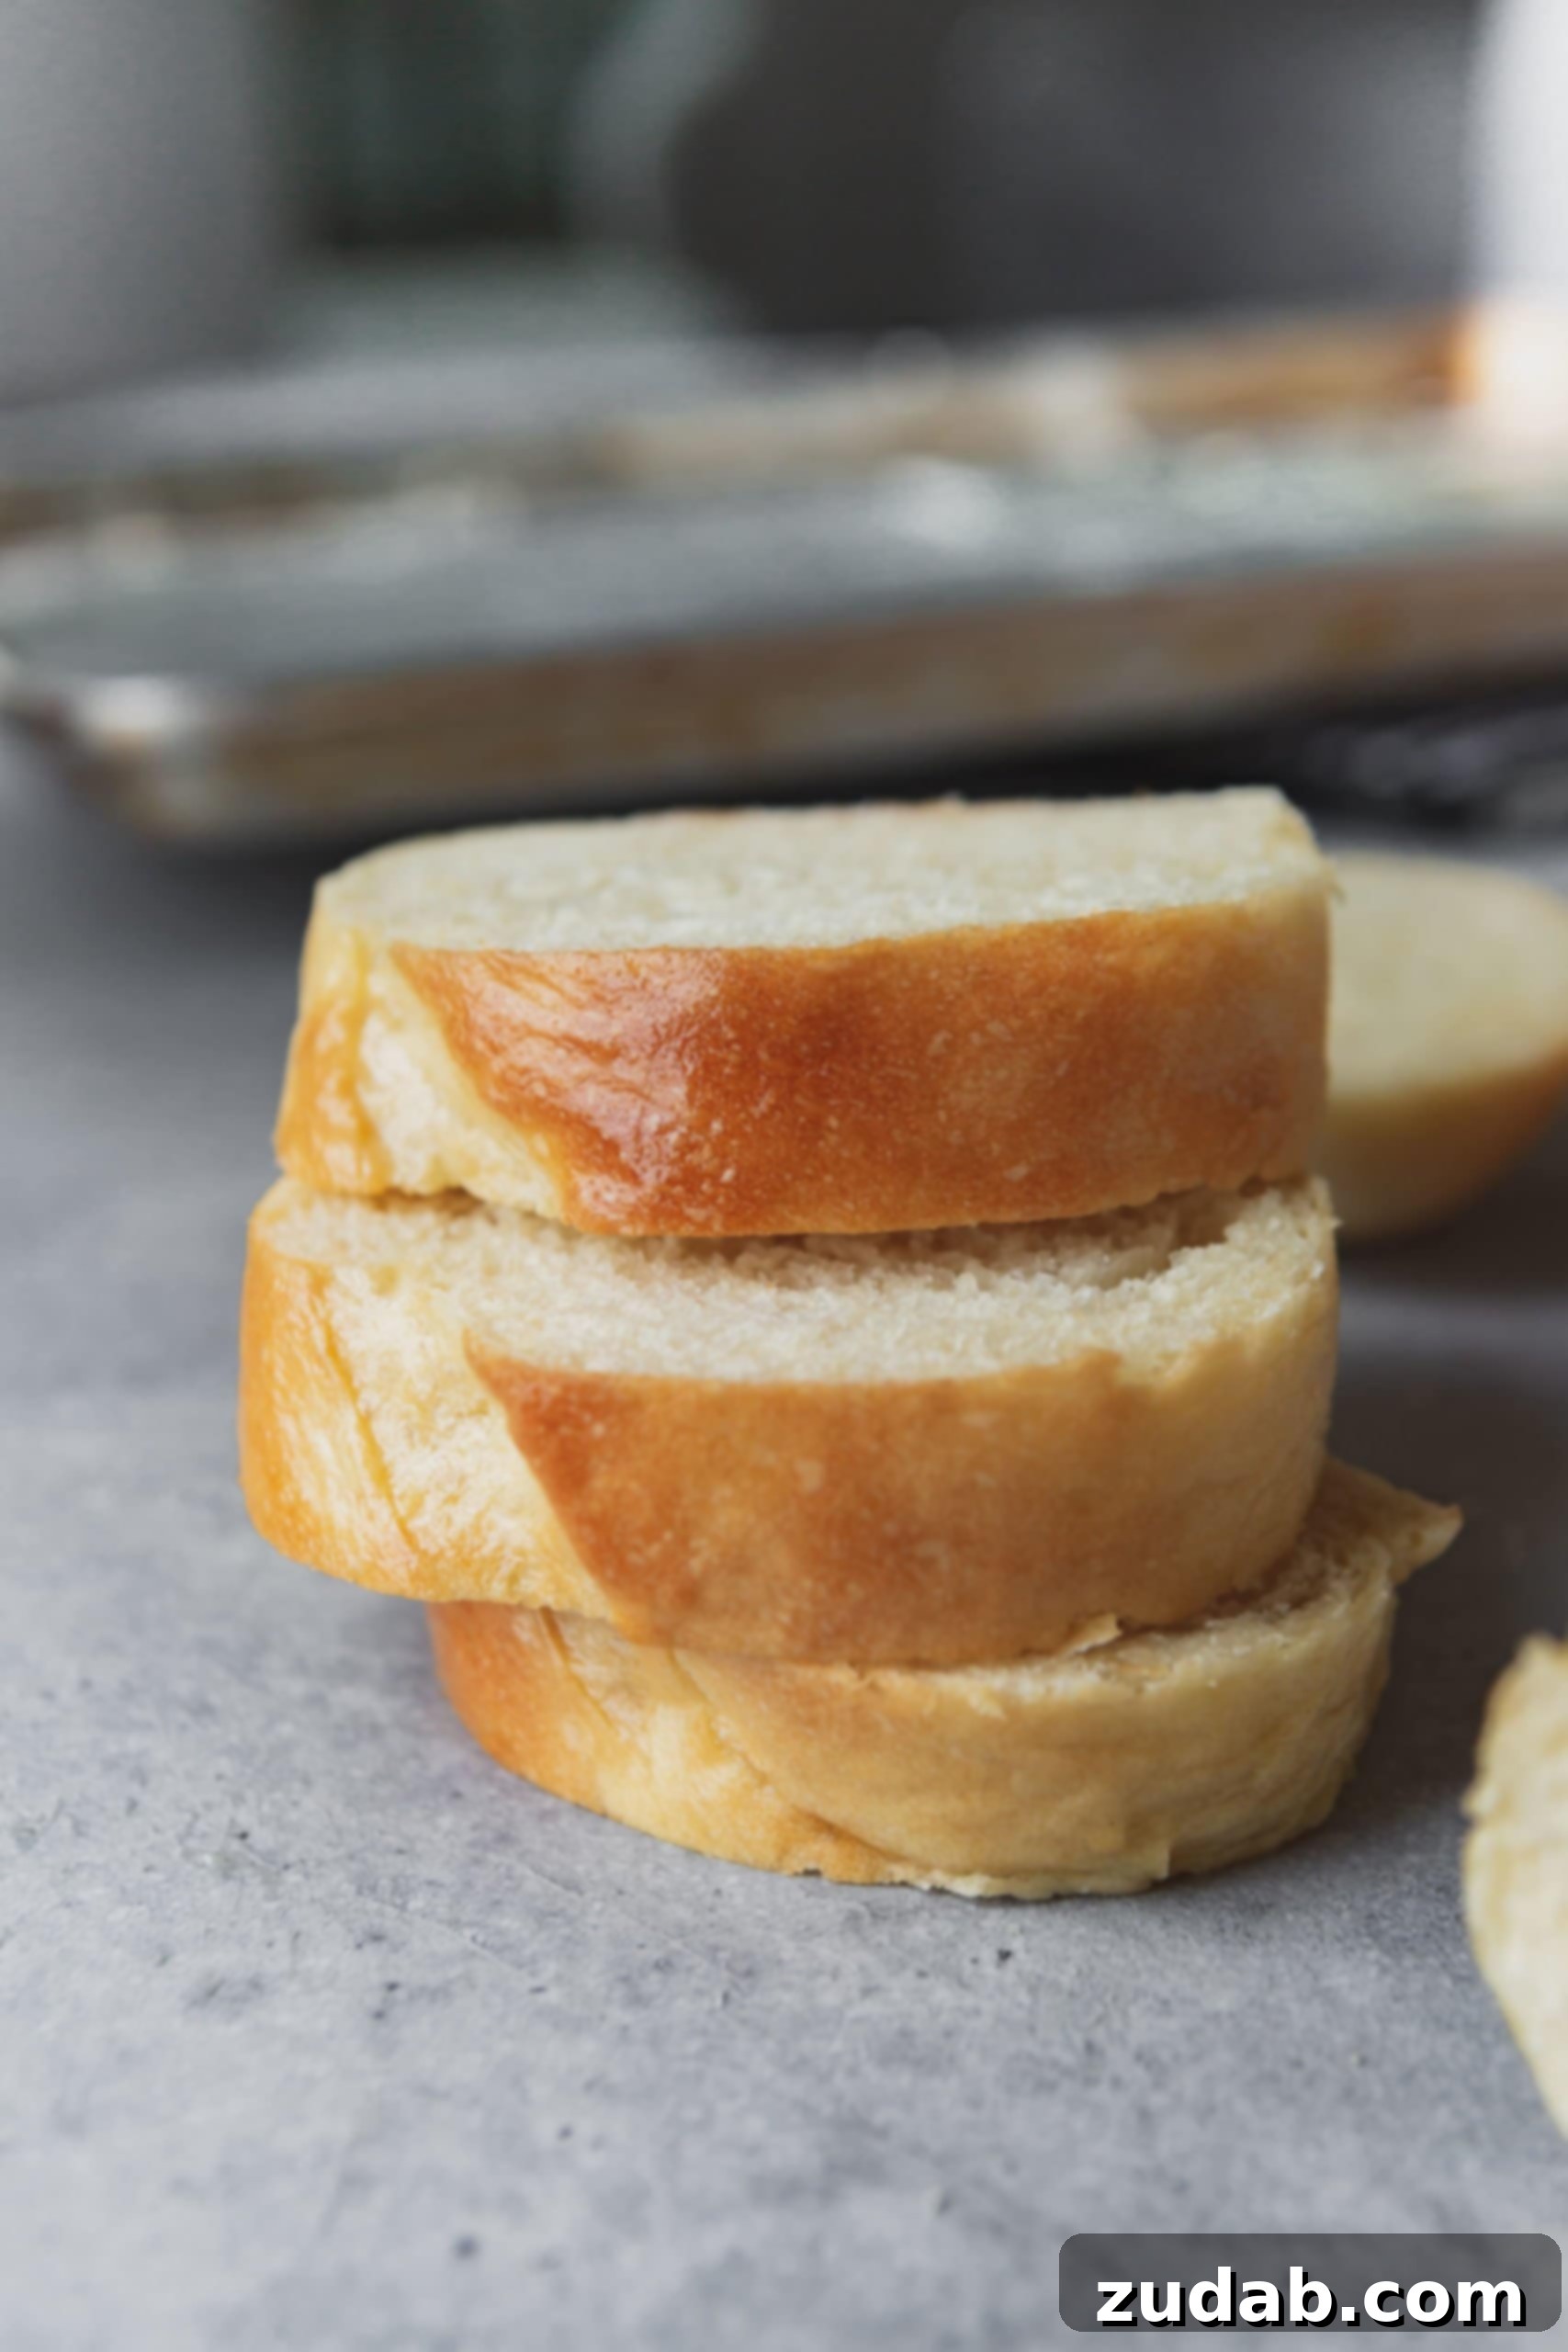
Welcome to the ultimate guide for baking the most exquisite homemade French bread you’ll ever taste! This isn’t just *a* French bread recipe; it’s *the* French bread recipe that has been a staple in our family since my college cooking class days. It’s the kind of bread that truly defines perfection: incredibly soft and airy on the inside, with that signature thin, crackling crust on the outside that French bread is famous for.
What makes this particular recipe so special? Beyond its irresistible texture and flavor, it’s remarkably versatile. You’ll get two generous loaves from a single batch, perfect for savoring one immediately and freezing the other for a quick, delicious meal later. Plus, it forms the ideal foundation for the best garlic bread you can imagine, transforming a simple side dish into a culinary event!
My husband, Cade, and I first encountered this magical recipe together in a college cooking class. What started as a fun, easy elective blossomed into a shared passion that has enriched our marriage and eventually led us to share our kitchen adventures and beloved recipes with you all. In many ways, the foundation of our culinary journey, and indeed our family life, goes right back to this very loaf of homemade French bread.
Unveiling the Simplicity: Ingredients for the Best Homemade French Bread
One of the most surprising aspects of this incredible French bread recipe is its minimalist ingredient list. You only need six basic items, and if you consider water a pantry staple rather than an ingredient you specifically shop for, then it’s just five! These are common ingredients you likely already have, making this an accessible and effortless baking project for anyone, regardless of their baking experience. Forget complex specialty flours or obscure additives; delicious bread doesn’t need to be complicated.
Here’s your straightforward shopping list for achieving bakery-quality easy French bread right in your own kitchen:
- Warm Water: Crucial for activating the yeast. The temperature is key – too hot will kill the yeast, too cold won’t activate it.
- Instant Yeast: Our secret weapon for a reliable rise. We’ll delve more into yeast types shortly, but instant yeast is a game-changer for speed and consistency.
- Sugar: A little bit of sugar provides food for the yeast, helping it to activate and thrive, contributing to a better rise and a hint of subtle flavor.
- Canola (or Vegetable) Oil: Adds tenderness to the crumb and helps with the dough’s elasticity, making it easier to work with.
- Fine Sea Salt: Essential for flavor, balancing the sweetness and enhancing the overall taste of the bread. It also plays a role in regulating yeast activity and strengthening gluten structure.
- All-Purpose Flour: The star of the show! We’ll discuss why this common flour yields the perfect French bread texture in the next section.
It’s quite possible that all these ingredients are already waiting in your pantry, meaning you’re just a few steps away from baking warm, fragrant loaves of fresh French bread. Let’s get started on your journey to homemade bread perfection!
Choosing Your Flour: The Secret to Perfect French Bread Texture
Before we dive into the step-by-step instructions, let’s talk about flour. Walk into any grocery store, and you’ll be greeted by an array of flour types – bread flour, cake flour, pastry flour, whole wheat flour, and, of course, all-purpose flour. Many French bread recipes might suggest specific blends or high-protein flours, but in our experience, the absolute best results for that classic soft interior and delicate crisp crust come from using good old-fashioned all-purpose flour.
Why all-purpose flour? It strikes the perfect balance. Bread flour, with its higher protein content, develops more gluten, leading to a chewier loaf, which isn’t always the desired texture for traditional French bread. While a certain amount of chew is good, French bread aims for a lighter, airier, and more tender crumb. All-purpose flour provides enough protein for a good gluten structure and a beautiful rise, without making the bread overly dense or tough. Its versatility makes it the ideal choice for this recipe, ensuring consistent success every time you bake.
So, save your specialized flours for other projects. For this easy French bread recipe, your standard all-purpose flour will deliver that authentic, delectable result you’re craving. It truly simplifies the process without compromising on quality.
Mastering the Art of Homemade French Bread: A Step-by-Step Guide
The thought of baking French bread at home might seem daunting to some, conjuring images of professional bakeries and complex techniques. But I promise you, there is no need to fear! This easy French bread recipe is designed to be approachable and rewarding. We’re going to walk you through each step with clear, concise instructions, ensuring your success from start to finish. Get ready to impress yourself and your loved ones with warm, aromatic, homemade bread!
Step 1: Activate the Yeast – The Foundation of Your Rise
In a glass measuring cup or small bowl, combine the warm water, instant yeast, and sugar. Give it a gentle stir to ensure all ingredients are mixed. Set this mixture aside for about 5-10 minutes. During this time, the yeast will “bloom” – it should become foamy and fragrant, indicating that it’s active and ready to work its magic. If your mixture doesn’t get foamy, your water might have been too hot (killing the yeast) or too cold (not activating it), or your yeast might be old. In that case, start fresh with new yeast and correctly tempered water.
Step 2: Combine Remaining Ingredients – Building the Dough Base
In the bowl of a stand mixer fitted with a dough hook, add half of the total flour (about 3 cups, assuming you’ll use 5.5-6 cups total), the oil, and the fine sea salt. Mix these ingredients on low speed until just combined. This preliminary mixing helps to distribute the salt and oil evenly before the yeast mixture is added.
Step 3: Incorporate All Ingredients and Knead – Developing Gluten
Pour the activated yeast mixture into the stand mixer bowl with the dry ingredients. Begin mixing on a low speed. Gradually add the remaining flour, about 1/2 cup at a time, allowing the dough to come together. Continue adding flour until the dough is only slightly sticky and has begun to pull away from the sides of the bowl. The total amount of flour can vary slightly depending on humidity and how well your flour absorbs liquid, so trust the feel of the dough. Once all the flour is incorporated and the dough is just sticky, increase the mixer speed to medium-low and let it knead for 2-3 minutes. This step is crucial for developing the gluten, which gives French bread its characteristic structure.
Step 4: The First Series of Rests and Kneads – Building Elasticity
Cover the mixer bowl with plastic wrap or a clean kitchen towel and let the dough rest for 10 minutes. This short rest allows the gluten to relax, making the dough easier to work with. After 10 minutes, return the bowl to the stand mixer and mix for another minute. Cover again and let it rest for another 10 minutes. This cycle of short rest and brief knead is a technique often used in artisan bread making, building strength and elasticity in the dough without extensive, continuous kneading.
Step 5: Repeat and Prepare for Bulk Fermentation – The Final Knead
Repeat the 10-minute rest and 1-minute mix cycle four more times. Each cycle will contribute to a smoother, more elastic dough. After the final short knead, lightly oil a separate, clean large bowl. Transfer the dough to this oiled bowl, turning it once or twice to ensure the entire surface of the dough is lightly coated in oil. This prevents it from sticking and drying out during the rise.
Step 6: The Bulk Fermentation (First Rise) – Flavor Development
Cover the oiled bowl tightly with plastic wrap or a damp kitchen towel. Place it in a warm, draft-free spot and allow the dough to rise for 1 hour. During this bulk fermentation, the yeast produces carbon dioxide, causing the dough to double in size and develop its rich flavor. You’re looking for the dough to approximately double in volume.
Step 7: Form Your Loaves – Shaping for Success
Lightly drizzle a small amount of oil onto a clean counter surface and spread it around evenly. Gently turn the risen dough out onto the oiled counter. Divide the dough into two equal halves. Take one half and gently press it into a rectangular shape, aiming for a size roughly equivalent to a 9×13-inch baking pan. Starting from one of the long edges, tightly roll up the dough. As you roll, gently press down to seal out any large air bubbles. This technique creates a tight, even crumb structure.
Step 8: The Final Rise (Proofing) – The Last Ascent
Once both loaves are shaped, place them seam-side down on a baking sheet that has been lined with parchment paper. Leave enough space between the loaves for them to expand. Cover the loaves loosely with a clean kitchen towel and let them rise for another 1 hour in a warm place. This final rise, known as proofing, is crucial for achieving a light, airy texture and a beautiful oven spring.
Step 9: Prepare for Baking and Score – Aesthetics and Functionality
While the loaves are completing their final rise, preheat your oven to 400°F (200°C). Place an oven rack in the center of the oven. Just before baking, use a very sharp blade (a razor blade or a sharp knife works well) to make several shallow, diagonal slashes across the top of each loaf. These “scores” are not just for decoration; they create weak spots in the dough, allowing the bread to expand uniformly in the oven without cracking erratically.
Step 10: Bake with Steam – The Secret to a Crispy Crust
Carefully place the baking sheet with the scored loaves into the preheated oven. Immediately, toss 4-5 ice cubes directly onto the bottom of the oven (or into a preheated cast iron pan placed on the bottom rack, if you prefer not to add ice directly to your oven). Quickly shut the oven door to trap the steam. This steam is a game-changer! It keeps the crust soft and pliable for the first few minutes of baking, allowing the bread to achieve maximum volume before the crust sets. This results in that desirable thin, crispy crust and a tender, soft interior. Bake for 15-20 minutes, or until golden brown. If the crust starts to get too dark too quickly, you can lightly tent the loaves with aluminum foil for the remaining bake time.
PRO TIP: The steam created by the melting ice cubes is vital. It delays the setting of the crust, allowing the bread to expand fully and achieve a beautiful, airy crumb and a wonderfully crispy, golden-brown exterior. Do not skip this step for truly authentic results.
Step 11: Butter and Serve – The Grand Finale
Once baked to perfection, remove the French bread loaves from the oven. For an extra layer of richness and a beautiful sheen, immediately rub the tops of both loaves with a stick of softened butter. The butter will melt into the warm crust, adding flavor and a lovely aroma. Allow the bread to cool for a few minutes before slicing and serving. Enjoy the incredible aroma and the even more incredible taste of your freshly baked, best French bread recipe!
French Bread FAQs: Your Baking Questions Answered
What Kind of Yeast Should I Use for French Bread?
While there are various types of yeast available, for this easy French bread recipe, I almost exclusively use instant yeast. It’s incredibly reliable and consistent, rarely letting me down. Unlike active dry yeast, instant yeast doesn’t require prior proofing in warm water and sugar; it can be mixed directly with the dry ingredients. However, in this recipe, we activate it first to ensure maximum activity and a robust rise. I always keep a large bag of instant yeast in my freezer, where it stays fresh and potent for a remarkably long time, ensuring my bread rises beautifully every time.
Can I Make French Bread Without a Stand Mixer?
Absolutely! If you don’t have a stand mixer, you can still achieve fantastic results by mixing and kneading the dough by hand. It might require a bit more effort, but it’s a great workout and incredibly satisfying. Simply combine the ingredients in a large bowl with a sturdy spatula or spoon as directed. Once the dough comes together, turn it out onto a lightly floured surface and knead it by hand for about 8-10 minutes, or until it becomes smooth and elastic. The rest and knead cycles can also be done manually, giving the dough quick kneads each time. Embrace the process; it truly builds muscles and character!
Why Is Scoring French Bread Important?
Scoring the dough, or making those deliberate slashes on the surface just before baking, serves a crucial purpose beyond aesthetics. As the bread bakes and undergoes “oven spring” (the rapid rise in the first few minutes), the dough expands significantly. Scoring creates controlled weak spots on the surface, allowing the bread to expand uniformly and predictably. Without scoring, the crust might tear or crack randomly in undesirable places, compromising both the appearance and the texture of your beautiful homemade French bread. It guides the expansion, ensuring an even rise and a classic, appealing shape.
How Can I Get My French Bread More Golden?
Achieving that perfect golden-brown crust is often a matter of technique and oven specifics. One common method is to brush the top of your loaves with an egg wash (a whisked egg mixed with a tablespoon of water) just before baking. This encourages a richer, deeper golden hue and a slightly glossier finish. Additionally, experimenting with your oven rack placement can help; moving it a little closer to the top heating element often does the trick for me. Every oven is different, so you might need to test a few positions to find your oven’s “sweet spot” for optimal browning.
Endless Delights: Ways to Enjoy Your Homemade French Bread
While it might seem silly to list ways to enjoy something as inherently delicious as freshly baked French bread – after all, it’s heavenly goodness on its own – its versatility is truly remarkable. Here are some of our favorite ways to savor this incredible loaf:
- Soup’s Best Friend: I refuse to eat soup until there’s some delicious bread to sop it up with! It’s perfect with rich lasagna soup, comforting chicken noodle soup, our legendary Cheesy Southwestern Chicken Tortilla Soup, or literally any soup you fancy!
- Pasta’s Perfect Companion: It always pairs flawlessly with pasta dishes like a hearty Bolognese, classic spaghetti and meatballs, or creamy Fettuccine Alfredo.
- Creative Meals: It’s the ultimate base for quick and delicious meals such as French bread pizza or a savory Philly Cheesesteak bread!
- Gourmet Sandwiches: Use thick slices as the bread for delectable sandwiches, like our mouthwatering French Dip or a fresh Caprese Panini.
- Sweet Treats: Don’t limit it to savory! Transform day-old French bread into the most incredible French toast. French bread to make French toast – it just makes perfect sense!
- Desserts: It’s also fantastic for bread pudding or an Instant Pot blueberry French toast bake!
- Simple Pleasures: And of course, enjoy it on its own with a generous spread of butter, our divine honey butter, or, as previously mentioned, as the best garlic bread on the globe!
Oh man, just writing about all these options has me literally drooling! Carbs and I have a solid, long-lasting relationship of pure bliss!
Smart Storage: How to Freeze French Bread for Later Enjoyment
As mentioned, this fantastic homemade French bread recipe yields two beautiful loaves, making it ideal for meal prep or simply having a backup for those busy days. We almost always freeze one of them for later, and it freezes exceptionally well! Here’s how to properly store your loaves to maintain their freshness and texture:
First, ensure the loaf or loaves have completely cooled to room temperature. Wrapping warm bread will trap moisture and make it soggy or icy. Once cooled, tightly wrap each loaf individually in plastic wrap, followed by a layer of aluminum foil. This double layer provides excellent protection against freezer burn. Place the wrapped loaves into a large freezer-safe ziploc bag, ensuring as much air as possible is removed before sealing. They will keep beautifully in the freezer for up to 3 months.
When you’re ready to enjoy your frozen French bread, simply remove it from the freezer and let it thaw on the counter at room temperature for a few hours. Once thawed, you can slice and eat it as is. For that “fresh out of the oven” experience, you can also warm it up in a preheated oven (around 350°F or 175°C) for 5-10 minutes, or until warmed through and the crust is crisp again. It’s truly a lifesaver for last-minute dinners or unexpected guests!
I once had a friend who received a loaf of French bread as a Christmas gift every year from his parents. They would literally wrap a fresh loaf because he loved it that much – a testament to just how good a truly perfect French bread can be. It always makes me laugh and fills me with such joy!
This French bread recipe is truly the best of the best! You’ll love how simple it is to prepare and how many joyful ways it can be used to enhance your meals and create lasting memories.
More Easy Bread Recipes You’ll Adore:
- Homemade Baguette
- Buttermilk Biscuits
- Skillet Cornbread
- Easy Hoagie Rolls
- Feta Muffins
- Awesome Cheesy Herb Rolls
- Homemade Naan
- Best Potato Rolls
- Easy No-Knead Artisan Bread
- One Hour Rolls
- 7-Up Biscuits
- Whole Wheat Potato Rolls
- All Our Bread Recipes Here!
Easy French Bread Recipe
By Sweet Basil
Prep: 45 mins | Cook: 20 mins | Total: 3 hrs 5 mins
Servings: 10 servings
Ingredients
- 2 1/4 Cups Warm Water
- 1 Tablespoon Instant Yeast
- 2 Tablespoons Sugar
- 5-5 1/2 Cups Flour
- 1 Tablespoon Canola Oil or Vegetable Oil
- 2 1/2 teaspoons Fine Sea Salt
Instructions
- In a glass measuring cup, add the warm water, yeast, and sugar. Stir to combine and set aside to foam for 5-10 minutes.
- In a standing mixer, add 3 of the 6 cups of flour, oil, and the salt; mix to combine on low speed.
- Add the yeast and water mixture and mix on low using a dough hook. Gradually add in more flour by 1/2 cup until the dough is slightly sticky but has pulled away from the sides of the bowl. You should use 5 1/2-6 cups total flour in this recipe. Continue to mix for 2-3 minutes.
- Cover the bowl with plastic wrap or a towel and set aside for 10 minutes. Place the bowl back in the mixer and mix again for another minute, then allow to rest for 10 minutes.
- Repeat the 10-minute rest and 1-minute knead cycle for 4 more cycles. After the final short knead, add a drizzle of oil to a clean bowl and then place the dough in, immediately turning it over so that the oil coats all the dough. Cover and allow to rest for 1 hour (first rise).
- Place a little oil directly on your counter and spread it out. Now place the risen dough on the oiled counter and divide the dough in half.
- Press each section into a thick rectangle, roughly the size of a 9×13″ pan. Roll the dough up tightly starting from the long edge, pressing gently to seal out any air bubbles as you go.
- Finally, pinch the seam to seal it completely. Arrange the loaves seam-side down on a large baking sheet lined with parchment paper and cover with a towel to rise for an hour (final rise).
- Place the oven rack in the center and preheat to 400°F (200°C). Using a sharp blade, slash through the top of the dough to create several marked toppings.
- Place the baking sheet into the oven and immediately throw 4-5 ice cubes onto the bottom of the oven (or into a preheated cast iron pan on the bottom rack) to create steam. Quickly shut the oven door.
- Bake for 15-20 minutes, or until golden brown. If the bread starts to darken too much, cover it loosely with foil. Remove from the oven and immediately rub a stick of softened butter all over the top of both loaves. Slice and serve warm!
Nutrition
Serving: 2 slices, Calories: 546kcal, Carbohydrates: 112g, Protein: 15g, Fat: 3g, Saturated Fat: 1g, Trans Fat: 1g, Sodium: 587mg, Potassium: 158mg, Fiber: 4g, Sugar: 3g, Vitamin C: 1mg, Calcium: 24mg, Iron: 7mg
Nutrition information is automatically calculated, so should only be used as an approximation.
REMEMBER TO SUBSCRIBE TO our FREE Oh Sweet Basil NEWSLETTER AND RECEIVE EASY RECIPES DELIVERED INTO YOUR INBOX EVERY DAY!
When you try a recipe, please use the hashtag #ohsweetbasil on INSTAGRAM for a chance to be featured in our stories! FOLLOW OH, SWEET BASIL ON FACEBOOK | INSTAGRAM | PINTEREST | TWITTER FOR ALL OF OUR LATEST CONTENT, RECIPES AND STORIES.