
Master the Art of Watermelon Slicing: The Easiest Way to Perfect Cubes
Watermelon is the quintessential fruit of summer, a juicy, refreshing delight that conjures images of picnics, beach days, and backyard barbecues. Its vibrant red flesh and crisp texture make it a popular choice for everything from a simple snack to a starring ingredient in salads and beverages. However, the sheer size and awkward shape of a whole watermelon often deter enthusiasts, making the task of slicing it into manageable, edible pieces feel like a culinary challenge. Many of us have endured the messy, often frustrating process of trying to carve out delicious bites, inevitably leaving behind precious fruit or contending with unsightly white rind attached to our painstakingly cut pieces.
For years, I followed the same inefficient ritual: hacking off large, unwieldy circles, then painstakingly running my knife along the inner ring to separate the rind, and finally, attempting to chop the remaining crescent into uniform pieces. This method was not only annoying and time-consuming but also resulted in significant waste and inconsistent chunks – some perfectly red, others still clinging to fibrous white bits. The joy of eating watermelon often came at the cost of a messy kitchen and a less-than-perfect yield. Then, a revelation came in the form of a simple, elegant technique shared by my girlfriend. This method completely transformed my approach to watermelon preparation, making it not just easy but genuinely enjoyable. It’s an awesome, waste-minimizing, and aesthetically pleasing way to ensure every piece is a perfect, bite-sized cube, ready for enjoyment.
The Common Watermelon Slicing Pitfalls: Why Your Old Method Might Be Failing You
Before diving into the superior slicing method, let’s acknowledge the struggles many face. The traditional approach often involves first cutting the watermelon into several thick, round slices, much like cutting a loaf of bread. While this seems logical, it immediately creates several problems. Each round slice, still encased in its thick green rind, becomes a slippery, cumbersome disk to handle. Removing the rind from these circles is a delicate dance, often requiring you to run a knife along the inner curve, an action that frequently results in either cutting away too much of the precious red flesh or leaving behind unwanted white portions of the rind. The next step, dicing these rind-free crescents, only adds to the inefficiency, leading to uneven pieces and more juice spillage.
This method is not only prone to significant waste but also increases the risk of accidental cuts due to the awkward angles and unstable surfaces. The goal is always to maximize the delicious fruit while minimizing the effort and mess. If you’ve ever found yourself with more juice on the counter than in your bowl, or felt frustrated by the amount of good fruit clinging to the discarded rind, then you’re ready for a better way. This innovative technique addresses these common frustrations head-on, ensuring a safer, cleaner, and much more efficient path to perfectly cubed watermelon.
Step-by-Step Guide: How to Achieve Perfectly Cubed Watermelon with Ease
This method is designed for efficiency, safety, and maximum yield. Follow these steps, and you’ll wonder why you ever did it any other way.
Step 1: Stabilize Your Melon – The Foundation of Safe Slicing
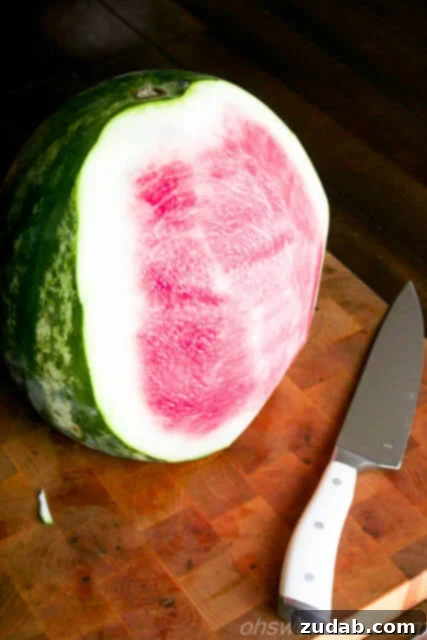
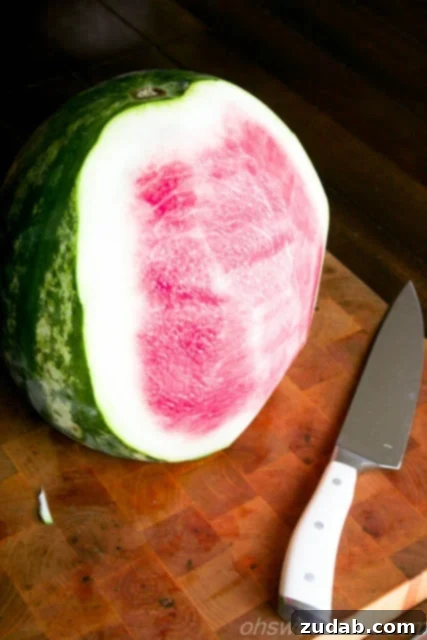
The first and most crucial step is to create a stable base for your watermelon. Safety in the kitchen, especially when dealing with large, round fruits, begins with stability. Carefully take your watermelon and slice off a small portion from one of its ends. The goal here is not to remove a significant amount of flesh, but just enough to expose a flat, stable surface. This allows the watermelon to sit securely on your cutting board without wobbling or rolling. A wobbly melon is a dangerous melon. Ensuring it remains firmly in place throughout the cutting process will significantly reduce the risk of accidents and make every subsequent step much easier and more precise.
Step 2: The Art of Rind Removal – Going Bald, Not Baldly
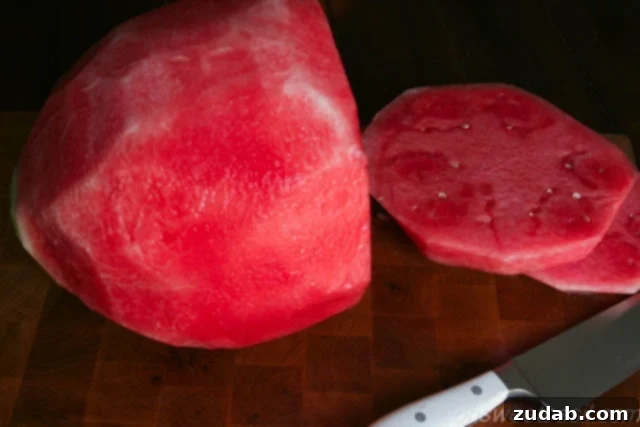
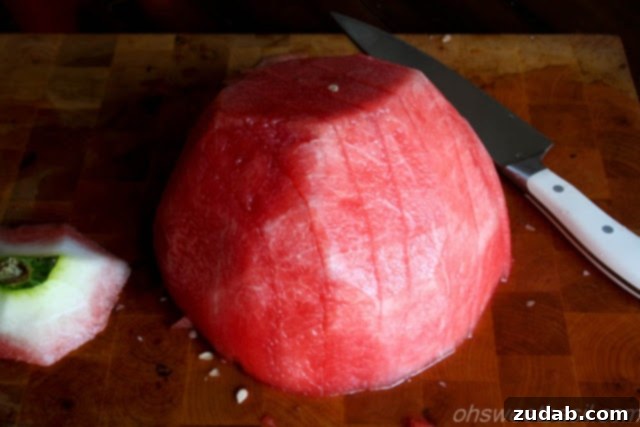
Once your watermelon is stable, standing upright on its newly flattened base, it’s time for the game-changing rind removal. Starting from the very top of your melon, positioned on your cutting board, begin to slice downwards, following the natural curve of the fruit. Use a sharp, large chef’s knife for this task. Your aim is to remove the green rind in long, continuous strips, revealing the vibrant red or pink flesh beneath. This takes a little practice the first time, but the key is to be intuitive. You can actually feel the slight resistance change as your knife transitions from the tough green rind to the softer white pith, and then to the tender flesh. The goal is to slice just deep enough to remove all the green and most of the white pith, leaving as much of the edible red flesh intact as possible. Continue this process all the way around the melon, rotating it as you go, until it is completely “bald” – a smooth, rind-free cylinder of delicious fruit. This method eliminates the need to awkwardly carve around curves, making it incredibly efficient and minimizing waste.
Step 3: Creating Uniform Slices – Setting the Stage for Cubes
With the rind completely removed, lay your now-bald watermelon cylinder on its side on the cutting board. This stable, rind-free log is incredibly easy to work with. Begin slicing it into uniform rounds or discs. The thickness of these slices will directly influence the size of your final cubes, so aim for a consistent width, typically between 1 to 1.5 inches, depending on your preference for bite-sized pieces. Carefully stack these rings as you slice them. This step effectively transforms the large, unwieldy melon into a series of manageable, flat surfaces, which are much easier and safer to cube than the curved slices from the traditional method. These neat, stacked rounds are the perfect canvas for the next phase of precision cutting.
Step 4: The Cubing Process – Vertical and Horizontal Cuts for Perfection
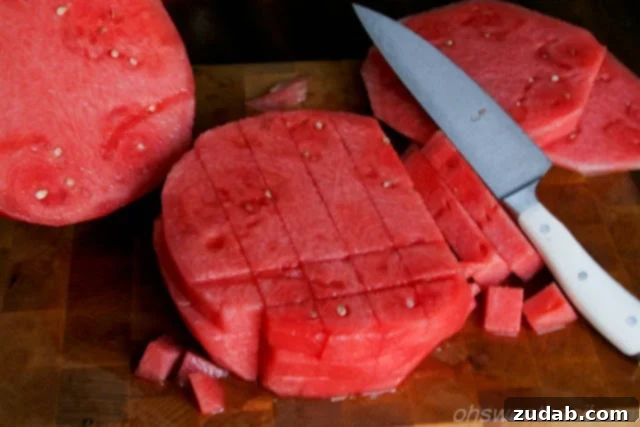
Now, with your stack of rind-free watermelon rings, the cubing process becomes remarkably simple and precise. Take your stack of slices and, keeping them as aligned as possible, begin to slice vertically. Make parallel cuts at intervals that match the thickness of your original rings (e.g., if your rings are 1-inch thick, make vertical cuts 1 inch apart). This will create long, rectangular sticks of watermelon. Once you’ve made all your vertical cuts across the entire stack, rotate the watermelon 90 degrees. Now, perform horizontal cuts across the sticks, again maintaining the same interval. This cross-hatching action will effortlessly transform the sticks into perfectly uniform, bite-sized cubes. The beauty of this method is its consistency; every cube will be roughly the same size, making for elegant presentation and easy eating.
Step 5: Maximizing Yield – Handling the End Pieces
As you approach the end of the watermelon, you’ll be left with smaller, less uniform “cap” pieces from where you initially flattened the melon. Don’t let these go to waste! Simply cut off these top or bottom chunks, lay them on their flat sides, and slice vertically and horizontally as you did with the main body of the melon. You might need to separate these smaller layers into two or three piles to ensure you’re working on a stable, flat surface. Cube these remaining pieces in the same fashion, ensuring you extract every last bit of delicious fruit. Once you’ve cubed these final sections, you’re done! You’ll be left with a generous bowl of perfectly cut, ready-to-enjoy watermelon cubes, with minimal waste and maximum satisfaction.
Why This Watermelon Slicing Method is a Game-Changer
Embracing this slicing technique offers a multitude of benefits that extend beyond just convenience:
- Unmatched Efficiency: This method drastically cuts down the time spent wrestling with a large fruit, allowing you to enjoy your watermelon sooner. The stable base and systematic rind removal streamline the entire process.
- Minimal Waste: By carefully peeling the rind in long strips, you maximize the amount of edible flesh, leaving very little behind. No more guessing where the rind ends and the fruit begins.
- Perfectly Uniform Cubes: Achieve consistent, bite-sized pieces that are ideal for snacking, fruit salads, skewers, or garnishes. The uniform shape enhances both presentation and eating experience.
- Enhanced Safety: Working with a stable, flat-bottomed watermelon significantly reduces the risk of slips and cuts, making it a safer method for any home cook.
- Cleanliness: The controlled removal of the rind and systematic cubing minimize juice spillage and mess on your cutting board, making cleanup a breeze.
- Versatility: Uniform cubes are incredibly versatile. They are perfect for freezing, blending into smoothies, infusing water, or simply serving chilled on their own.
Expert Tips for Watermelon Success and Enjoyment
To further elevate your watermelon experience, consider these additional tips:
- Picking the Perfect Melon: Look for a watermelon that feels heavy for its size. A dull, dark green skin with a large, creamy yellow spot on the underside indicates ripeness. Give it a good thump; a hollow, resonant sound suggests a juicy interior.
- The Right Tool for the Job: A long, sharp chef’s knife (8-10 inches) is essential. A sharp knife is always safer than a dull one, as it requires less force and is less likely to slip.
- Chilling is Key: Watermelon is best served cold. After cubing, store your watermelon in an airtight container in the refrigerator for at least an hour before serving to enhance its refreshing qualities.
- Creative Serving Ideas: Beyond simply eating it plain, try tossing your watermelon cubes with fresh mint and feta for a refreshing salad, or blending them into a vibrant smoothie or a batch of homemade sorbet. They also make excellent additions to skewers with other fruits or grilled halloumi.
- Don’t Waste the Rind (Optional): For the adventurous, the white part of the rind can be pickled, similar to cucumber pickles, offering a tangy and unique treat.
Conclusion: Embrace a New Era of Watermelon Enjoyment
Gone are the days of struggling with a cumbersome melon, losing precious fruit to the rind, and ending up with an uneven, messy pile of chunks. By adopting this simple yet ingenious slicing method, you’ll transform the way you prepare and enjoy watermelon. From the initial stabilization to the final precise cubing, each step is designed for ease, efficiency, and a perfect outcome. This technique not only maximizes the yield of your delicious summer fruit but also ensures a safer, cleaner, and more enjoyable culinary experience.
So, the next time you bring home a magnificent watermelon, approach it with confidence. Follow these steps, and prepare to impress yourself and your guests with perfectly cubed, ready-to-devour watermelon. It’s more than just a kitchen hack; it’s an upgrade to your summer fruit ritual. Enjoy the sweet, hydrating rewards of your newly mastered watermelon slicing skills!