
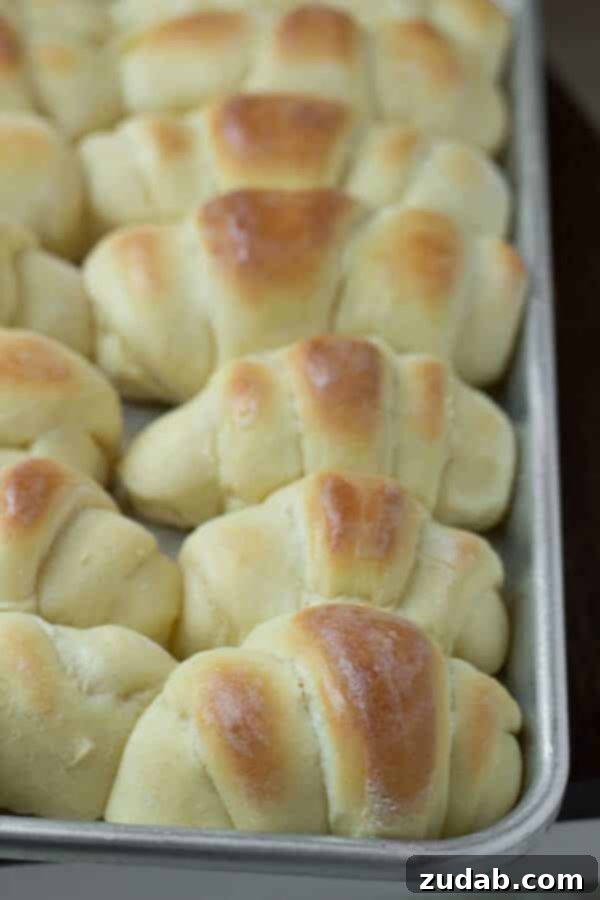
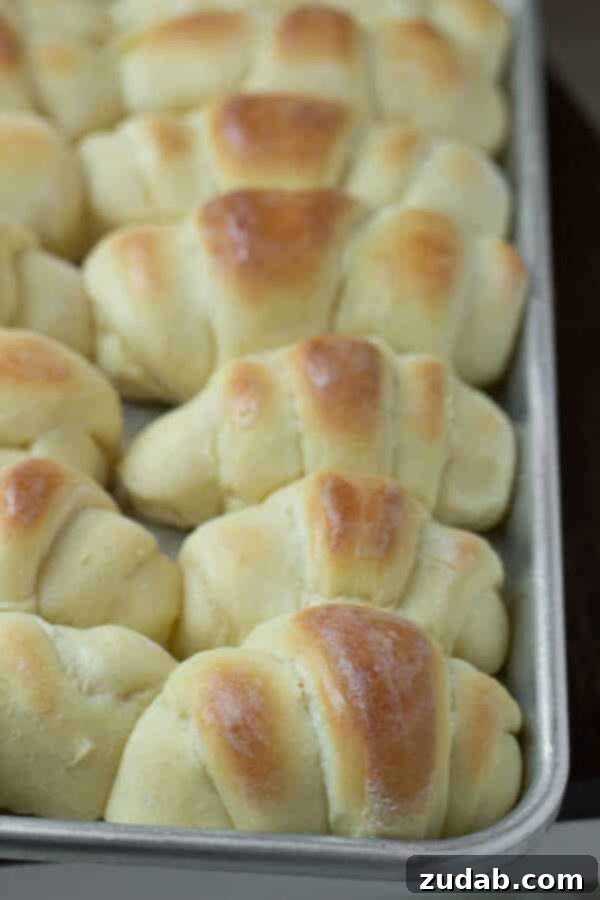
Discover the unparalleled joy of baking with this recipe for the world’s best homemade rolls. Often hailed as the most delicious, fluffy, and perfectly soft rolls you’ll ever taste, they are sure to become a cherished favorite in your home. Forget store-bought bread; these rolls offer an experience that is truly extraordinary.
Do you remember those classic Caramello candy bar commercials? The ones where they’d slowly stretch out the caramel, revealing its rich, silky texture? Even as a little girl, those commercials captivated me. I wasn’t just hungry for the candy; I was fascinated by the sheer *pleasure* it promised. That moment was probably my first conscious realization that food isn’t just sustenance; it’s an experience, a source of profound enjoyment and comfort. This deep appreciation for food explains why a recipe for truly exceptional homemade rolls holds such a significant place in my heart.
I genuinely adore food, and fluffy bread, in particular, has always been a weakness of mine. However, this also means I’m quite discerning when it comes to my carbohydrates. Over the years, I’ve experimented with countless roll recipes – a veritable gazillion, it feels like! While my potato rolls are undoubtedly heavenly, I still craved a versatile, consistently perfect “regular” homemade roll recipe. After much trial and error, I can confidently say I’ve found it. This isn’t just *a* homemade roll recipe; this is truly the **world’s best homemade rolls recipe**, yielding soft, perfect, utterly delightful homemade rolls every single time. It’s the ultimate recipe for achieving that bakery-quality softness and flavor right in your own kitchen.
The Irresistible Allure of Homemade Rolls
There’s something uniquely comforting and incredibly rewarding about homemade rolls. The aroma alone, wafting through your kitchen as they bake, is enough to bring a smile to anyone’s face. Unlike their store-bought counterparts, homemade rolls offer a freshness and depth of flavor that simply cannot be replicated. They’re free from preservatives and artificial ingredients, giving you complete control over what goes into your food. From the first bite, you’ll notice the difference – a tender crumb, a slightly crisp crust, and a rich, buttery taste that melts in your mouth. Whether served alongside a hearty dinner, as a breakfast treat with jam, or simply enjoyed on their own, these rolls elevate any meal into a special occasion.
Why This Recipe Stands Out: The Secret to Perfection
What makes this particular recipe the “world’s best”? It’s a combination of thoughtfully selected ingredients and a method designed for foolproof success. The inclusion of heavy cream and whole milk, along with a generous amount of butter, contributes to the unparalleled richness and tenderness of the dough. These fats create a luxuriously soft texture that remains moist and flavorful even days after baking. The use of instant dry yeast simplifies the process, ensuring a robust rise without the need for extensive proofing. Moreover, the technique of scalding the milk mixture before adding it to the eggs and flour creates a more stable and pliable dough, resulting in a superior crumb structure. This recipe, adapted from Ann Romney’s renowned cookbook, has been perfected to guarantee consistently outstanding results for home bakers of all skill levels.
Essential Tips for Baking Your Best Homemade Rolls
- Yeast Activation: Always ensure your warm water is between 105-115°F (40-46°C) for optimal yeast activation. Water that’s too hot will kill the yeast, while water that’s too cold won’t activate it properly, leading to dense rolls.
- Room Temperature Ingredients: Butter and eggs at room temperature emulsify better with other ingredients, leading to a smoother, more cohesive dough and a better rise.
- Don’t Over-Flour: It’s crucial to add flour gradually. The dough should be soft, slightly sticky, but pull away from the sides of the bowl. Over-flouring will result in dry, tough rolls. The range of 5 to 5 1/2 cups is a guide; adjust based on humidity and flour type.
- Proper Kneading (or No-Kneading!): This recipe is wonderfully forgiving and doesn’t require vigorous kneading. The process of mixing and letting the dough rise twice develops the gluten naturally, giving you that desired fluffy texture.
- Warm Rising Environment: Yeast loves warmth! Find a cozy, draft-free spot for your dough to rise. A slightly warm oven (turned off, with the light on) or a sunny spot on your counter works wonders.
- Scalding the Milk: Heating the milk and butter mixture until foam appears around the edges helps to activate the proteins in the milk, resulting in a softer, more delicate crumb. Just be careful not to boil it!
- The Butter Finish: Brushing the hot rolls with extra melted butter right out of the oven isn’t just for flavor; it also helps to keep the crust soft and shiny, adding another layer of irresistible appeal.
Can Roll Dough Be Frozen for Later Use?
Absolutely! Freezing roll dough is an excellent way to prepare ahead and enjoy fresh homemade rolls whenever a craving strikes. This makes planning for holidays, gatherings, or just a busy weeknight dinner incredibly convenient.
How to Freeze Roll Dough:
- Once your yeast dough has been kneaded (but *before* its first rise), shape it into individual rolls.
- Arrange the shaped rolls on a baking sheet lined with parchment paper, ensuring they don’t touch each other.
- Place the baking sheet in the freezer until the rolls are completely frozen solid. This prevents them from sticking together when bagged.
- Once frozen, transfer the rolls into airtight freezer bags or containers. Label them with the date and stash them in the freezer. They will keep well for up to 2-3 months.
To Bake Frozen Dough:
- When you’re ready to bake, remove the desired number of frozen rolls and place them on a greased baking sheet.
- Cover them loosely with a kitchen towel or plastic wrap (greased lightly to prevent sticking).
- Allow them to thaw and rise in a warm, draft-free place until doubled in size. This can take anywhere from 3 to 5 hours, depending on your kitchen’s temperature.
- Once risen, bake according to the recipe instructions (375°F for 15-18 minutes).
How Long Will Fresh Rolls Last?
These delicious homemade dinner rolls, when stored properly, will maintain their freshness and soft texture for 5-7 days at room temperature. The key to longevity is proper storage to prevent them from drying out.
Best Storage Practices:
- Once cooled completely, wrap them tightly in aluminum foil.
- Alternatively, place them in a zippered airtight storage bag.
- Keep them in a cool, dry place away from direct sunlight.
How Do You Reheat Dinner Rolls?
Reheating dinner rolls correctly ensures they taste almost as good as when they were first baked – warm, soft, and inviting. You have a couple of excellent options:
Oven Reheating Method (Recommended for Best Results):
- Preheat your oven to 350°F (175°C).
- Arrange a rack in the middle of the oven.
- Place the rolls in a baking dish or spread them out on a baking sheet. For extra moisture, you can lightly dampen a paper towel and place it over the rolls or sprinkle a few drops of water in the dish before covering with foil.
- Bake for 7 to 10 minutes, or until thoroughly warmed through and soft.
Microwave Reheating Method (Quick Option):
- Place the rolls on a microwave-safe plate.
- Cover the rolls with a slightly damp paper towel. This helps create steam and prevents them from drying out.
- Microwave for 20-30 seconds, or until warm. Be careful not to over-microwave, as this can make them tough.
World’s BEST Homemade Rolls Recipe
World’s BEST Homemade Rolls Recipe
By Sweet Basil
Cook: 15 mins
Total: 3 hrs 15 mins
Yields: 24 rolls
Ingredients
For the Dough:
- 3/4 Cup Warm Water (105-115°F / 40-46°C)
- 2 teaspoons Sugar (for yeast activation)
- 4 1/2 teaspoons Instant Dry Yeast
- 1/4 Cup Heavy Cream
- 1/2 Cup Whole Milk (low-fat is acceptable, but avoid skim milk for best results)
- 1/2 Cup Unsalted Butter, at room temperature (see note below)
- 1/2 Cup Sugar
- 3 Large Eggs, lightly whisked
- 5 to 5 1/2 Cups All-Purpose Flour (start with 5 cups and add more as needed)
- 1 1/2 teaspoons Real Sea Salt (not kosher salt, as it measures differently)
- Canola Oil, for greasing the bowl/bag
For Finishing:
- Extra Butter (about 1/4 cup or half a stick), melted, for brushing after baking
Instructions
- In a small bowl, combine the 3/4 cup warm water, 2 teaspoons of sugar, and the instant dry yeast. Stir gently.
- Set this mixture aside in a warm place for 5-10 minutes until it becomes foamy. This indicates the yeast is active.
- While the yeast is activating, in a medium saucepan, combine the heavy cream, milk, 1/2 cup unsalted butter, and 1/2 cup sugar.
- Heat over medium heat, stirring occasionally, until foam appears around the edges. Do not allow the mixture to boil.
- Remove the saucepan from the heat and let it cool until it’s lukewarm (around 100-110°F / 38-43°C). You can place the pan on a hot pad in the fridge, stirring occasionally, to speed up cooling, but monitor it closely.
- Meanwhile, in a separate large mixing bowl, lightly whisk the 3 large eggs.
- Add 1 cup of the all-purpose flour and the 1 1/2 teaspoons of sea salt to the whisked eggs. Mix until just combined.
- Pour the cooled milk mixture and the foamy yeast mixture into the flour and egg mixture. Mix well.
- Gradually add an additional cup of flour, mixing until the dough begins to pull away from the sides of the bowl.
- Continue adding more flour, 1/4 cup at a time, until the dough is soft but no longer sticks to your fingers when lightly pressed. The dough should still be slightly tacky, but manageable.
- Lightly grease a large bowl or a small grocery/plastic bag with canola oil. Scrape the dough out of the mixing bowl and place it into the greased container. If using a bag, twist it loosely to allow for expansion and tuck the twisted end underneath.
- Allow the dough to rise in a warm, draft-free place for 45-60 minutes, or until doubled in size.
- Gently punch down the risen dough to release the air.
- Allow the dough to rise for an additional 45-60 minutes, or until doubled in size again. This second rise contributes to a finer, softer texture.
- Once risen, divide the dough in half. On a lightly floured surface, roll each half into a circular shape, about 1/4 to 1/2 inch thick.
- Cut each circle into 12 equal wedge-shaped pieces (like slicing a pizza).
- Starting from the wide end of each dough triangle, roll it tightly towards the pointed end to form a crescent roll shape.
- Place the shaped rolls onto a greased baking sheet, leaving some space between them.
- Repeat with the remaining dough. Lightly cover the baking sheets with a clean kitchen towel.
- Allow the rolls to rise for a final 45 minutes to 1 hour, or until noticeably puffy.
- Preheat your oven to 375°F (190°C).
- Bake the rolls for 15-18 minutes, or until golden brown on top and cooked through.
- As soon as the rolls come out of the oven, generously brush the hot rolls with the extra melted butter. This adds a beautiful sheen and rich flavor. Serve warm and enjoy!
Recipe Notes
- Butter vs. Margarine: For the best flavor and texture, use unsalted butter or shortening. Margarine is not recommended as it can affect the final result.
- Follow Instructions Precisely: The instructions, especially regarding cooling temperatures and rising times, might seem unconventional, but they are crucial for achieving the desired soft and fluffy outcome. This recipe is adapted from Ann Romney’s The Romney Family Table Cookbook, a trusted source for delightful baked goods.
- Freezing Shaped Rolls: Rolls can be shaped after the first rise and then frozen. Place them on a cookie sheet and freeze until solid, then transfer to a freezer-safe bag. When ready to bake, let them thaw and rise in a warm place (covered with a towel) until doubled, then bake as directed.
Nutrition
Nutrition information is an approximation only and may vary based on specific ingredients and preparation methods.
- Serving Size: 1 roll (approx.)
- Calories: 182kcal
- Carbohydrates: 28g
- Protein: 5g
- Fat: 6g
- Saturated Fat: 3g
- Polyunsaturated Fat: 1g
- Monounsaturated Fat: 2g
- Trans Fat: 1g
- Cholesterol: 34mg
- Sodium: 158mg
- Potassium: 71mg
- Fiber: 1g
- Sugar: 5g
- Vitamin A: 193IU
- Vitamin C: 1mg
- Calcium: 17mg
- Iron: 1mg
There’s an undeniable magic in creating something so utterly delicious from simple ingredients. These homemade rolls aren’t just food; they’re a testament to the warmth of home, the joy of sharing, and the simple pleasure of a perfectly baked bite. Don’t let the thought of baking bread intimidate you; this recipe is designed to be straightforward and rewarding. Give it a try, and prepare to be amazed by the incredible softness, flavor, and sheer delight of your very own “World’s BEST Homemade Rolls.” Your family and friends will thank you, and you might just discover a new favorite kitchen pastime.
Explore More Delicious Roll Recipes
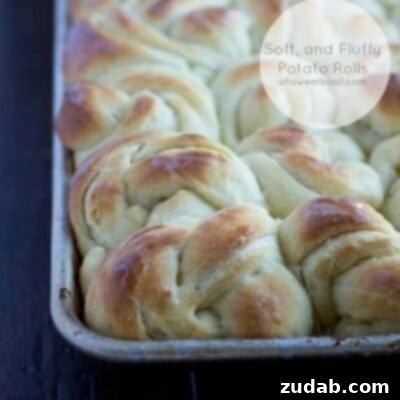
For another incredible bread experience, try our Best Darn Potato Rolls – they are pure heaven!

Whip up a batch of our speedy One-Hour Rolls when time is of the essence!

And for a bright, citrusy twist, don’t miss our indulgent Orange Rolls.