
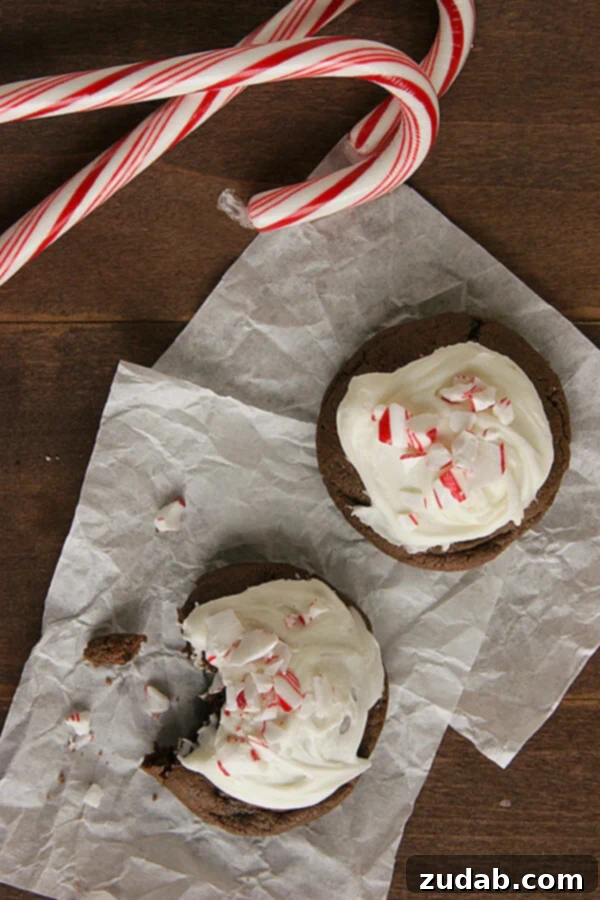
We are absolutely thrilled to welcome Deborah from the esteemed Taste and Tell to our site today! Deborah, a wonderfully talented blogger and a dear friend, is sharing her irresistible recipe for **chocolate peppermint cookies**. Her culinary creations are always exceptional, and this festive treat is no exception. As part of a delightful holiday cookie exchange, make sure you also hop over to her blog to discover the delicious recipe I’ve shared there.
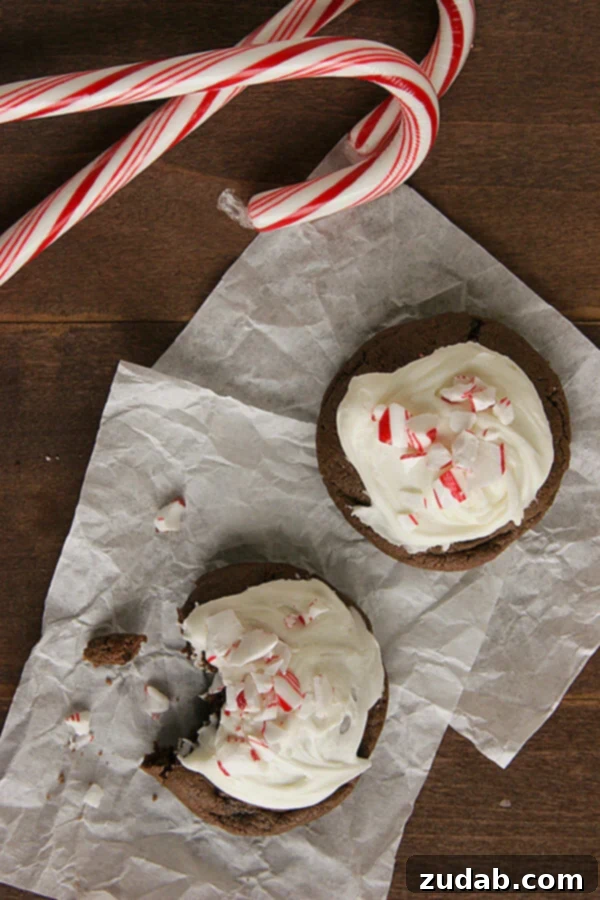
The Ultimate Holiday Indulgence: Chocolate Peppermint Cookies
For me, nothing quite captures the essence of Christmas like the vibrant, cool burst of peppermint. It’s a flavor that instantly transports me to cozy holiday evenings, twinkling lights, and the joyful anticipation of the season. While my family might not share my profound love for all things peppermint – perhaps a hidden blessing, as it means more for me to savor! – that certainly doesn’t deter me from embracing this quintessential holiday flavor. As soon as December arrives, my kitchen transforms into a peppermint paradise, bustling with the creation of countless treats. From peppermint Rocky Road brownies to double chocolate peppermint surprise cookies and even peppermint snickerdoodles, I simply can’t get enough of its refreshing charm.
These chocolate peppermint cookies are a dream come true for any peppermint enthusiast. Each bite offers a harmonious blend of rich, deep chocolate and a lively kick of refreshing peppermint, creating a taste sensation that is both comforting and exhilarating. But the magic doesn’t stop there. These cookies are crowned with a luscious, creamy white chocolate cream cheese frosting, adding a layer of velvety sweetness that perfectly complements the robust cookie base. And, of course, no peppermint holiday cookie would be complete without a generous sprinkle of glistening, crushed candy canes, providing a delightful crunch and an extra festive flourish. The secret to their perfectly balanced flavor lies in high-quality ingredients, notably McCormick’s peppermint extract, which delivers just the right amount of invigorating minty goodness without overpowering the chocolate. Whether you’re preparing for a holiday cookie exchange, looking for a thoughtful gift for neighbors, or simply craving a festive treat for your family, these cookies are guaranteed to elevate any holiday cookie platter and spread cheer!
Expert Baking Tips for Your Holiday Cookies
Can You Freeze Cookie Dough for Later?
Yes, absolutely! Freezing cookie dough is a fantastic way to get ahead on your holiday baking, ensure you always have fresh cookies on hand, or prevent waste if you’ve made too much. There are several effective methods for freezing cookie dough, each offering convenience depending on how you plan to use it.
One popular method is to roll the cookie dough into a log. Once formed, wrap the log tightly with plastic wrap, ensuring no air can get in, and then place it in a heavy-duty freezer bag or an airtight container. This method is excellent for slice-and-bake cookies, allowing you to easily cut off individual portions as needed. Alternatively, you can simply scoop the cookie dough into an airtight container and freeze it. This works well for drop cookies where precise shapes aren’t as critical. For best quality, cookie dough can be frozen using either of these methods for up to 3 months.
For ultimate convenience, especially if you prefer uniformly sized cookies or want to bake just a few at a time, you can freeze cookie dough after dropping it into individual cookie portions. Simply portion out your dough onto a parchment-lined baking sheet, leaving some space between each cookie. Flash freeze them for about 1-2 hours, or until they are firm. Once frozen solid, transfer these individual cookie dough portions to a heavy-duty freezer bag or an airtight freezer-safe container. This prevents them from sticking together and makes it easy to grab exactly how many you need. When you’re ready to bake, you can usually bake frozen cookie dough directly from the freezer, adding a few extra minutes to the baking time.
What Can You Substitute For Cream Cheese in Frosting?
Cream cheese is a key ingredient for its tangy flavor and smooth, rich texture in many frostings, but if you’re out or looking for alternatives, several substitutes can work. Keep in mind that while these options can replicate some of the qualities, the flavor and consistency might vary slightly from traditional cream cheese frosting.
One common substitute is Neufchâtel cheese. It’s very similar to cream cheese but typically has a lower fat content, making for a slightly lighter frosting while still retaining that desirable tang and creamy texture. Another option is to use equal parts of ricotta cheese mixed with plain, full-fat yogurt. The ricotta provides body and a mild flavor, while the yogurt adds the necessary tanginess and creaminess. Ensure you drain any excess liquid from both the ricotta and yogurt before mixing to prevent a runny frosting.
For a lower-fat alternative, you can try combining 8 ounces of lower-fat cottage cheese with 1/4 cup of margarine. It’s crucial to blend the cottage cheese thoroughly until it’s completely smooth to avoid a lumpy texture in your frosting. This combination will offer a lighter profile, both in terms of fat and flavor, but still provide a palatable creaminess. Always taste and adjust sweetness and texture when using substitutes to achieve your desired result.
Can You Use Salted Butter Instead of Unsalted?
While most baking recipes, including this one, call for unsalted butter, you can certainly substitute salted butter if that’s all you have on hand. The primary reason unsalted butter is preferred in baking is to give the baker complete control over the amount of salt in the recipe. Different brands of salted butter can have varying amounts of salt, which can lead to unpredictable results in terms of flavor balance.
If you opt to use salted butter, the critical adjustment you need to make is to eliminate or significantly reduce any additional salt called for in the recipe. As a general rule of thumb, for every 1/2 cup (or one stick) of salted butter used, you should reduce the added salt in the recipe by about 1/4 teaspoon. So, if your recipe calls for 1 cup of butter and 1 teaspoon of salt, and you use salted butter, you would omit the added salt entirely. It’s always a good idea to start with less salt and add more to taste, especially in recipes where salt plays a significant role in balancing sweetness. Being mindful of this small adjustment will ensure your delicious chocolate peppermint cookies maintain their perfect flavor profile.
The Recipe: Irresistible Chocolate Peppermint Cookies
Chocolate Peppermint Cookies
By Sweet Basil

Print Recipe
Indulge in these festive chocolate peppermint cookies, featuring a rich chocolate cookie base, a luscious white chocolate cream cheese frosting, and a sprinkle of crushed candy canes. Perfect for holiday gatherings and cookie exchanges!
Ingredients
For the Cookies:
- 1 Cup Butter, at room temperature
- 1 Cup Brown Sugar
- 1/2 Cup Granulated Sugar
- 2 Eggs
- 1 teaspoon McCormick Peppermint Extract
- 2 1/2 Cups All-Purpose Flour
- 3/4 Cup Unsweetened Cocoa Powder
- 1 teaspoon Salt
- 1 teaspoon Baking Soda
For the Frosting:
- 1/2 Cup White Chocolate Chips
- 4 Ounces Cream Cheese, at room temperature
- 2 1/2 Cups Powdered Sugar
- Crushed Candy Canes (for topping)
Instructions
For the Cookies:
- Preheat your oven to 350°F (175°C). Prepare baking sheets by lining them with parchment paper; no greasing is needed for this recipe.
- In the large bowl of a stand mixer, or with a hand mixer, cream together the softened butter, brown sugar, and granulated sugar until the mixture is light, fluffy, and pale in color. This usually takes about 3-5 minutes.
- Add the eggs, one at a time, beating well after each addition to ensure they are fully incorporated into the mixture. Stir in the McCormick peppermint extract until evenly distributed.
- In a separate medium-sized bowl, whisk together the flour, unsweetened cocoa powder, salt, and baking soda. Gradually add this dry mixture to the wet butter mixture, mixing on low speed until just combined. Be careful not to overmix the dough, as this can lead to tough cookies.
- Roll the cookie dough into 1-inch balls and place them on the prepared baking sheets, ensuring they are at least 2 inches apart to allow for spreading.
- Bake in the preheated oven for 8-10 minutes, or until the edges are set and the centers appear slightly soft. The cookies will firm up as they cool.
- Remove the cookies from the oven and let them cool on the baking sheets for a few minutes before transferring them to a wire rack to cool completely.
To make the frosting:
- In a microwave-safe bowl, melt the white chocolate chips in 30-second intervals, stirring after each interval, until they are mostly melted. Continue stirring until the chocolate is completely smooth and melted.
- Allow the melted white chocolate to cool slightly for about 10 minutes. This prevents it from melting the cream cheese.
- In a clean mixing bowl, add the softened cream cheese. Beat until it is light and fluffy.
- Gradually add the powdered sugar to the cream cheese, beating on low speed until fully incorporated and the frosting is smooth and creamy.
- Once the cookies are completely cool, spread a generous layer of white chocolate cream cheese frosting on top of each cookie.
- Finish by sprinkling each frosted cookie with crushed candy canes for a beautiful, festive touch and an added hint of peppermint crunch.
Recipe Notes
For optimal freshness and flavor, store these chocolate peppermint cookies in an airtight container at room temperature for up to 3 days, or in the refrigerator for up to a week (especially with cream cheese frosting). If refrigerating, allow them to come to room temperature for the best texture before serving. You can also make the cookie dough ahead of time and freeze it for up to 3 months.
Nutrition Information (Approximate)
Serving: 1 cookie | Calories: 175kcal | Carbohydrates: 26g | Protein: 2g | Fat: 8g | Saturated Fat: 5g | Polyunsaturated Fat: 1g | Monounsaturated Fat: 2g | Trans Fat: 1g | Cholesterol: 26mg | Sodium: 154mg | Potassium: 61mg | Fiber: 1g | Sugar: 19g | Vitamin A: 214IU | Vitamin C: 1mg | Calcium: 20mg | Iron: 1mg
Nutrition information is automatically calculated and should only be used as an approximation.
More Holiday Baking Inspiration & Variations
These chocolate peppermint cookies are fantastic as they are, but don’t hesitate to get creative with variations to suit your taste or make them even more unique!
- Double Chocolate Delight: For an extra dose of chocolate, fold in 1/2 cup of chocolate chips (milk, semi-sweet, or dark) into the cookie dough before baking. This adds another layer of rich cocoa flavor and texture.
- Peppermint Intensity: If you’re an extreme peppermint lover, you can slightly increase the amount of peppermint extract in the cookie dough or add a tiny drop to the frosting. Always add gradually and taste as you go to avoid an overpowering mint flavor.
- Topping Alternatives: Instead of or in addition to crushed candy canes, consider finely chopped dark or white chocolate pieces, festive sprinkles, or even a drizzle of melted chocolate over the frosting for an elegant touch.
- Flavor Combinations: Experiment with different extracts! While peppermint is quintessential for the holidays, a hint of almond or vanilla extract could also complement the chocolate base beautifully for other occasions.
These cookies are not just a treat for the taste buds; they’re also a joy to make. The aroma of chocolate and peppermint filling your kitchen is truly one of the best parts of holiday baking. So gather your ingredients, put on some festive music, and create some magical moments with these delightful cookies!
Storing Your Delicious Chocolate Peppermint Creations
Proper storage is key to keeping your chocolate peppermint cookies fresh and delicious for as long as possible. Once completely cooled and frosted, these cookies should be stored in an airtight container. If you plan to consume them within 2-3 days, they can be kept at room temperature in a cool, dry place. For longer storage, or if your kitchen is particularly warm, it’s best to refrigerate them. When refrigerated, they will stay fresh for up to a week. Remember to allow them to sit at room temperature for about 15-20 minutes before serving to ensure the frosting and cookie texture are at their best.
If you’ve made a large batch or want to enjoy fresh cookies throughout the holiday season, freezing is an excellent option. Place the frosted and fully set cookies in a single layer on a baking sheet and flash freeze them until solid (about 1-2 hours). Once frozen, transfer them to an airtight freezer-safe container, separating layers with parchment paper to prevent sticking. They can be frozen for up to 1-2 months. When you’re ready to enjoy, simply take out the desired number of cookies and let them thaw at room temperature. This way, you can have a taste of holiday cheer whenever the craving strikes!
**Disclosure- I am in a working partnership with McCormick, but all opinions are my own.**