
Mastering the Art of Pan-Seared Chicken: Achieve Crispy Skin and Juicy Perfection Every Time
Are you tired of serving up chicken that’s either dry and overcooked or lacking that irresistible crispy exterior? Do you dream of creating a restaurant-quality meal with a perfectly golden, crunchy crust and an incredibly tender, moist interior? Achieving that ideal pan-seared chicken might seem like a culinary challenge, but with the right technique, it’s not only possible but surprisingly simple. This comprehensive guide will unlock the secrets to truly exceptional pan-seared chicken, transforming your home cooking and impressing everyone at your table. Say goodbye to guesswork and hello to consistently delicious, perfectly cooked chicken!
The Secret to Perfect Pan-Seared Chicken: A Two-Stage Approach
Many home cooks struggle to get pan-seared chicken just right. Often, you might achieve a fantastic crispy crust only to find the inside disappointingly dry, or conversely, a moist interior with a lackluster, pale skin. The key to our foolproof method lies in a clever two-stage approach: a gentle initial bake to lock in moisture and ensure even cooking, followed by a quick, high-heat sear to develop that coveted crispy, golden-brown skin. This innovative technique ensures your chicken is cooked through tenderly without drying out, then finished with an explosive burst of flavor and texture from the pan. We’ll also introduce a simple yet powerful trick – an egg wash mixture – that elevates the crust to a whole new level, making it exceptionally crisp and flavorful.
Essential Ingredients and Equipment for Your Best Pan-Seared Chicken
Before we dive into the step-by-step process, let’s gather everything you’ll need. High-quality ingredients and the right tools are fundamental to achieving the best results and ensuring your pan-seared chicken is a triumph every time.
Key Ingredients:
- Chicken: Two boneless, skinless chicken breasts or thighs (approximately 6-8 ounces each). While this method works wonderfully for both, chicken breasts particularly benefit from this moisture-preserving technique. For even cooking, ensure your chicken pieces are of relatively uniform thickness. If a breast is significantly thicker on one end, you can gently pound the thicker parts between two sheets of plastic wrap to an even ½ to ¾ inch thickness.
- Kosher Salt: Essential for seasoning. It not only enhances flavor but also helps draw out surface moisture, which is crucial for achieving that crispy skin during the sear.
- Freshly Ground Black Pepper: To taste, for an added layer of flavor.
- High Smoke Point Oil: 1-2 tablespoons of a neutral oil like avocado oil, grapeseed oil, canola oil, or vegetable oil. These oils can withstand the high heat required for searing without burning, which is critical for a clean, crisp finish. Avoid extra virgin olive oil for high-heat cooking as it has a low smoke point.
- Large Egg: One large egg, lightly beaten. This forms the base of our special crust mixture, acting as a binder.
- All-Purpose Flour: 1 teaspoon. Helps to bind the egg wash and contributes to the crispness of the crust.
- Cornstarch: 1 teaspoon. Our secret ingredient for an incredibly crisp and golden-brown crust. It works wonders in creating a light, shatteringly crisp exterior.
- Optional Seasonings: Feel free to experiment with additional flavors such as garlic powder, onion powder, paprika, dried herbs (thyme, oregano, rosemary), or a pinch of cayenne pepper for a subtle kick.
Essential Equipment:
- Oven-Safe Baking Dish: A shallow dish large enough to hold your chicken pieces in a single layer without crowding.
- Aluminum Foil: For tightly covering the baking dish during the initial gentle bake, creating a steamy environment that locks in moisture.
- Heavy-Bottomed Skillet: A cast iron skillet is highly recommended for its superior heat retention and even heating, which results in an unparalleled sear. A high-quality stainless steel skillet can also work effectively.
- Instant-Read Meat Thermometer: Absolutely critical for ensuring the chicken is cooked to the perfect internal temperature (165°F / 74°C) without the risk of undercooking or, more commonly, overcooking. This tool eliminates all guesswork.
- Paper Towels: An abundant supply is crucial for thoroughly patting the chicken dry before searing. This is a non-negotiable step for crispiness.
- Small Bowl and Whisk/Fork: For smoothly combining the egg, flour, and cornstarch.
- Pastry Brush: Or a silicone brush, for applying a thin, even layer of the egg wash mixture to the chicken.
- Tongs: For safely handling and flipping the chicken in the hot pan without tearing the delicate crust.
Step-by-Step Guide: How to Pan-Sear Chicken to Unrivaled Perfection
Follow these detailed instructions carefully to achieve restaurant-quality pan-seared chicken right in your own kitchen. This method guarantees a juicy interior and a spectacular crispy crust, every single time.
Phase 1: The Initial Gentle Bake for Ultimate Juiciness
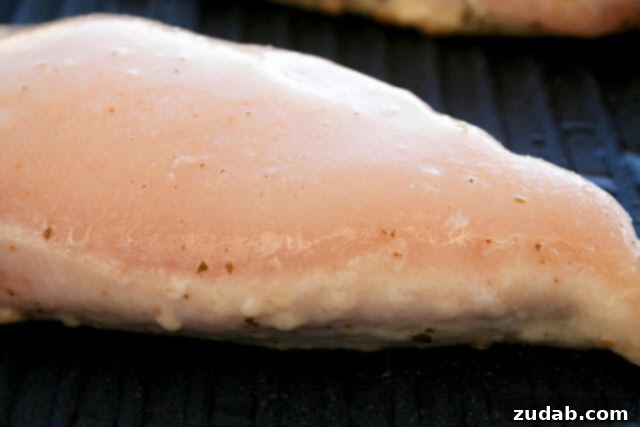
- Prepare Your Oven and Chicken: Begin by preheating your oven to a low temperature, specifically 275-300°F (135-150°C). While the oven preheats, remove your chicken pieces from their packaging. Using several sheets of paper towels, thoroughly pat both sides of the chicken dry. This initial patting helps seasonings adhere and preps the surface, even before the searing stage.
- Season Generously: Place the chicken in your chosen baking dish. Season both sides liberally with kosher salt and black pepper. If you’re incorporating other seasonings like garlic powder, onion powder, or paprika, apply them now. The kosher salt not only imparts flavor but also aids in tenderizing the chicken slightly and preparing its surface for superior searing.
- Gentle Tenderization (For Thicker Cuts): For thicker chicken breasts, gently poke the thickest part a few times with the tines of a fork. This subtle action helps to improve heat distribution during baking and can contribute to a more consistently tender texture throughout the meat.
- Cover and Bake: Tightly cover the baking dish with aluminum foil. This creates a humid, steamy environment within the dish, gently cooking the chicken and infusing it with moisture, which is key to preventing dryness. Place the covered dish in the preheated oven and bake until the internal temperature of the chicken reaches 145°F (63°C). Depending on the thickness of your chicken, this will typically take about 20-30 minutes. Always use your instant-read meat thermometer, inserting it into the thickest part of the chicken, ensuring it doesn’t touch any bone if using bone-in pieces.
- Remove from Oven: Once the target temperature of 145°F (63°C) is reached, carefully remove the baking dish from the oven. Keep it covered if you’re not immediately proceeding to the searing stage, as the residual heat will continue to gently cook the chicken.
Phase 2: The Searing Stage for Unbeatable Crispness and Flavor
- Thoroughly Pat Dry (The Most Crucial Step!): This step is paramount for achieving a truly crispy crust. Uncover the chicken and immediately transfer it to a plate lined with a generous stack of fresh paper towels. Using more paper towels, firmly and thoroughly pat both sides of the chicken until it is as dry as humanly possible. Any residual moisture on the surface will cause the chicken to steam rather than sear, hindering the formation of that beautiful, desired crispy crust.
- Prepare the Special Egg Wash Mixture: In a small bowl, lightly beat the egg. Add 1 teaspoon of all-purpose flour and 1 teaspoon of cornstarch. Whisk these ingredients together until the mixture is smooth and well combined, with no lumps. This unique mixture is a game-changer: the egg acts as a binder, while the flour and cornstarch create a thin, quick-browning coating that becomes exceptionally crisp and delicious when seared.
- Heat Your Skillet to Perfection: Place your heavy-bottomed skillet (ideally cast iron) over medium-high heat. Add 1-2 tablespoons of your chosen high smoke point oil. Allow the oil to heat until it is shimmering and just beginning to show wisps of smoke. A properly hot pan is absolutely essential for an immediate, effective sear and a superior crust.
- Apply Egg Wash & Initiate the First Sear: Using a pastry brush, lightly and evenly brush one side of the chicken with a thin layer of the prepared egg wash mixture. You want a consistent, thin coating, not a thick, gloopy layer. Carefully place the chicken, egg-wash side down, into the hot skillet. Let it sear undisturbed for approximately 3-5 minutes. It is crucial to resist the urge to move or flip the chicken during this time; allowing it to cook undisturbed facilitates the development of that deep golden-brown, crispy crust. You should observe a beautiful golden-brown color forming around the edges.
- Flip & Finish Searing to Doneness: Once the first side is gorgeously browned and crispy, brush the uncooked side of the chicken with the remaining egg wash mixture. Then, using your tongs, carefully flip the chicken to sear the second side. Continue to cook for another 3-5 minutes, or until that side is also beautifully golden brown and, most importantly, the internal temperature of the chicken reaches 165°F (74°C). Reconfirm doneness by inserting your meat thermometer into the thickest part of the chicken.
The Crucial Step: Resting Your Perfectly Cooked Chicken
Once your pan-seared chicken has achieved an internal temperature of 165°F (74°C) and boasts a magnificent crispy crust, immediately remove it from the skillet. Transfer the chicken to a clean cutting board or plate and tent it loosely with aluminum foil. Allow the chicken to rest for a minimum of 5-10 minutes. This resting period is not optional; it is absolutely crucial! It allows the juices, which have migrated to the center of the meat during cooking, to redistribute throughout the entire piece of chicken. The result is an even more tender, incredibly moist, and wonderfully flavorful piece of meat. Skipping this vital step often leads to dry chicken, regardless of how perfectly it was cooked.
Pro Tips for Pan-Searing Chicken Like a Culinary Expert
- Avoid Overcrowding the Pan: If you’re cooking more than two pieces of chicken, it’s always better to cook them in batches. Overcrowding the pan will drastically lower the temperature of your skillet, causing the chicken to steam rather than sear, thereby preventing a proper crispy crust from forming.
- Ensure Even Thickness: As mentioned, for chicken breasts, if they are unevenly thick, pound them gently with a meat mallet or rolling pin between two sheets of plastic wrap until they are of uniform thickness. This simple preparation step ensures consistent cooking throughout.
- Your Meat Thermometer is Your Best Friend: An instant-read thermometer is indispensable for perfectly cooked chicken. It eliminates all guesswork, preventing both dangerous undercooking and flavor-destroying overcooking.
- Select the Right Oil: Always use an oil with a high smoke point for searing. Oils like extra virgin olive oil are not suitable for high-heat searing as they will burn, creating unpleasant smoke and imparting a bitter flavor to your food.
- Trust Your Senses: A properly hot pan will produce an immediate, satisfying sizzle when the chicken is added. If you don’t hear that sound, your pan isn’t hot enough yet. Give it another minute or two.
- Resist the Urge to Move the Chicken: Once the chicken is placed in the hot pan, leave it undisturbed. The crust needs direct, uninterrupted contact with the hot surface to develop properly. Moving it too soon will tear the crust and prevent deep browning.
Delicious Variations and Inspiring Serving Suggestions
Once you’ve mastered this fundamental pan-searing technique, feel empowered to experiment with various flavor profiles to suit your taste:
- Herbs and Spices Infusion: Before the initial bake, enhance your seasoning blend by adding dried rosemary, thyme, oregano, a pinch of red pepper flakes for heat, or even a dash of smoked paprika for depth.
- Aromatic Citrus Zest: Incorporate finely grated lemon or orange zest into your egg wash mixture for a bright, aromatic, and refreshing twist that complements chicken beautifully.
- Garlic & Butter Baste: In the final minute of searing, add a tablespoon of unsalted butter and a smashed garlic clove to the pan. Tilt the pan and use a spoon to baste the chicken with the melted butter and infused garlic oil for an extra layer of richness and flavor.
- Quick Pan Sauce: After removing and resting the chicken, you can effortlessly create a quick pan sauce. Deglaze the pan with a splash of white wine, chicken broth, or even a little lemon juice, scraping up any browned bits (fond) from the bottom. Reduce the liquid slightly, then swirl in a pat of cold butter for a luxurious, restaurant-style finish.
Pan-seared chicken is incredibly versatile and pairs wonderfully with a myriad of sides. Consider serving it alongside:
- A medley of roasted or steamed vegetables like asparagus, broccoli, green beans, or carrots.
- Creamy mashed potatoes, a light and fluffy rice pilaf, or a nutty quinoa salad.
- A fresh, vibrant green salad dressed with a simple vinaigrette for a refreshing contrast.
- Pasta tossed with a light lemon-herb sauce or a simple tomato concasse.
- Couscous or bulgur for a Mediterranean-inspired meal.
The Science Behind Our Perfect Pan-Seared Chicken Method
This hybrid cooking technique ingeniously combines the best of two culinary worlds to deliver consistent perfection:
- Low-Temperature Baking (Convection Cooking): By baking the chicken first at a low temperature, we gently cook the proteins through without aggressively contracting the muscle fibers. This gentle heat helps to retain the chicken’s natural moisture. The covered dish creates a humid environment, which further prevents the chicken from drying out. The target internal temperature of 145°F (63°C) ensures the chicken is mostly cooked but still has just enough room to finish perfectly in the hot pan without becoming tough or dry.
- High-Heat Searing (Conduction Cooking) and the Maillard Reaction: The subsequent quick, high-heat sear applies intense direct heat to the surface of the chicken. This rapid heat triggers the Maillard reaction – a complex chemical reaction between amino acids and reducing sugars – which creates hundreds of new, delicious flavor compounds and is responsible for the desirable golden-brown color and crispy texture. Because the chicken is already mostly cooked from the initial bake, the searing time is minimized, significantly reducing the risk of drying out the interior while maximizing the development of that exquisite crust.
- The Magic of the Egg Wash: The egg in our mixture acts as an excellent binder, creating a very thin, even layer that helps the flour and cornstarch adhere uniformly to the chicken’s surface. When exposed to high heat, the proteins in the egg, along with the starches in the flour and cornstarch, rapidly dehydrate and crisp up beautifully, contributing significantly to that sought-after shatteringly crisp exterior.
Storage and Reheating Best Practices
Should you be fortunate enough to have any delicious leftovers, store them in an airtight container in the refrigerator for up to 3-4 days. To reheat, the best method to maintain some of that desirable crispness is to gently warm the chicken in a preheated oven (around 300°F/150°C) until just heated through. Alternatively, you can quickly reheat it in a skillet over medium heat to re-crisp the exterior without overcooking and drying out the interior too much. For optimal texture, it’s best to avoid reheating pan-seared chicken in the microwave, as this can make the crust soggy and the chicken rubbery.
Conclusion: Your Journey to Crispy, Juicy Chicken Starts Now
With this detailed and comprehensive guide, you are now equipped with all the knowledge and techniques to achieve truly spectacular pan-seared chicken. No longer will you have to compromise between a crispy crust and a juicy interior – this ingenious two-stage method delivers both with consistent excellence. Embrace the initial gentle bake, pay meticulous attention to the crucial step of patting the chicken thoroughly dry, and unlock the power of that secret egg wash mixture. Your culinary confidence will undoubtedly soar, and your taste buds will celebrate. Get ready to transform your chicken dinners and savor every delicious, perfectly cooked bite. Happy cooking!