
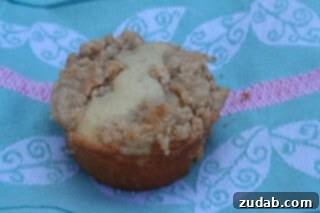
Irresistible Crumb Muffins: Your Go-To Recipe for a Perfect Treat
Muffins often get a reputation as a simple, everyday baked good, perhaps overshadowed by more decadent pastries or elaborate breakfast dishes. My husband, for instance, typically leans towards German pancakes or classic chocolate chip pancakes. However, there’s one muffin recipe that consistently breaks through his breakfast preferences and earns a rave review every single time: these incredible Crumb Muffins. The moment he takes a bite, all other breakfast options fade into the background. It’s truly a testament to their exceptional flavor and texture, prompting an immediate “Nough said” from his satisfied grin.
What makes these crumb muffins so special? It’s the perfect harmony between a tender, moist muffin base and a generous, buttery, cinnamon-spiced crumb topping that adds an irresistible crunch to every bite. This recipe isn’t just about baking; it’s about creating a moment of pure culinary delight that transforms a simple breakfast into an extraordinary experience. Whether you’re an experienced baker or just starting, this guide will walk you through crafting the ultimate crumb muffins that will surely become a staple in your kitchen.
Baking Muffins: Essential Tips and Tricks
Successfully baking muffins goes beyond just mixing ingredients. Understanding a few key techniques can elevate your muffins from good to truly exceptional. Here, we address common questions that can impact your baking results, ensuring your crumb muffins turn out perfectly every time.
Can Muffins Be Baked Without Paper Liners?
Absolutely, you can bake muffins and cupcakes directly in a muffin tin without paper liners. This method can even result in a slightly crispier edge on your muffins, which some bakers prefer for that extra textural contrast. However, it requires a bit more attention to pan preparation to ensure easy release and prevent sticking.
- **Thoroughly Grease Your Muffin Tin:** Before adding any batter, make sure to generously spray each cup of your muffin tin with a good quality non-stick baking spray, or grease them meticulously with butter or shortening and then dust lightly with flour. Ensure every crevice is coated.
- **Cool Before Removing:** Patience is key. Allow the muffins to cool in the pan for several minutes after baking (typically 5-10 minutes) before attempting to remove them. This allows them to firm up slightly and contract from the sides of the pan, making them much easier to lift out without tearing.
- **Consider the Cleanup:** While liner-free baking is great for texture, be aware that cleanup might be a bit more involved, especially if your pan isn’t perfectly non-stick or wasn’t greased thoroughly.
How Long Will Muffins Keep Fresh?
Proper storage is crucial for maintaining the freshness and deliciousness of your homemade muffins. With the right technique, your crumb muffins can stay delightful for several days.
- **Room Temperature (1-3 Days):** For optimal freshness, muffins should be stored at room temperature for the first 1-3 days. After they have completely cooled, wrap them tightly in plastic wrap or place them in an airtight container. If you find moisture building up inside the container, place a paper towel at the bottom to absorb excess humidity.
- **Refrigeration (Up to 1 Week):** If you need to extend their shelf life beyond a few days, refrigerate your muffins. Again, ensure they are in an airtight container or tightly wrapped to prevent them from drying out or absorbing odors from the fridge. Reheating them gently in the microwave for 15-30 seconds or in a toaster oven can restore some of their warmth and softness.
- **Freezing (Up to 3 Months):** Muffins freeze exceptionally well. Once completely cooled, wrap each muffin individually in plastic wrap, then place them in a freezer-safe bag or container. This prevents freezer burn. To enjoy, simply thaw at room temperature for a few hours, or warm directly from frozen in the microwave or oven until heated through. Freezing is an excellent way to prepare a batch and enjoy fresh-tasting muffins whenever a craving strikes.
Can You Bake Muffin Batter In A Loaf Pan?
Yes, many muffin recipes can be successfully adapted to bake in a loaf pan, offering a different presentation and often a longer baking time. This conversion is perfect for when you want a sliceable treat rather than individual portions.
- **Adjust Oven Rack and Temperature:** To convert a muffin recipe to a loaf, set your oven rack in the middle position. Crucially, decrease the oven temperature by about 50 degrees Fahrenheit (approximately 28 degrees Celsius) from what the muffin recipe calls for. The lower temperature helps the thicker loaf bake through evenly without the outside browning too quickly.
- **Increase Baking Time:** A loaf pan holds a larger volume of batter, so the baking time will significantly increase. Expect to bake for approximately 60-70 minutes, or potentially longer, depending on your oven and the specific recipe.
- **Test for Doneness:** To check if the loaf is fully baked, insert a wooden toothpick or skewer into the center. It should come out with only a few moist crumbs attached, or completely clean. Avoid opening the oven door too frequently during the first 40 minutes of baking to prevent the loaf from sinking.
- **Pan Preparation:** Ensure your loaf pan (typically 9×5 inches) is thoroughly greased and floured, or lined with parchment paper, especially for easier removal.
The Ultimate Crumb Muffins Recipe
This crumb muffin recipe is designed for both ease and incredible flavor, ensuring a soft interior, a rich taste, and that signature crunchy topping that everyone adores. Get ready to bake a batch that will disappear as quickly as you make them!
Crumb Muffins
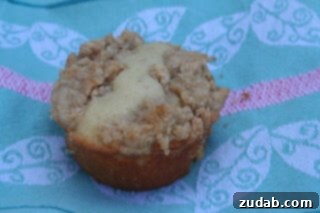
My husband is usually not overtly enthusiastic about muffins, preferring German or chocolate chip pancakes. Yet, he absolutely devoured these Crumb Muffins. Their irresistible crunch and moist texture are simply unforgettable!
Want to save this recipe?
Get this sent to your inbox, plus receive new recipes from us every week!
Ingredients
Crumb Topping
- 1/3 Cup Granulated Sugar, 2 2/3 ounces
- 1/3 Cup Dark Brown Sugar, 2 2/3 ounces
- 3/4 teaspoon Ground Cinnamon
- 1/8 teaspoon Table Salt
- 8 Tablespoons Unsalted Butter, 1 stick, melted and still warm
- 1 3/4 Cups Cake Flour, 7 ounces
Muffins
- 1 1/4 Cups Cake Flour, 5 ounces
- 1/2 Cup Granulated Sugar, 3 1/2 ounces
- 1/4 teaspoon Baking Soda
- 1/4 teaspoon Table Salt
- 6 Tablespoons Unsalted Butter, 3/4 stick, cut into 6 pieces, softened but still cool
- 1 Large Egg
- 1 Large Egg Yolk
- 1 teaspoon Vanilla Extract
- 1/3 Cup Buttermilk
- Confectioners’ Sugar for Dusting
Instructions
For the Topping
- Whisk granulated sugar, dark brown sugar, cinnamon, salt, and melted butter in a medium bowl until thoroughly combined.
- Add cake flour to the mixture and stir with a rubber spatula or wooden spoon until it forms a thick, cohesive dough that resembles large crumbs.
- Set the crumb topping aside to cool to room temperature, which should take approximately 10 to 15 minutes. This step is important for achieving the perfect crumb texture.
For the Muffins
- Adjust your oven rack to the upper-middle position and preheat the oven to 325 degrees Fahrenheit (160 degrees Celsius).
- Line a standard-sized 12-cup muffin pan (each cup typically has a 1/2 cup capacity) with paper baking-cup liners. If baking without liners, ensure your tin is thoroughly greased as per the tips above.
- In the bowl of a stand mixer fitted with a paddle attachment, combine cake flour, granulated sugar, baking soda, and table salt on low speed until just mixed.
- With the mixer still running at low speed, add the softened butter pieces one at a time. Continue beating until the mixture resembles moist crumbs, ensuring no visible butter chunks remain. This process usually takes 1 to 2 minutes.
- Add the large egg, large egg yolk, vanilla extract, and buttermilk to the batter. Increase the mixer speed to medium-high and beat until the mixture becomes light and fluffy, about 1 minute. Scrape down the sides of the bowl once if necessary to ensure everything is well incorporated.
- Using a 1/4-cup measure or an ice cream scoop, divide the muffin batter evenly among the prepared muffin cups. Use a small rubber spatula to gently spread the batter into an even layer in each cup.
- Break apart the cooled crumb topping into large, pea-sized pieces. Evenly spread these crumbs over the batter in each muffin cup (approximately 1/4 cup of crumbs per muffin), starting with the edges and working your way towards the center. Be careful not to press the crumbs into the batter.
- Bake the muffins for about 20 minutes, or until the crumb topping is golden brown and a wooden skewer inserted into the center of a muffin comes out clean.
- Cool the muffins in the pan for 5 minutes before transferring them to a wire rack to cool completely for at least 20 minutes. This allows them to set properly.
- Just before serving, dust the cooled muffins generously with confectioners’ sugar for an elegant finish and an extra touch of sweetness.
Recipe Notes for Perfect Muffins
- The Importance of Cake Flour: Do not be tempted to substitute all-purpose flour for the cake flour in this recipe. Cake flour has a lower protein content, which results in a softer, more tender crumb in your muffins. Using all-purpose flour will likely yield a drier and tougher muffin.
- Buttermilk Substitute: If buttermilk is not readily available, you can easily make your own substitute. Simply combine an equal amount of regular milk (dairy or non-dairy) with one tablespoon of lemon juice or white vinegar. Let it sit for 5-10 minutes until it slightly curdles, then use as directed. Plain, low-fat yogurt can also be substituted cup for cup.
- Crumb Topping Technique: When applying the crumb topping, remember to break it into varied, larger pieces to ensure a delightful texture. Crucially, avoid pushing the crumbs into the batter; simply sprinkle them gently on top. This allows the crumbs to bake into a distinct, crunchy layer.
- Storage for Leftovers: Cooled leftovers can be wrapped tightly in plastic wrap or stored in an airtight container at room temperature for up to 2 days, or refrigerated for up to a week. For longer storage, freeze them as detailed in our storage tips above.
- Doneness Test: The toothpick test is your best friend. Make sure it comes out clean or with only a few moist crumbs, indicating the muffins are fully baked but still moist.
Nutrition Information (Approximate)
Serving: 1g, Calories: 322kcal, Carbohydrates: 43g, Protein: 5g, Fat: 15g, Saturated Fat: 9g, Polyunsaturated Fat: 1g, Monounsaturated Fat: 4g, Trans Fat: 1g, Cholesterol: 66mg, Sodium: 113mg, Potassium: 60mg, Fiber: 1g, Sugar: 20g, Vitamin A: 462IU, Vitamin C: 1mg, Calcium: 27mg, Iron: 1mg
Nutrition information is automatically calculated, so should only be used as an approximation.
Crumb Muffin Variations to Explore
While the classic crumb muffin is a showstopper on its own, its versatile nature makes it perfect for creative variations. Don’t hesitate to experiment with these ideas to find your next favorite flavor combination:
- Berry Bliss: Fold in 1 cup of fresh or frozen blueberries (do not thaw) or chopped raspberries into the muffin batter just before scooping. The burst of fruit complements the sweet crumb topping beautifully.
- Zesty Lemon: Add 1-2 teaspoons of fresh lemon zest to both the muffin batter and a pinch to the crumb topping for a bright, tangy lift.
- Chocolate Chip Delight: For chocolate lovers, stir in 1/2 to 1 cup of mini chocolate chips into the muffin batter. They melt slightly during baking, creating gooey pockets of chocolate.
- Spiced Apple: Dice half an apple very finely and toss with a sprinkle of cinnamon before folding into the batter. This adds a lovely autumnal twist.
- Nutty Crunch Topping: Enhance the crumb topping by adding 1/4 cup of finely chopped pecans or walnuts to the mixture for an extra layer of texture and nutty flavor.
- Almond Extract Boost: Replace half of the vanilla extract with almond extract for a delicate, nutty aroma that pairs wonderfully with the sweet crumbs.
Serving Suggestions for Your Crumb Muffins
These glorious crumb muffins are fantastic on their own, but they can be even more delightful when paired with the right accompaniments:
- Coffee or Tea Companion: A warm crumb muffin is the quintessential partner for your morning coffee or afternoon tea. The rich flavors complement each other perfectly.
- Glass of Milk: For a simple, comforting treat, serve them with a cold glass of milk, especially if you’re enjoying them for breakfast or a snack.
- Fruit Platter: Pair them with a fresh fruit salad or a bowl of berries for a balanced breakfast or brunch spread.
- Yogurt Parfait: Crumble a muffin over a yogurt parfait for an indulgent twist on a healthy breakfast, adding crunch and sweetness.
- Warm with Butter: While they are moist and flavorful on their own, a freshly warmed muffin with a pat of softened butter or a dollop of fruit jam can be incredibly delicious.
These crumb muffins are more than just a recipe; they’re an experience. They bring warmth, comfort, and undeniable deliciousness to any occasion. From the soft, tender cake to the rich, crunchy topping, every element works in harmony to create a truly irresistible treat. Don’t be surprised if these become the most requested item in your household!
Enjoyed this recipe? Leave a comment below!