
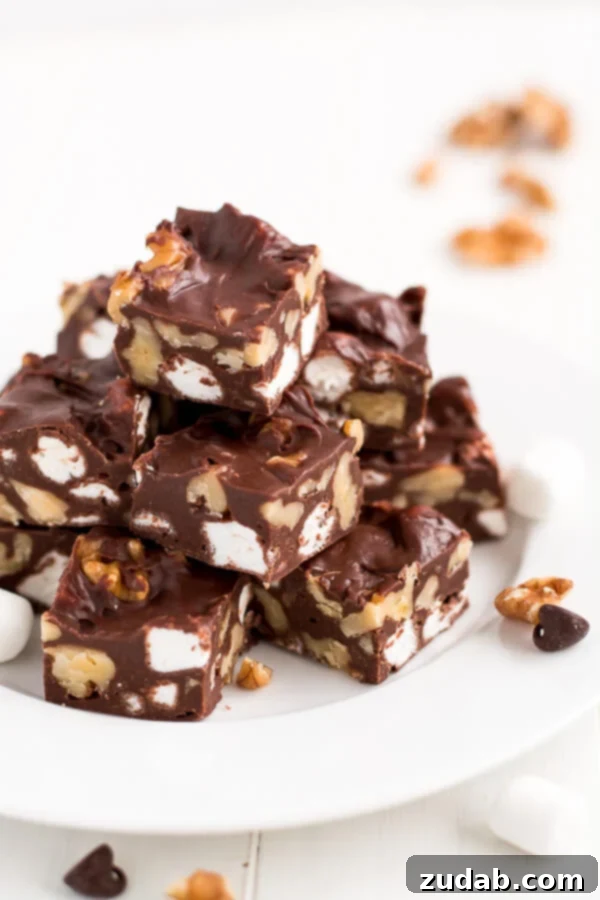
Rocky Road Fudge is a timeless treat, especially beloved during the bustling holiday season. Its rich, chocolatey base, studded with fluffy marshmallows and crunchy nuts, creates an irresistible combination that will leave everyone craving more. This outrageously delicious dessert is not only a crowd-pleaser but also incredibly simple to prepare, requiring just four basic ingredients and minimal effort. Get ready to delight your family and friends with a sweet confection that’s surprisingly easy to make and impossible to resist!
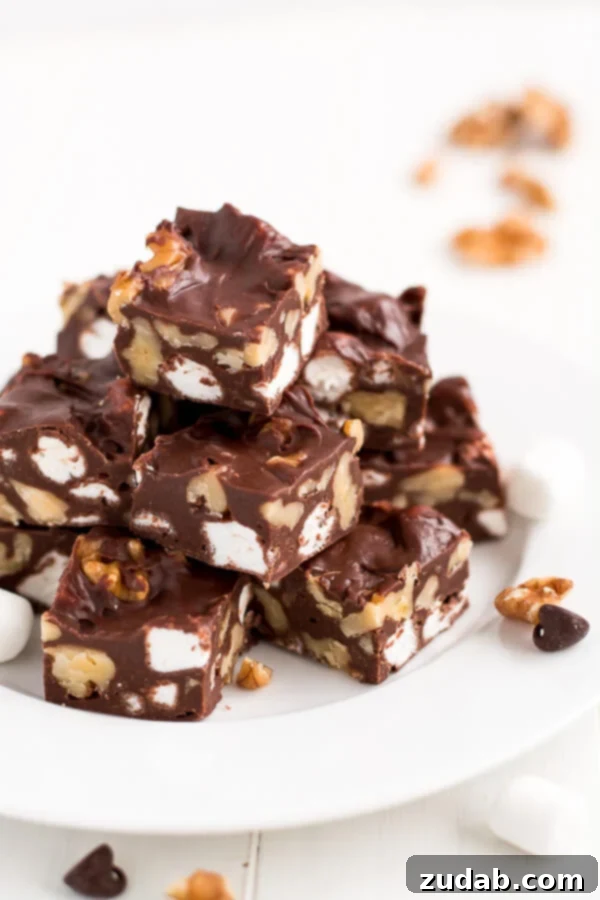
December often brings a whirlwind of activities: preparing for Christmas, attending festive parties, wrapping up school semesters, planning travel, and of course, shopping for and crafting thoughtful gifts. Amidst all this holiday hustle, finding time for elaborate baking can feel overwhelming. That’s precisely why this Rocky Road Fudge recipe is your perfect solution! It’s designed for those who are incredibly busy or simply desire a quick yet decadent homemade treat. You’ll be amazed that such a sensational dessert can be whipped up in less than 10 minutes of active prep time, making it an ideal candidate for any holiday gathering or a delightful impromptu indulgence.
The beauty of this recipe lies in its utter simplicity. With just four pantry staples and the convenience of a microwave, dessert-making truly doesn’t get any easier. Forget about complicated techniques, double boilers, or candy thermometers. The most challenging part, dare we say, is patiently waiting for the fudge to chill and set properly in the refrigerator, and perhaps keeping eager little hands (or even big ones!) from sneaking all the marshmallows before they make it into the mix! This fudge captures all the beloved flavors and textures of your favorite rocky road ice cream, but in a delightful, rich, and shareable solid form.
Essential Ingredients for Your Rocky Road Fudge
Crafting the perfect Rocky Road Fudge starts with selecting high-quality, yet simple, ingredients. The convenience factor of this recipe is significantly enhanced by the fact that all four components can be purchased weeks in advance, making it a fantastic last-minute holiday dessert option. Here’s a breakdown of what you’ll need to create this incredibly tasty fudge, along with some helpful tips for each:
- **Chocolate Chips:** We generally lean towards semi-sweet chocolate chips as they provide a balanced sweetness that beautifully complements the other ingredients. However, if you prefer a richer, more intense chocolate flavor, dark chocolate chips work wonderfully. For a sweeter profile, milk chocolate chips are also an excellent alternative. Feel free to experiment with your favorite chocolate variety to customize the taste to your liking.
- **Sweetened Condensed Milk:** This ingredient is the unsung hero of no-bake fudge, providing both sweetness and a smooth, creamy texture without the need for complex sugar cooking. We consistently use Eagle Brand, as it reliably delivers the best consistency and flavor, ensuring your fudge turns out perfectly every time.
- **Mini Marshmallows:** These soft, pillowy treats are essential for the classic rocky road texture. One standard 10oz bag of mini marshmallows is typically sufficient. For an extra touch of festive color, you could even seek out holiday-themed mini marshmallows if available. Remember to fold them in gently to prevent them from melting completely into the warm chocolate.
- **Walnuts:** Roughly chopped walnuts add a delightful crunch and nutty depth that is characteristic of rocky road. The “roughly chopped” aspect is key; you want noticeable pieces, not finely ground nuts.
For precise measurements of each ingredient, please refer to the comprehensive recipe card located further down on this page.
Crafting Your Easy Rocky Road Fudge: Step-by-Step Guide
Prepare to be amazed, as this truly might be the easiest fudge recipe you’ll ever encounter! Not only is it unbelievably simple, but it’s also a fantastic no-bake dessert, eliminating the need for an oven, a finicky double boiler, or even a candy thermometer. For many, quick and straightforward recipes are an absolute lifesaver, especially during the busy holiday season. Follow these basic steps to create your perfect batch:
- Prepare Your Pan: Begin by lining a 9×9 inch baking pan with aluminum foil. This step is crucial for easy removal of the fudge once it’s set. Lightly grease the foil with butter or a non-stick cooking spray. This prevents sticking and ensures clean, effortless slices later.
- Melt the Chocolate: In a microwave-safe bowl, combine your chocolate chips and sweetened condensed milk. Microwave the mixture for 1 minute. After the initial minute, stir well. Continue to microwave in short 15-second increments, stirring thoroughly after each interval, until the chocolate is fully melted and the mixture becomes smooth and glossy. Be careful not to overheat the chocolate, as this can cause it to seize.
- Fold in Goodies: Once your chocolate mixture is smooth, gently fold in the mini marshmallows and roughly chopped walnuts. Work quickly but carefully to ensure even distribution without melting the marshmallows too much. You want distinct pieces of marshmallow and nut throughout the fudge.
- Chill to Perfection: Pour the rich, chunky mixture into your prepared pan, spreading it evenly with a spatula. Place the pan in the refrigerator and allow it to chill for at least 2 hours. This crucial chilling period ensures the fudge sets properly, making it firm enough to slice beautifully. For best results, overnight chilling is often ideal.
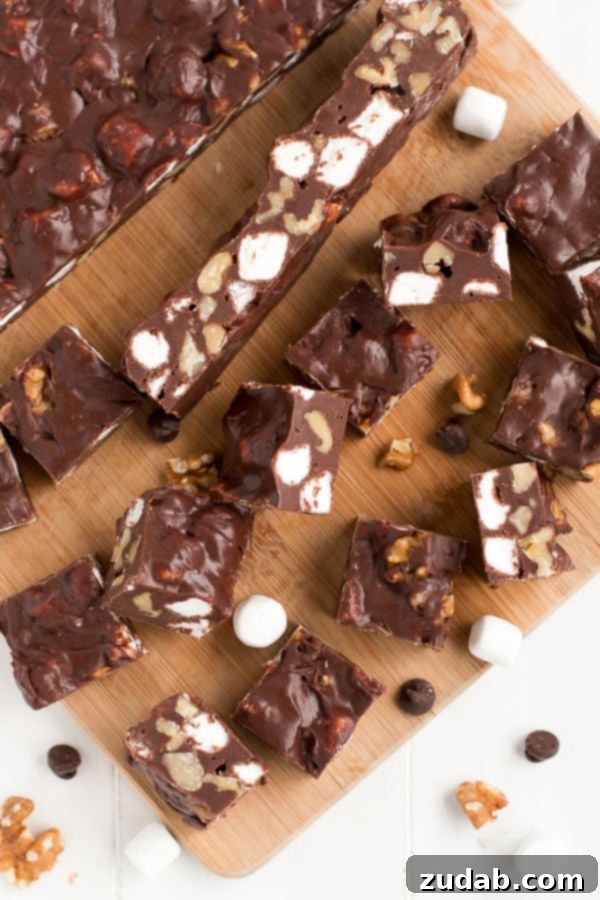
- Slice and Serve: Once the fudge is completely set, lift it out of the pan using the foil edges. Peel away the foil, then slice the fudge into desired squares using a sharp knife. Serve immediately and watch it disappear!
You can find the complete, detailed recipe, including precise measurements and any additional tips, in the recipe card at the conclusion of this post. Feel free to save or print the recipe from there for future reference.
Frequently Asked Questions About Rocky Road Fudge
Can I Double This Rocky Road Fudge Recipe for a Larger Pan?
Absolutely! This recipe is incredibly versatile and scales up beautifully. If you’re preparing fudge for a big holiday party, a school bake sale, or simply want to share generous portions with neighbors and friends as homemade Christmas gifts, doubling the recipe is highly recommended. For a doubled batch, simply use a standard 9×13 inch baking pan instead of the 9×9 inch. All other steps remain the same, though you might need to extend the chilling time slightly to ensure it sets completely.
What Nuts Can I Substitute for Walnuts in Rocky Road Fudge?
While walnuts are a classic choice for Rocky Road Fudge, you have plenty of delicious alternatives if you prefer a different flavor or texture, or if you simply have other nuts on hand. Excellent substitutes include:
- Pecans: Offer a buttery, slightly sweeter flavor that pairs wonderfully with chocolate.
- Cashews: Provide a milder, creamier crunch.
- Almonds: Can be used slivered, sliced, or chopped for a distinct flavor and firmer bite.
- Peanuts: Bring a classic salty-sweet dynamic, especially if roasted.
- Black Walnuts: For a more intense, earthy walnut flavor.
Feel free to mix and match or use a single preferred nut to customize your fudge. Just be sure they are roughly chopped to achieve the signature rocky road texture.
Why Does My Fudge Sometimes Turn Out Grainy?
Grainy fudge is a common issue, but fortunately, it’s usually preventable, especially with no-bake recipes. The primary culprit behind grainy fudge is the formation of large sugar crystals. In traditional cooked fudge, this happens if the sugar isn’t fully dissolved or if the mixture is stirred too much while cooling. For microwave fudge like this Rocky Road recipe, graininess is less common but can still occur if:
- The chocolate and condensed milk mixture is overcooked or melted too quickly at a high temperature, causing sugar crystals to form prematurely.
- The mixture is not stirred until completely smooth *before* adding the marshmallows and nuts.
To avoid graininess with this simple recipe, ensure you microwave in short intervals and stir thoroughly until the chocolate is perfectly smooth and integrated with the condensed milk before incorporating the solid ingredients. Allowing the fudge to cool undisturbed in the refrigerator is also key to a smooth finish.
Can I Use Different Types of Marshmallows?
Mini marshmallows are ideal because they disperse evenly and provide small bursts of chewy sweetness. However, if you only have large marshmallows, you can definitely chop them into smaller, bite-sized pieces before folding them into the chocolate mixture. Just ensure they are fresh for the best texture.
What Are Some Fun Variations for Rocky Road Fudge?
This basic recipe is a fantastic canvas for creativity! Here are a few ideas to customize your Rocky Road Fudge:
- Nutty Remix: Try a combination of different nuts, or add a sprinkle of toasted coconut flakes for an extra layer of flavor.
- Candy Crush: Mix in crushed candy canes for a festive peppermint rocky road, or add mini chocolate candies for extra sweetness and texture.
- Dried Fruit Delight: Incorporate chopped dried cranberries, cherries, or apricots for a chewy, fruity twist.
- Spice It Up: A pinch of cinnamon, chili powder, or even a tiny amount of cayenne can add an unexpected and delicious warmth to the chocolate.
- Extract Elegance: A splash of vanilla extract (beyond what’s in the condensed milk), almond extract, or even a coffee extract can elevate the flavor profile.
Storing and Freezing Rocky Road Fudge
Proper storage is essential to maintain the freshness and delightful texture of your homemade Rocky Road Fudge. Store any leftover fudge in an airtight container in the refrigerator. When stored correctly, it will retain its quality and flavor for a good 2-3 weeks, making it perfect for preparing ahead of time or enjoying over an extended period.
For even longer enjoyment, this fudge freezes exceptionally well. To freeze, wrap individual pieces tightly in plastic wrap, then place them in a freezer-safe bag or an airtight container. When you’re ready to enjoy a frozen treat, simply remove the desired number of pieces from the freezer and allow them to sit at room temperature for approximately two hours to thaw. Frozen Rocky Road Fudge can maintain its excellent quality for several months, ensuring you always have a delightful sweet treat on hand.
Indulge yourself and your loved ones with this truly decadent and remarkably easy-to-make Rocky Road Fudge. With its luxurious blend of rich chocolate, satisfying crunch from the nuts, and the delightful chewiness of fluffy marshmallows, it stands out as the ultimate treat for satisfying any sweet tooth. Whether you’re making it for a special occasion or just a cozy night in, this fudge promises pure delight in every bite.
More Candy Recipes You’ll Love:
- Chocolate Covered Coconut Balls
- Chocolate Fudge
- Oreo Peanut Butter Truffles
- White Chocolate Peppermint Cream Cheese Mints
- Salted Caramel Pretzel Snaps
- Red Velvet Truffles
- Salted Milk Chocolate Homemade Caramels
- 6 Minute Microwave Caramels
- Twix Ritz
- Chocolate Peanut Butter Truffles
- All ourCANDY RECIPES here!
Rocky Road Fudge
By Sweet Basil
Prep Time: 3 minutes
Total Time: 2 hours 3 minutes (includes chilling)
Servings: 36 pieces
Rocky Road Fudge is a classic for the holiday season and you won’t be able to stop eating it! Outrageously delicious, super easy and only 4 ingredients needed! Your family will love it!
Ingredients
- 2 Cups Chocolate Chips (semi-sweet recommended)
- 1 Can Sweetened Condensed Milk (14 ounce)
- 2 ½ Cups Miniature Marshmallows
- 1 ½ Cups Walnuts (roughly chopped)
(Measurements are in US Customary)
Instructions
- Line a 9×9 inch pan with foil and then lightly grease with butter or cooking spray.
- Place chocolate chips and sweetened condensed milk in a microwave-safe bowl. Microwave for 1 minute.
- Stir the mixture well, then continue to microwave in 15-second increments, stirring after each, until the chocolate is fully melted and smooth.
- Gently mix in the miniature marshmallows and roughly chopped walnuts. Pour the mixture into the prepared pan, spreading evenly.
- Place the pan in the refrigerator for at least 2 hours, or until the fudge is completely set. Then, cut into squares.
- Store any leftover fudge in an airtight container in the fridge.
Recipe Notes
For best results, allow the fudge to chill undisturbed for the full 2 hours (or longer) to ensure perfect setting. This fudge can also be frozen for extended storage.
Nutrition (Approximate per 1 piece)
Serving Size: 1 piece
- Calories: 154 kcal
- Carbohydrates: 16g
- Protein: 2g
- Fat: 9g
- Saturated Fat: 4g
- Polyunsaturated Fat: 3g
- Monounsaturated Fat: 2g
- Trans Fat: 1g
- Cholesterol: 5mg
- Sodium: 18mg
- Potassium: 137mg
- Fiber: 1g
- Sugar: 13g
- Vitamin A: 37 IU
- Vitamin C: 1mg
- Calcium: 44mg
- Iron: 1mg
Nutrition information is automatically calculated and should only be used as an approximation.
Like this recipe? Leave a comment below!