
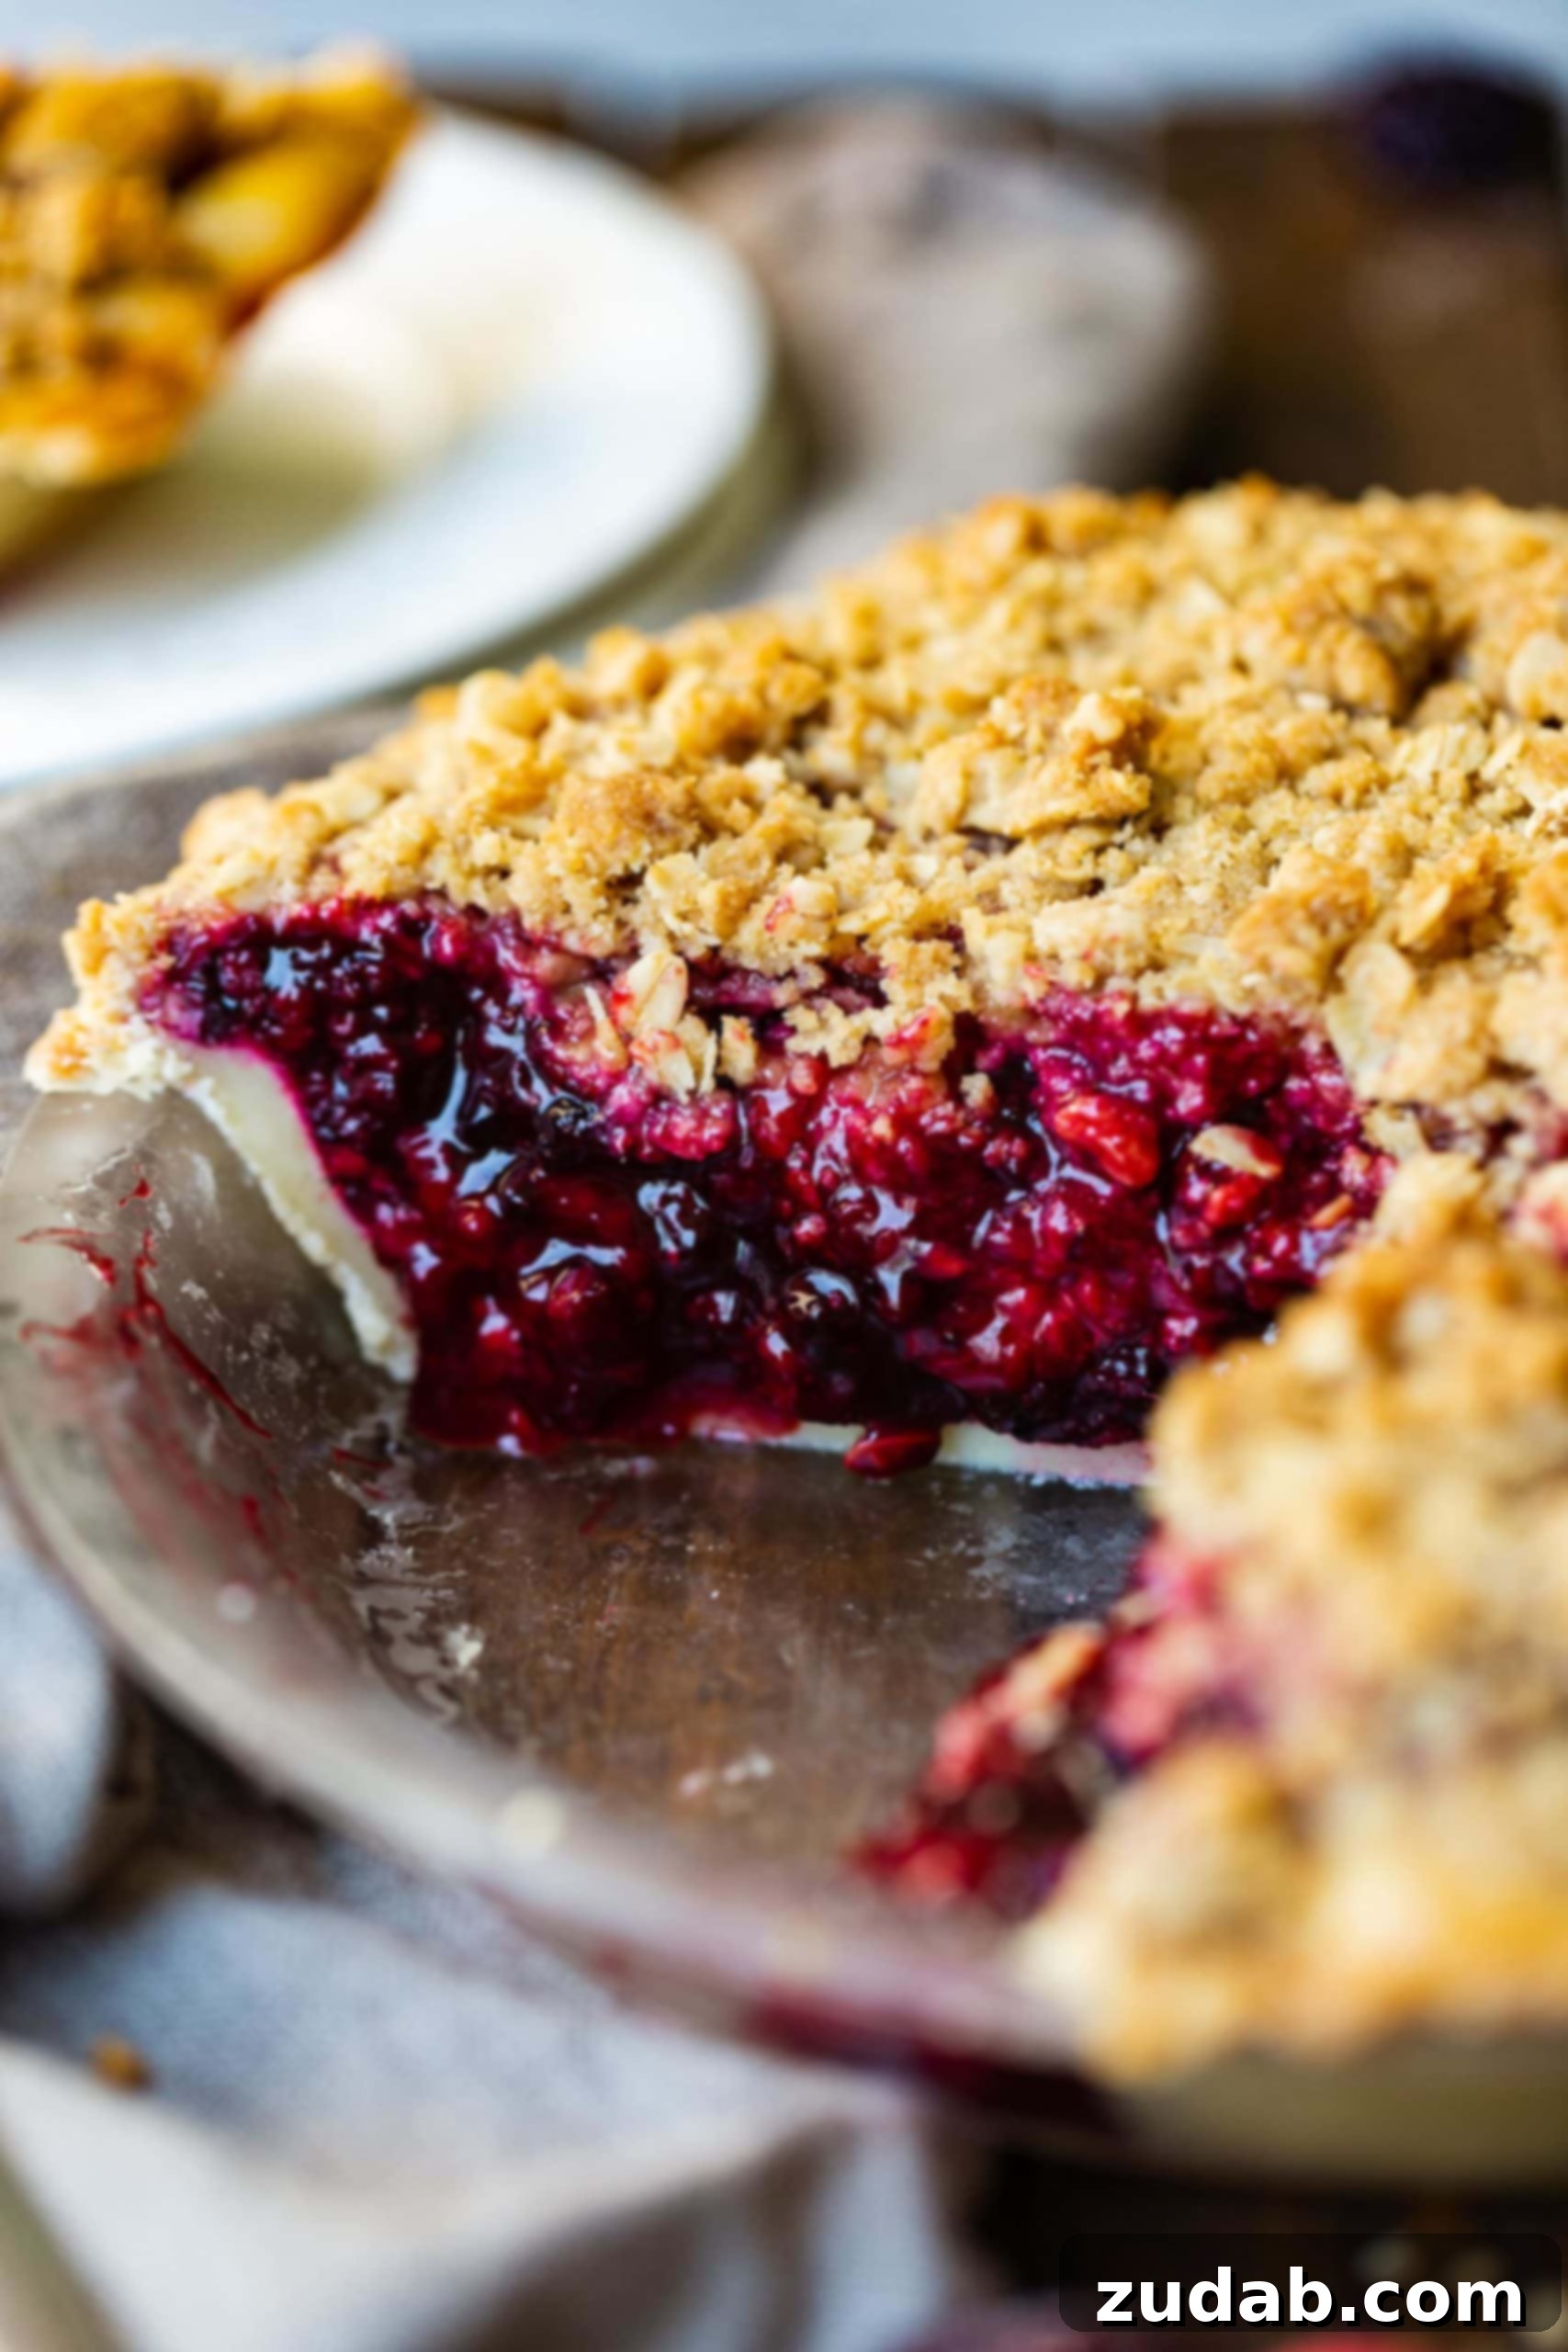
Indulge in a truly extraordinary dessert experience with our **Dutch Crumb Topping Mixed Berry Pie**. This recipe is a delightful fusion, marrying the vibrant, luscious filling of our acclaimed Razzleberry Pie with the irresistibly crunchy, buttery **streusel** topping from our classic Dutch Apple Pie. It’s a harmonious blend, offering the best of both worlds – imagine the sweet, juicy burst of a berry crisp, but encased within a beautifully flaky pie crust, culminating in a dessert that’s truly a cut above the rest.
The magic of streusel topping is undeniable; it adds an unparalleled texture and flavor dimension that transforms any pie into a masterpiece. Our love for this crumbly delight led to an inevitable creation: smashing two of our favorite pie recipes into one. The result is nothing short of spectacular. We’ve combined our rich **triple berry pie** filling with the signature Dutch apple pie streusel, giving birth to what we confidently declare as the new reigning champion of pies. One bite and you’ll understand—it is absolute heaven!
Growing up, my dessert allegiance was firmly with cookies. The sheer joy of a plate piled high with chocolate chip or oatmeal cookies was unmatched. Pie, while appreciated, simply didn’t hold the same allure. However, as the years have passed, I’ve discovered a profound truth: taste buds evolve. What I once craved has shifted, and now, I can honestly say I can’t imagine life without pie. This Dutch Mixed Berry Pie, with its perfect balance of sweet and tart, and that incredible streusel, is precisely why.
Unveiling the Essential Ingredients for Our Dutch Mixed Berry Pie
Creating this stunning Dutch Mixed Berry Pie doesn’t require an extensive list of obscure ingredients. In fact, you’ll likely have most of them already stocked in your pantry! The stars of the show are, of course, the vibrant mixed berries, complemented by foundational baking staples. Here’s a detailed look at what you’ll need to assemble this culinary delight:
- For the Flaky Pie Crust: A truly exceptional pie begins with a perfect crust. Our recipe calls for essential baking components:
- All-Purpose Flour: The structural backbone of your crust.
- Unsalted Butter: Crucial for achieving that desirable flaky texture and rich flavor. Keep it very cold!
- A Pinch of Salt: To balance the sweetness and enhance overall flavor.
- A Hint of Sugar: Just enough to complement the crust’s richness.
- Ice Water: The binding agent that brings the dough together without overworking the gluten.
- For the Irresistible Mixed Berry Filling: This pie shines with a medley of fresh, juicy berries.
- Fresh Raspberries: Offering a delicate sweetness with a hint of tartness, their vibrant color is also key.
- Plump Blackberries: Providing a deeper, earthy sweetness and a satisfying chew.
- Sweet Blueberries: Adding a mellow, fruity counterpoint that ties all the berry flavors together beautifully.
- Granulated Sugar: Berries can vary greatly in tartness. We recommend starting with 1/2 cup and adjusting incrementally, 1 tablespoon at a time, to achieve your preferred sweetness. Tasting is key!
- Cornaby’s Ultra Gel: Our absolute secret weapon for a perfectly thickened pie filling. This remarkable ingredient creates a clear, glossy, and beautifully set filling without any starchy taste. We’ll provide excellent substitutes if Ultra Gel isn’t readily available.
Crafting the Ultimate Streusel Topping
The streusel is what truly elevates this berry pie, giving it that signature “Dutch” touch. Each ingredient plays a vital role in creating its irresistible crumbly texture and warm, inviting aroma:
- All-Purpose Flour: The base for our streusel, creating its crumbly foundation.
- Ground Cinnamon: Infuses the topping with a comforting, warm spice that perfectly complements the berries.
- Old-Fashioned Oats: These are essential for the streusel’s hearty texture and delightful chewiness, providing a pleasant contrast to the soft filling.
- Light Brown Sugar: Its molasses content provides depth of flavor and stickiness, helping the streusel to clump together beautifully and caramelize during baking.
- Fine Salt: A small but mighty addition, it enhances all the other flavors and balances the sweetness of the sugar and berries.
- Cold Unsalted Butter: The key to a proper streusel. When cut into the dry ingredients, it creates those distinct, rich, crumbly clusters.
Precise measurements for each of these ingredients can be found in the comprehensive recipe card located at the conclusion of this post.
Mastering the Art of Dutch Mixed Berry Pie: A Step-by-Step Guide
Crafting this incredible Dutch Mixed Berry Pie involves three distinct, yet harmonious components: the flaky crust, the vibrant berry filling, and the golden streusel topping. For an in-depth tutorial on achieving the perfect foundation, please refer to our dedicated favorite pie crust recipe post.
Preparing the Flawless Pie Crust
A cold, well-prepared crust is paramount for a flaky, tender base that holds up to the juicy filling. Follow these simple steps for success:
- Once you’ve prepared your double pie crust dough, divide it in half. You’ll only need one half for this recipe. Gently roll out one half of the dough and carefully fit it into a standard 9-inch pie plate. Ensure it’s evenly distributed and has a neat edge.
- To prevent sticking and maintain its cold temperature, cover the pie crust in the plate tightly with plastic wrap. Place it in the refrigerator to chill while you prepare the filling and topping. This step is crucial for preventing a soggy crust.
- The remaining half of the dough is a bonus! Wrap it securely in plastic wrap, then place it in a resealable freezer bag. Store it in the freezer for up to three months, ready for your next spontaneous pie-baking adventure.
Crafting the Luscious Berry Filling
The heart of our pie is its sweet, tart, and beautifully thickened berry filling. Patience is key here to allow the flavors to meld and the juices to thicken perfectly:
- Begin by preheating your oven to 375°F (190°C). This ensures it’s ready for baking as soon as your pie is assembled.
- In a medium saucepan, combine about three-quarters of your mixed berries (raspberries, blackberries, and blueberries), the initial 1/2 cup of sugar, and the Ultra Gel.
- Over medium-low heat, gently fold the ingredients together using a rubber spatula. Avoid vigorous stirring, as we want the berries to retain some of their shape. As the berries warm, they will begin to release their juices, and the Ultra Gel will start to work its magic, thickening the mixture. Continue to cook until the filling visibly thickens. Remember to taste and adjust the sugar if your berries are particularly tart, adding one tablespoon at a time until desired sweetness is reached.
- Once the filling has reached the desired consistency, remove it from the heat. Allow the fruit mixture to cool completely. This cooling process is vital as it allows the filling to set further and prevents it from making your crust soggy when assembled.
Assembling the Irresistible Streusel Topping
This crumbly, golden topping is the hallmark of a Dutch pie, adding incredible texture and flavor. It’s surprisingly simple to prepare:
- In a large mixing bowl, combine all the dry ingredients for the topping: flour, cinnamon, old-fashioned oats, brown sugar, and salt. Mix thoroughly to ensure even distribution.
- Add the cold, unsalted butter, cut into small pieces. Using a pastry cutter or your fingertips, cut the butter into the dry ingredients. Continue until the mixture resembles coarse crumbs with some larger, pea-sized clumps. This ensures a wonderfully varied texture in your baked streusel. Avoid overmixing; some clumps are desirable.
Bringing It All Together: Pie Assembly and Baking
With all components ready, the final assembly is quick, leading you closer to a warm, fragrant pie:
- Once the cooked berry filling has completely cooled, gently stir in the remaining fresh berries (the one-quarter portion you set aside). This adds pockets of fresh fruit flavor and texture to the baked pie.
- Remove the chilled pie crust from the refrigerator. Carefully pour the prepared berry filling into the pie crust, spreading it evenly.
- Generously sprinkle the streusel topping all over the surface of the berry filling, ensuring good coverage. Don’t be shy; the more streusel, the better!
- Carefully transfer the pie to the preheated oven. Bake for 25 minutes. After this initial bake, loosely drape a sheet of aluminum foil over the top of the pie to prevent the streusel and crust edges from over-browning. Continue to bake for an additional 20-30 minutes, or until the filling is visibly bubbling in the center and the crust is golden brown.
- Remove the glorious pie from the oven and place it on a wire rack to cool completely. This step is crucial! Allowing the pie to cool entirely (ideally several hours or even overnight) ensures the filling fully sets, preventing it from running when sliced.
- For the ultimate treat, serve your cooled Dutch Mixed Berry Pie with a dollop of freshly whipped cream or a generous scoop of creamy vanilla ice cream. The contrast of warm pie and cold topping is simply divine.
Top Tips for Baking the Best Berry Pie
Achieving pie perfection is within reach with these expert tips:
- Maintain a Cold Crust: This is arguably the most important rule for a flaky pie crust. Keep your pie dough as cold as possible until it goes into the oven. Cold butter in the dough creates steam during baking, separating the layers of flour and resulting in that coveted flaky texture.
- Prevent Oven Spills: Berry pies are notorious for bubbling over, especially as the fruit juices heat up and expand. Always place your pie on a baking sheet lined with aluminum foil. This simple step will save you from a messy oven cleanup.
- Protect the Edges: If you notice the edges of your pie crust browning too quickly, loosely cover them with a strip of aluminum foil. This shields the delicate crust from direct heat, allowing the rest of the pie to catch up.
- Gauge Doneness with Bubbles: The tell-tale sign that your berry pie is perfectly baked is when the filling in the center is actively bubbling. This indicates that the fruit juices have thickened properly and the starches have fully gelatinized.
- Patience for Perfection: We know it’s hard to wait, but allowing the pie to cool completely is non-negotiable for a well-set filling. Resist the urge to cut into it too soon, or you’ll end up with a runny mess!
Can I Use Frozen Berries for This Recipe?
Absolutely, frozen berries can be a convenient alternative for this Dutch Mixed Berry Pie, especially when fresh berries are out of season or too costly. However, for the absolute best flavor and texture, fresh berries are always our top recommendation. If you opt for frozen, there are a few important considerations:
- Select Plain Frozen Fruit: Ensure you purchase only frozen fruit without any added syrups or sugars. These can significantly alter the sweetness and consistency of your filling.
- No Need to Thaw: Unlike some recipes, there’s no need to thaw the frozen berries beforehand. They will naturally thaw and release their juices as you cook them on the stovetop when preparing the filling. This gradual thawing helps to create a rich, flavorful berry “jam.”
- Adjust Thickener if Needed: Frozen berries tend to release more liquid than fresh ones. While our recipe’s thickener amount should generally suffice, be mindful of the filling’s consistency. If it seems too thin after cooking, you might add an additional teaspoon or two of Ultra Gel (or your chosen substitute) to achieve the desired thickness.
What Exactly is Ultra Gel? Your Pie Thickener Secret Weapon
Ultra Gel is a game-changer for pie makers. It’s a specialized, gluten-free, and non-GMO modified cornstarch that boasts incredible thickening properties. What sets it apart is its unique ability to be added directly to any liquid—whether hot or cold—for instant thickening, all without the undesirable starchy, chalky taste often associated with traditional flour or cornstarch.
Hands down, Ultra Gel is our preferred method for achieving perfectly set pie fillings. It’s truly a baker’s secret weapon, producing a clear, shiny, and vibrant fruit filling that looks as good as it tastes. Other thickeners can often leave your filling looking cloudy or opaque. The consistency is consistently smooth, and unlike other agents that can clump or lose their thickening power if overheated, Ultra Gel performs reliably every single time. While it might be a specialty item, it’s about the same price on Amazon as in many stores, making it easy to acquire. Trust us, once you try it, you’ll understand why it’s the best option around!
What Can I Use as a Substitute for Ultra Gel?
If Ultra Gel isn’t available or you prefer to use ingredients you already have on hand, don’t worry! There are several excellent substitutes that will still yield a delicious pie filling. Each comes with its own nuances, so pay attention to the specific instructions:
- Tapioca (Granulated or Instant): Tapioca is a fantastic alternative, creating a clear, slightly chewy filling. To thicken your pie filling with tapioca, it’s crucial to use a lower temperature during cooking. This allows the starches to properly open up and achieve gelatinization. Use the same amount of tapioca as Ultra Gel (1/4 cup) and stir it into the berries along with the sugar in step 4 of the filling preparation.
- All-Purpose Flour: Flour is a common thickener, though it’s generally not our first choice for fruit pies. You’ll typically need about 1.5 times more flour than other thickening agents. Be aware that flour can make the filling appear cloudy and may impart a slightly “floury” taste if not cooked thoroughly. It will work in a pinch, but aim for a smoother, clearer thickener if possible.
- Cornstarch: Our second-best choice after Ultra Gel. Cornstarch requires higher temperatures to thicken effectively. When preparing the filling, ensure you toss the cornstarch with the sugar first before adding it to the berries. This crucial step helps the cornstarch disperse evenly and prevents clumping during cooking. Cornstarch results in a fairly clear and smooth filling, avoiding the gummy texture or floury taste that can sometimes occur with plain flour.
Can You Freeze a Mixed Berry Pie?
Yes, this Dutch Mixed Berry Pie freezes beautifully! Freezing homemade pies is a wonderful way to prepare ahead for holidays, special occasions, or simply to enjoy a delicious treat whenever the craving strikes. For the best results, we highly recommend freezing the pie *before* baking and *without* the streusel topping.
Here’s how to properly freeze your pie:
- Prepare the pie crust and filling according to the recipe instructions.
- Pour the prepared berry filling into the unbaked pie crust.
- Place the assembled, unbaked pie (without the streusel topping) directly into the freezer. Let it freeze completely solid. This step helps the pie maintain its shape during wrapping.
- Once thoroughly frozen, wrap the pie tightly in several layers of plastic wrap, ensuring no air can reach the crust or filling.
- Follow with a layer of heavy-duty aluminum foil. This double layer of protection guards against freezer burn.
- Label the pie with the date and baking instructions. A frozen unbaked pie will keep exceptionally well for 3 to 6 months.
When you’re ready to bake your frozen pie:
- Remove the wrapped pie from the freezer.
- Prepare the streusel topping fresh while the oven preheats.
- Unwrap the frozen pie and sprinkle the freshly made streusel topping evenly over the frozen filling.
- Bake as instructed in the recipe, but be prepared to add an additional 15-20 minutes to the baking time, as you are starting with a frozen pie. Watch for the bubbling center and golden-brown crust as indicators of doneness.
Essential Tools for Your Berry Pie Baking Adventure
Having the right tools can make all the difference in achieving pie perfection. Here’s a list of kitchen essentials that will streamline your Dutch Mixed Berry Pie creation process:
- Rolling Pin: Indispensable for rolling out your pie dough to an even thickness and perfect circular shape.
- 9-inch Pie Dish: The vessel for your delicious creation. A ceramic or glass pie plate ensures even baking.
- Rubber Spatula: Ideal for gently folding the berry filling and scraping bowls clean.
- Large Mixing Bowls: You’ll need at least two – one for the streusel topping and one for the berry filling.
- Pastry Blender (or Pastry Cutter): Essential for cutting cold butter into the flour for both the pie crust and the streusel topping, ensuring a flaky texture.
- Measuring Cups and Spoons: For accurate ingredient measurement, crucial for successful baking.
- Saucepan: For cooking down the berries to create that perfectly thickened filling.
- Wire Cooling Rack: To allow your pie to cool completely and prevent a soggy bottom.
Whether you’re baking this **Dutch Mixed Berry Pie** for a festive Thanksgiving gathering, a cozy family dinner, or simply “just because,” you are guaranteed to adore the exquisite combination of tart, sweet berries and the crunchy, buttery **streusel topping**. For an elevated serving experience, we highly recommend pairing it with a generous dollop of freshly whipped cream or a scoop of rich vanilla ice cream. Each bite is a testament to homemade deliciousness!
Recipe: Dutch Mixed Berry Pie
By Sweet Basil
Prep Time: 10 mins
Cook Time: 45 mins
Total Time: 55 mins
Servings: 18 slices
Ingredients
For the Pie
- 1 Double Pie Crust (our favorite recipe here)
- 2 Pints (about 4 cups) Raspberries
- 2 Pints (about 4 cups) Blackberries
- 1 Pint (about 2 cups) Blueberries
- 1/2 – 3/4 Cup Granulated Sugar (adjust to taste)
- 1/4 Cup Cornaby’s Ultra Gel (see notes for substitutes)
For the Streusel Topping
- 1 Cup All-Purpose Flour
- 1 teaspoon Ground Cinnamon
- 1 1/2 Cups Old-Fashioned Oats
- 1 1/2 Cups Light Brown Sugar, packed
- 1/8 teaspoon Salt
- 3/4 Cup Unsalted Butter, cold and cubed
Instructions
- Prepare the pie crust: Roll out half of your double crust dough and fit it into a 9-inch pie plate. Cover with plastic wrap and chill in the fridge. Wrap the remaining half of the dough in plastic wrap, then place it in a freezer-safe bag and store it in the freezer for future use.
- Preheat the oven to 375°F (190°C).
- Prepare the berry filling: In a saucepan, combine 3/4 of the berries (reserving the remaining 1/4), 1/2 cup sugar, and Ultra Gel. Over medium-low heat, gently fold the berries. Cook until berries release juices and the mixture begins to thicken, stirring only occasionally to keep fruit intact. Taste and add more sugar, 1 tablespoon at a time, if berries are too tart. Remove from heat and allow to cool completely.
- Prepare the streusel topping: In a large bowl, mix together the flour, cinnamon, oats, brown sugar, and salt. Cut in the cold butter using a pastry cutter or your hands until well combined and crumbly with some larger clumps.
- Assemble the pie: Once the berry filling has cooled, gently stir in the reserved 1/4 of fresh berries. Pour the filling into the chilled pie crust.
- Evenly sprinkle the streusel topping over the berry filling.
- Bake the pie for 25 minutes. Then, loosely drape a piece of aluminum foil over the pie to prevent over-browning of the crust edges and streusel. Continue baking for another 20-30 minutes, or until the filling is bubbly in the center and the crust is golden brown.
- Remove the pie from the oven and cool completely on a wire rack on the counter. We strongly recommend allowing the pie to set overnight for the best results; this ensures the filling is perfectly set and won’t run when sliced. If you need to cool it faster, you can place it in the fridge, but allow it to come back to room temperature before serving.
Recipe Notes
- This pie can be assembled and frozen unbaked (without the streusel topping). A frozen pie will keep well for 3-6 months. When ready to bake, add fresh streusel and bake from frozen, increasing baking time by 15-20 minutes.
- If you can find marionberries (often in the freezer section), they make a fantastic addition or substitute for some of the other berries, offering a unique tart-sweet flavor.
Nutrition
Serving: 1 slice, Calories: 350kcal, Carbohydrates: 62g, Protein: 4g, Fat: 11g, Saturated Fat: 6g, Polyunsaturated Fat: 1g, Monounsaturated Fat: 3g, Trans Fat: 1g, Cholesterol: 20mg, Sodium: 63mg, Potassium: 253mg, Fiber: 8g, Sugar: 39g, Vitamin A: 381IU, Vitamin C: 27mg, Calcium: 55mg, Iron: 2mg
Nutrition information is automatically calculated and should only be used as an approximation.
We invite you to join our FREE Oh Sweet Basil NEWSLETTER and receive delightful, easy-to-follow recipes delivered directly to your inbox every single day!
When you create and enjoy one of our recipes, don’t forget to use the hashtag #ohsweetbasil on INSTAGRAM for a chance to be featured in our stories! FOLLOW OH, SWEET BASIL ON FACEBOOK | INSTAGRAM | PINTEREST | TWITTER FOR ALL OF OUR LATEST CONTENT, NEW RECIPES, AND heartwarming STORIES.
More Irresistible Fruit Pies You’re Sure to Love:
- Classic Peach Pie with Lattice Top
- The Perfect Razzleberry Pie
- Effortlessly Simple Blueberry Pie
- Summery Fresh Strawberry Pie
- Unique Lemon Jello Peach Pie
- Adorable Strawberry Rhubarb Pot Pies
- Creamy Sour Cream Peach Pie
- Comforting Homemade Apple Pie
- Decadent Dulce de Leche Banana Cream Pie
- Traditional Dutch Apple Pie