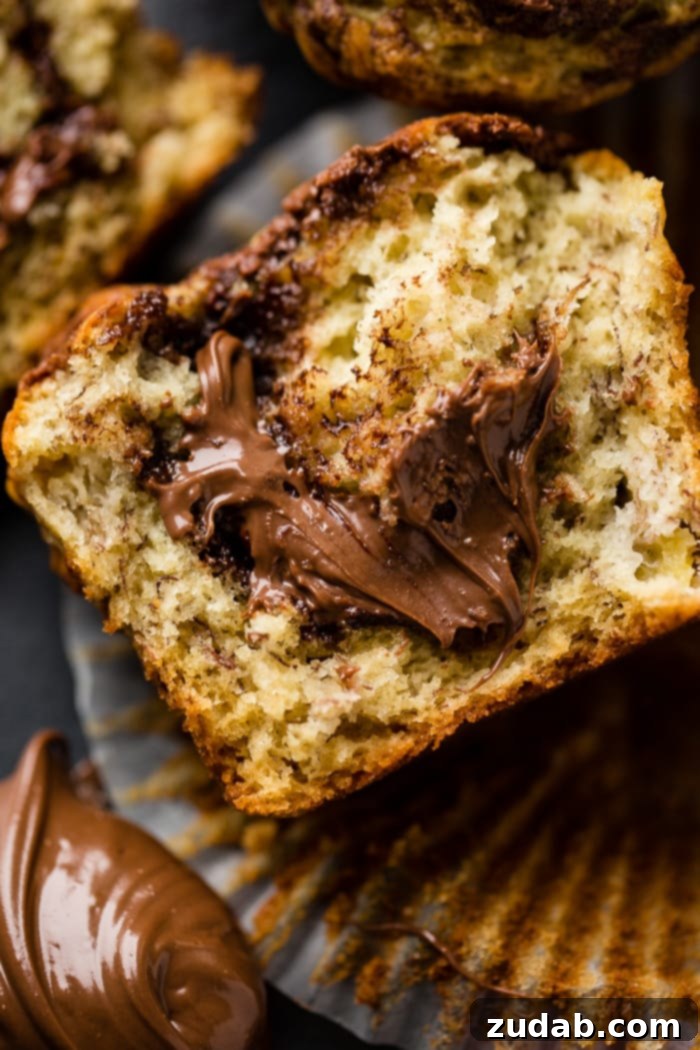
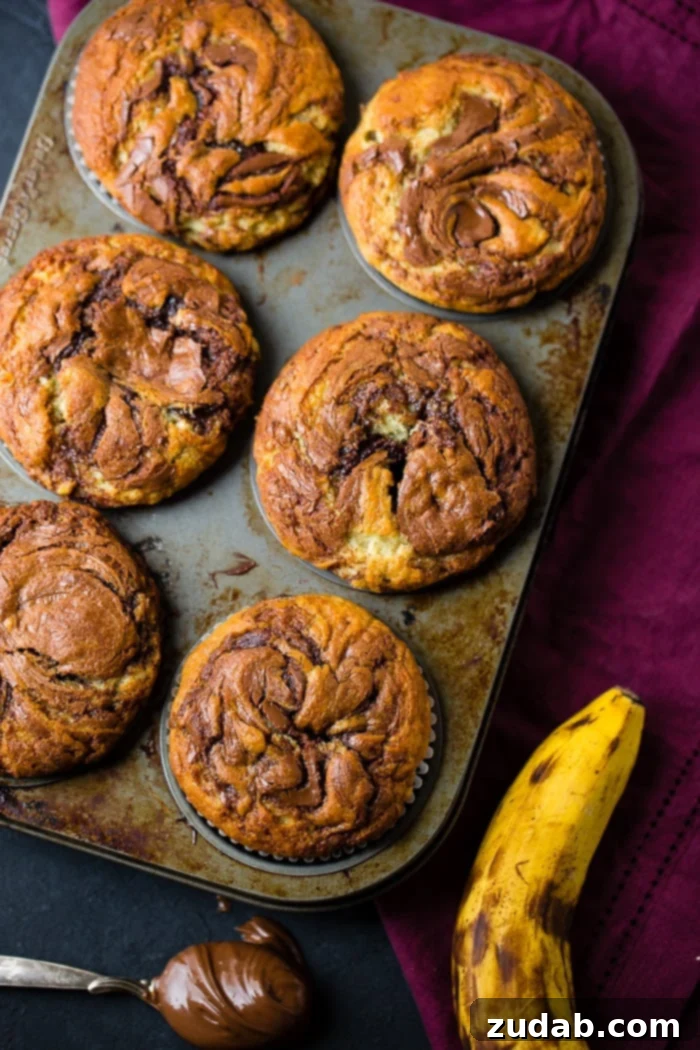
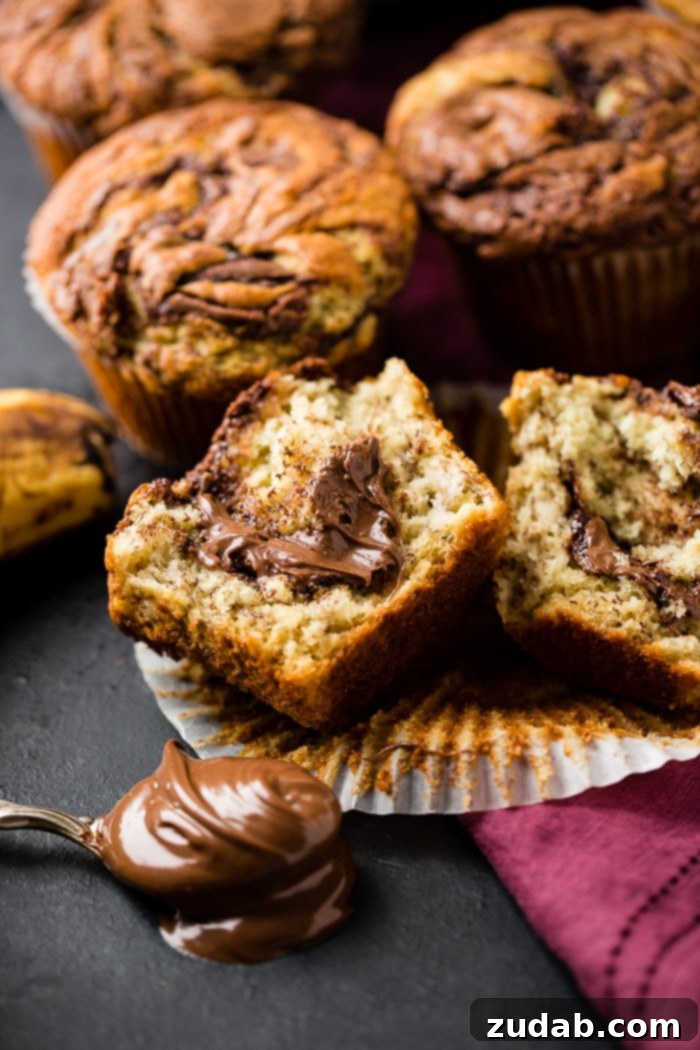
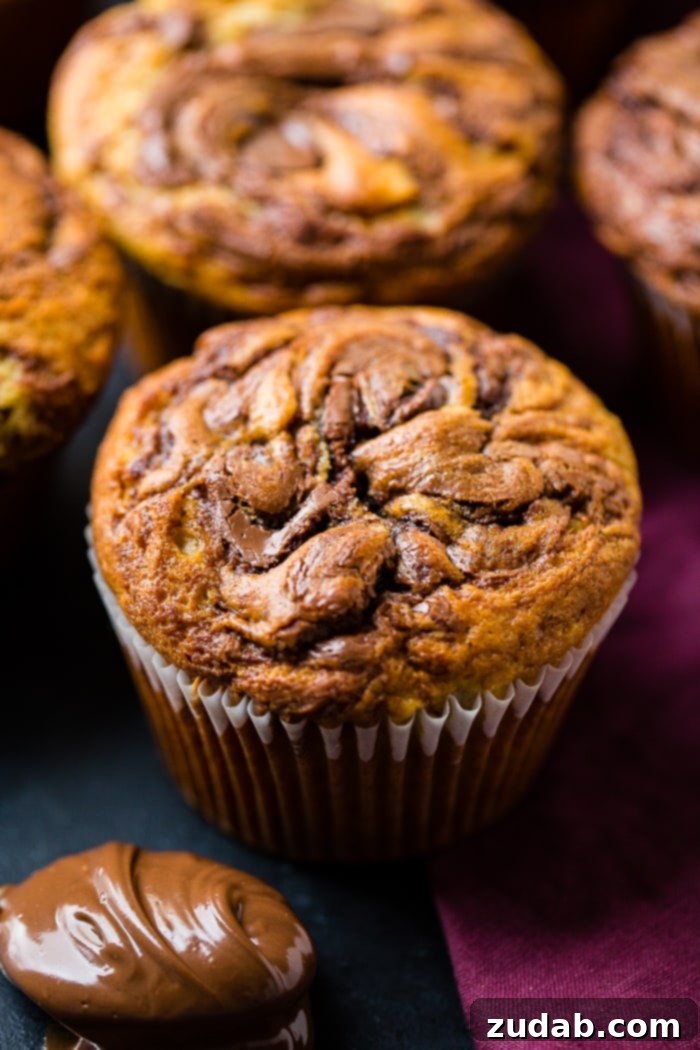
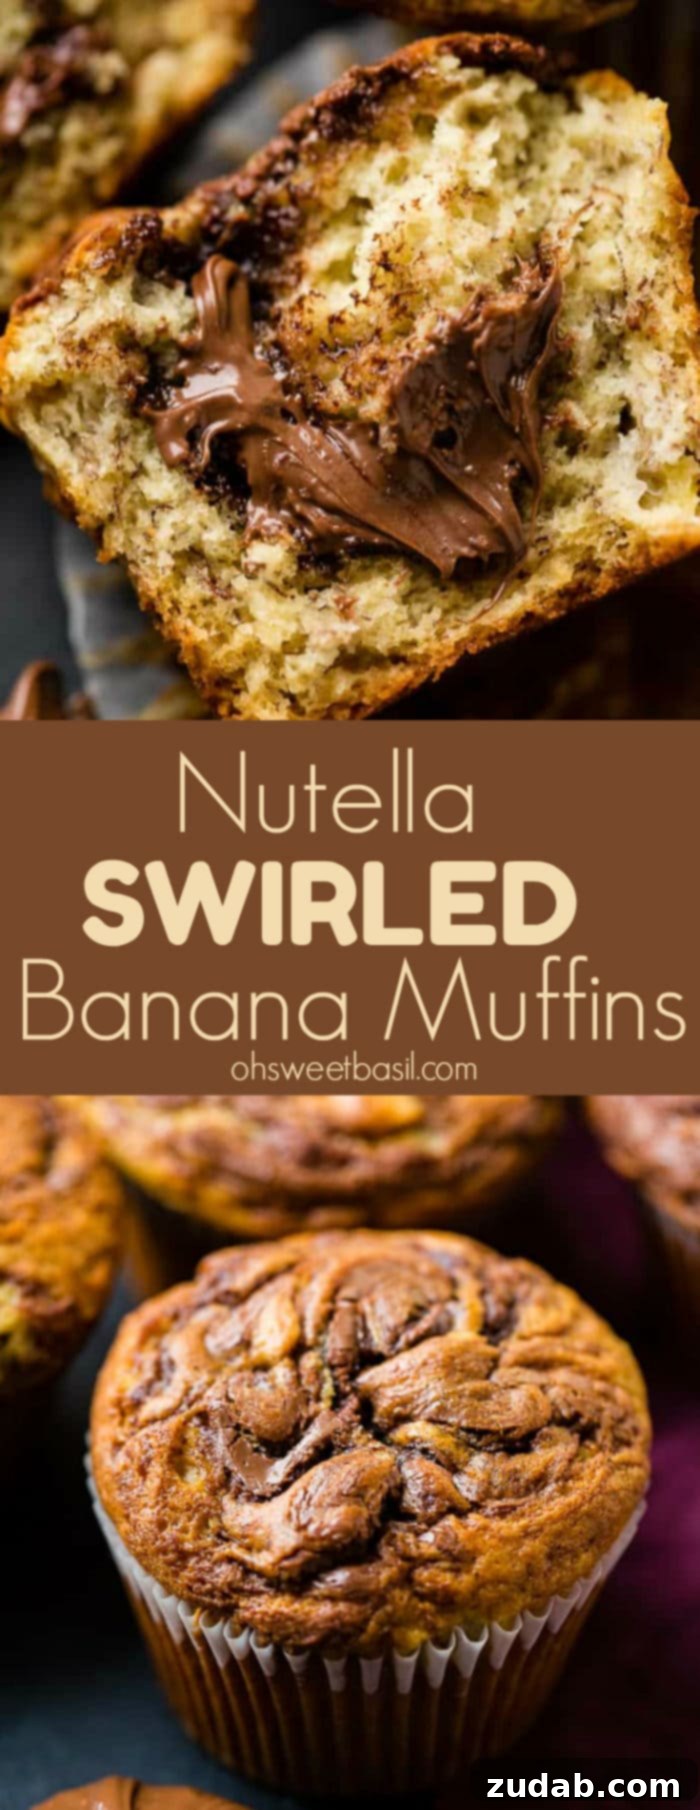
Prepare to experience a culinary masterpiece: our **Nutella Swirled Banana Muffins**, a delightful fusion of creamy Nutella and ripe, sweet bananas that creates pure magic in every bite. These aren’t just ordinary banana muffins; they’re generously stuffed with luscious Nutella and then artfully swirled on top, promising an unforgettable treat.
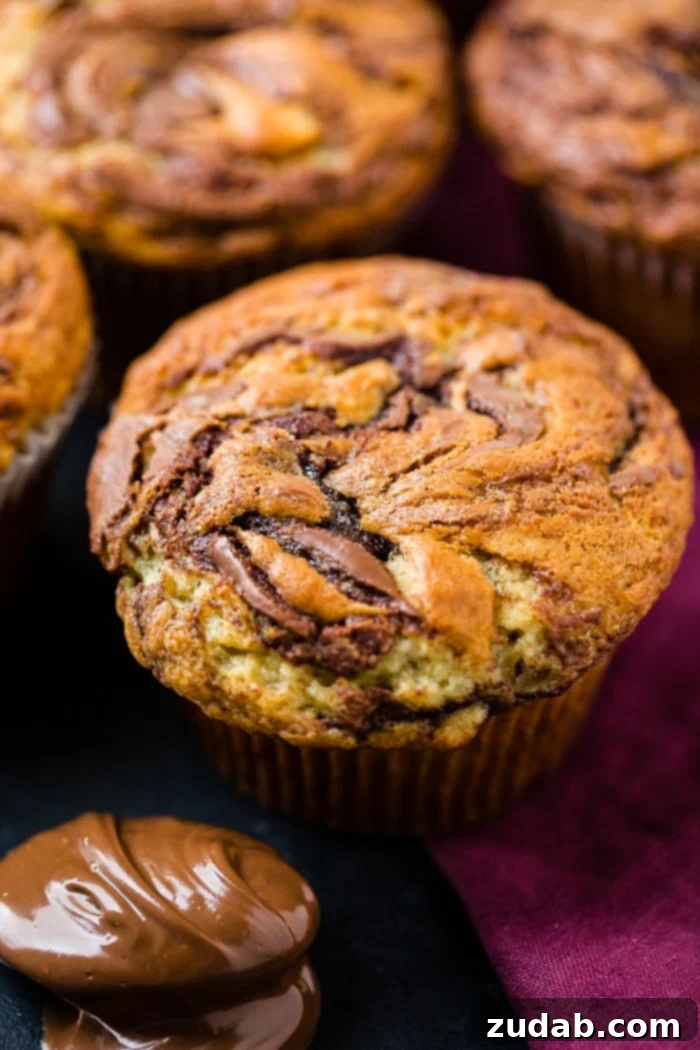
Have you ever encountered a dish so exquisite that you dread taking the final bite, knowing the experience will soon end? We certainly have, and these muffins fall squarely into that category! They redefine what a banana muffin can be – incredibly soft, remarkably moist, and elevated to an entirely new dimension of flavor by the decadent addition of Nutella. Once you’ve tasted our **Nutella Swirled Banana Muffins**, you’ll realize what you’ve been missing.
Why These Nutella Swirled Banana Muffins Are a Must-Try
Beyond their incredible taste, these muffins offer a versatility that makes them perfect for any time of day. While traditionally a breakfast item, we often find ourselves enjoying breakfast-inspired meals for dinner. Whether it’s a busy weeknight or a lazy Sunday brunch, these muffins fit perfectly. They are substantial enough to satisfy, yet indulgent enough to feel like a special treat. The combination of classic banana bread flavors with the rich hazelnut-chocolate spread is simply irresistible. Each muffin is a miniature journey to a happy place, a comforting hug in edible form.
The Delight of Breakfast for Dinner (and These Muffins!)
It’s true, we often lean towards quick and healthy options like green protein shakes, oatmeal, and fruit and yogurt parfaits (all boosted with protein to keep us energized) for our morning routine. This leaves evenings open for more playful and comforting “breakfast for dinner” meals. Think savory breakfast burritos, or our legendary Melt-in-Your-Mouth Buttermilk Pancakes, and of course, these glorious muffins! There’s something undeniably awesome about shaking up mealtime norms, and it makes our dinner table a place of delicious surprises.
Decoding the Difference: Muffins vs. Cupcakes
While many might casually interchange the terms, muffins and cupcakes are distinct baked goods, each with its own charm and characteristics. The key lies in their ingredients, preparation methods, and ultimate texture.
Muffins are often characterized by their rustic, dense crumb and can range from sweet to savory. They are incredibly versatile, allowing for a wide variety of flours such as all-purpose, oat, whole wheat, or even alternative flours, along with diverse mix-ins like fruits, nuts, or cheese. Cupcakes, on the other hand, are unequivocally sweet and traditionally stick to all-purpose or gluten-free flours, serving primarily as a miniature cake for dessert.
A significant difference lies in their fat and sugar content. Cupcakes typically boast a much higher proportion of butter and sugar, contributing to their finer, more cake-like texture. Muffin recipes, especially our banana muffins, often utilize oil for moisture and tenderness, resulting in a slightly coarser but delightfully soft crumb.
The mixing process also plays a crucial role. Cupcake batter is beaten extensively to incorporate air, resulting in a uniform, delicate rise. Muffin batter, conversely, is mixed just enough to combine the ingredients, often leaving a few streaks of flour. This minimal mixing preserves the natural texture and creates a denser, more substantial baked good, which is why a muffin often feels heavier than its cupcake counterpart. Understanding these distinctions helps appreciate the unique qualities of each treat.
Mastering Homemade Muffins: From Scratch to Perfection
For those of us who grew up with convenient boxed mixes, the idea of baking muffins from scratch might seem daunting. However, it’s a surprisingly simple and rewarding process that yields far superior results. Let’s dive into the fundamentals.
The foundation of any great muffin begins with selecting the right fat and sugar. We highly recommend using oil, like canola oil, in our banana muffins for an unparalleled moist and tender crumb. While butter can add a rich flavor, it sometimes results in a less moist texture compared to oil. Avoid margarine or shortening, as they tend to compromise both flavor and moisture. Start by creaming your chosen fat with sugar until light and fluffy.
The golden rule of muffin making is a light hand when mixing. Overmixing is the arch-nemesis of a tender muffin. Once the wet and dry ingredients are combined, fold them together gently using a rubber spatula or wooden spoon. Stop as soon as a few streaks of flour are still visible. This might feel counterintuitive, as we’re often taught to mix until smooth, but trust us – a slightly lumpy batter is the secret to a beautifully textured muffin. Overmixing develops the gluten in the flour too much, leading to a tough, chewy muffin instead of a soft, airy one. Resist the urge to keep stirring!
Secrets to Achieving Perfectly Fluffy Muffins
A truly great muffin should be light and fluffy, with a delicate crumb that practically melts in your mouth. Achieving this texture involves a few key techniques:
- **Accurate Flour Measurement:** This is paramount. Too much flour can lead to dense, dry muffins. Always spoon your flour into the measuring cup and level it off with a straight edge, rather than scooping directly from the bag. For a detailed guide, refer to our tips on how to measure flour.
- **Sifting the Flour:** For an even lighter texture, consider sifting your dry ingredients. This breaks up any lumps and incorporates air, resulting in a finer, more tender crumb.
- **Gentle Mixing:** As mentioned earlier, a light hand is essential. Ditch the electric mixer for muffin batter. A simple whisk for dry ingredients and a rubber spatula or wooden spoon for folding wet and dry together will prevent overworking the gluten. Mix just until combined, leaving some small lumps and flour streaks.
- **The Batter Rest:** This is our cherished secret for extra fluffy muffins. After mixing the batter and filling your muffin tin, let the batter rest in the pan for 8-12 minutes before placing it in the oven. While the scientific explanation isn’t fully clear, we’ve observed that this brief rest allows the leavening agents to begin activating and the flour to fully hydrate, leading to a higher, more airy rise. We once baked two pans from the same doubled recipe, one immediately and one after resting, and the rested muffins were noticeably taller and fluffier!
By following these steps, you’ll consistently bake muffins that are wonderfully airy and full of flavor.
Freezing Muffins: Your Guide to Long-Lasting Freshness
Muffins are an ideal candidate for freezing, making them a fantastic make-ahead option for busy mornings or unexpected guests. Properly stored, they retain their delicious taste and texture for weeks.
For short-term storage, up to two weeks, simply place cooled muffins in a freezer-safe zip-top bag. Squeeze out as much air as possible before sealing. If you plan to store them for a longer duration, individual wrapping is key. Wrap each muffin tightly in plastic wrap, then place them all in a large freezer bag or an airtight container. This extra step prevents freezer burn and helps maintain their moisture.
When you’re ready to enjoy a frozen muffin, simply take it out of the freezer and let it thaw at room temperature on the counter. For a warm, freshly baked experience, you can gently reheat thawed muffins in the microwave for 15-30 seconds or in a preheated oven (around 300°F/150°C) for a few minutes until warmed through. Freezing muffins correctly can extend their life for up to one month. For even longer storage, consider using a Food Saver vacuum sealer, which can keep them fresh for up to two months. However, exercise caution: vacuum sealers are powerful and can flatten delicate muffins if all the air is sucked out too quickly. It’s best to seal them just before the machine removes all the air, a lesson we learned the hard way when our muffins ended up looking more like pancakes!
The Art of Filling Muffin Tins: How Much is Just Right?
A common question among bakers is how much batter to pour into each muffin well. The general guideline is to fill them about two-thirds full. This allows enough room for the muffins to rise beautifully without overflowing the tin, giving them that classic domed top.
However, baking is also an art that allows for some experimentation. While two-thirds full is a great starting point, you might find that filling your muffin wells three-quarters full yields slightly larger, more satisfying muffins with an even more pronounced dome. We’ve certainly done it both ways and each has its charm. Don’t be afraid to try a slightly fuller fill on a small batch to see if it works best with your specific recipe and oven. Ultimately, the best amount will be what produces your ideal muffin, so a little trial and error can lead to perfect results.
Troubleshooting: Why Do Muffins Sometimes Fall Flat?
Few things are as disappointing as seeing your beautifully risen muffins deflate. Muffins typically fall for one of two main reasons: insufficient leavening or being under-baked. Let’s explore these common issues and how to prevent them.
First, ensure your leavening agent is fresh and correctly measured. For most quick breads like muffins (unless you’re specifically making banana muffins that rely heavily on baking soda interacting with the acid in the bananas), baking powder is the unsung hero. It’s responsible for the muffin’s light, airy puff, ensuring it rises evenly without over-browning or crisping the top too much. Always check the expiration date on your baking powder; old leavening agents lose their potency, leading to flat muffins.
Under-baking is another frequent culprit. There’s a natural tendency to worry about overcooking baked goods, which can lead to removing them from the oven too soon. To determine if your muffins are perfectly done, gently tap the top of one. If it springs back quickly and resiliently, it’s ready. If your finger leaves an indentation, they need more time. A toothpick inserted into the center should also come out clean (unless you have a gooey Nutella center, in which case the surrounding batter should be cooked).
To ensure even baking and prevent those dreaded sunken centers, here’s a pro tip: once your muffins are baked, turn off the oven, open the oven door slightly, and let the muffin tin rest in the warm oven for about a minute. This gradual temperature change helps the muffins set without a sudden drop in temperature, which can cause them to fall. After a minute, transfer the entire tin to a cooling rack for a few more minutes before carefully removing the individual muffins. This gentle transition helps them retain their shape and fluffy texture.
Preventing Sticky Situations: When Muffins Cling to Paper Liners
It’s frustrating when you peel back a paper liner only to find half your delicious muffin stuck to it. This common issue can usually be attributed to a few factors.
Firstly, the quality of your paper liners can make a significant difference. Cheaper, thin liners may not have adequate non-stick properties. Investing in good quality, grease-proof paper liners or even silicone liners can greatly improve your chances of a clean release. Another factor is the fat content in your recipe. Recipes that are low in fat or where you’ve substituted a fat (like applesauce for oil) are more prone to sticking. In such cases, or simply as an extra precaution, try lightly spraying your paper liners with a nonstick cooking spray before filling them with batter. This creates an additional barrier between the muffin and the paper.
Additionally, an old trick from our mom involves placing a small pan of water on the lower rack of the oven while baking. The steam created can help maintain a moist baking environment, which seems to aid in preventing sticking. Lastly, and arguably the most crucial tip, is patience. Resist the urge to peel the paper from hot muffins. The heat can cause the muffin’s surface to adhere more strongly to the paper. Allow the muffins to cool completely on a wire rack before attempting to remove the liners. While enjoying a warm muffin is wonderful, a few extra minutes of waiting can save you from a sticky situation.
Overnight Storage: Can Muffins Be Left Out?
Muffins, particularly those without perishable fillings or toppings, can generally be left out overnight at room temperature. However, to maintain their freshness and prevent them from drying out or becoming stale, it’s crucial to store them properly.
The best method for overnight storage on the counter is to place them in a large, airtight container. A sturdy plastic or glass container with a tight-fitting lid works perfectly. This protects them from air exposure, which causes staling, and also keeps them safe from any curious kitchen critters. Avoid placing them in the refrigerator unless they contain cream cheese or fresh fruit fillings that require refrigeration, as the cold air can actually make them dry out faster. For these Nutella Swirled Banana Muffins, an airtight container on the counter is ideal for up to 2-3 days.
Rated 4.17 out of 5 stars by 6 users.
Nutella Swirled Banana Muffins
By Sweet Basil
Prep Time: 5 mins
Cook Time: 25 mins
Total Time: 30 mins
Servings: 6 Jumbo muffins or 12 regular
It’s happening!! We took Nutella and bananas and made magic. These Nutella swirled banana muffins are also stuffed with creamy, delicious Nutella!
Ingredients
- 2/3 Cup Nutella
- 2 Cups Flour
- 1 teaspoon Baking Soda
- 1/2 teaspoon Salt
- 1/3 Cup Canola Oil
- 1 Cup Sugar
- 2 Large Eggs
- 5 Tablespoons Sour Cream
- 1 1/3 Cups Mashed Banana, about 2 very large bananas or 3 small
Instructions
- Place parchment paper or a silicone mat on a plate and scoop out small mounds (less than a tablespoon) of Nutella, then freeze until set.
- Set out the eggs and sour cream to come to room temperature.
- Preheat the oven to 350 degrees F (175 degrees C).
- Spray a jumbo muffin tin with nonstick spray or line with paper liners.
- In a large bowl, whisk together the flour, baking soda, and salt. Set aside.
- In another bowl, whisk together the oil and sugar. Add in the eggs and sour cream and whisk again, being careful not to overmix.
- Pour the dry ingredients into the wet ingredients and add the mashed banana. Using a rubber spatula or wooden spoon, gently fold the ingredients together just until a few streaks of flour remain.
- Scoop one large spoonful (a cookie scoop works well) of batter into the bottom of each muffin well. Place a dollop of the frozen Nutella in the center of the batter. (See notes for options). Cover with more batter, filling each well up to two-thirds high.
- Place a small dollop of Nutella on top of the batter. Using a small knife or a toothpick, gently swirl the Nutella into the batter, starting from the outside edge and moving inwards.
- Allow the filled muffin batter to rest in the pan for 8-12 minutes before baking. See note.
- Bake at 350 degrees F (175 degrees C) for 25 minutes for jumbo muffins, or 12-16 minutes for regular-sized muffins. The muffins are done when lightly golden and the middle springs back up when you gently touch the top.
- Once the muffins are baked, open the oven door, turn off the oven, and let the muffins rest in the warm oven for 2 minutes before carefully transferring the tin to the counter to cool for a few more minutes.
- Enjoy your delicious Nutella Swirled Banana Muffins!
Recipe Notes
You don’t have to freeze the Nutella, but it will melt into the batter faster if you do. If you need to skip the batter rest time, that’s perfectly fine.
Muffins can be frozen for up to 3 months. Place them in an airtight, heavy-duty freezer bag to freeze. Thaw on the counter when ready to eat.
Nutrition
Serving: 1g, Calories: 327kcal, Carbohydrates: 52g, Protein: 5g, Fat: 12g, Saturated Fat: 5g, Polyunsaturated Fat: 6g, Cholesterol: 34mg, Sodium: 213mg, Fiber: 2g, Sugar: 30g
Nutrition information is automatically calculated, so should only be used as an approximation.
Like this? Leave a comment below and share your thoughts!
Explore More Delicious Muffin Recipes: Apple Coffee Cake Muffins
If you’ve loved our Nutella Swirled Banana Muffins, you’ll definitely want to try these light and flavorful Apple Coffee Cake Muffins. They’re the perfect way to kickstart any day with a comforting, spiced treat!