
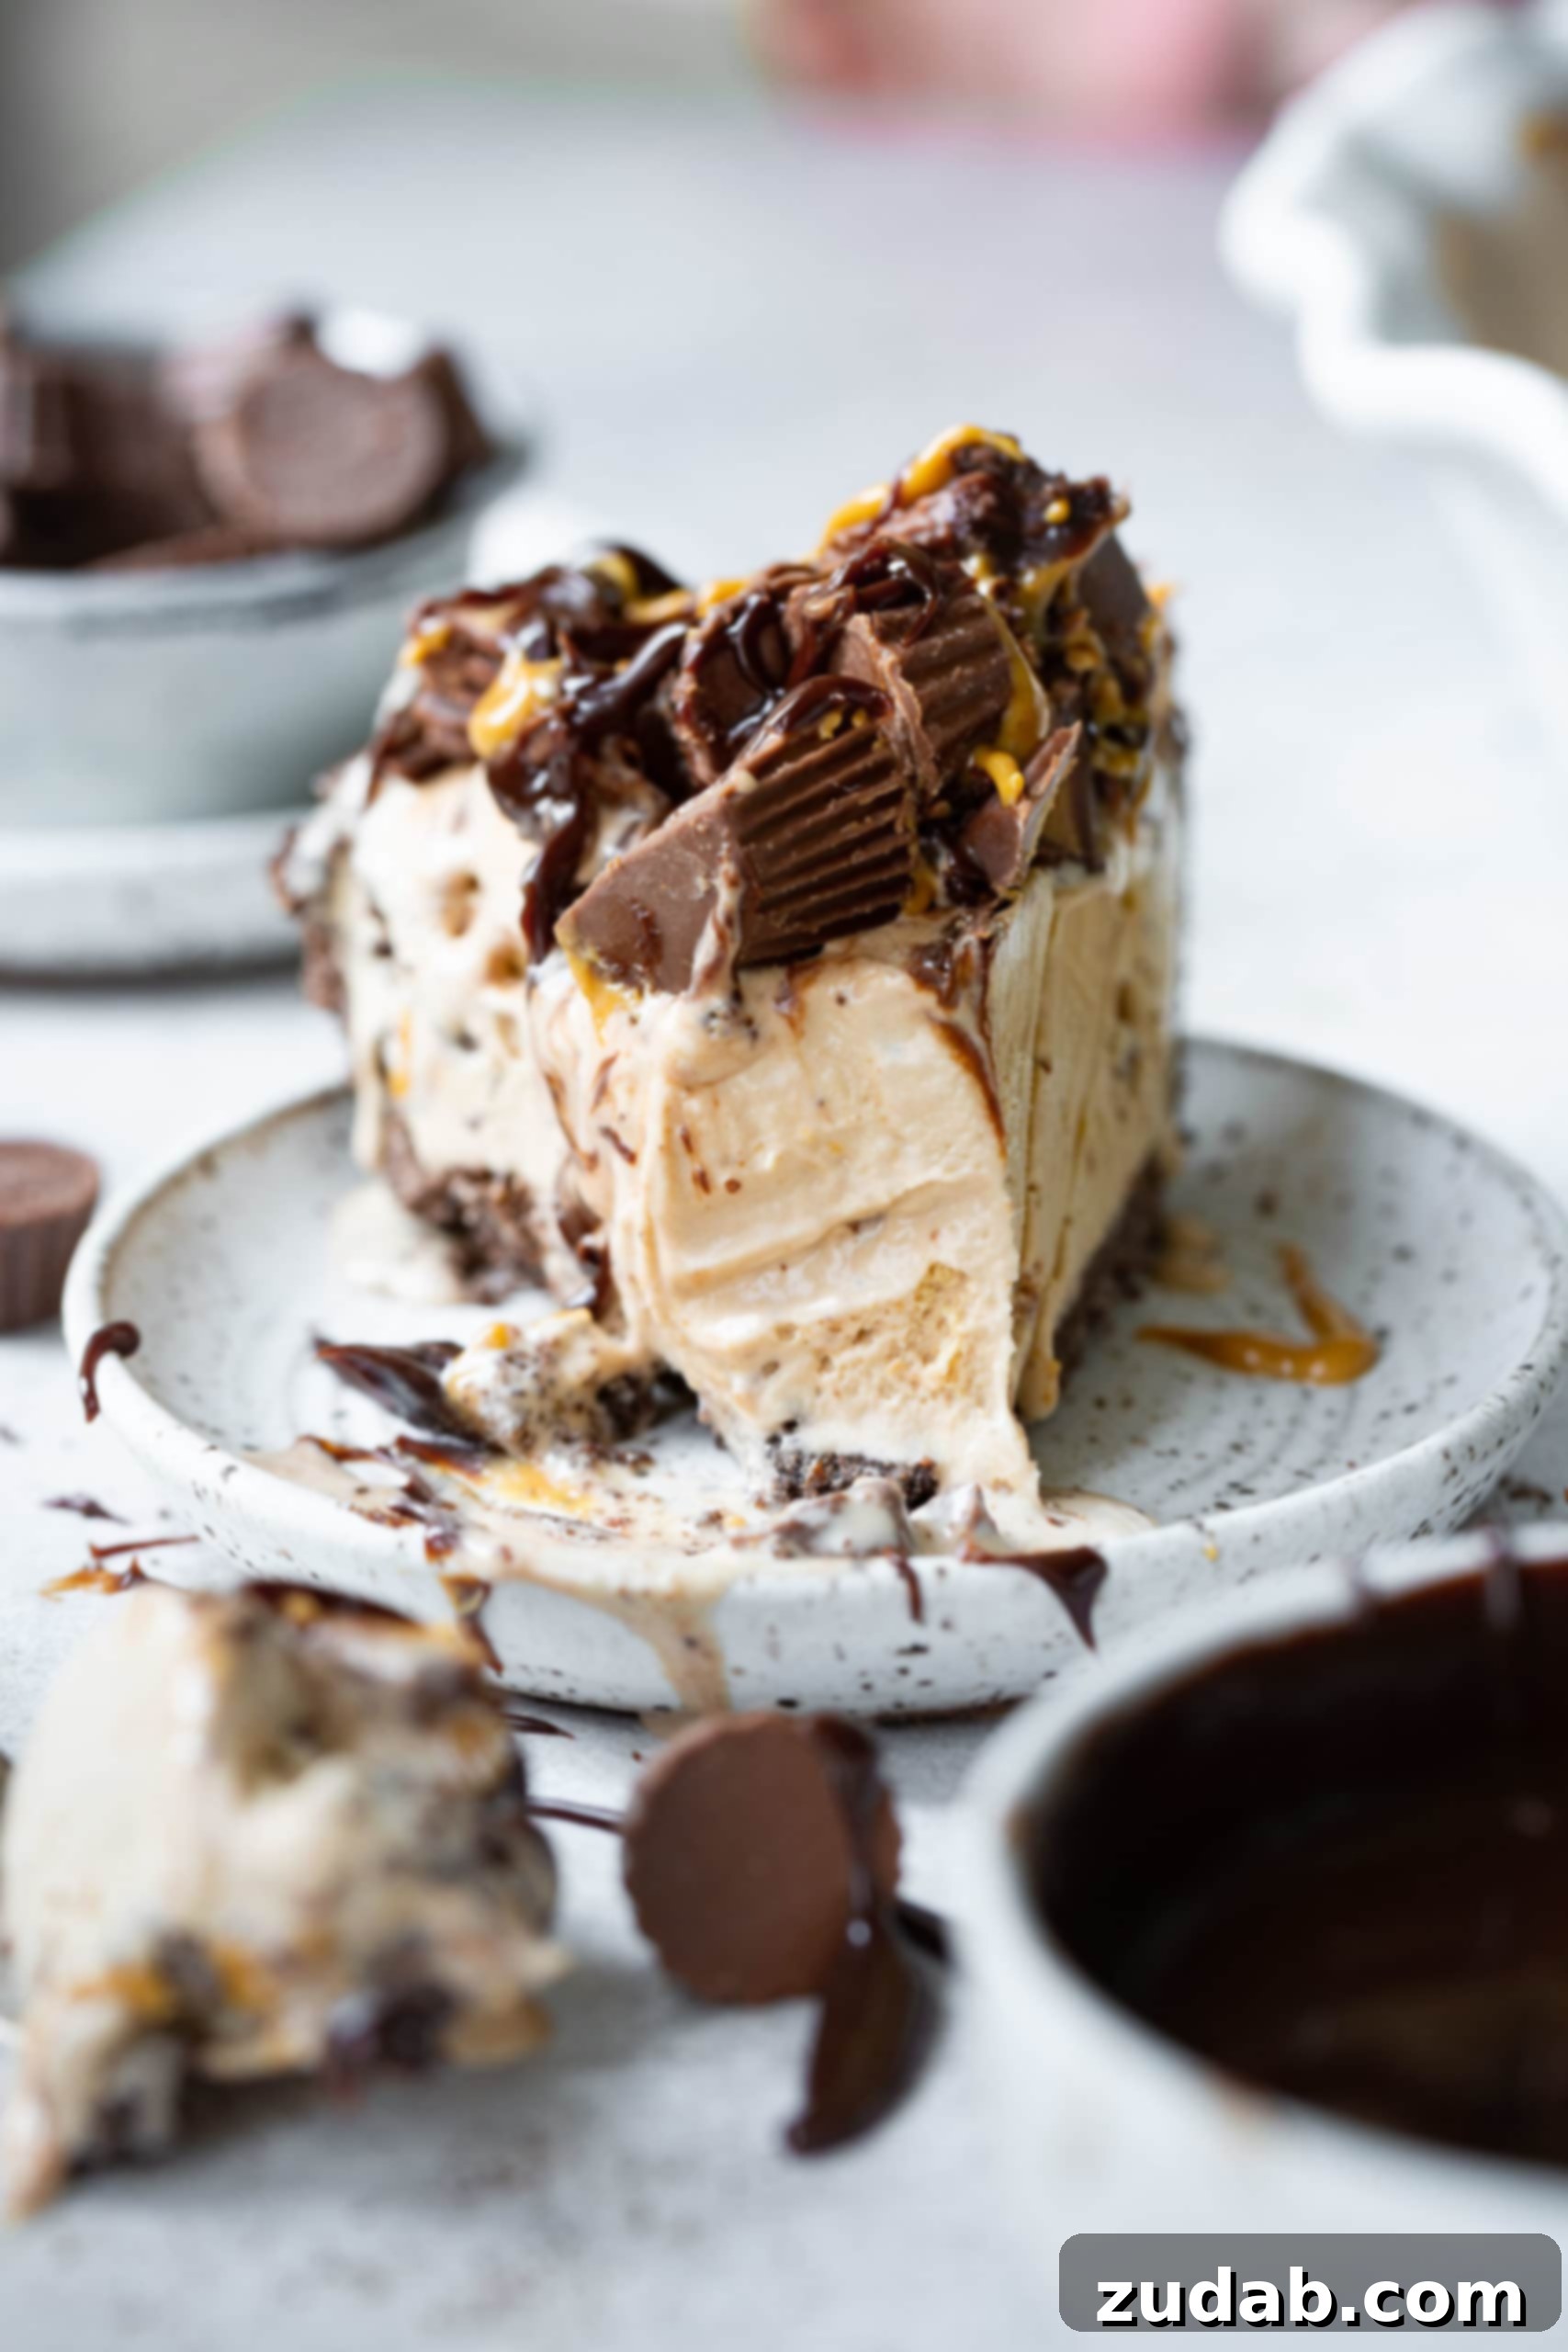
For those balmy summer days or cozy winter evenings, a slice of **Reese’s Ice Cream Pie with a rich chocolate crust** is the ultimate no-stress dessert. This delightful treat combines the irresistible flavors of **peanut butter and chocolate** into a cool, creamy confection that’s incredibly easy to assemble and guaranteed to be a crowd-pleaser.
I must confess, I’m not the biggest ice cream enthusiast – a fact that might make me slightly less American in some eyes! However, my husband is a devoted fan, and our children fall somewhere in between. After the immense popularity of our classic peanut butter pie, the kids were eager for an ice cream variation. Since it’s a concept we’ve explored before for ice cream cakes (minus the brownie base), I decided to embrace the challenge.
To my surprise, it was our youngest, Grayson, who couldn’t get enough, devouring slice after slice. I genuinely expected him to feel ill, but ice cream simply doesn’t faze him!
This magnificent pie features creamy **peanut butter chocolate ice cream** piled high with an abundance of Reese’s candies, all nestled within a crisp **chocolate graham cracker pie crust**. The best part? You can easily customize it to suit your personal preferences, making it truly your own signature dessert!
Irresistible Ingredients for Your Reese’s Ice Cream Pie
Crafting this incredible **peanut butter ice cream pie** requires surprisingly few ingredients, all centered around the heavenly combination of **chocolate and peanut butter**. This duo creates a flavor profile that dreams are truly made of! While I’ve provided a specific list for this recipe, remember that versatility is key. Feel free to explore other topping ideas, which I’ll detail further below.
For the Perfect Chocolate Crust
A sturdy and flavorful crust is the foundation of any great pie. For our Reese’s Ice Cream Pie, we opt for a homemade chocolate graham cracker crust that offers a delightful crunch and deep cocoa notes. Gathering your ingredients is the first step towards this easy, no-fail base.
- Chocolate Graham Cracker Crumbs: Achieve fine crumbs by crushing chocolate graham crackers. A food processor makes quick work of this, or you can place them in a sturdy ziploc bag and crush them with a rolling pin for a satisfying, hands-on approach.
- Melted Butter: Unsalted butter, melted, binds the crumbs together, ensuring a firm and perfectly crisp crust.
- Granulated Sugar: A touch of sugar enhances the sweetness of the chocolate graham crackers, creating a balanced flavor.
- Hot Fudge Sauce: This secret ingredient creates a delicious barrier and adds an extra layer of chocolatey goodness to your crust.
For the Creamy Reese’s Filling and Toppings
The heart of this ice cream pie lies in its rich, creamy filling and generous scattering of iconic Reese’s candies. Each component plays a crucial role in delivering that signature peanut butter and chocolate bliss.
- Reese’s Ice Cream: For unmatched flavor and convenience, we recommend Breyer’s Reese’s Ice Cream. Its creamy texture and pre-mixed peanut butter cup chunks make it the ideal base for this pie, simplifying the preparation process significantly.
- Cool Whip: This whipped topping adds a light, airy texture to the ice cream, making the filling even more decadent and easier to spread. It also helps stabilize the ice cream, ensuring your pie holds its shape beautifully.
- Creamy Peanut Butter: A swirl of creamy peanut butter throughout the ice cream filling intensifies the peanut butter flavor and creates beautiful, marbled patterns.
- Mini Reese’s Peanut Butter Cups: These bite-sized candies are perfect for mixing into the filling and scattering generously over the top for varied texture and intense flavor.
- Standard Reese’s Peanut Butter Cups: Chopped larger cups provide substantial chunks of chocolate and peanut butter goodness, adding another textural dimension to the pie.
- Mini Unwrapped Reese’s Peanut Butter Cups: These tiny, unwrapped treats are ideal for easy sprinkling and add visual appeal to the finished pie, ensuring every bite is packed with Reese’s magic.
Exact measurements for each ingredient are provided in the comprehensive recipe card below, ensuring you have all the details at your fingertips for perfect execution.
Effortless Steps to Crafting Your Peanut Butter Ice Cream Pie with Reese’s
Making this incredible ice cream pie is surprisingly simple, primarily thanks to the star ingredient: high-quality Reese’s ice cream! The process involves three straightforward stages: preparing the chocolate crust, mixing the creamy filling, and finally, topping it all off with an abundance of your favorite Reese’s candies. Follow these easy steps for a dessert that comes together with minimal fuss.
For the Crispy Chocolate Crust
- Preheat Oven: Begin by preheating your oven to 350°F (175°C) to ensure it’s ready for baking the crust.
- Combine and Press: In a medium bowl, combine your chocolate graham cracker crumbs, melted butter, and granulated sugar until well mixed. This creates a moist, crumbly mixture. Firmly press this mixture into the bottom and up the sides of a 9-10 inch pie dish. Ensuring an even thickness is key for a uniform bake.
- Bake and Cool: Bake the crust for approximately 8 minutes. This brief bake sets the crust and enhances its flavor. Once baked, remove it from the oven and allow it to cool completely on a wire rack. This step is crucial to prevent the hot fudge from melting unevenly.
- Fudge Layer and Freeze: Once the crust is fully cooled, gently warm your hot fudge sauce until it’s pourable. Evenly spread the hot fudge over the cooled crust. This layer not only adds rich chocolate flavor but also acts as a barrier to prevent the ice cream from making the crust soggy. Place the crust in the freezer to firm up while you prepare the filling.
For the Decadent Ice Cream Pie Filling
- Soften and Mix Ice Cream: Allow the Reese’s ice cream to soften slightly at room temperature for about 10-15 minutes, making it easier to work with. Transfer the softened ice cream to the bowl of a stand mixer fitted with a paddle attachment (or use a large bowl with an electric hand mixer). Beat until it’s smooth and creamy. Next, add the Cool Whip and mix until just combined, creating a lighter, more voluminous base.
- Swirl in Peanut Butter: With the electric mixer on low speed, add dollops of creamy peanut butter to the ice cream mixture. Mix just until lovely peanut butter swirls appear throughout the ice cream. Be careful not to overmix, as you want distinct swirls, not a fully incorporated peanut butter flavor throughout the entire base.
- Pour, Spread, and Freeze: Retrieve your prepared chocolate fudge crust from the freezer. Carefully pour the ice cream and peanut butter mixture into the crust, spreading it evenly with an offset spatula or the back of a spoon. Cover the pie tightly with plastic wrap to prevent ice crystal formation and freeze for at least 4 hours, or preferably overnight (up to 24 hours), to ensure it’s firm enough to slice cleanly.
- Top and Serve: Approximately 5-10 minutes before you plan to serve, remove the pie from the freezer. This brief softening period makes it easier to cut. Generously top the pie with the various Reese’s candies (mini, chopped, and unwrapped). For an extra touch of indulgence, drizzle with additional warmed hot fudge or melted peanut butter. Slice and serve immediately to enjoy this exquisite frozen treat!
These detailed instructions, along with all precise measurements, can be found in the recipe card at the conclusion of this post. There, you’ll also have the option to print and save the recipe for future use.
Creative Topping Ideas to Personalize Your Pie
While the classic Reese’s ensemble is undeniably perfect, this ice cream pie offers endless possibilities for customization through various toppings. Unleash your creativity and make this dessert truly your own with these delicious suggestions:
- Reese’s Pieces: Add a burst of colorful peanut butter candy crunch.
- M&Ms: Classic chocolate candies for a familiar and delightful bite.
- Take 5 Bars: Chopped pieces of these bars bring a salty-sweet pretzel, caramel, peanut, and chocolate explosion.
- Snickers: Chunks of Snickers add caramel, nougat, and peanuts for a more substantial topping.
- Twix: Crumbled Twix bars introduce shortbread, caramel, and chocolate textures.
- Chocolate Chips: A simple yet effective way to add more chocolatey goodness.
- Peanut Butter Chips: For an extra dose of rich peanut butter flavor.
- Nutter Butters: Crushed Nutter Butter cookies provide a crumbly, intensely peanut butter element.
- Oreo Cookies: Crushed Oreos offer a delightful chocolatey crunch that pairs wonderfully with peanut butter.
- Hot Fudge: An essential drizzle that melts slightly into the cold ice cream.
- Warmed Peanut Butter: A smooth, savory-sweet drizzle to complement the other flavors.
Don’t stop there! You can even experiment with different ice cream flavors to completely transform the pie. Let your imagination, heart, and belly guide you!
Delicious Variations for Your Ice Cream Pie
Beyond changing up the toppings and ice cream flavors, as suggested above, you can also get creative with the pie crust itself. The crust offers another fantastic avenue for personalization, allowing you to tailor this dessert to specific cravings or dietary preferences. Here are some popular variations:
If you’re an ardent Oreo lover, one of my absolute favorite variations is to substitute the chocolate graham cracker crust with a decadent Oreo cookie crust. The deep chocolate flavor of Oreos pairs exquisitely with the peanut butter and chocolate filling. For a tried-and-true recipe, I highly recommend following the Oreo crust instructions found in our dulce de leche chocolate cheesecake bars recipe. The method is simple, yielding a rich, buttery, and perfectly crunchy base.
Alternatively, consider a Nutter Butter crust for an all-out peanut butter experience, a shortbread cookie crust for a buttery contrast, or even a classic vanilla wafer crust if you prefer a milder base. Each crust offers a unique texture and flavor profile that can elevate your Reese’s Ice Cream Pie to new heights.
Can I Use Homemade Whipped Cream Instead of Cool Whip?
Absolutely! I understand that there’s a strong contingent of homemade whipped cream enthusiasts out there who prefer to avoid store-bought Cool Whip. While I use Cool Whip in this recipe to ensure maximum ease and minimal fuss – truly making it a no-stress dessert – homemade whipped cream is a fantastic alternative that will elevate the freshness and richness of your pie.
To use homemade whipped cream, simply whip 1 cup of heavy cream until soft peaks form, then sweeten it to your desired taste with a tablespoon or two of powdered sugar and a splash of vanilla extract. This will yield approximately 2 cups of whipped cream. Gently fold this freshly whipped cream into the softened ice cream mixture as directed in the recipe. The result will be an even more luxurious and intensely flavored pie filling. Feel free to take shortcuts elsewhere too, like using a pre-made store-bought chocolate graham cracker crust if time is of the essence!
How Long Does Ice Cream Pie Last in the Freezer?
Proper storage is essential to maintain the optimal texture and flavor of your Reese’s Ice Cream Pie. After preparing, cover the pie plate with a lid if you have one. For extra protection against freezer burn and ice crystals, double-wrap the entire pie in plastic wrap, followed by a layer of aluminum foil. This airtight seal helps preserve its creamy consistency and prevents it from absorbing freezer odors.
For the best texture and taste, it is highly recommended to enjoy your ice cream pie within 2-3 days of preparation. While it can technically last up to 5 days in the freezer, beyond that, the texture may start to degrade, becoming less creamy and potentially developing more ice crystals. Always ensure it’s tightly wrapped to maximize its freezer life.
When is the Best Time to Enjoy Ice Cream Pie?
The answer is unequivocally, always! Reese’s Ice Cream Pie is a versatile dessert that shines on any occasion and in any season. On scorching summer days, it’s the perfect refreshing treat to help you cool down, requiring minimal kitchen time so you can enjoy the sunshine.
Conversely, during cozy winter nights, when you’re craving a comforting dessert but desire something a little more exciting than a plain bowl of ice cream, this pie delivers. Its rich flavors and satisfying textures provide a delightful indulgence that’s perfect for snuggling up indoors. Whether it’s a special celebration, a casual family gathering, or simply a treat for yourself, there’s never a wrong moment for this incredible dessert. Always!
You all know my profound love for pie; I genuinely love it more than almost any other dessert, every single time. Whether it’s served warm or cold, just hand me all the pie! When you combine the iconic flavors of chocolate, peanut butter, and the creamy indulgence of ice cream, the result is simply irresistible. This **Reese’s Ice Cream Pie** is not only incredibly easy to make but also a delightful dessert that everyone is sure to adore.
More Delicious Ice Cream Desserts to Try:
- Biscoff Cookie Butter Ice Cream
- Dulce De Leche Ice Cream
- Berries and Cream Ice Cream
- Lemon Curd Frozen Custard
- Key Lime Pie Milkshake
- Cookies and Cream Frozen Custard
- Copycat Pinkberry Chocolate Crunch Sauce
- Chocolate Chip Cookie Ice Cream Sandwiches dipped in Milk Chocolate
- Apple Pie Fried Ice Cream Cake
- Loaded Salted Pretzel Ice Cream Sundae
- Mint Chocolate Stracciatella Ice Cream
- Nutella Chocolate Chip Ice Cream
- All our ICE CREAM RECIPES here!
Reese’s Ice Cream Pie
10 mins
8 mins
4 hrs 18 mins

Ingredients
For the Crust
- 2 Cups Chocolate Graham Cracker Crumbs
- 7 Tablespoons Butter, melted
- 1/3 Cup Sugar
- 1 Cup Hot Fudge, warmed
For the Pie
- 1 Tub Reese’s Ice Cream (Breyer’s recommended)
- 2 Cups Cool Whip
- 1/2 Cup Peanut Butter
- 3 Cups Mini Reese’s Peanut Butter Cups, halved
- 1 1/2 Cups Reese’s Peanut Butter Cups, chopped
- 2 Cups Mini Unwrapped Reese’s Peanut Butter Cups
- Hot Fudge (for drizzling)
- Peanut Butter, warmed up (for drizzling)
Instructions
For the Crust
-
Preheat the oven to 350 degrees F (175°C).
-
In a bowl, combine the graham cracker crumbs, melted butter, and sugar. Press the mixture firmly into a 9-10 inch pie dish.
-
Bake for 8 minutes and then remove to cool completely on a wire rack.
-
Once cooled, warm the hot fudge until pourable and spread it evenly over the crust. Place the crust in the freezer to set while you prepare the filling.
For the Pie
-
In a standing mixer (or with an electric hand mixer), add the softened Reese’s ice cream and beat until smooth. Add in the Cool Whip and beat again until just combined.
-
With the mixer running on low speed, drop in dollops of creamy peanut butter and mix until beautiful peanut butter swirls are incorporated. Avoid overmixing to maintain distinct swirls.
-
Pour the ice cream mixture into the prepared pie crust and spread evenly. Cover tightly with plastic wrap and place in the freezer for 4 hours, or up to 24 hours, until completely firm.
-
Remove the pie from the freezer 5-10 minutes before serving. Top generously with the different sized Reese’s candies, and drizzle with additional hot fudge and warmed peanut butter. Serve immediately.
Nutrition
Serving: 1 slice, Calories: 856kcal, Carbohydrates: 93g, Protein: 15g, Fat: 50g, Saturated Fat: 19g, Polyunsaturated Fat: 7g, Monounsaturated Fat: 21g, Trans Fat: 0.3g, Cholesterol: 36mg, Sodium: 609mg, Potassium: 491mg, Fiber: 5g, Sugar: 67g, Vitamin A: 379IU, Vitamin C: 0.3mg, Calcium: 107mg, Iron: 2mg
Nutrition information is automatically calculated and should only be used as an approximation.
REMEMBER TO SUBSCRIBE TO our FREE Oh Sweet Basil NEWSLETTER AND RECEIVE EASY RECIPES DELIVERED INTO YOUR INBOX EVERY DAY!
When you try a recipe, please use the hashtag #ohsweetbasil on INSTAGRAM for a chance to be featured in our stories! FOLLOW OH, SWEET BASIL ON FACEBOOK | INSTAGRAM | PINTEREST | TWITTER FOR ALL OF OUR LATEST CONTENT, RECIPES AND STORIES.