
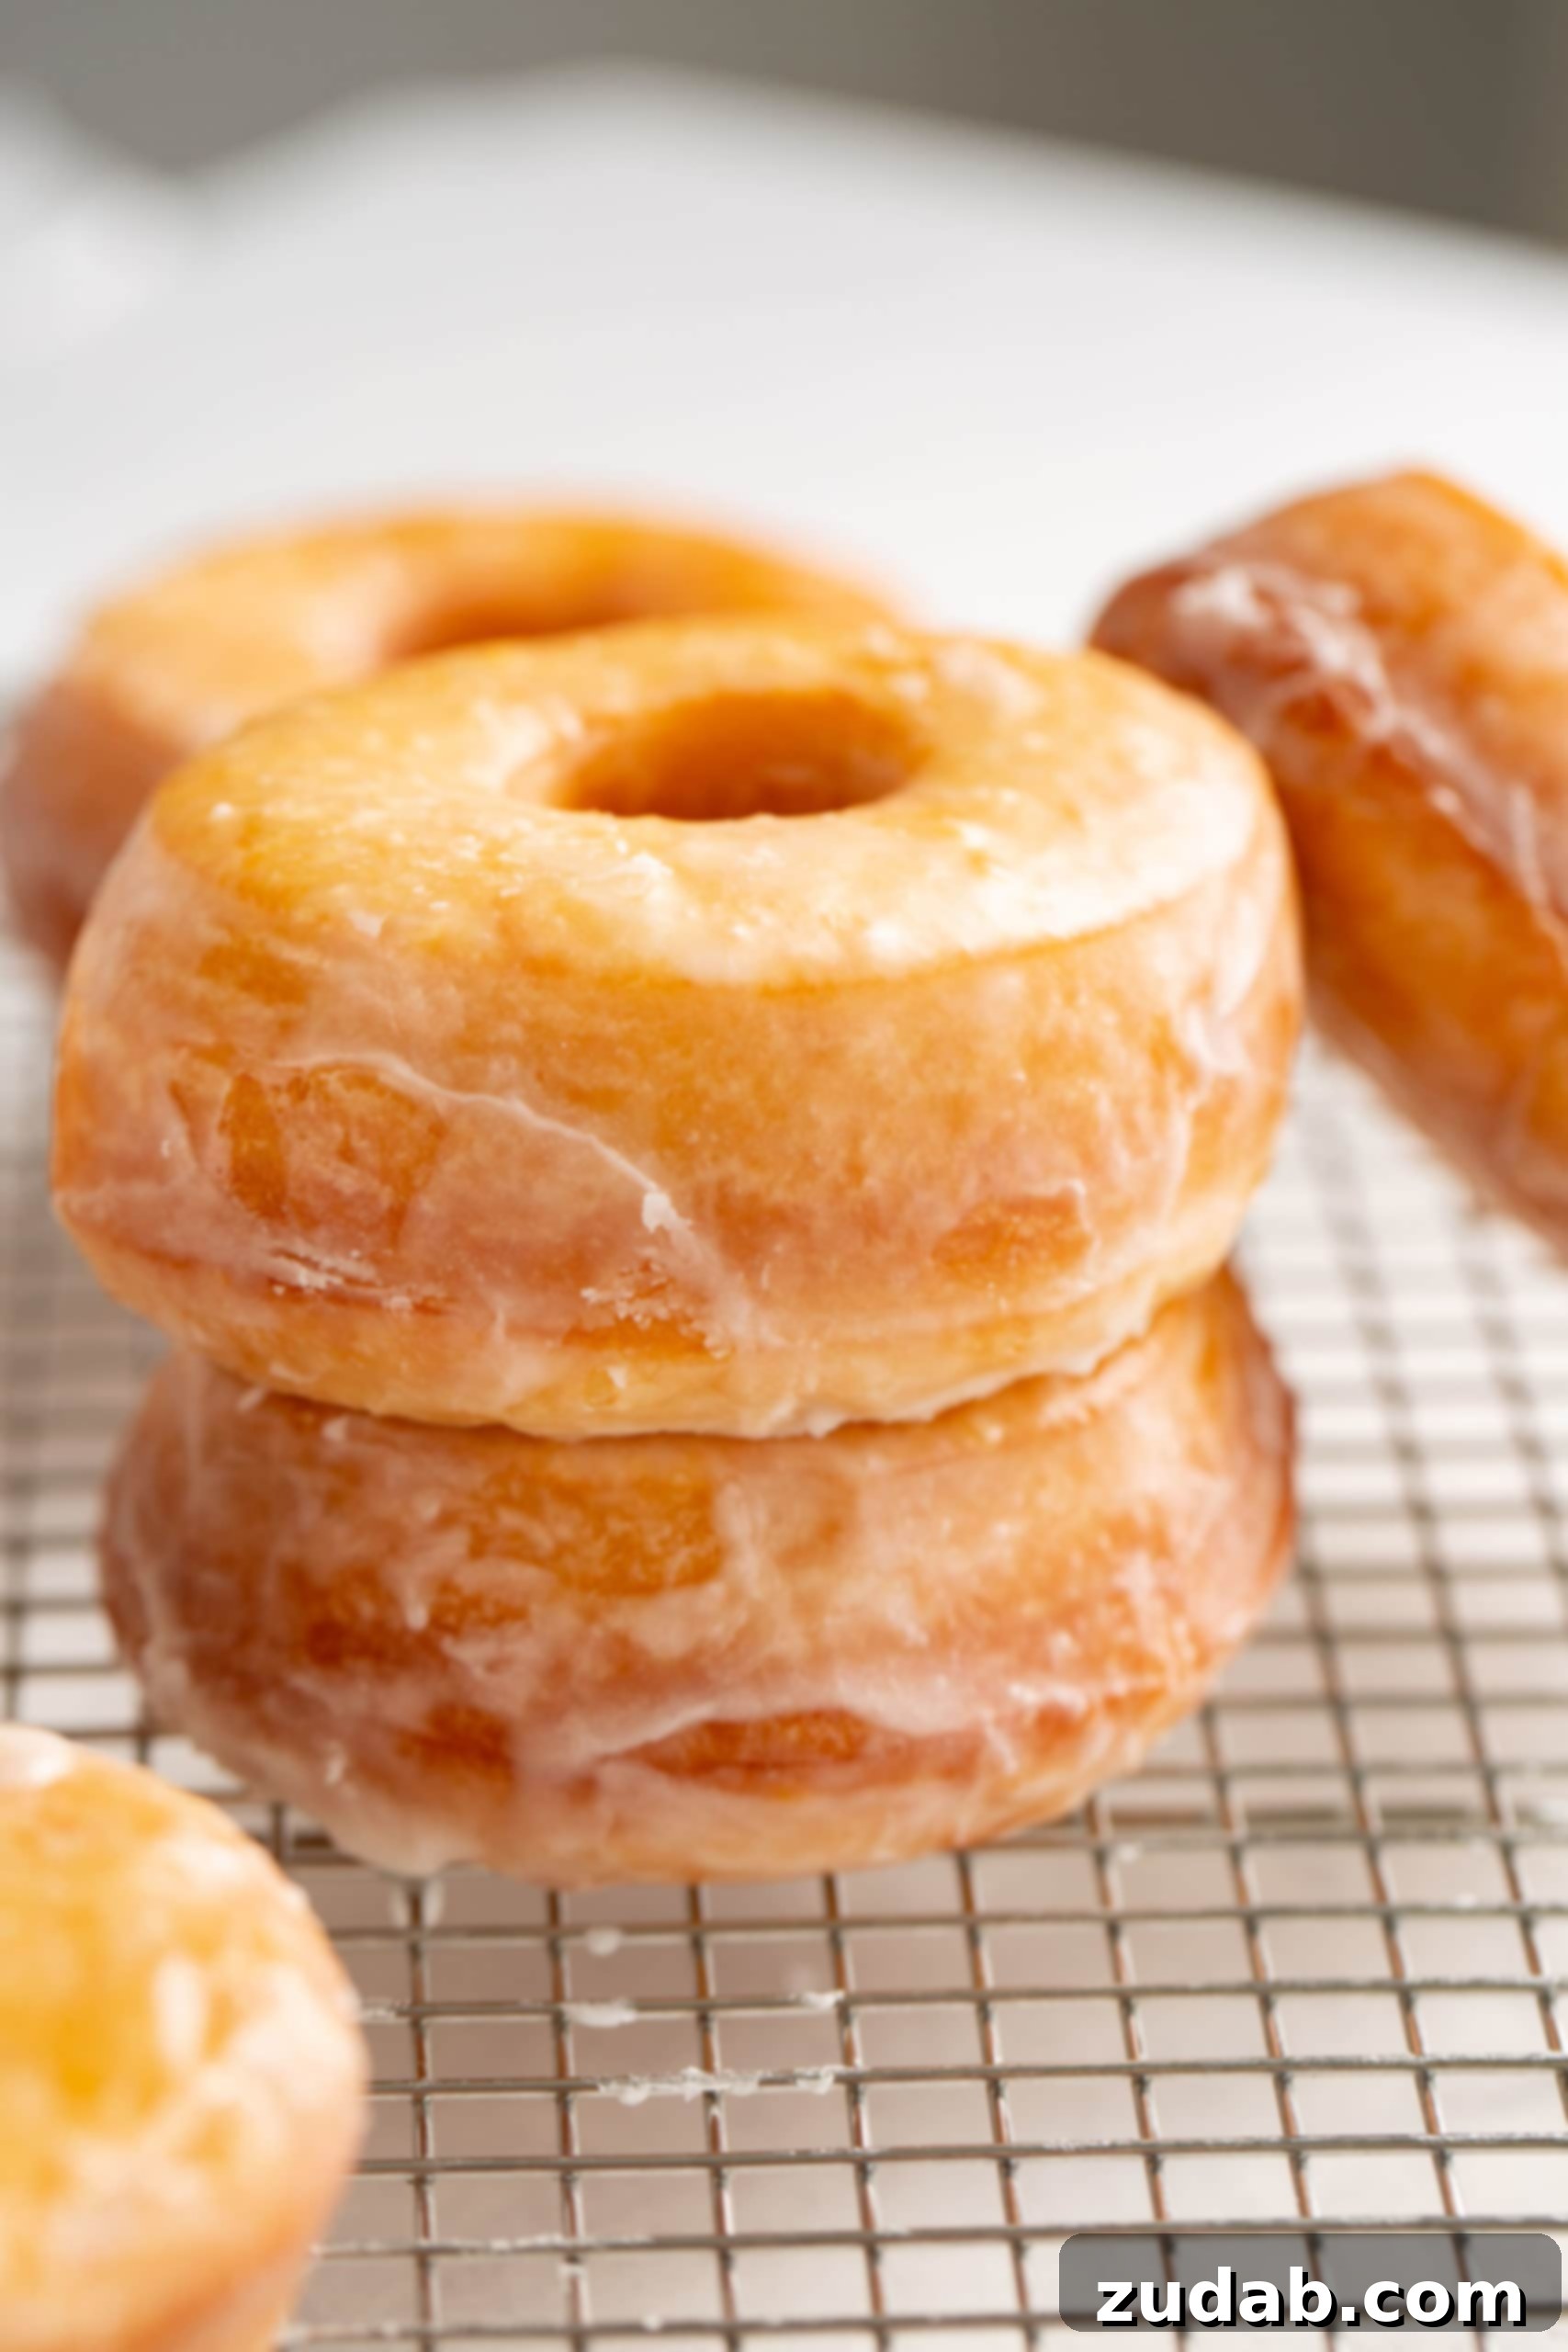
There’s nothing quite like the aroma of freshly baked goods filling your home, and when it comes to sweet treats, homemade glazed donuts reign supreme. Imagine sinking your teeth into a golden, pillow-soft donut, perfectly sweetened with a delicate glaze that melts in your mouth. This isn’t just a recipe; it’s an invitation to create unforgettable memories with your family, and trust us, your kids (and you!) are going to absolutely adore these incredible homemade donuts.
Before we dive into the delicious details, let’s settle a common culinary query: “donut” or “doughnut”? While “doughnut” is the traditional spelling in English, the simplified “donut” has become widely accepted and popular, especially in American English and marketing. Both spellings refer to the same beloved fried pastry, so feel free to use whichever you prefer. For this recipe, we’ll stick with “donut” as it’s prevalent in modern usage and aligns with our delicious goal!
The Heartwarming Tradition of Homemade Donuts
Growing up, Christmas Eve at our house was always steeped in cherished traditions. The entire month leading up to it was a flurry of activity: preparing thoughtful gifts, engaging in community service through our church and town, baking an abundance of goodies for neighbors, and crafting small gifts for school friends. The grand culmination was Christmas Eve itself – a day dedicated to family, comfort, and culinary delights.
Our holiday dinner typically featured a sumptuous ham and hearty potatoes. Mom’s reasoning was simple yet brilliant: a substantial Christmas Eve meal meant Christmas Day could be a relaxed affair of noshing on delicious leftovers, much like Thanksgiving, allowing even her to unwind completely. After dinner, we’d gather to play board games, read our favorite Christmas Books, all while indulging in a generous spread of homemade donuts.
Honestly, as a child, those early donuts didn’t quite capture my heart; they weren’t quite fluffy enough or sweet enough for my developing palate. But oh, how times have changed! The recipe has evolved, and now, these tender, perfectly glazed homemade donuts are absolutely irresistible. They are truly a treat that embodies comfort, joy, and family togetherness, making every bite a return to those cherished memories, now perfected.
Why Choose Homemade Over Store-Bought Donuts?
While a trip to the local donut shop offers convenience, there’s an unparalleled satisfaction and quality that comes with making donuts from scratch. Homemade donuts boast a freshness that simply can’t be replicated. You control every ingredient, ensuring no artificial flavors or preservatives, and the taste is undeniably superior. Furthermore, the process itself becomes a fun, engaging activity for the whole family, transforming a simple baking session into a cherished memory. The aroma wafting through your kitchen as they fry and the collective joy of decorating them creates a unique bond and a truly personalized treat tailored to your preferences.
Essential Ingredients for Your Golden Glazed Donuts
Crafting these delectable homemade donuts requires a selection of straightforward ingredients, likely staples in most kitchens. No exotic items here – just simple components that combine to create something truly magical. The precise measurements for each ingredient are thoughtfully detailed in the comprehensive recipe card at the conclusion of this article.
For the Dough (Donuts)
- **Flour:** All-purpose flour is your go-to for its balanced protein content, providing the perfect structure for a light and airy donut.
- **Sugar:** Granulated sugar not only sweetens the dough but also feeds the yeast, aiding in the rising process and contributing to that desirable golden crust during frying.
- **Instant Yeast:** This type of yeast is fantastic for convenience, as it doesn’t require prior activation and can be mixed directly with dry ingredients. It’s key to achieving that fluffy, risen texture.
- **Whole Milk:** Adds richness, flavor, and tenderness to the dough. The fat content in whole milk creates a more luscious donut.
- **Water:** Used in conjunction with milk to create the ideal liquid balance for the yeast and dough hydration.
- **Salt:** Essential for balancing the sweetness, enhancing the overall flavor, and regulating yeast activity.
- **Eggs:** Provide structure, richness, and help bind the ingredients together, resulting in a more tender crumb. Using one extra egg yolk further boosts richness and color.
- **Butter:** Contributes to a tender texture and a delightful buttery flavor. Using softened, cut butter ensures it incorporates smoothly into the dough.
- **Shortening (or Lard):** This ingredient is crucial for achieving an exceptionally tender and moist crumb, as well as a lighter frying result. Shortening has a higher melting point than butter, contributing to a crisper exterior without making the donut greasy.
- **Vegetable Oil:** The best choice for deep frying due to its high smoke point and neutral flavor, ensuring your donuts cook evenly to a beautiful golden brown without imparting unwanted tastes.
- **Wooden Dowel:** (For Glazing, optional but helpful) A simple tool to suspend glazed donuts, allowing excess glaze to drip off for a clean finish.
For the Irresistible Glaze
- **Powdered Sugar:** The base of our sweet, smooth glaze. Its fine texture dissolves easily, creating a silky coating.
- **Water:** Used to thin the powdered sugar to the desired consistency. Warm water helps dissolve the sugar more effectively.
- **Vanilla Extract:** A touch of vanilla elevates the flavor of the glaze, adding a classic, comforting aroma and taste.
How to Create the Perfect Homemade Glazed Donut Recipe
While the process might seem to have many steps at first glance, making homemade donuts is genuinely a simple and incredibly rewarding culinary adventure. My children absolutely love getting involved in every stage, making it a fantastic recipe to engage helpers of all ages. Each step builds upon the last, leading to that ultimate, fluffy, golden perfection.
Phase 1: Preparing the Dough – The Foundation of Flavor and Texture
- **Scald the Milk:** Begin by gently heating the whole milk in a saucepan over medium heat until small bubbles form around the edges and a light skin appears on top (do not boil). Remove from heat and pour into a measuring cup with the cold water. Allow this mixture to cool down until it’s comfortably warm to the touch (around 105-115°F or 40-46°C). This temperature is ideal for activating the yeast without killing it.
- **Combine Liquids:** Carefully pour the scalded milk into a glass measuring cup with the cold water. Allow this mixture to cool down until it’s comfortably warm to the touch (around 105-115°F or 40-46°C). This temperature is ideal for activating the yeast without killing it.
- **Activate the Yeast:** Once the milk-water mixture is warm, stir in the instant yeast and a teaspoon of sugar. Let it sit for about 5-10 minutes. You’ll know your yeast is active and ready when a foamy layer appears on the surface, indicating it’s alive and thriving.
- **Mix Dry Ingredients:** In the bowl of a stand mixer fitted with the dough hook attachment, combine the flour and the remaining granulated sugar. Mix them briefly to ensure they are well integrated.
- **Combine Wet and Dry:** Slowly add the activated yeast mixture to the flour and sugar in the stand mixer. Begin mixing on a low speed. Once partially combined, incorporate the salt and eggs. The salt should be added after the yeast mixture to prevent direct contact, which can inhibit yeast.
- **Add Fats and Knead:** With the mixer still running on low, gradually add the softened butter and shortening, one tablespoon at a time, allowing each addition to fully incorporate before adding the next. Don’t worry if you see chunks of butter initially; the kneading process will eventually blend everything smoothly into the dough. Continue to knead for about 8-10 minutes, or until the dough becomes sticky but cohesive and pulls away from the sides of the bowl. This kneading is vital for developing gluten, which gives your donuts their characteristic chewiness and elasticity.
- **First Rise (Bulk Fermentation):** Transfer the sticky dough to a lightly oiled bowl, turning it over once to coat the entire surface in oil. Cover the bowl loosely with a clean kitchen towel and allow the dough to rise in a warm, draft-free place for about 2 hours, or until it has doubled in size. This initial rise builds flavor and gas, contributing to a light texture.
- **Overnight Chill:** After the first rise, cover the bowl tightly with plastic wrap and transfer it to the refrigerator. Let it chill overnight, or for a minimum of 8 hours and up to 24 hours. This crucial chilling period is a secret to incredibly fluffy donuts, allowing the butter and shortening to solidify and preventing the donuts from becoming greasy during frying. It also deeply enhances the dough’s flavor and makes it much easier to handle when shaping.
Phase 2: Shaping the Donuts & Preparing for Fry Time
- **Roll Out the Dough:** The next morning (or after chilling), remove the dough from the fridge. Lightly grease a clean work surface or use a large silicone baking mat (which I highly recommend for easy handling and minimal sticking). Gently roll out the chilled dough to an even thickness of about 1/4 inch (approximately 12×16 inches for this recipe). The cold dough will be much easier to work with, maintaining its shape.
- **Prepare Baking Sheets:** Line two large baking sheets with parchment paper and lightly spray them with non-stick cooking spray. These will be used for the second rise of your cut donuts.
- **Cut the Donuts:** Using a donut cutter (or a combination of a large biscuit cutter for the donut shape and a smaller one for the hole), carefully cut out your donuts. Minimize re-rolling dough scraps as too much handling can lead to tougher donuts. Set aside the donut holes – they make for delightful mini treats!
- **Second Rise:** Gently transfer the cut donuts to the prepared baking sheets, ensuring they are spaced adequately. Cover them loosely with a clean kitchen towel and let them rise in a warm, draft-free spot for another 1-2 hours, or until they look visibly puffy and light. This crucial second rise ensures super fluffy donuts. For a quicker rise, you can warm an oven to 170°F (77°C) for 10 minutes, then turn it off and place the covered baking sheets inside for a few minutes.
- **Prepare the Glaze:** While the donuts are undergoing their second rise, whisk together all the glaze ingredients (powdered sugar, warm water, and vanilla extract) in a wide, shallow casserole dish until completely smooth. The consistency should be thin enough to drip but thick enough to coat the donuts. Set this aside.
- **Set Up Glazing Station:** If using a wooden dowel for glazing, place the casserole dish on your counter. Elevate the wooden dowel by resting its ends on two short cups or jars on either side of the dish. This setup allows excess glaze to drip back into the dish, minimizing waste and creating a neat finish. If you don’t have a dowel, a cooling rack set over parchment paper will work just as well.
- **Heat the Frying Oil:** In a large, heavy-bottomed Dutch oven or deep skillet, pour in enough vegetable oil for frying (typically 8-10 cups, depending on your pot’s size). Heat the oil over medium heat until it reaches a consistent temperature of 350°F (175°C). **Always use a candy thermometer to monitor the oil temperature accurately.** Maintaining the correct temperature is paramount for perfectly cooked, non-greasy donuts.
- **Prepare for Draining:** Line another large baking sheet with two layers of paper towels. This will be your station for draining the freshly fried donuts, absorbing any excess oil.
Phase 3: Frying and Glazing for Irresistible Results
- **Fry the Donuts:** Carefully cut the parchment paper around each donut. Using the parchment paper as a sling, gently lift one donut and invert it into the hot oil. This technique helps preserve the donut’s shape and prevents deflation.
- **PRO TIP:** To avoid overcrowding the pan and drastically lowering the oil temperature, only fry 2-3 donuts at a time, depending on the size of your Dutch oven. Overcrowding leads to greasy, undercooked donuts.
- **Cook to Golden Perfection:** Fry the donuts for approximately 1 to 1.5 minutes per side, or until they achieve a beautiful golden brown color and are puffed up. Use tongs or a slotted spoon to carefully flip them.
- **Drain Excess Oil:** Once fried, carefully remove the donuts from the oil using a slotted spoon and transfer them to the paper towel-lined baking sheet to drain any excess oil. This step is crucial for preventing greasy donuts.
- **Glaze While Warm:** Allow the donuts to cool for just a few minutes until they are warm to the touch but no longer piping hot. If they’re too hot, the glaze will melt off; if too cold, it won’t adhere well. Dip each donut, covering all sides generously, into the prepared glaze.
- **PRO TIP:** If you’re using the wooden dowel setup, string the glazed donuts along it, allowing the excess glaze to drip back into the casserole dish. This creates a beautifully even coating. If you don’t have a dowel, simply place the glazed donuts on a cooling rack set over parchment paper or a baking sheet to catch the drips.
- **Set the Glaze:** Once the dripping has stopped (usually after 5-10 minutes), carefully transfer the glazed donuts to a clean wire cooling rack to allow the glaze to fully set.
- **Enjoy!** Serve these irresistible homemade glazed donuts warm and watch them disappear!
For a printable version of these detailed instructions, complete with precise measurements, refer to the recipe card located further down the page. You can easily save or print it for future use.
Creative Uses for Excess Dough Pieces
When cutting out your donuts, you’ll inevitably be left with “donut holes” and irregular scraps of dough. Don’t let these go to waste – they’re just as delicious and offer fun opportunities! The donut holes can be deep-fried and glazed alongside your full-sized donuts, creating delightful bite-sized treats. With the pieces of dough in between the cut donuts, gather them gently, let them rest for about 15 minutes to allow the gluten to relax, and then lightly re-roll and cut more donuts. For a truly fun and stress-free approach, especially with kids, you can simply keep the remaining dough in all their whimsical, crazy shapes, deep fry them, and glaze them. My kids think these uniquely shaped pieces are the most exciting part!
The Critical Role of Chilling: Why Dough Needs an Overnight Rest
One of the most crucial steps in achieving truly fluffy, non-greasy homemade donuts is the extended chilling time for the dough – ideally overnight. This step is absolutely non-negotiable for several reasons. Firstly, it allows the butter and shortening within the dough to solidify. When cold dough hits hot oil, the solid fats create steam and push outwards, resulting in a lighter, airier internal structure. If the fats are warm and soft, they melt too quickly, leading to greasy, dense donuts. Secondly, chilling helps the dough maintain its shape during the subsequent rising and frying processes, preventing it from spreading excessively. Thirdly, and perhaps most importantly for flavor, the long, slow fermentation in the refrigerator allows the yeast to work its magic over an extended period, developing a deeper, more complex flavor profile that simply can’t be achieved with a quick rise. Plus, the convenience of preparing the dough the night before means you can wake up to fresh, warm donuts for breakfast!
Frying to Perfection: Optimal Oil Temperature and Type
Achieving a perfectly fried donut that’s golden brown on the outside and wonderfully fluffy on the inside hinges on maintaining the correct oil temperature. For best results, the oil should be consistently between 350-375°F (175-190°C). Frying at too low a temperature will cause the donuts to absorb excessive oil, making them greasy and heavy. Conversely, if the oil is too hot, the exterior will brown too quickly, leaving the inside raw. For this reason, I cannot stress enough the importance of using a reliable candy thermometer to monitor and adjust the temperature throughout the frying process.
When it comes to the type of oil, we personally favor vegetable oil for its neutral taste, which allows the delicious donut and glaze flavors to shine through. However, peanut oil and canola oil are also excellent alternatives due to their high smoke points and mild flavors. You will typically need a generous amount of oil for deep frying – roughly 8-10 cups, depending on the size and depth of your Dutch oven or frying vessel. Ensure you have enough oil to allow the donuts to float freely and cook evenly.
A Lighter Alternative: Can You Air Fry Homemade Donuts?
Yes, absolutely! For those seeking a slightly lighter version or simply preferring not to deep-fry, homemade donuts can be successfully prepared in an air fryer, yielding surprisingly good results. To air fry, begin by preheating your air fryer to 350°F (175°C). Lightly spray the air fryer basket with cooking spray to prevent sticking. Place the raw, risen donuts in a single layer in the basket, being careful not to overcrowd them. Spray the tops of the donuts lightly with cooking spray. Cook for approximately 4 minutes, then carefully flip them and cook for another 2-3 minutes, or until they are golden brown and cooked through. Repeat this process with the remaining donuts. Once air-fried, glaze them according to the instructions provided in the recipe. While the texture won’t be identical to deep-fried, they will still be deliciously light and satisfying.
Elevate Your Glaze: Delicious Flavor Variations
While the classic vanilla glaze is undeniably perfect, you can easily customize your homemade donuts by infusing the glaze with different flavors. This is a fantastic way to experiment and cater to various tastes!
- **Rich Chocolate Glaze:** For a decadent treat, simply whisk in 2-3 teaspoons of unsweetened cocoa powder into your basic glaze mixture. You can also add a tiny dash of hot coffee or milk to achieve the desired consistency.
- **Tropical Coconut Glaze:** Replace the vanilla extract with 1/4 teaspoon of coconut extract for a subtle, tropical note. For extra texture and flavor, sprinkle some toasted shredded coconut on top of the wet glaze.
- **Zesty Lemon Glaze:** Brighten up your donuts by substituting the vanilla extract with 1-2 teaspoons of fresh lemon juice. A little lemon zest can also be added for an extra citrusy kick.
- **Warm Maple Glaze:** Introduce a comforting, autumnal flavor by adding 1/2 to 1 teaspoon of pure maple syrup or maple extract to your glaze. This pairs wonderfully with a cup of coffee.
- **Fun & Colorful Glazes:** Appeal to the visual senses, especially for kids, by adding a few drops of food coloring to your glaze. Create vibrant pinks, blues, or greens for special occasions or just for fun.
- **Spice it Up:** A pinch of cinnamon or nutmeg in the glaze can add a warm, cozy dimension, especially enjoyable during colder months.
- **Coffee Glaze:** Dissolve a teaspoon of instant coffee or espresso powder in a tablespoon of hot water, then mix it into the glaze for a sophisticated coffee-flavored donut.
Storing and Reheating Your Homemade Donut Delights
Proper storage is key to enjoying your homemade donuts for longer, though they are always best fresh!
- **Reheating:** If you have any leftovers (a rare occurrence!), they can be gently reheated. Place a donut in the microwave for just 6-12 seconds. Be careful not to overheat, as this can make them tough.
- **Freezing:** Yes, homemade donuts freeze wonderfully! To freeze, ensure they are completely cooled. Wrap each donut individually in aluminum foil or plastic wrap, then place them in a heavy-duty freezer bag or an airtight container. They can be frozen for up to 3 months. Thaw at room temperature and reheat briefly if desired.
- **Shelf Life:** Store freshly made donuts in an airtight container at room temperature. They will maintain their deliciousness for approximately 3-4 days. While they won’t be as soft as on day one, they’ll still be a delightful treat.
Your Journey to Delicious Homemade Donuts Starts Here!
Forget the Saturday morning donut run to the local bakery. With this incredible homemade donut recipe, you can create tender, fluffy, rich pastries with just the right amount of sweetness from a glistening glaze, right in the comfort of your own home. More than just a tasty treat, it’s an opportunity to create cherished family memories in the kitchen. Whether you call them “doughnuts” or “donuts,” the result is the same: pure, unadulterated deliciousness that melts in your mouth. So roll up your sleeves, gather your loved ones, and get ready for some truly satisfying homemade donut time!
Explore More Fried Sweet Treats
- Deep Fried Strawberry Shortcakes
- Dulce de Leche Churro Donuts
- Apple Pie Bombs
- Deep Fried Peaches
- Mother Clucker Doughnuts
- Lemon Raspberry Donuts
- Spudnut Donuts
Homemade Donut Recipe Card
This comprehensive recipe will guide you through making 36 delectable homemade glazed donuts. Perfectly sweet, fluffy, and utterly irresistible!
Recipe Snapshot
- Prep Time: 13 hours 25 minutes (includes chilling time)
- Cook Time: 3 minutes
- Total Time: 13 hours 28 minutes
- Servings: 36 donuts
Ingredients
For the Donuts
- 1 Cup Whole Milk
- 3/4 Cup Water
- 1 Tablespoon Instant Yeast
- 3/4 Cup Sugar (divided, a portion for yeast activation, rest for dough)
- 6-6 1/2 Cups All-Purpose Flour
- 1 1/2 teaspoons Salt
- 2 Large Eggs
- 1 Large Egg Yolk
- 1/2 Cup Butter, cut into tablespoons
- 4 Tablespoons Shortening (or lard), cut into tablespoons
- Vegetable Oil for frying (approx. 8-10 cups)
- Wooden Dowel for dripping glaze (optional)
For the Glaze
- 6 Cups Powdered Sugar
- 1/2 Cup Hot Water
- 1 Dash Vanilla Extract
Instructions
- **Activate Yeast:** In a saucepan over medium heat, gently heat 1 cup of whole milk until foamy at the sides and a light skin has appeared on top (do not boil). Remove from heat and pour into a measuring cup with 3/4 cup water. Allow to cool to warm (105-115°F / 40-46°C). Once warm, add 1 tablespoon instant yeast and 1 teaspoon of the sugar, stir, and set aside for 5-10 minutes to foam.
- **Prepare Dough:** In the bowl of a stand mixer fitted with a dough hook, combine 6-6 1/2 cups flour and the remaining 3/4 cup sugar. Mix briefly. Gently pour in the yeast mixture on low speed, then add 1 1/2 teaspoons salt, 2 large eggs, and 1 large egg yolk. Mix for 2 minutes. Gradually add 1/2 cup butter and 4 tablespoons shortening, one tablespoon at a time, mixing completely after each addition until the dough is sticky but comes together and pulls away from the bowl (about 8-10 minutes of kneading).
- **First Rise & Chill:** Transfer dough to a lightly oiled bowl, flip once to coat in oil. Cover with a towel and let rise for 2 hours in a warm place until doubled. Then cover tightly with plastic wrap and refrigerate overnight (or at least 8 hours, up to 24 hours).
- **Roll & Cut:** Remove dough from fridge. On a lightly greased surface or a large silicone baking mat, roll out the dough to about 1/4 inch thick (approx. 12×16 inches). Line two baking sheets with parchment paper and lightly spray with nonstick spray. Using a donut cutter, cut out donuts and carefully transfer them to the prepared baking sheets. Gather dough scraps, let rest for 15 minutes, then re-roll and cut more donuts.
- **Second Rise:** Cover the cut donuts loosely with a towel and let them rise for 1-2 hours in a warm, draft-free place until puffy. (Optional: heat oven to 170°F for 10 mins, turn off, then place sheets inside for quicker rise.)
- **Prepare Glaze & Frying Station:** Whisk together 6 cups powdered sugar, 1/2 cup hot water, and 1 dash vanilla extract in a shallow casserole dish until smooth. Set aside. In a large Dutch oven, heat 8-10 cups vegetable oil to 350°F (175°C) using a candy thermometer. Line another baking sheet with 2 layers of paper towels for draining. Set up your wooden dowel over the glaze dish (if using).
- **Fry Donuts:** Cut parchment paper between donuts. Lift one donut with its parchment paper, gently invert into the hot oil so the top side fries first. Fry 2-3 donuts at a time to avoid overcrowding. Cook for 1-1.5 minutes per side until golden brown. Remove to the paper towel-lined baking sheet to drain excess oil.
- **Glaze & Cool:** Once donuts are warm (not hot), dip all sides into the glaze. String them along the wooden dowel to drip excess glaze back into the dish. If not using a dowel, place them on a cooling rack over parchment paper. Once dripping stops, move to a clean cooling rack to set.
- **Enjoy!**
Recipe Notes
Store leftover donuts in an airtight container at room temperature, covered in foil or plastic, for 3-4 days. For reheating, microwave for 6-12 seconds.
Nutrition Information (Approximate per 1 donut serving)
- **Calories:** 221 kcal
- **Carbohydrates:** 42g
- **Protein:** 3g
- **Fat:** 5g
- **Saturated Fat:** 2g
- **Cholesterol:** 22 mg
- **Sodium:** 127 mg
- **Potassium:** 38 mg
- **Fiber:** 1g
- **Sugar:** 24g
- **Vitamin A:** 110 IU
- **Calcium:** 14 mg
- **Iron:** 1 mg
Nutrition information is automatically calculated and should only be used as an approximation.
REMEMBER TO SUBSCRIBE TO our FREE Oh Sweet Basil NEWSLETTER AND RECEIVE EASY RECIPES DELIVERED INTO YOUR INBOX EVERY DAY!
When you try a recipe, please use the hashtag #ohsweetbasil on INSTAGRAM for a chance to be featured in our stories! FOLLOW OH, SWEET BASIL ON FACEBOOK | INSTAGRAM | PINTEREST | TWITTER FOR ALL OF OUR LATEST CONTENT, RECIPES AND STORIES.