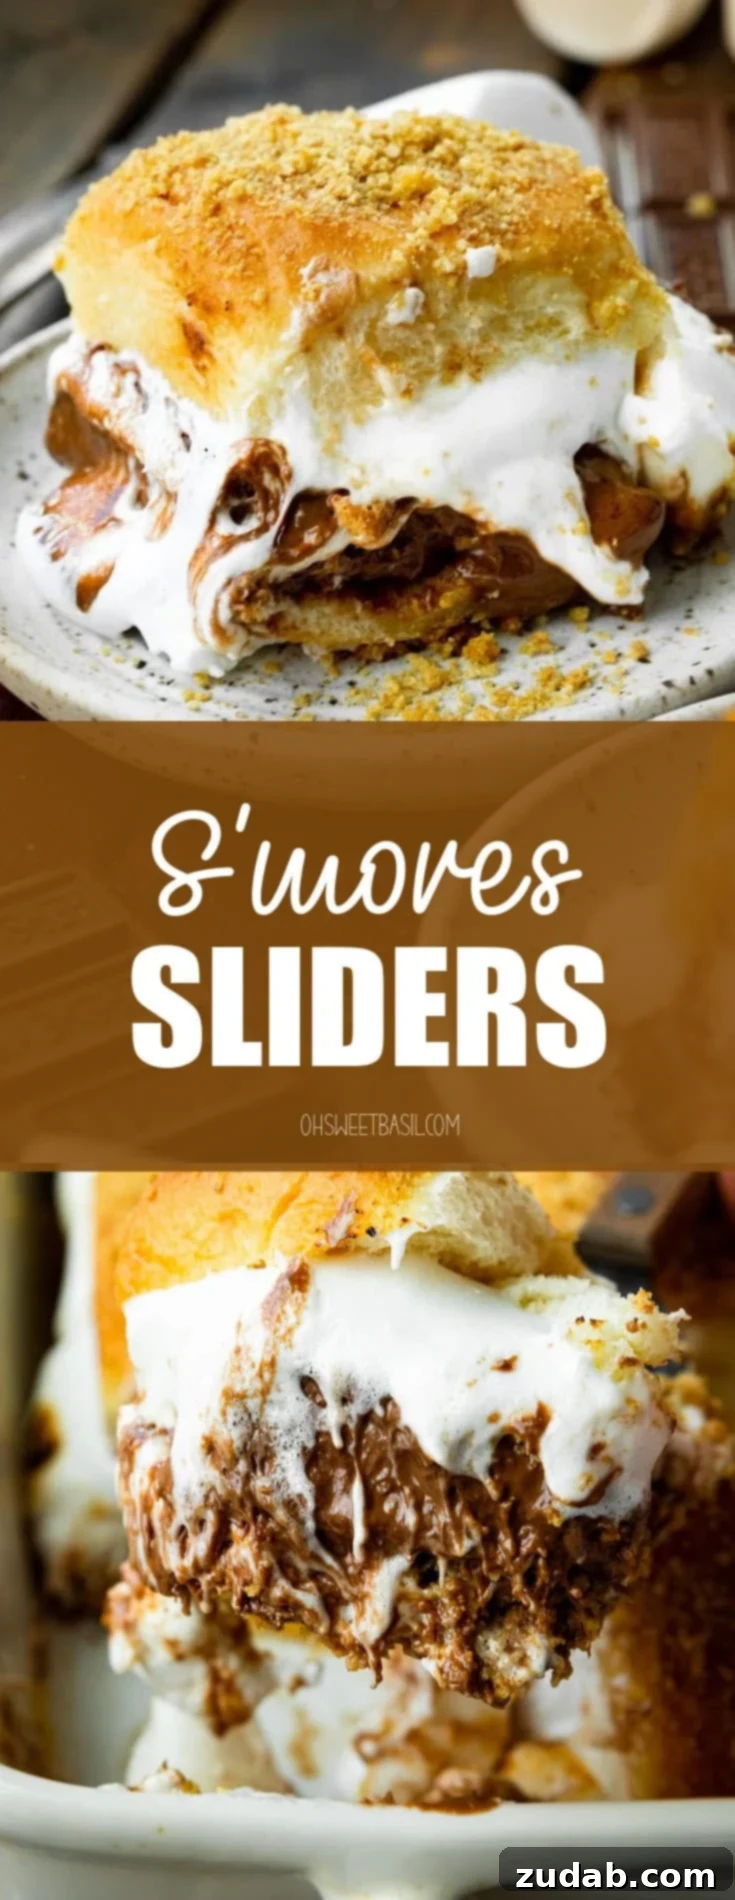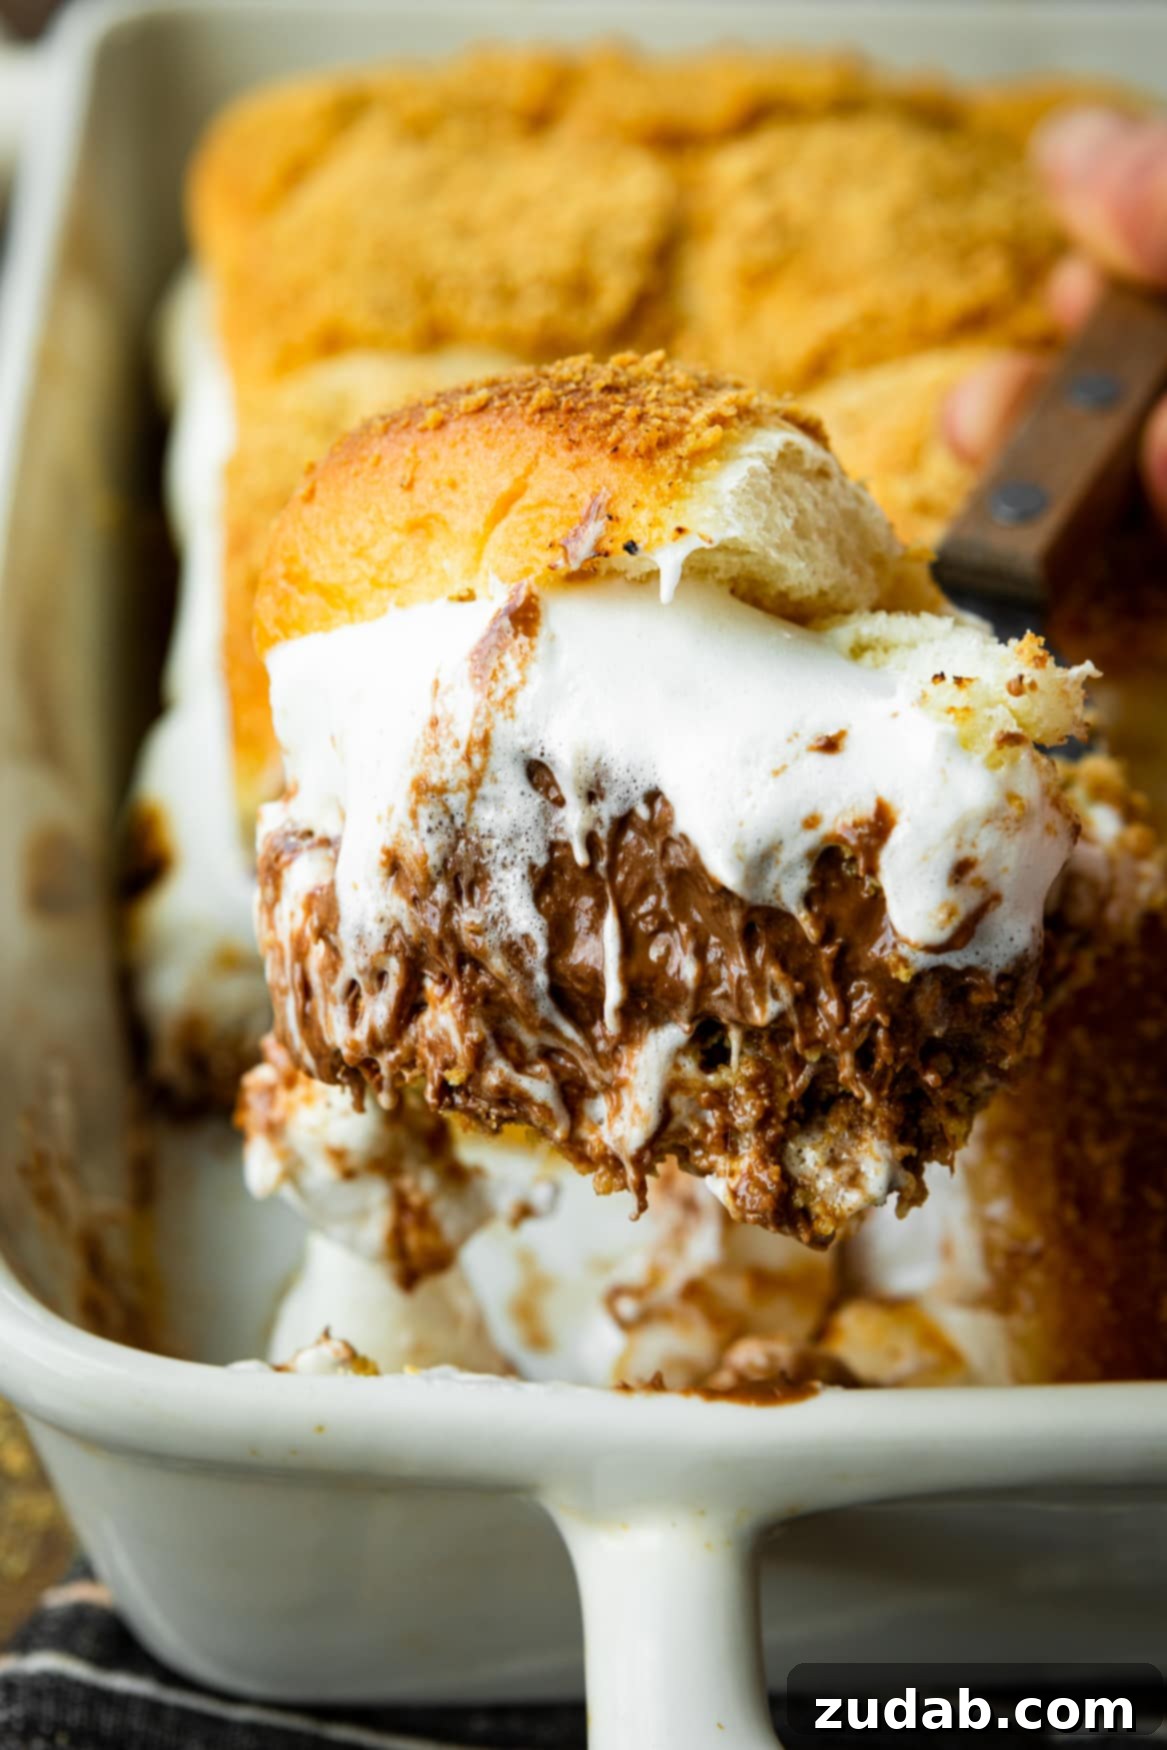
Craving the warm, gooey goodness of classic s’mores but without the hassle of a campfire? Look no further! Get ready to discover a delectable and incredibly easy-to-make dessert that brings all your favorite s’mores flavors right to your kitchen: **S’mores Sliders**. These bite-sized, oven-baked treats offer a fun, unique, and utterly irresistible twist on the traditional **campfire dessert**, making them perfect for any occasion, year-round.
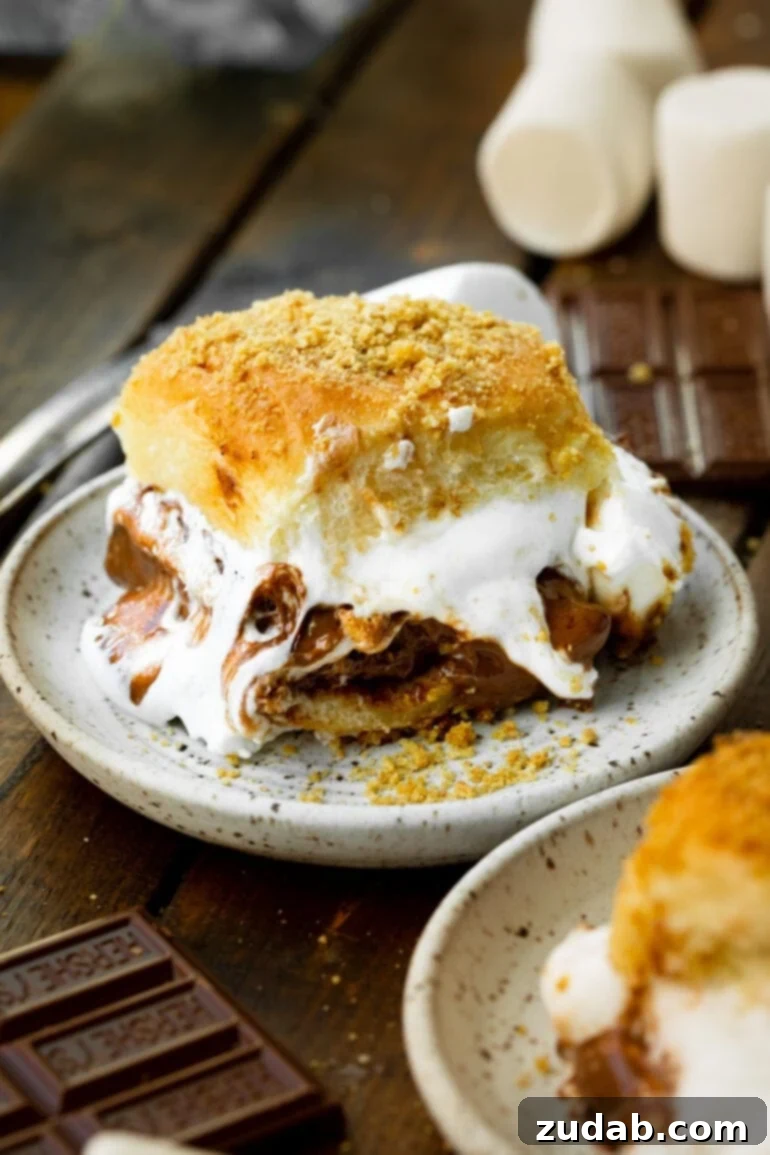
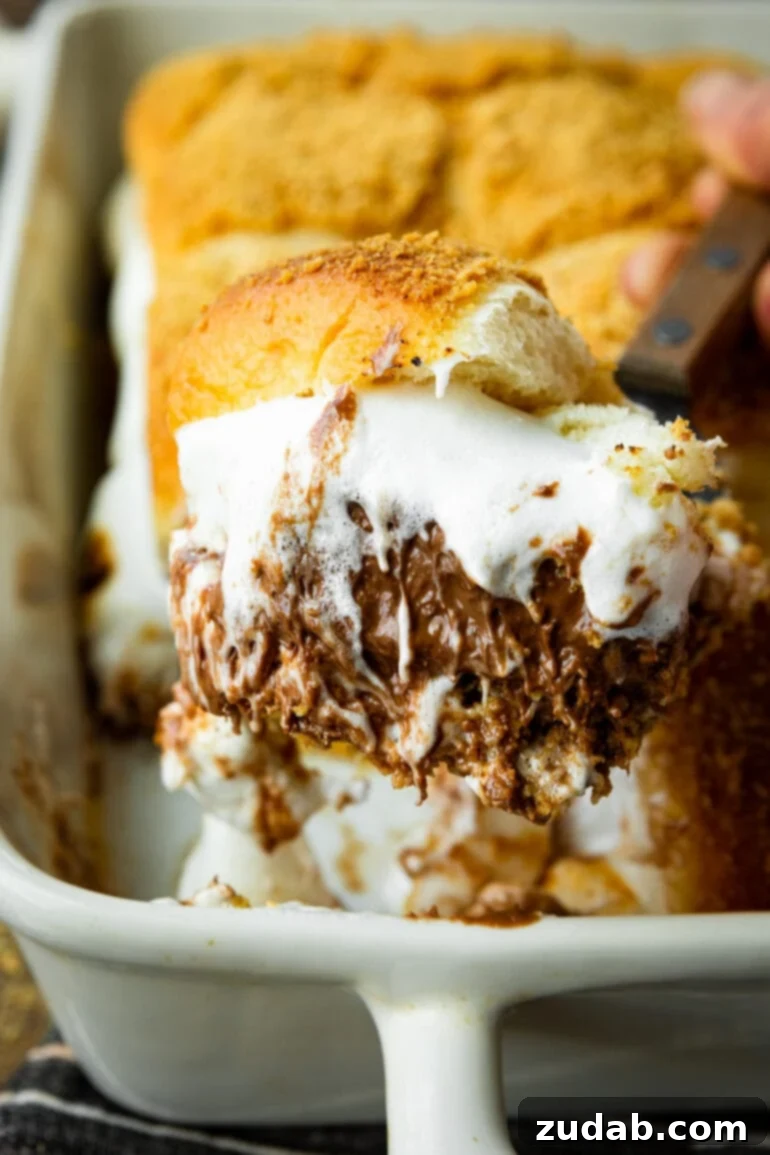
Imagine all the cherished tastes of a classic s’more – the sticky sweetness of toasted marshmallows, the rich, melty indulgence of chocolate, and the satisfying crunch of graham crackers – harmoniously layered between two soft, sweet, and buttery Hawaiian rolls. What makes these **s’mores sliders** truly exceptional is their sheer convenience. Baked right in your oven, they eliminate the need for an open flame, allowing you to enjoy this delightful treat effortlessly, whether it’s a chilly winter evening or a summer barbecue.
The inspiration for these **dessert sliders** struck when faced with a bag of Hawaiian rolls that needed a purpose beyond savory applications. The idea of transforming them into a s’mores version was a stroke of genius, and the results were nothing short of spectacular. My family’s reaction was an absolute uproar of delight – they unanimously declared them even better than traditional s’mores! Since then, oven-baked dessert sliders have become a beloved staple in our home, transforming ordinary moments into sweet, memorable experiences.
Why S’mores Sliders Are Your Next Go-To Dessert
In a world full of complex dessert recipes, **s’mores sliders** stand out for their elegant simplicity and incredible payoff. They capture the nostalgic essence of a campfire favorite while introducing a level of convenience and sophistication that makes them perfect for any gathering, big or small. Here’s why you’ll fall in love with this modern twist:
- No Campfire Required: The most obvious benefit is the ability to enjoy s’mores without the need for a fire pit. Just your oven and a baking dish!
- Less Mess, More Fun: While s’mores are inherently gooey, preparing them in slider form helps contain some of the stickiness, making them easier for guests (and kids!) to handle. The rolls act as a perfect vessel, ensuring a balanced bite every time.
- A Crowd-Pleaser Extraordinaire: These **baked s’mores** are designed for sharing. A single batch yields a dozen individual sliders, making them an ideal dessert for parties, potlucks, family dinners, or game nights. Their bite-sized nature encourages easy serving and snacking.
- Effortless Preparation: With just a handful of ingredients and minimal prep time, you can have a warm, delicious dessert ready in under 30 minutes. It’s the ultimate easy dessert for busy hosts.
- Year-Round Enjoyment: Break free from seasonal constraints! Whether it’s a cozy winter evening or a summer afternoon, these oven-baked delights mean s’mores are always in season.
The sweet Hawaiian rolls provide the ideal foundation, perfectly complementing the classic combination of chocolate and marshmallow. The result is a dessert that’s not only incredibly flavorful but also delightfully textural – a crispy exterior, a soft interior, and an irresistible, molten center.
Essential Ingredients for Crafting Perfect S’mores Sliders
You’ll be amazed at how few ingredients are needed to create this absolutely irresistible **easy s’mores dessert**. You likely already have many of these staples in your pantry. It’s the beloved trio of graham crackers, chocolate, and marshmallows, plus just two additional items that bring this recipe to life. Here’s a detailed look at what you’ll need:
- Hawaiian Sweet Rolls (1 Package): These are the star of our sliders! Their inherent sweetness and soft, fluffy texture make them the perfect vehicle for the s’mores fillings. They hold up beautifully to the melted ingredients and provide a delightful buttery flavor that elevates the entire dessert. Using a full sheet of rolls allows for easy layering.
- Hershey’s Chocolate Bars (5 Standard Bars): For that quintessential s’mores taste, Hershey’s milk chocolate bars are unmatched. Their classic flavor and excellent melting qualities ensure a smooth, creamy layer. While chocolate chips can be used, bars offer a more uniform and satisfying melt, essential for that perfect gooey pull.
- Large Marshmallows (1 Bag, 10oz): You’ll use almost the entire bag. Large marshmallows create a wonderfully thick, gooey, and lightly toasted layer. When baked, they expand and brown beautifully, forming that signature sticky texture we all crave.
- Butter (6 Tablespoons, Melted and Divided): Butter is crucial for two reasons: a portion is brushed on the bottom of the baking dish to prevent sticking and add richness, while the remaining melted butter is poured over the top of the rolls, contributing to their golden-brown crust and infusing a lovely buttery flavor throughout.
- Graham Crackers (8 Crackers, Crushed and Divided): The foundation and crowning glory! A portion of crushed graham crackers forms a delicious, slightly crunchy base in the pan, while the rest are sprinkled on top of the buttered rolls, adding that essential s’mores crunch and classic flavor to every bite.
The simplicity of these ingredients belies the incredible flavor and texture explosion you’ll experience. This recipe proves that sometimes, the fewest components make for the most impactful and beloved treats.
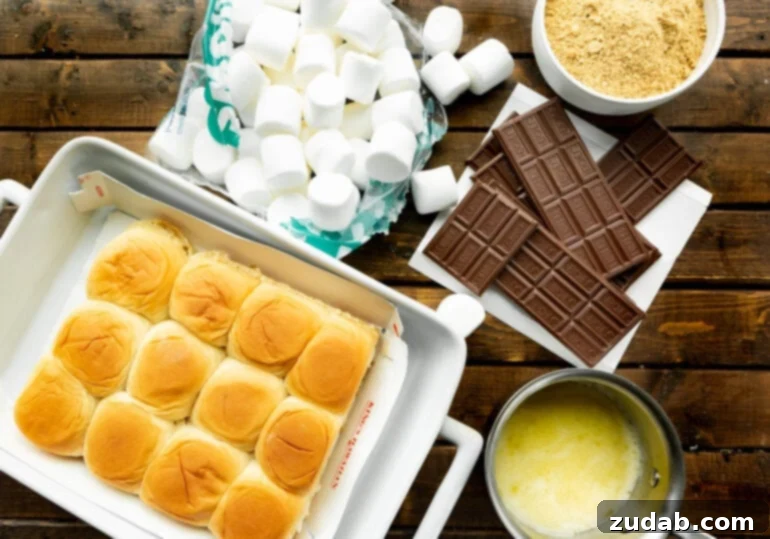
Crafting Your S’mores Sliders: A Simple Step-by-Step Guide
Prepare to be amazed at how quickly and easily you can whip up this delightful **easy s’mores dessert**. With just a few straightforward steps and some time in the oven, you’ll be digging into an irresistible treat perfect for a crowd in under half an hour! Here are the essential steps to guide you through the process, ensuring perfectly gooey and golden s’mores sliders every time:
- 1. Prepare Your Oven and Baking Dish: Begin by preheating your oven to 350°F (175°C). Next, take a 9×13 inch baking dish and lightly brush the bottom with a portion of your melted butter. This not only prevents sticking but also adds a delicious base layer. Evenly sprinkle about a third of the crushed graham crackers over the buttered bottom of the dish.
- 2. Slice and Arrange the Rolls: Using a sharp bread knife, carefully cut the entire sheet of Hawaiian rolls horizontally in half, keeping the top and bottom halves intact as single pieces. Gently place the bottom half of the rolls into the prepared baking dish, ensuring they fit snugly.
- 3. Layer the Goodness: Arrange the Hershey’s chocolate bars in a single layer over the bottom rolls. Break them into smaller pieces if necessary to cover the surface evenly. Following the chocolate, uniformly place the large marshmallows over the chocolate layer, making sure to cover as much surface area as possible for maximum gooeyness.
- 4. Top and Butter: Carefully place the top half of the Hawaiian rolls back onto the marshmallows. Pour the remaining melted butter generously over the top of the rolls. Use a pastry brush to spread the butter evenly across all the rolls and even down the sides, ensuring every part gets that rich, buttery coating for a beautiful golden crust.
- 5. Sprinkle for Extra Crunch: Take the remaining crushed graham cracker crumbs and sprinkle them generously and evenly over the buttery top of the rolls. This adds a fantastic texture and reinforces that classic s’mores flavor.
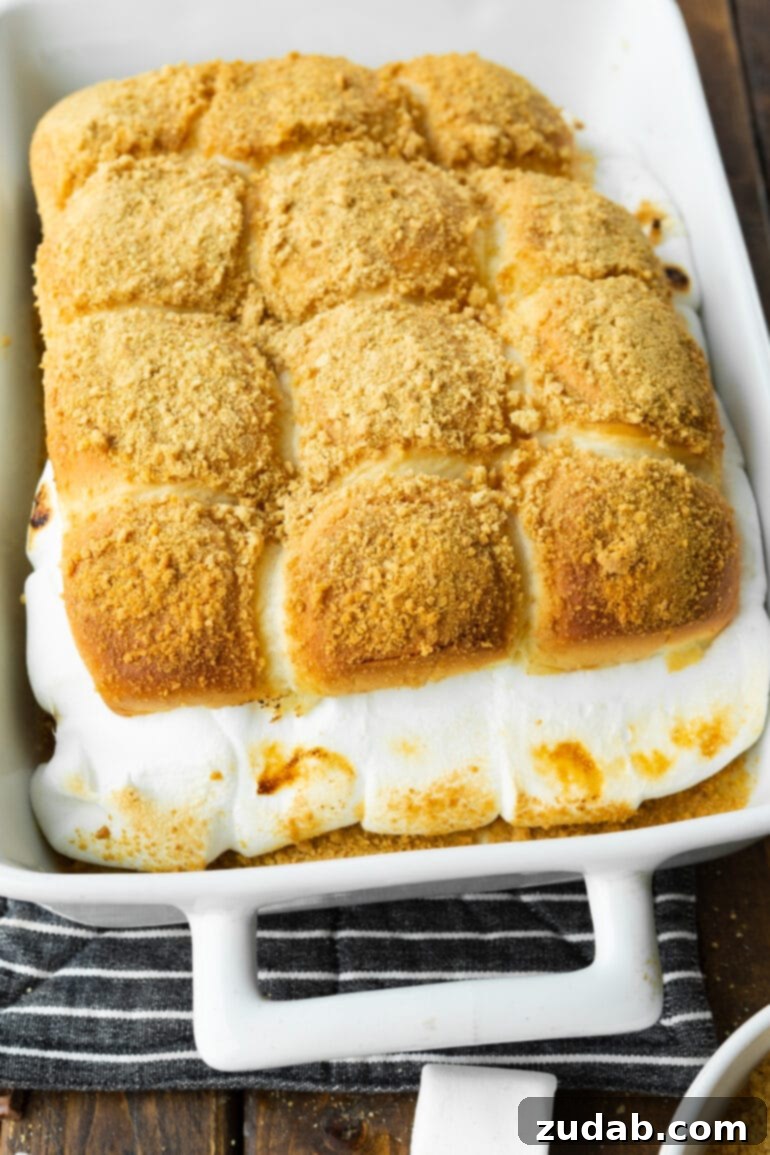
- 6. Bake to Perfection: Cover the baking dish loosely with aluminum foil. Bake for 10 minutes to allow the chocolate and marshmallows to melt beautifully without browning too quickly. After 10 minutes, remove the foil and continue baking for another 10 minutes, or until the marshmallows are golden brown and perfectly toasted, and the rolls are lightly golden.
Once baked, let the sliders cool for a few minutes before serving. This brief cooling period helps the gooey filling set slightly, making them easier (though still deliciously messy!) to pull apart and enjoy. Get ready to dive into this incredibly satisfying dessert!
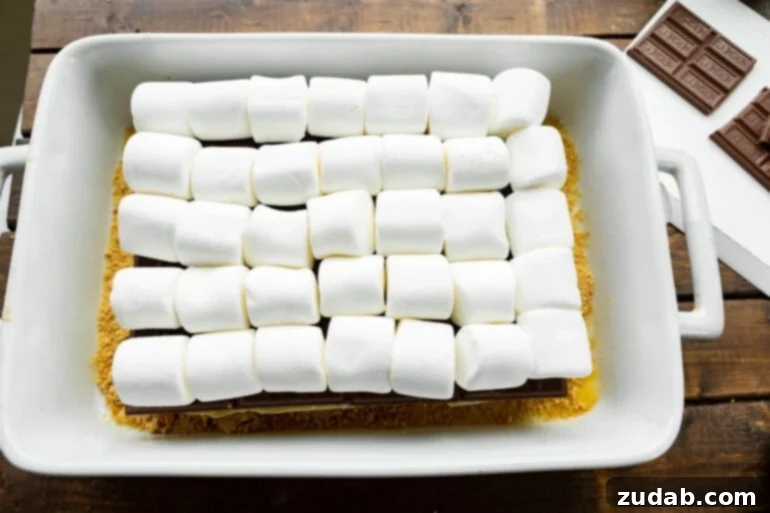
Unleash Your Creativity: Delicious S’mores Slider Variations
Just like their campfire counterparts, **s’mores sliders** are wonderfully adaptable, inviting you to customize them with an array of different chocolates, fruits, and spreads. Don’t be afraid to experiment and create your own signature s’mores sandwich! Here are some fantastic ideas to inspire your next batch:
- Reese’s Peanut Butter Cups: For the ultimate chocolate and peanut butter lovers, chopped Reese’s Peanut Butter Cups melt into a dreamy, nutty layer that pairs perfectly with marshmallows.
- Nutella: Spread a generous layer of Nutella over the bottom rolls for a rich, creamy hazelnut chocolate flavor that will have everyone coming back for more.
- Dark Chocolate: Swap out milk chocolate for dark chocolate bars or chunks to add a deeper, more sophisticated cocoa note, balancing the sweetness of the marshmallows and rolls.
- Bananas: Thinly sliced bananas can be layered over the chocolate for a delightful, naturally sweet, and slightly caramelized fruit addition.
- Strawberries: Fresh, thinly sliced strawberries provide a burst of fruity freshness and a beautiful color contrast when layered with the chocolate and marshmallows.
- Coconut Flakes: Sprinkle a handful of shredded coconut flakes over the marshmallows before baking for a tropical, toasted flavor and added texture.
- Caramel Drizzle: After baking, a drizzle of warm caramel sauce over the top of the sliders adds another layer of sweet, buttery gooeyness.
- Peanut Butter Spread: For a simpler peanut butter boost, spread a thin layer of creamy peanut butter over the bottom rolls before adding chocolate.
Beyond these suggestions, consider adding mini chocolate candies, different flavored marshmallows (like peppermint or caramel swirl), or even a sprinkle of sea salt to enhance the chocolate. The possibilities are endless when it comes to customizing these delightful **dessert sliders** to suit any palate or preference!
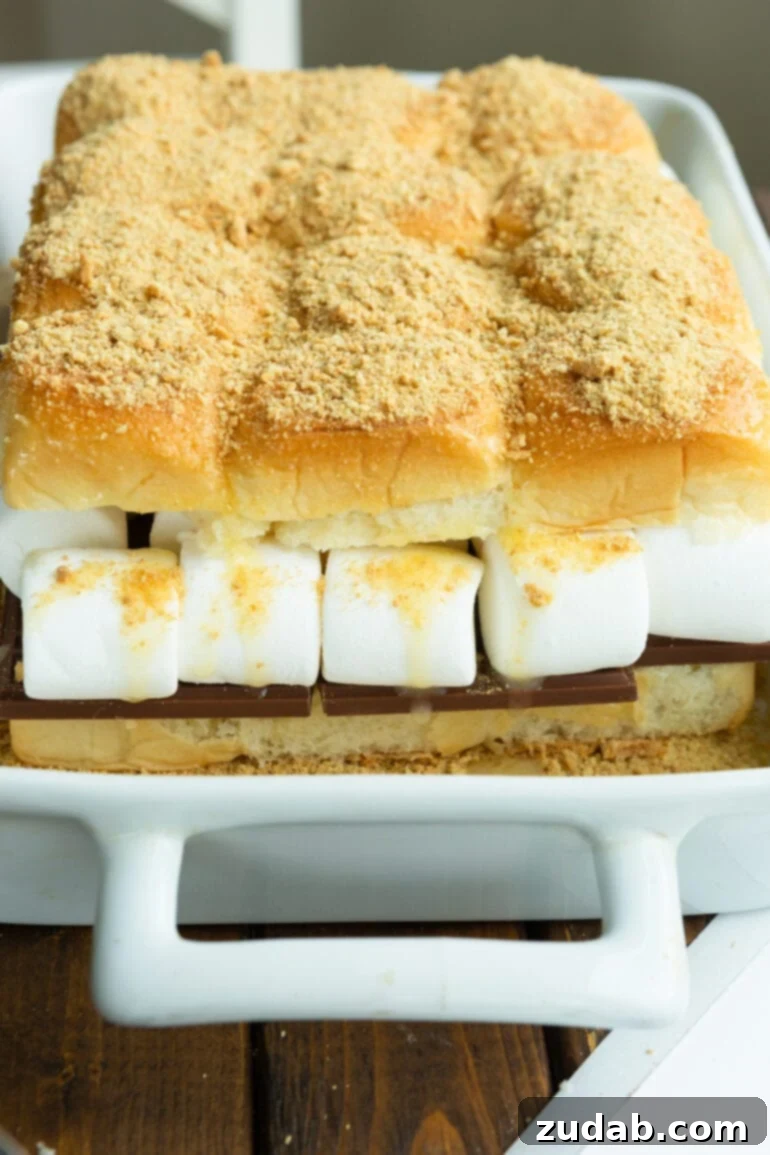
Smart Prep: Making S’mores Sliders Ahead of Time
One of the many advantages of this **baked s’mores dessert** is its suitability for making ahead, making entertaining a breeze. Preparing these sliders in advance allows you to enjoy your guests without the last-minute rush of dessert preparation. This flexibility is a game-changer for parties, holidays, or any event where you want to serve a warm, fresh dessert without the stress.
To prepare your **s’mores sliders** ahead of time, simply follow all the assembly steps as instructed, right up to the point of brushing the melted butter over the top rolls. The butter and graham cracker crumb topping should always be applied just before baking to ensure the freshest texture and best browning. Once assembled (without the final butter and crumbs), cover the baking dish tightly with plastic wrap to prevent the rolls from drying out. They can be kept at room temperature for several hours or stored in the refrigerator for up to one day.
When you’re ready to bake and serve, remove the plastic wrap, brush with the melted butter, sprinkle with the remaining graham cracker crumbs, and bake according to the recipe instructions. This make-ahead method guarantees you’ll be enjoying a warm, gooey, and freshly **baked s’mores dessert** before you know it, with minimal effort on the day of your event.
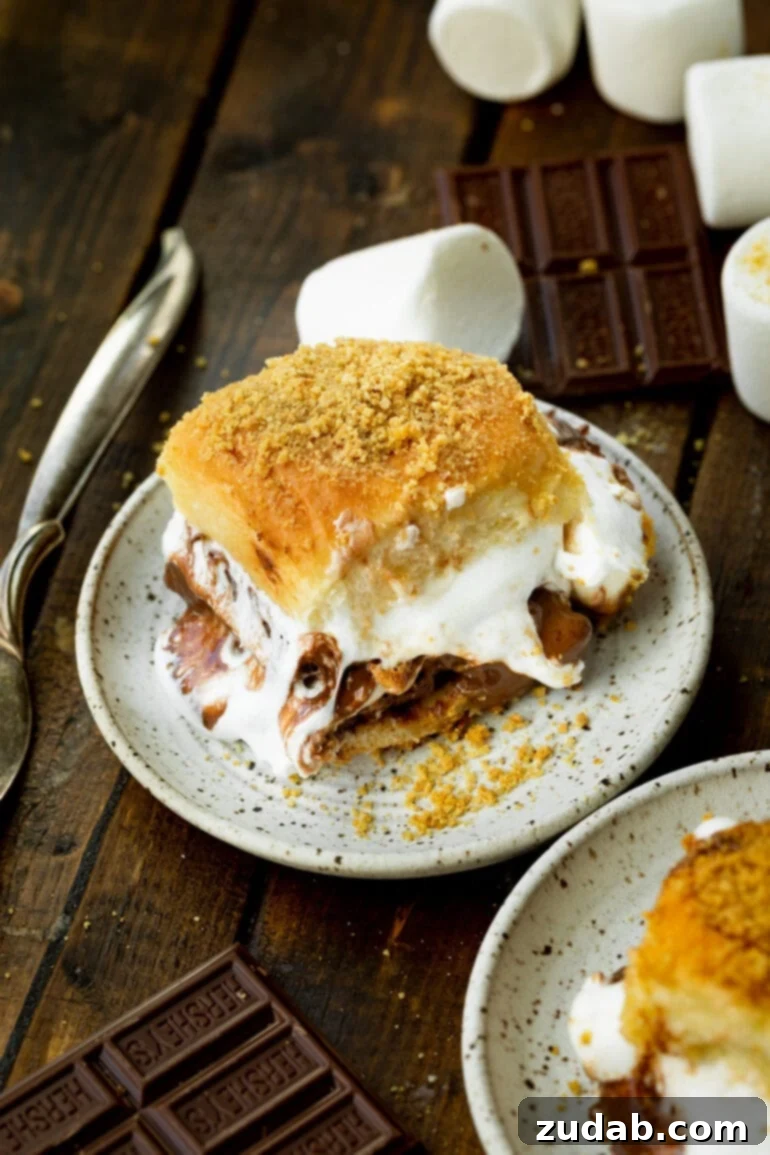
Storing and Reheating Your Delectable S’mores Sliders
While it’s hard to imagine having any leftovers of these irresistible **s’mores sliders**, should you find yourself with a few remaining, proper storage and reheating techniques will ensure they stay delicious for later enjoyment. These tips help preserve their gooey texture and delightful flavor.
Storing Leftovers
Allow any leftover s’mores sliders to cool completely to room temperature. Once cooled, transfer them to an airtight container. They will keep well in the refrigerator for 3-4 days. Storing them in an airtight container prevents them from drying out and absorbing other odors from the fridge, maintaining their delicious taste and texture.
Reheating for Freshness
To best enjoy leftover s’mores sliders, reheating them in the oven is highly recommended, as it revives their warm, gooey center and crispy exterior. Preheat your oven to 350°F (175°C). Place the sliders on a baking sheet and cover them loosely with aluminum foil. Bake for 5-7 minutes. The foil helps prevent the marshmallows and rolls from browning further or drying out. After this initial reheating, remove the foil and bake for an additional 2-3 minutes, or until the marshmallows are slightly re-toasted and the chocolate is melted and gooey again. Serve immediately for that fresh-baked experience.
Avoid microwaving, as it can make the rolls tough and the marshmallows rubbery, losing that desirable s’mores texture.
Pro Tips for the Ultimate S’mores Slider Experience
Before you dive into making this wonderfully easy recipe, I’d be remiss not to offer a friendly warning: these **s’mores sliders** are delightfully messy! Prepare for gooey, chocolatey fingers that absolutely demand to be licked clean – it’s all part of the fun! Embrace the mess and savor every moment of this indulgent treat. Here are a few extra tips to ensure your s’mores sliders are absolutely perfect:
- Embrace the Gooeyness: S’mores are meant to be messy! Don’t shy away from the melted chocolate and marshmallow. Provide napkins, or better yet, just enjoy the experience!
- Serve Warm: While delicious at any temperature, s’mores sliders are at their absolute best when served warm, straight from the oven. The melted chocolate and soft marshmallows create an unparalleled texture.
- Don’t Overbake: Keep an eye on them during the final baking stage. You want the marshmallows lightly golden and puffed, not burnt or overly stiff. Overbaking can make the rolls too crusty and the marshmallows hard.
- Parchment Paper for Easy Cleanup: Lining your baking dish with parchment paper before buttering and adding graham crackers can make cleanup significantly easier, especially with all that gooey marshmallow and melted chocolate.
- A Touch of Salt: For an elevated flavor, consider sprinkling a tiny pinch of sea salt flakes over the chocolate layer before adding the marshmallows. This subtle touch enhances the chocolate’s richness and cuts through some of the sweetness.
Enjoy a new, incredibly convenient, and utterly delicious twist on an old classic with these **easy s’mores sliders**! They are guaranteed to become a family favorite and a go-to dessert for any occasion.
Frequently Asked Questions About S’mores Sliders
Can I use different types of bread instead of Hawaiian rolls?
While Hawaiian sweet rolls are highly recommended for their unique sweetness and soft texture, you can experiment with other slider buns or even brioche rolls for a rich flavor. Just ensure they are soft and slightly sweet to complement the s’mores fillings.
How can I prevent the marshmallows from burning?
The key is to cover the baking dish with foil for the initial baking period. This allows the marshmallows and chocolate to melt thoroughly without the marshmallows browning too quickly. Once the foil is removed for the last 10 minutes, keep a close eye on them to achieve that perfect golden toast without burning.
Can I make these on a grill or smoker?
Yes, you can! If using a grill, place the covered baking dish over indirect heat at about 350°F (175°C) for the same baking times. For a smoker, maintain a similar temperature. Always ensure the internal temperature of the chocolate and marshmallows reaches a melty state, and toast the top gently.
Are S’mores Sliders suitable for a crowd?
Absolutely! This recipe is designed to be a crowd-pleaser. A standard 9×13 inch baking dish yields a dozen sliders, making them perfect for parties, potlucks, or family gatherings. They are easy to serve and individual portions make for simple enjoyment.
Can I make them gluten-free?
Yes, with a few substitutions. You would need to find gluten-free Hawaiian-style rolls and gluten-free graham crackers. Most standard Hershey’s chocolate bars and marshmallows are naturally gluten-free, but always check labels to be certain.
Discover More Irresistible S’mores Dessert Recipes
If these S’mores Sliders have ignited your love for all things s’mores, you’re in luck! There’s a whole world of creative and delicious s’mores-inspired desserts waiting to be explored. From gooey cookies to rich brownies, these recipes capture the magic of the campfire classic in exciting new forms. Expand your s’mores repertoire with these fantastic ideas:
- S’mores Stuffed Chocolate Chip Cookies
- Grilled S’mores Quesadilla
- S’mores Brownies
- S’mores Banana Bread
- No Bake S’mores Bars
- S’mores Chocolate Chip Cookies
- S’mores Granola Bars